
Grow Kohlrabi at Home? Absolutely! And I’m here to tell you it’s easier than you think. Forget those bland, store-bought veggies – imagine biting into a crisp, slightly sweet kohlrabi that you nurtured from seed to table, right in your own backyard. Sounds amazing, doesn’t it?
Kohlrabi, sometimes called a German turnip (though it’s not a turnip!), has a fascinating history. Originating in Europe, it’s been a staple in German and Eastern European cuisine for centuries. Think of hearty stews and vibrant salads – kohlrabi adds a unique crunch and flavor that’s hard to beat. But you don’t need to travel to Europe to enjoy this delicious vegetable. You can grow kohlrabi at home, no matter the size of your garden!
Why should you bother with this DIY project? Well, for starters, homegrown kohlrabi tastes infinitely better than anything you’ll find in the supermarket. Plus, you control exactly what goes into your food – no pesticides or questionable chemicals. And let’s be honest, there’s something incredibly satisfying about harvesting your own food. In this article, I’ll share my favorite tips and tricks for successfully growing kohlrabi at home, even if you’re a complete beginner. Get ready to unleash your inner gardener and enjoy the freshest, most flavorful kohlrabi you’ve ever tasted!
Grow Your Own Delicious Kohlrabi: A Beginner’s Guide
Hey there, fellow gardening enthusiasts! Ever wanted to try growing something a little different? Kohlrabi might just be your answer! It’s a quirky-looking vegetable, often described as a cross between a turnip and a cabbage, but with a milder, sweeter flavor. Trust me, once you taste homegrown kohlrabi, you’ll be hooked. And the best part? It’s surprisingly easy to grow! Let’s dive in and I’ll show you how to cultivate this unique veggie in your own backyard (or even in containers!).
Understanding Kohlrabi: The Basics
Before we get our hands dirty, let’s understand what we’re dealing with. Kohlrabi, also known as German turnip, is a member of the Brassica family (think cabbage, broccoli, and kale). The edible part is the swollen stem, which grows above ground. You can eat it raw, cooked, or even pickled!
* Varieties: There are several varieties of kohlrabi, but the most common are ‘Early White Vienna’ (pale green bulb) and ‘Early Purple Vienna’ (purple bulb). There are also giant varieties like ‘Superschmelz’ which can grow to enormous sizes! I personally prefer the ‘Early White Vienna’ for its mild flavor and quick growth.
* Flavor: The taste is often described as a mild, sweet turnip or a slightly peppery cabbage. The texture is crisp and juicy, especially when harvested young.
* Nutritional Value: Kohlrabi is packed with vitamins and minerals, including vitamin C, potassium, and fiber. It’s a healthy and delicious addition to any diet.
Getting Started: Planning and Preparation
Success in gardening starts with good planning. Here’s what you need to consider before planting your kohlrabi.
* Timing: Kohlrabi is a cool-season crop, meaning it thrives in temperatures between 60°F and 75°F (15°C and 24°C). The best time to plant is in early spring or late summer for a fall harvest. Avoid planting during the hottest months of summer, as the heat can cause the bulbs to become tough and bitter. I usually start my seeds indoors about 4-6 weeks before the last expected frost in spring, or directly sow them in late summer.
* Location: Choose a location that receives at least 6 hours of sunlight per day. Kohlrabi needs plenty of sun to develop properly.
* Soil: Kohlrabi prefers well-drained, fertile soil with a pH between 6.0 and 7.5. Amend your soil with compost or other organic matter to improve drainage and fertility. I always add a generous amount of compost to my garden beds before planting anything.
* Starting Seeds Indoors (Optional): If you live in an area with a short growing season, starting seeds indoors is a great way to get a head start. You’ll need seed starting trays, seed starting mix, and a grow light.
Step-by-Step Guide: Planting Kohlrabi
Now for the fun part! Let’s get those kohlrabi seeds in the ground (or in seed trays).
1. Starting Seeds Indoors (If Applicable)
1. Fill the trays: Fill your seed starting trays with seed starting mix. Gently tap the trays to settle the mix.
2. Sow the seeds: Sow 2-3 kohlrabi seeds per cell, about ¼ inch deep.
3. Water gently: Water the trays gently with a spray bottle or watering can. Be careful not to dislodge the seeds.
4. Provide light: Place the trays under a grow light or in a sunny window. If using a grow light, keep it a few inches above the seedlings.
5. Keep moist: Keep the soil consistently moist, but not soggy.
6. Thin seedlings: Once the seedlings have their first true leaves (the second set of leaves), thin them to one seedling per cell. Choose the strongest seedling and snip off the others at the soil line.
2. Direct Sowing (If Applicable)
1. Prepare the soil: Rake the soil to create a smooth surface.
2. Sow the seeds: Sow the kohlrabi seeds about ½ inch deep and 1-2 inches apart in rows.
3. Water gently: Water the area gently with a watering can.
4. Thin seedlings: Once the seedlings emerge and have their first true leaves, thin them to 4-6 inches apart.
3. Transplanting Seedlings (If Applicable)
1. Harden off seedlings: Before transplanting, you need to harden off the seedlings. This means gradually exposing them to outdoor conditions over a period of 7-10 days. Start by placing them outside for a few hours each day, gradually increasing the amount of time they spend outdoors.
2. Prepare the planting area: Dig holes that are slightly larger than the root balls of the seedlings. Space the holes 4-6 inches apart.
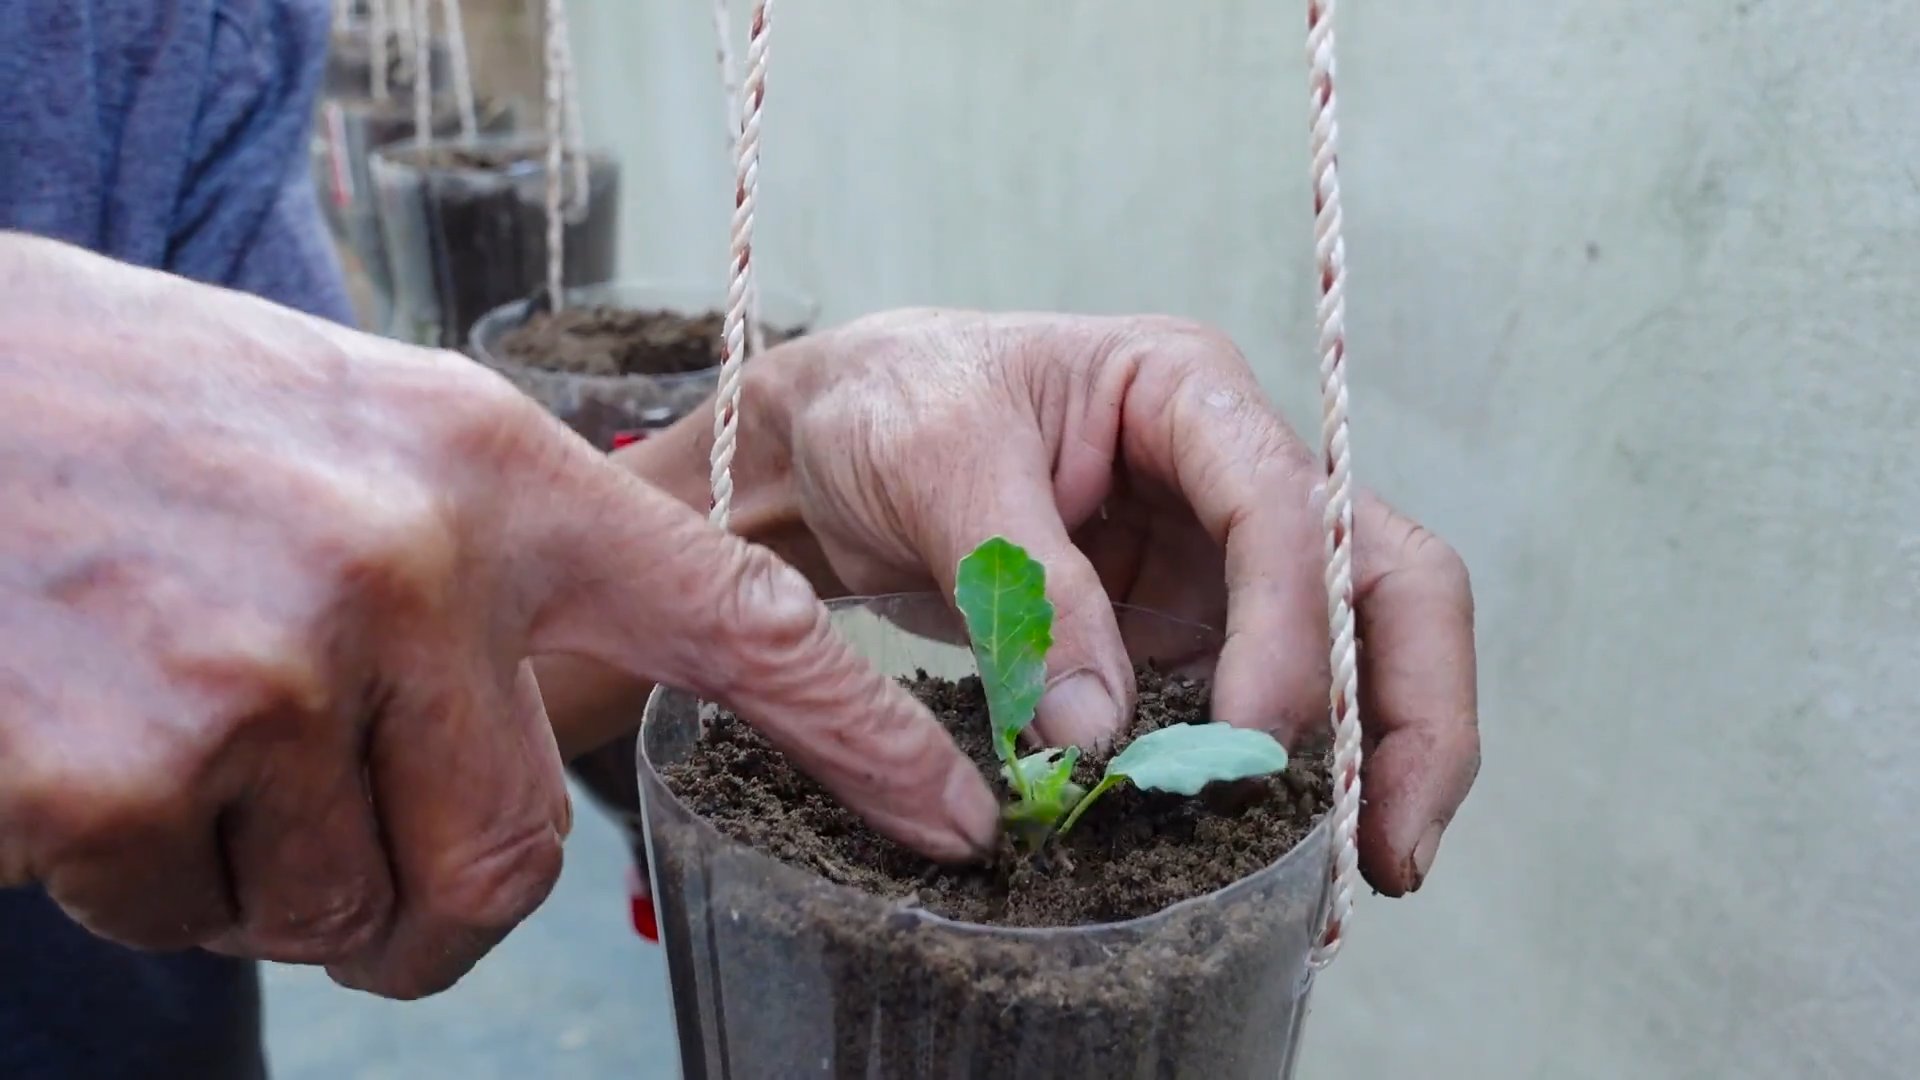
3. Transplant the seedlings: Gently remove the seedlings from the trays and place them in the holes. Make sure the top of the root ball is level with the soil surface.
4. Fill the holes: Fill the holes with soil and gently firm the soil around the seedlings.
5. Water thoroughly: Water the transplanted seedlings thoroughly.
Caring for Your Kohlrabi Plants
Once your kohlrabi plants are in the ground, it’s important to provide them with the care they need to thrive.
* Watering: Kohlrabi needs consistent moisture to grow properly. Water regularly, especially during dry periods. Aim for about 1 inch of water per week. I like to use a soaker hose to water my kohlrabi plants, as it delivers water directly to the
Hey there, fellow gardening enthusiasts! Ever wanted to try growing something a little different? Kohlrabi might just be your answer! It’s a quirky-looking vegetable, often described as a cross between a turnip and a cabbage, but with a milder, sweeter flavor. Trust me, once you taste homegrown kohlrabi, you’ll be hooked. And the best part? It’s surprisingly easy to grow! Let’s dive in and I’ll show you how to cultivate this unique veggie in your own backyard (or even in containers!).
Understanding Kohlrabi: The Basics
Before we get our hands dirty, let’s understand what we’re dealing with. Kohlrabi, also known as German turnip, is a member of the Brassica family (think cabbage, broccoli, and kale). The edible part is the swollen stem, which grows above ground. You can eat it raw, cooked, or even pickled!
* Varieties: There are several varieties of kohlrabi, but the most common are ‘Early White Vienna’ (pale green bulb) and ‘Early Purple Vienna’ (purple bulb). There are also giant varieties like ‘Superschmelz’ which can grow to enormous sizes! I personally prefer the ‘Early White Vienna’ for its mild flavor and quick growth.
* Flavor: The taste is often described as a mild, sweet turnip or a slightly peppery cabbage. The texture is crisp and juicy, especially when harvested young.
* Nutritional Value: Kohlrabi is packed with vitamins and minerals, including vitamin C, potassium, and fiber. It’s a healthy and delicious addition to any diet.
Getting Started: Planning and Preparation
Success in gardening starts with good planning. Here’s what you need to consider before planting your kohlrabi.
* Timing: Kohlrabi is a cool-season crop, meaning it thrives in temperatures between 60°F and 75°F (15°C and 24°C). The best time to plant is in early spring or late summer for a fall harvest. Avoid planting during the hottest months of summer, as the heat can cause the bulbs to become tough and bitter. I usually start my seeds indoors about 4-6 weeks before the last expected frost in spring, or directly sow them in late summer.
* Location: Choose a location that receives at least 6 hours of sunlight per day. Kohlrabi needs plenty of sun to develop properly.
* Soil: Kohlrabi prefers well-drained, fertile soil with a pH between 6.0 and 7.5. Amend your soil with compost or other organic matter to improve drainage and fertility. I always add a generous amount of compost to my garden beds before planting anything.
* Starting Seeds Indoors (Optional): If you live in an area with a short growing season, starting seeds indoors is a great way to get a head start. You’ll need seed starting trays, seed starting mix, and a grow light.
Step-by-Step Guide: Planting Kohlrabi
Now for the fun part! Let’s get those kohlrabi seeds in the ground (or in seed trays).
1. Starting Seeds Indoors (If Applicable)
1. Fill the trays: Fill your seed starting trays with seed starting mix. Gently tap the trays to settle the mix.
2. Sow the seeds: Sow 2-3 kohlrabi seeds per cell, about ¼ inch deep.
3. Water gently: Water the trays gently with a spray bottle or watering can. Be careful not to dislodge the seeds.
4. Provide light: Place the trays under a grow light or in a sunny window. If using a grow light, keep it a few inches above the seedlings.
5. Keep moist: Keep the soil consistently moist, but not soggy.
6. Thin seedlings: Once the seedlings have their first true leaves (the second set of leaves), thin them to one seedling per cell. Choose the strongest seedling and snip off the others at the soil line.
2. Direct Sowing (If Applicable)
1. Prepare the soil: Rake the soil to create a smooth surface.
2. Sow the seeds: Sow the kohlrabi seeds about ½ inch deep and 1-2 inches apart in rows.
3. Water gently: Water the area gently with a watering can.
4. Thin seedlings: Once the seedlings emerge and have their first true leaves, thin them to 4-6 inches apart.
3. Transplanting Seedlings (If Applicable)
1. Harden off seedlings: Before transplanting, you need to harden off the seedlings. This means gradually exposing them to outdoor conditions over a period of 7-10 days. Start by placing them outside for a few hours each day, gradually increasing the amount of time they spend outdoors.
2. Prepare the planting area: Dig holes that are slightly larger than the root balls of the seedlings. Space the holes 4-6 inches apart.
3. Transplant the seedlings: Gently remove the seedlings from the trays and place them in the holes. Make sure the top of the root ball is level with the soil surface.
4. Fill the holes: Fill the holes with soil and gently firm the soil around the seedlings.
5. Water thoroughly: Water the transplanted seedlings thoroughly.
Caring for Your Kohlrabi Plants
Once your kohlrabi plants are in the ground, it’s important to provide them with the care they need to thrive.
* Watering: Kohlrabi needs consistent moisture to grow properly. Water regularly, especially during dry periods. Aim for about 1 inch of water per week. I like to use a soaker hose to water my kohlrabi plants, as it delivers water directly to the roots.
* Fertilizing: Kohlrabi is a heavy feeder, so it benefits from regular fertilization. Use a balanced fertilizer, such as 10-10-10, according to the package directions. You can also side-dress your plants with compost or other organic matter. I usually fertilize my kohlrabi plants every 2-3 weeks.
* Weeding: Keep the area around your kohlrabi plants free of weeds. Weeds compete with kohlrabi for water and nutrients. Hand-pull weeds or use a hoe to remove them. Mulching can also help to suppress weeds.
* Pest Control: Kohlrabi can be susceptible to pests such as cabbage worms, aphids, and flea beetles. Inspect your plants regularly for signs of pests. If you find pests, you can try hand-picking them off the plants or using an insecticidal soap or neem oil. I prefer to use organic pest control methods whenever possible.
* Row Covers: To protect your young plants from pests and frost, consider using row covers. These lightweight fabrics can be placed over your plants to create a barrier against insects and cold weather.
Harvesting Kohlrabi
The moment we’ve all been waiting for! Harvesting your homegrown kohlrabi.
* Timing: Kohlrabi is typically ready to harvest 50-60 days after planting. The ideal size for harvesting is when the bulb is about 2-3 inches in diameter. If you let the bulbs grow too large, they can become tough and woody.
* How to Harvest: To harvest kohlrabi, simply cut the bulb from the plant at the base with a sharp knife.
* Storage: Kohlrabi can be stored in the refrigerator for several weeks. Remove the leaves before storing, as they can draw moisture from the bulb. You can also freeze kohlrabi, but it’s best to blanch it first.
Enjoying Your Harvest: Kohlrabi Recipes and Ideas
Now that you’ve harvested your kohlrabi, it’s time to enjoy the fruits (or rather, vegetables) of your labor! Here are a few ideas for using your homegrown kohlrabi:
* Raw: Kohlrabi can be eaten raw, sliced or grated into salads. It adds a crisp, refreshing flavor. I love to add it to coleslaw or use it as a crudité with hummus.
* Cooked: Kohlrabi can be cooked in a variety of ways, including steaming, boiling, roasting, and stir-frying. It’s delicious in soups, stews, and stir-fries. You can also mash it like potatoes or roast it with other root vegetables.
* Pickled: Pickled kohlrabi is a delicious and tangy treat. It’s a great way to preserve your harvest and enjoy it throughout the year.
* Leaves: Don’t forget about the leaves! Kohlrabi leaves are also edible and can be cooked like spinach or kale. They’re a great source of vitamins and minerals.
Conclusion
So, there you have it! Growing kohlrabi at home isn’t just a gardening project; it’s a gateway to fresh, flavorful, and incredibly versatile produce right at your fingertips. We’ve walked you through the process, from selecting the right seeds to harvesting your own crisp, bulbous treasures. But why should you bother with this particular DIY endeavor?
Simply put, the taste of homegrown kohlrabi is unparalleled. Forget the sometimes-tough, slightly bitter kohlrabi you might find at the grocery store. When you grow it yourself, you control the growing conditions, ensuring a tender, sweet, and subtly peppery flavor that will elevate your salads, slaws, stir-fries, and even your snacking habits. Plus, you’ll be reducing your carbon footprint by sourcing your food locally – from your own backyard!
Beyond the superior taste, growing kohlrabi at home offers a fantastic opportunity to connect with nature, learn new skills, and enjoy the satisfaction of nurturing something from seed to table. It’s a rewarding experience that can be shared with family and friends, making it a fun and educational activity for all ages.
But the benefits don’t stop there. Kohlrabi is packed with essential vitamins and minerals, making it a healthy addition to your diet. It’s a great source of vitamin C, potassium, and fiber, contributing to a strong immune system, healthy blood pressure, and improved digestion.
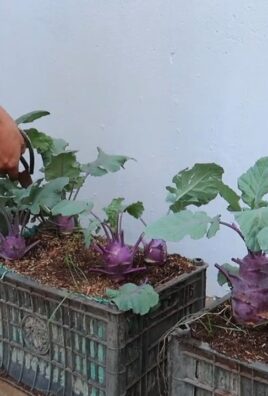
Now, let’s talk about variations. While we’ve focused on the standard green kohlrabi, don’t be afraid to experiment with different varieties. ‘Purple Vienna’ offers a beautiful color and a slightly milder flavor, while ‘White Vienna’ is known for its exceptional sweetness. You can also try growing different sizes, harvesting some bulbs when they’re small and tender for salads and letting others grow larger for roasting or grilling.
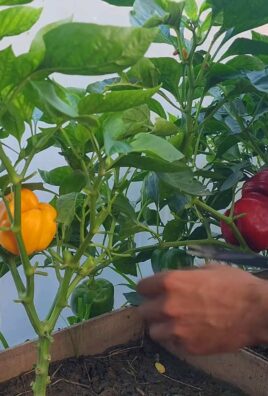
Consider companion planting to maximize your garden’s potential. Kohlrabi thrives alongside herbs like dill and chamomile, which can help deter pests and attract beneficial insects. Marigolds are also excellent companions, adding a splash of color and further protecting your kohlrabi from unwanted visitors.
And speaking of pests, remember to be vigilant in monitoring your plants for signs of trouble. Cabbage worms and aphids can sometimes be a nuisance, but they can be easily controlled with organic methods like hand-picking or using insecticidal soap.
The key to successful kohlrabi cultivation is consistent care. Regular watering, proper fertilization, and diligent weeding will ensure that your plants thrive and produce a bountiful harvest. Don’t be afraid to get your hands dirty and spend some time tending to your garden. The rewards will be well worth the effort.
We encourage you to embrace the challenge and embark on your own kohlrabi-growing adventure. It’s a simple, satisfying, and delicious way to connect with nature and enjoy the fruits (or rather, vegetables) of your labor.
So, grab your seeds, prepare your soil, and get ready to experience the joy of growing kohlrabi at home. And once you’ve harvested your first crop, be sure to share your experiences with us! We’d love to hear about your successes, your challenges, and your favorite ways to enjoy your homegrown kohlrabi. Share your photos, recipes, and tips in the comments below – let’s build a community of kohlrabi enthusiasts!
Frequently Asked Questions (FAQs)
What is kohlrabi, exactly?
Kohlrabi, sometimes called a German turnip, is a cruciferous vegetable related to cabbage, broccoli, and kale. It features a bulbous stem that grows above ground, with leaves sprouting from the top. The bulb is the edible part, offering a crisp, slightly sweet, and subtly peppery flavor. Both the bulb and the leaves are edible.
When is the best time to plant kohlrabi?
Kohlrabi is a cool-season crop, meaning it thrives in cooler temperatures. The best time to plant it depends on your climate. For a spring harvest, start seeds indoors 4-6 weeks before the last expected frost or direct sow them outdoors 2-3 weeks before the last frost. For a fall harvest, sow seeds in late summer, about 6-8 weeks before the first expected frost.
How much sunlight does kohlrabi need?
Kohlrabi needs at least 6 hours of sunlight per day to thrive. Choose a sunny location in your garden where your plants will receive ample sunlight throughout the day.
What kind of soil is best for growing kohlrabi?
Kohlrabi prefers well-drained, fertile soil with a pH between 6.0 and 7.5. Amend your soil with compost or other organic matter to improve drainage and fertility. A slightly sandy loam is ideal.
How often should I water kohlrabi?
Kohlrabi needs consistent moisture to grow properly. Water deeply and regularly, especially during dry periods. Aim to keep the soil consistently moist but not waterlogged. Mulching around the plants can help retain moisture and suppress weeds.
How do I fertilize kohlrabi?
Fertilize kohlrabi with a balanced fertilizer (e.g., 10-10-10) at planting time. You can also side-dress with a nitrogen-rich fertilizer a few weeks after planting to promote leafy growth. Avoid over-fertilizing, as this can lead to excessive foliage and smaller bulbs.
How do I know when kohlrabi is ready to harvest?
Kohlrabi is typically ready to harvest when the bulbs are about 2-3 inches in diameter. Larger bulbs can become tough and woody. Check the variety you are growing, as some are meant to be harvested at a larger size. Gently pull the entire plant from the ground, or use a knife to cut the bulb from the roots.
Can I eat the leaves of kohlrabi?
Yes, the leaves of kohlrabi are edible and nutritious! They can be cooked like spinach or kale, or added to salads when young and tender. Choose leaves that are firm and green, and avoid any that are yellowed or damaged.
What are some common pests and diseases that affect kohlrabi?
Common pests that affect kohlrabi include cabbage worms, aphids, and flea beetles. Diseases include clubroot and downy mildew. Monitor your plants regularly for signs of pests or diseases, and take appropriate action to control them. Organic methods like hand-picking pests, using insecticidal soap, or applying neem oil can be effective. Ensure good air circulation to prevent fungal diseases.
How do I store kohlrabi?
Store kohlrabi bulbs in the refrigerator for up to several weeks. Remove the leaves before storing, as they can draw moisture from the bulb. Wrap the bulbs in a plastic bag or container to prevent them from drying out. Kohlrabi leaves can be stored in the refrigerator for a few days, wrapped in a damp paper towel.
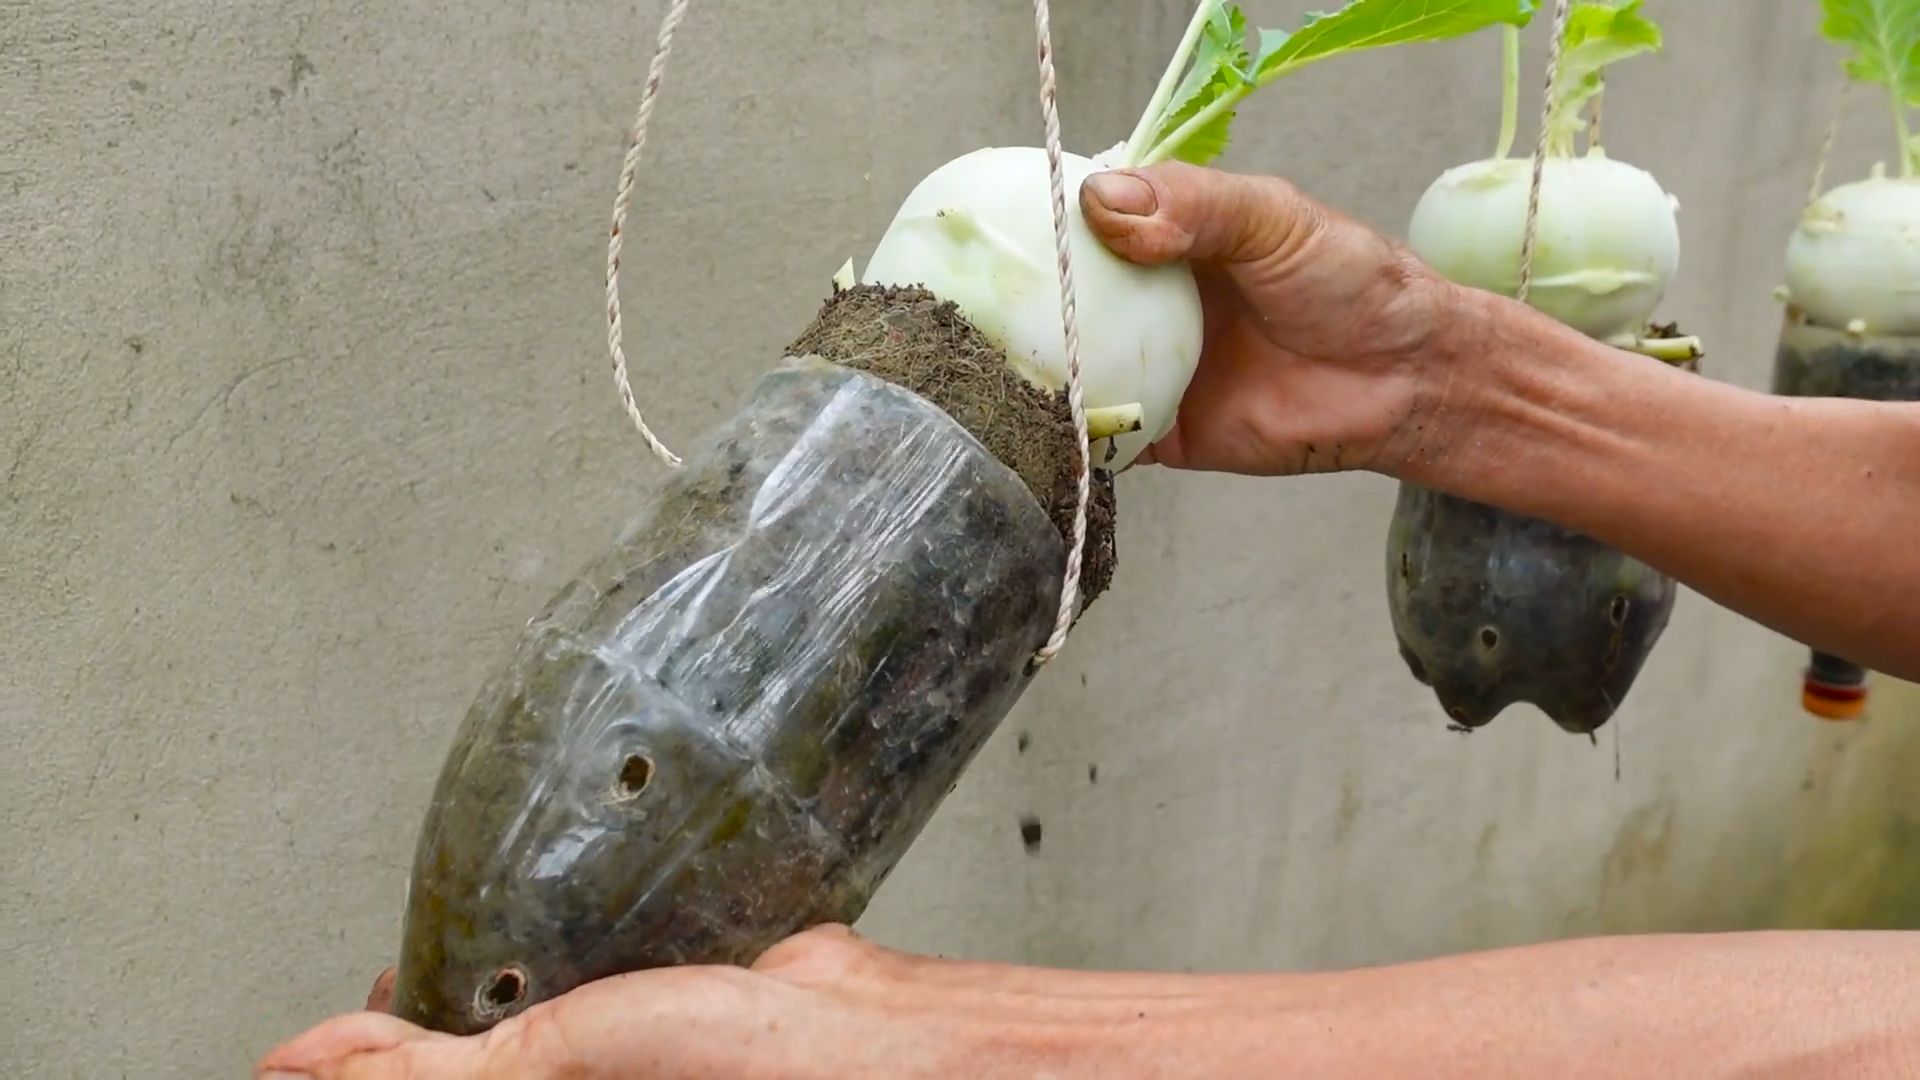
Can I grow kohlrabi in containers?
Yes, kohlrabi can be grown in containers. Choose a container that is at least 12 inches deep and wide to accommodate the plant’s root system. Use a well-draining potting mix and provide regular watering and fertilization.
What are some ways to use kohlrabi in cooking?
Kohlrabi can be eaten raw or cooked. It can be sliced and added to salads, shredded for slaws, or roasted, grilled, or stir-fried. The leaves can be cooked like spinach or kale. Kohlrabi has a mild, slightly sweet flavor that pairs well with a variety of seasonings and sauces.
Is kohlrabi good for you?
Yes, kohlrabi is a healthy vegetable. It is a good source of vitamin C, potassium, and fiber. It is also low in calories and fat. Including kohlrabi in your diet can contribute to a strong immune system, healthy blood pressure, and improved digestion.
Leave a Comment