
Grow Grape Tomatoes at Home and unlock a world of fresh, flavorful snacking right outside your door! Imagine popping juicy, sun-ripened grape tomatoes straight from the vine into your mouth – a taste far superior to anything you can find in a grocery store. But the best part? You don’t need acres of land or a green thumb of steel to achieve this delicious dream. This DIY guide is your passport to a bountiful harvest, even if you’re a complete beginner.
For centuries, cultivating tomatoes has been a cherished tradition across cultures. From the sun-drenched fields of Italy to the vibrant gardens of Mexico, these little red gems have been a staple ingredient, adding zest and nutrition to countless dishes. Now, you can bring that same rich history and flavor to your own home, regardless of your space constraints.
Let’s face it, store-bought grape tomatoes often lack that intense sweetness and satisfying burst of flavor. Plus, with rising grocery costs, growing your own is not only rewarding but also a smart way to save money. This DIY article will equip you with simple, effective tricks and hacks to grow grape tomatoes at home successfully, whether you have a sprawling backyard or just a sunny balcony. I’m excited to share my favorite tips and tricks to help you enjoy a delicious and rewarding harvest!
Tomato Happiness: How to Grow Juicy Cherry Tomatoes Yourself!
Hey everyone, are you tired of watery, tasteless tomatoes from the supermarket? Me too! That’s why today I’m showing you how to grow your own sun-ripened cherry tomatoes right at home. It’s easier than you think, and the taste is simply unbeatable! Let’s get started!
What you need:
- Cherry tomato seeds: Organic quality is best, so you know what you’re getting. There are countless varieties, so choose your favorite color and shape!
- Seed starting mix: This is low in nutrients and perfect for the delicate seedlings.
- Seed starting pots or trays: Small pots or trays with drainage holes are ideal.
- Spray bottle: For gently moistening the soil.
- Mini-greenhouse or clear plastic wrap: To create a warm, humid climate.
- Pricking tool or pencil: For carefully separating the seedlings.
- Vegetable soil: For later transplanting into larger pots or outdoors.
- Larger pots or containers: At least 10 liters (about 2.5 gallons) in volume per plant.
- Tomato stakes or trellis: Cherry tomatoes can get quite tall!
- Liquid fertilizer for tomatoes: For a bountiful harvest.
- Patience and love: The most important things of all!
Sowing and Starting Seeds: The Foundation for Your Tomato Glory
- Preparation is everything: Fill your seed starting pots or trays with seed starting mix. Lightly press the soil down and moisten it with the spray bottle. The soil should be damp, but not wet.
- Sow seeds: Distribute the cherry tomato seeds evenly on the soil. Press them down lightly, but don’t cover them too thickly with soil. A thin layer (about 0.5 cm or 1/4 inch) is plenty.
- Create a humid climate: Place the seed starting pots in a mini-greenhouse or cover them with clear plastic wrap. This ensures a warm, humid climate that promotes germination.
- Place in a warm and bright spot: Put the mini-greenhouse or covered pots in a warm and bright place. A temperature of 20-25°C (68-77°F) is ideal. Direct sunlight should be avoided, as the soil will dry out too quickly.
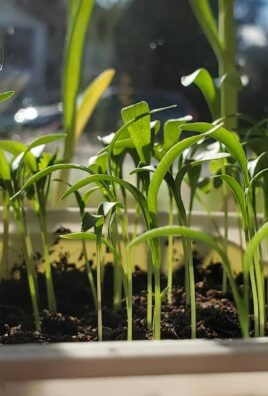
- Be patient: Now it’s time to wait! After about 7-14 days, the first seedlings should sprout. Ventilate the mini-greenhouse or remove the plastic wrap regularly to prevent mold growth.
- Control moisture: Make sure the soil is always slightly moist. Spray it with the spray bottle if needed. Avoid waterlogging!
Pricking Out: Giving the Little Tomatoes More Space
As soon as the seedlings have developed their first true leaves (in addition to the initial seed leaves), it’s time to prick them out. This means you separate the small plants and transplant them into their own pots.
- Preparation: Fill small pots (about 8-10 cm or 3-4 inches in diameter) with seed starting mix. Lightly moisten the soil.
- Carefully lift seedlings: Gently loosen the seedlings from the seed tray with a pricking tool or a pencil. Try to damage the roots as little as possible.
- Planting: Place each seedling into its own pot. The seed leaves should be just above the soil. Lightly press the soil down and gently water the seedlings.
- Bright location: Place the pricked-out tomatoes in a bright, but not full-sun, location.
- Continue care: Water the tomatoes regularly and fertilize them after about two weeks with a mild liquid fertilizer.
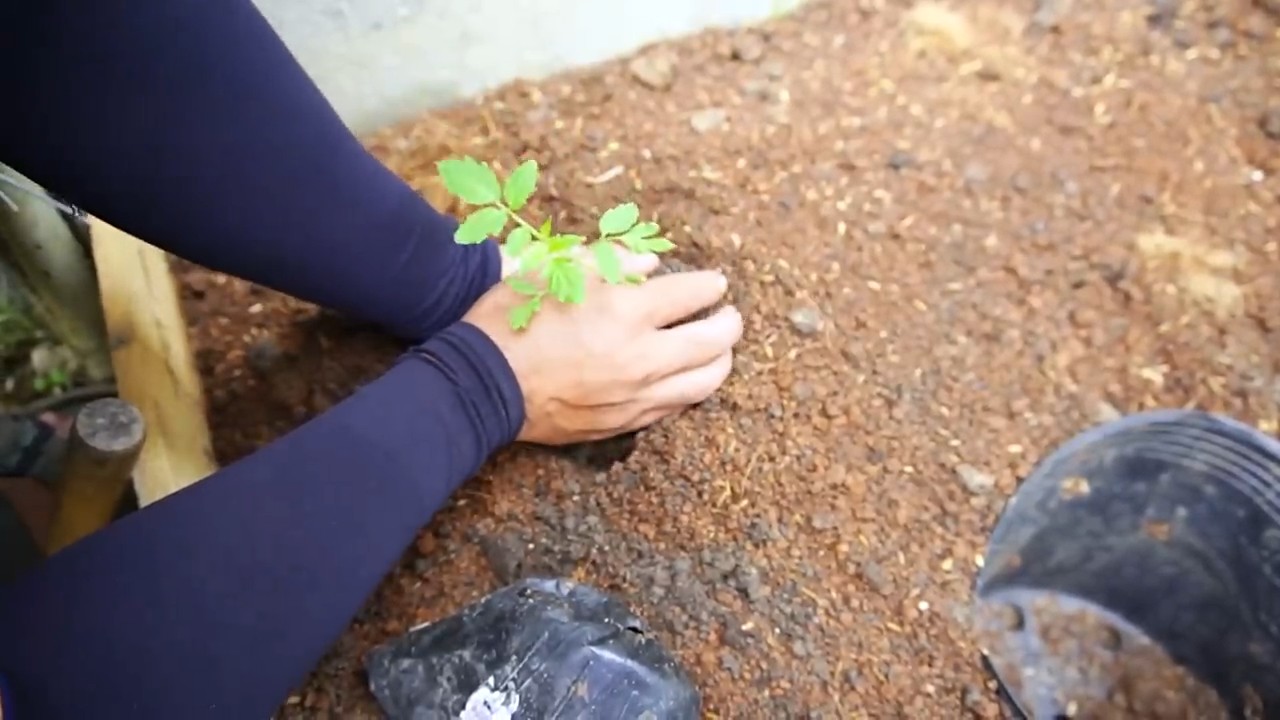
Transplanting Outdoors or into Larger Pots: The Move to Freedom
Once the tomato plants are strong enough (about 15-20 cm or 6-8 inches high) and there is no more danger of frost (mid-May, after the last frost), you can transplant them outdoors or into larger pots.
- Preparation: Choose a sunny and wind-protected location for your tomatoes. Prepare the soil by loosening it and enriching it with compost or organic fertilizer. If you are planting the tomatoes in pots, use high-quality vegetable soil.
- Dig planting holes: Dig planting holes that are slightly larger than the root balls of the tomato plants.
- Plant tomatoes: Place the tomato plants in the planting holes. The lowest leaves can be covered with soil, as this promotes root formation. Lightly press the soil down and water the plants thoroughly.
- Install tomato stakes: Cherry tomatoes can get very tall and need support. Place tomato stakes next to the plants or install a trellis.
- Water and fertilize: Water the tomatoes regularly, especially in dry weather. Fertilize them every two weeks with a liquid fertilizer for tomatoes.
Care During the Season: So Your Tomatoes Thrive
- Pruning suckers: Regularly remove the side shoots (suckers) that grow in the leaf axils. This promotes the growth of the main stems and ensures better air circulation for the plants.
- Watering: It’s best to water the tomatoes in the morning so the leaves can dry during the day. Avoid watering the leaves directly, as this can encourage fungal diseases.
- Fertilizing: Fertilize the tomatoes regularly with a liquid fertilizer for tomatoes. Follow the manufacturer’s dosage instructions.
- Protection from diseases and pests: Regularly check the tomatoes for diseases and pests. If necessary, you can use organic pesticides.
- Harvesting: As soon as the cherry tomatoes have reached their full color and are easily detached from the stem, they are ready for harvest.
Common Problems and Solutions: Don’t Panic, I’ll Help You!
- Yellow leaves: Can be a sign of a nutrient deficiency. Fertilize the tomatoes with a liquid fertilizer.
- Brown spots on leaves (late blight): A fungal disease that occurs especially in damp weather. Remove affected leaves and treat the plants with a fungicide. Ensure good air circulation for the plants.
- Aphids: Small, green or black insects that suck on the leaves. Spray the plants with a jet of water or introduce beneficial insects like ladybugs.
- Snails/Slugs: Like to eat the leaves and fruits. Set up snail traps or collect the snails by hand.
Extra Tips for a Bountiful Harvest:
Promote pollination: Gently shake the tomato plants to promote pollination.
Mulching: Cover the soil around the tomato plants with mulch (e.g., straw or grass clippings). This keeps the moisture in the soil and suppresses weeds.
Rain protection: If you live in a region with a lot of rain, you should provide your tomatoes with a rain cover. This protects the plants from late blight.
Variety selection: Choose robust and disease-resistant cherry tomato varieties.
Conclusion
So, there you have it! Growing grape tomatoes at home is not only achievable, but it’s also incredibly rewarding. From the vibrant burst of flavor in every bite to the sheer satisfaction of nurturing your own food, this DIY project offers a unique connection to nature and your plate. We’ve walked you through the essential steps, from selecting the right seeds or seedlings to providing the optimal growing conditions and tackling common challenges.
But why is this DIY trick a must-try? Beyond the obvious benefit of having a readily available supply of fresh, delicious grape tomatoes, consider the advantages of knowing exactly where your food comes from. You control the growing process, ensuring that your tomatoes are free from harmful pesticides and chemicals. Plus, homegrown tomatoes simply taste better! The flavor is more intense, the texture is firmer, and the overall experience is far superior to anything you can find in a grocery store.
The joy of harvesting your own sun-ripened grape tomatoes is an experience you won’t soon forget.
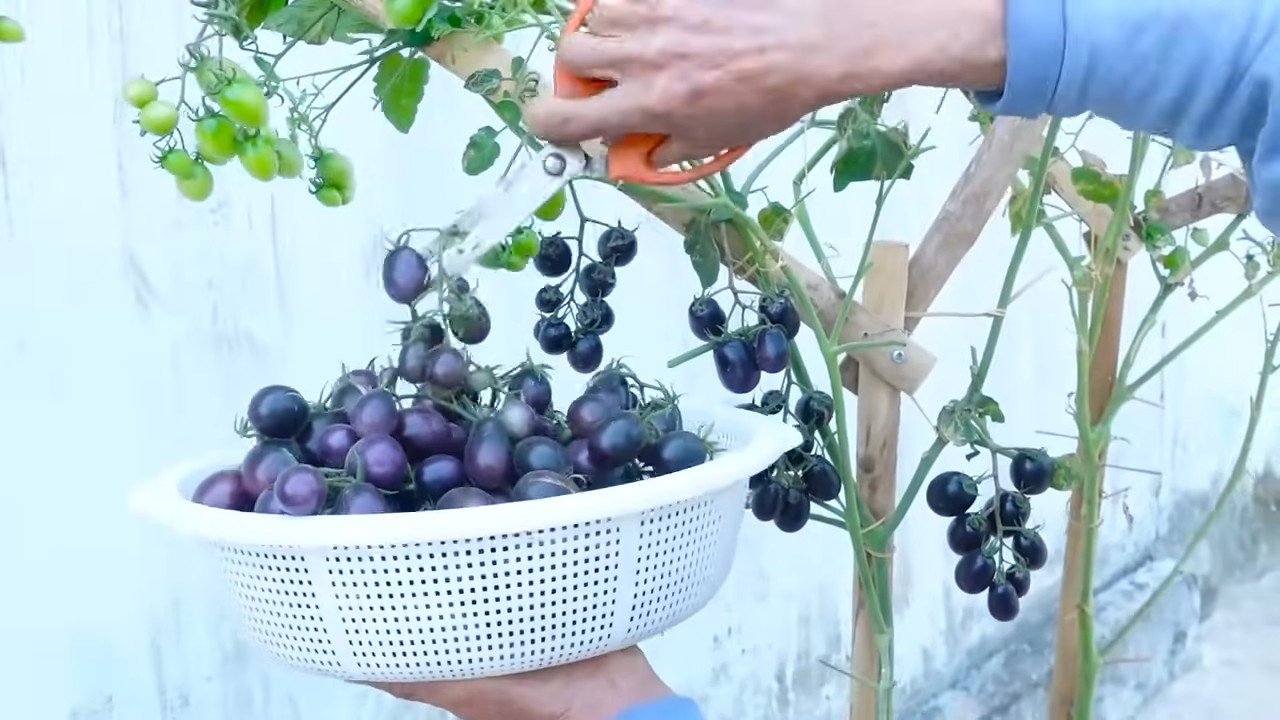
Looking for variations? Absolutely! Experiment with different varieties of grape tomatoes. Some are sweeter, some are tangier, and some offer unique colors like yellow or even black. You can also try growing your tomatoes in different containers, from traditional pots to hanging baskets or even repurposed materials like old buckets or tires. Consider companion planting to enhance growth and deter pests. Basil, marigolds, and carrots are all excellent companions for tomatoes.
Another exciting variation is to explore different growing methods. While we’ve focused on traditional soil-based gardening, you could also try hydroponics or aquaponics for a more advanced and space-saving approach. These methods can be particularly beneficial if you have limited space or poor soil quality.
We encourage you to embrace the challenge and embark on your own grape tomato growing adventure. Don’t be afraid to experiment, learn from your mistakes, and most importantly, have fun! The journey is just as rewarding as the destination.
And now, we want to hear from you! Have you tried growing grape tomatoes at home before? What were your successes and challenges? Do you have any tips or tricks to share with fellow gardeners? Please share your experiences in the comments below. Your insights could help others achieve their own grape tomato growing dreams. We are confident that with a little effort and dedication, you can successfully grow grape tomatoes at home and enjoy the fruits (or vegetables!) of your labor. Happy gardening!
Frequently Asked Questions (FAQ)
What is the best time of year to start growing grape tomatoes?
The best time to start growing grape tomatoes depends on your climate. Generally, you should start seeds indoors 6-8 weeks before the last expected frost. If you’re buying seedlings, wait until after the last frost to transplant them outdoors. The soil temperature should be at least 60°F (15°C) for optimal growth. In warmer climates, you can start growing grape tomatoes earlier in the spring or even in the fall for a winter harvest.
How much sunlight do grape tomatoes need?
Grape tomatoes need at least 6-8 hours of direct sunlight per day. Choose a location in your garden that receives plenty of sunlight throughout the day. If you’re growing them indoors, supplement with grow lights if necessary. Insufficient sunlight can lead to leggy plants and reduced fruit production.
What kind of soil is best for growing grape tomatoes?
Grape tomatoes thrive in well-draining, fertile soil with a slightly acidic pH (6.0-6.8). Amend your soil with compost or other organic matter to improve drainage and nutrient content. Avoid heavy clay soils, as they can become waterlogged and hinder root growth. You can also use a potting mix specifically formulated for tomatoes if you’re growing them in containers.
How often should I water my grape tomato plants?
Water your grape tomato plants deeply and regularly, especially during hot, dry weather. Aim to keep the soil consistently moist but not waterlogged. Water at the base of the plant to avoid wetting the foliage, which can increase the risk of fungal diseases. A good rule of thumb is to water when the top inch of soil feels dry to the touch. Mulching around the plants can help retain moisture and suppress weeds.
Do grape tomatoes need fertilizer?
Yes, grape tomatoes benefit from regular fertilization. Use a balanced fertilizer specifically formulated for tomatoes, following the instructions on the package. Fertilize every 2-3 weeks during the growing season. Avoid over-fertilizing, as this can lead to excessive foliage growth and reduced fruit production. You can also use organic fertilizers like compost tea or fish emulsion.
How do I prevent pests and diseases from affecting my grape tomato plants?
Prevention is key when it comes to pests and diseases. Start by choosing disease-resistant varieties of grape tomatoes. Practice good garden hygiene by removing any dead or diseased leaves and keeping the area around your plants clean. Use organic pest control methods like insecticidal soap or neem oil to control common pests like aphids and whiteflies. Ensure good air circulation around your plants to prevent fungal diseases. Consider using a tomato cage or staking your plants to keep them off the ground and improve air circulation.
When are grape tomatoes ready to harvest?
Grape tomatoes are ready to harvest when they are fully colored (usually red, but depending on the variety, it could be yellow, orange, or even black) and slightly soft to the touch. Gently twist the tomato from the vine. The tomatoes should come off easily when they are ripe. Harvest regularly to encourage continued fruit production.
Can I grow grape tomatoes in containers?
Yes, grape tomatoes are well-suited for container gardening. Choose a large container (at least 12 inches in diameter) with drainage holes. Use a potting mix specifically formulated for tomatoes. Provide adequate sunlight and water, and fertilize regularly. You may need to stake or cage your plants to support their growth.
What are some common problems when growing grape tomatoes?
Some common problems include blossom end rot (caused by calcium deficiency), cracking (caused by inconsistent watering), and fungal diseases (caused by excessive moisture). Address these problems by providing adequate calcium, watering consistently, and ensuring good air circulation.
How do I prune grape tomato plants?
Pruning grape tomato plants can improve air circulation, reduce the risk of disease, and encourage fruit production. Remove suckers (the small shoots that grow between the main stem and the branches) to focus the plant’s energy on fruit development. You can also remove any yellowing or diseased leaves.
Can I save seeds from my grape tomatoes to plant next year?
Yes, you can save seeds from your grape tomatoes, but keep in mind that if you grew hybrid varieties, the resulting plants may not be true to type. To save seeds, allow the tomatoes to fully ripen on the vine. Scoop out the seeds and pulp and place them in a jar with a little water. Let the mixture ferment for a few days, stirring occasionally. This process helps remove the gelatinous coating around the seeds. Rinse the seeds thoroughly and spread them out on a paper towel to dry completely. Store the dried seeds in an airtight container in a cool, dark place.
Leave a Comment