
Grow Ginger at Home? Absolutely! Imagine the satisfaction of snipping off a piece of fresh, zesty ginger root right from your own backyard (or even your windowsill!). It’s easier than you think, and this DIY guide will show you exactly how to make it happen. Forget those sad, shriveled ginger roots at the grocery store – we’re talking vibrant, homegrown flavor!
Ginger, with its fiery kick and incredible health benefits, has been cherished for centuries. Originating in South Asia, it’s been used in traditional medicine and culinary practices across cultures for thousands of years. From soothing teas to flavorful stir-fries, ginger is a staple in many households. But did you know you can easily cultivate this amazing spice yourself?
Let’s face it, buying fresh ginger can sometimes be a gamble. You never quite know how long it’s been sitting on the shelf, and the quality can vary wildly. That’s where this DIY trick comes in! By learning how to grow ginger at home, you’ll have a constant supply of fresh, organic ginger right at your fingertips. Plus, it’s a rewarding and surprisingly simple gardening project that anyone can tackle, regardless of their experience. So, grab your gardening gloves, and let’s get started on this exciting journey to homegrown ginger goodness!
Ingwer zu Hause anbauen: Dein einfacher DIY-Leitfaden
Hallo liebe Gartenfreunde! Habt ihr euch jemals gefragt, wie ihr euren eigenen Ingwer zu Hause anbauen könnt? Es ist einfacher als ihr denkt und unglaublich lohnend! Frischer, selbst angebauter Ingwer ist nicht nur lecker, sondern auch vielseitig einsetzbar – ob im Tee, im Curry oder als natürliche Medizin. In diesem Artikel zeige ich euch Schritt für Schritt, wie ihr das ganz einfach selbst machen könnt. Los geht’s!
Was du brauchst: Die Zutatenliste
Bevor wir loslegen, hier eine Liste der Dinge, die du für dein Ingwer-Anbauprojekt benötigst:
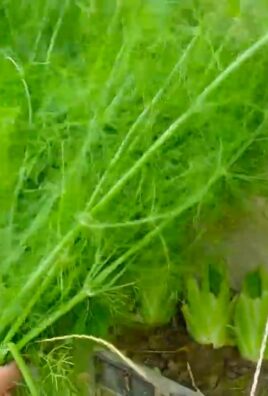
* Ein Ingwer-Rhizom: Am besten eines aus dem Bioladen, da diese oft nicht mit Wachstumsinhibitoren behandelt wurden. Achte darauf, dass es pralle Knospen (Augen) hat.
* Ein Pflanzgefäß: Wähle einen Topf oder Behälter mit guter Drainage. Er sollte mindestens 30 cm breit und 20 cm tief sein, damit der Ingwer genügend Platz zum Wachsen hat.
* Hochwertige Blumenerde: Eine gut durchlässige, nährstoffreiche Erde ist ideal. Du kannst auch Kompost oder Kokosfasern untermischen.
* Wasser: Zum Gießen, natürlich!
* Ein warmer, heller Standort: Ingwer liebt Wärme und indirektes Sonnenlicht.
* Optional: Organischer Dünger für zusätzliches Wachstum.
Die Vorbereitung: Den Ingwer zum Sprießen bringen
Bevor wir den Ingwer einpflanzen, können wir ihn zum Sprießen bringen. Das ist zwar nicht unbedingt notwendig, beschleunigt aber den Wachstumsprozess.
1. Ingwer auswählen: Suche dir ein Ingwer-Rhizom mit mehreren prallen Knospen aus. Diese Knospen sind die Stellen, aus denen die neuen Triebe wachsen werden.
2. Einweichen (optional): Lege den Ingwer über Nacht in eine Schale mit lauwarmem Wasser. Das hilft, ihn zu rehydrieren und das Sprießen anzuregen.
3. Schneiden (optional): Wenn dein Ingwer-Rhizom sehr groß ist, kannst du es in mehrere Stücke schneiden. Achte darauf, dass jedes Stück mindestens eine Knospe hat. Lass die Schnittflächen ein paar Stunden an der Luft trocknen, um Fäulnis zu vermeiden.
Das Einpflanzen: Der Start ins Ingwer-Glück
Jetzt kommt der spannende Teil: das Einpflanzen!
1. Topf vorbereiten: Fülle den Topf mit Blumenerde. Lass etwa 5 cm Platz bis zum Rand.
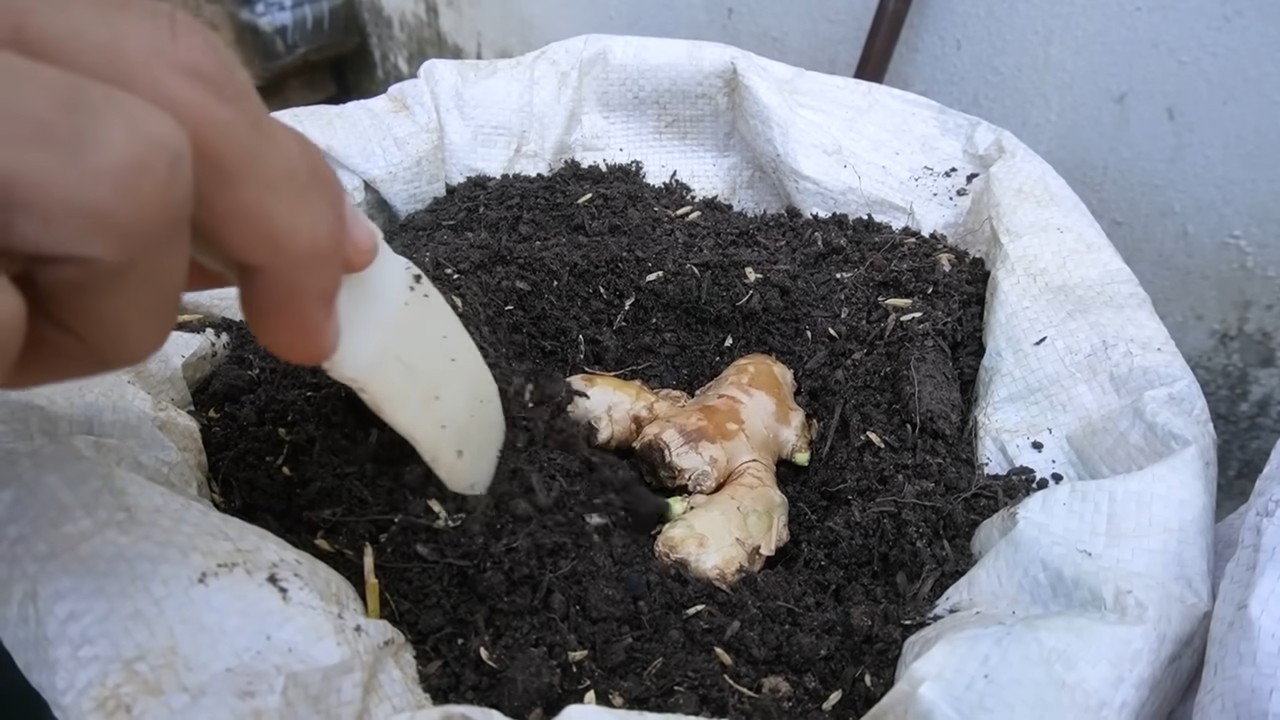
2. Ingwer platzieren: Lege den Ingwer mit den Knospen nach oben auf die Erde.
3. Mit Erde bedecken: Bedecke den Ingwer mit etwa 2-5 cm Erde. Drücke die Erde leicht an.
4. Gießen: Gieße die Erde gründlich, bis sie gut durchfeuchtet ist. Achte darauf, dass das Wasser gut ablaufen kann.
5. Standort wählen: Stelle den Topf an einen warmen, hellen Ort, aber nicht in die pralle Sonne. Ein Fensterbrett nach Osten oder Westen ist ideal.
Die Pflege: Ingwer glücklich machen
Damit dein Ingwer gut wächst, braucht er die richtige Pflege.
1. Gießen: Halte die Erde feucht, aber nicht nass. Gieße, wenn sich die oberste Erdschicht trocken anfühlt. Vermeide Staunässe, da dies zu Fäulnis führen kann.
2. Düngen (optional): Dünge den Ingwer alle paar Wochen mit einem organischen Dünger. Das fördert das Wachstum und die Gesundheit der Pflanze.
3. Temperatur: Ingwer liebt Wärme. Die ideale Temperatur liegt zwischen 20 und 30 Grad Celsius.
4. Luftfeuchtigkeit: Ingwer mag eine hohe Luftfeuchtigkeit. Du kannst die Blätter regelmäßig mit Wasser besprühen, um die Luftfeuchtigkeit zu erhöhen.
5. Beobachten: Achte auf Anzeichen von Schädlingen oder Krankheiten. Wenn du Probleme feststellst, handle schnell, um sie zu beheben.
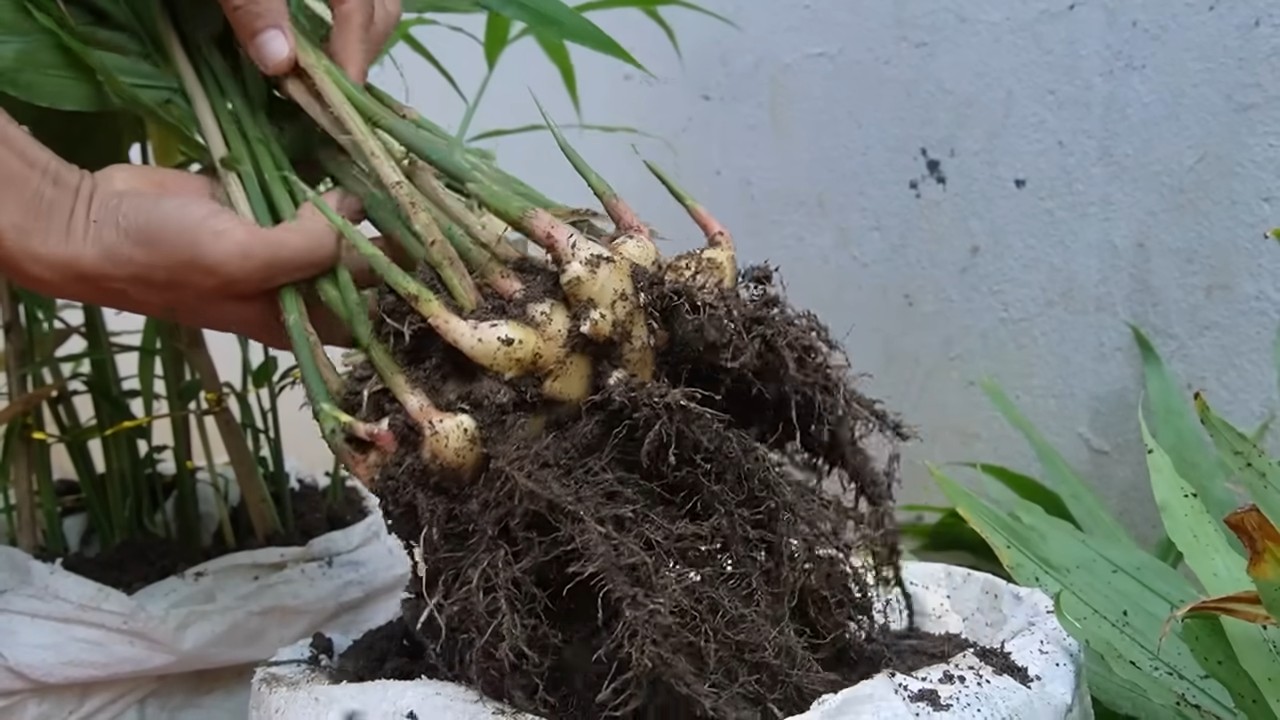
Die Ernte: Dein eigener Ingwer
Nach etwa 8-10 Monaten ist es Zeit für die Ernte!
1. Anzeichen der Reife: Die Blätter werden gelb und beginnen zu welken. Das ist ein Zeichen, dass der Ingwer reif ist.
2. Ernten: Grabe den Ingwer vorsichtig aus. Du kannst entweder das ganze Rhizom ernten oder nur einen Teil davon abschneiden und den Rest im Topf lassen, damit er weiterwächst.
3. Reinigen: Reinige den geernteten Ingwer von Erde.
4. Verwenden: Dein selbst angebauter Ingwer ist jetzt bereit für die Verwendung! Du kannst ihn frisch verwenden, trocknen oder einfrieren.
Häufige Probleme und Lösungen
Auch beim Ingweranbau können Probleme auftreten. Hier sind einige häufige Probleme und wie du sie lösen kannst:
* Gelbe Blätter: Können ein Zeichen von Überwässerung, Nährstoffmangel oder zu wenig Licht sein. Überprüfe deine Gießgewohnheiten, dünge die Pflanze und stelle sie an einen helleren Ort.
* Fäulnis: Wird oft durch Staunässe verursacht. Achte auf eine gute Drainage und gieße nicht zu viel.
* Schädlinge: Spinnmilben oder Blattläuse können auftreten. Besprühe die Pflanze mit einer Lösung aus Wasser und Spülmittel oder verwende ein biologisches Schädlingsbekämpfungsmittel.
Zusätzliche Tipps für den Ingwer-Anbau
* Verschiedene Sorten: Es gibt verschiedene Ingwersorten. Probiere verschiedene Sorten aus, um herauszufinden, welche dir am besten schmeckt.
* Ingwer im Freien anbauen: In warmen Klimazonen kannst du Ingwer auch im Freien anbauen. Wähle einen halbschattigen Standort und achte auf eine gute Drainage.
* Ingwer vermehren: Du kannst Ingwer ganz einfach vermehren, indem du das Rhizom in mehrere Stücke teilst. Achte darauf, dass jedes Stück mindestens eine Knospe hat.
Ingwer in der Küche und als Heilmittel
Ingwer ist nicht nur lecker, sondern auch sehr gesund. Er wirkt entzündungshemmend, schmerzlindernd und verdauungsfördernd.
* In der Küche: Ingwer ist vielseitig einsetzbar. Du kannst ihn in Currys, Suppen, Smoothies, Tee oder Gebäck verwenden.
* Als Heilmittel: Ingwer kann bei Übelkeit, Erkältungen und Muskelschmerzen helfen. Du kannst ihn als Tee trinken, kauen oder als ätherisches Öl verwenden.
Fazit: Dein eigener Ingwer-Garten
Ich hoffe, dieser Leitfaden hat dir geholfen, deinen eigenen Ingwer zu Hause anzubauen. Es ist ein lohnendes Projekt, das dir frischen, gesunden Ingwer direkt aus deinem eigenen Garten liefert. Viel Spaß beim Gärtnern! Und denk daran: Geduld ist der Schlüssel zum Erfolg. Mit der richtigen Pflege wirst du bald deinen eigenen Ingwer ernten können. Viel Erfolg!
Conclusion
So, there you have it! Growing ginger at home is not only achievable, but it’s also a deeply rewarding experience that connects you to the food you eat in a whole new way. Forget those bland, store-bought rhizomes that have been sitting on shelves for weeks. Imagine the vibrant, spicy flavor of freshly harvested ginger, ready to elevate your culinary creations and soothe your senses. This isn’t just about saving a few dollars; it’s about embracing sustainability, reducing your carbon footprint, and enjoying the unparalleled taste of homegrown goodness.
This DIY trick is a must-try for several compelling reasons. First, the flavor difference is undeniable. Homegrown ginger boasts a zest and intensity that commercially available options simply can’t match. Second, you have complete control over the growing process, ensuring that your ginger is free from harmful pesticides and chemicals. Third, it’s incredibly satisfying to nurture a plant from a small rhizome to a thriving source of deliciousness. Finally, it’s a fantastic way to add a touch of green to your home and connect with nature, even if you don’t have a sprawling garden.
But the adventure doesn’t stop there! Feel free to experiment with different varieties of ginger. Perhaps you’d like to try growing the delicate pink ginger, known for its milder flavor, or the fiery blue ginger, prized for its medicinal properties. You can also adjust the growing conditions to suit your specific climate. If you live in a colder region, consider growing your ginger indoors year-round, providing it with plenty of warmth and sunlight. For those in warmer climates, you might explore different soil compositions to optimize growth and flavor.
Don’t be afraid to get creative with your ginger harvest! Beyond using it in your favorite recipes, consider making your own ginger tea, candied ginger, or even ginger-infused oil. The possibilities are endless!
We wholeheartedly encourage you to embark on this exciting journey of growing ginger at home. It’s a simple, sustainable, and incredibly rewarding project that will transform the way you think about this versatile spice. Once you’ve experienced the joy of harvesting your own fresh ginger, you’ll never go back to store-bought again.
We’re eager to hear about your experiences! Share your tips, tricks, and triumphs in the comments below. Let us know what varieties you’re growing, what challenges you’ve faced, and what delicious creations you’ve made with your homegrown ginger. Together, we can build a community of passionate ginger growers and inspire others to embrace the magic of DIY gardening. So, grab a rhizome, get your hands dirty, and prepare to be amazed by the incredible power of growing ginger at home!
Frequently Asked Questions (FAQ)
What kind of ginger should I plant?
The best type of ginger to plant is culinary ginger, also known as common ginger (Zingiber officinale). Look for rhizomes that are plump, firm, and have visible “eyes” or buds. Avoid rhizomes that are shriveled, soft, or show signs of mold. You can often find suitable ginger at your local grocery store or Asian market. Organic ginger is preferable, as it hasn’t been treated with growth inhibitors. Remember that ornamental ginger varieties, while beautiful, are not typically suitable for culinary use.
How long does it take to grow ginger?
Ginger typically takes around 8-10 months to mature and be ready for harvest. However, you can start harvesting small pieces of ginger after about 4 months, as needed. The plant will continue to produce new rhizomes as it grows. The best time to harvest the entire plant is when the leaves start to turn yellow and die back, indicating that the rhizomes have reached their peak flavor and size.
What are the ideal growing conditions for ginger?
Ginger thrives in warm, humid environments with partial shade. It prefers well-draining soil that is rich in organic matter. The ideal soil pH is between 6.0 and 6.5. Ginger needs consistent moisture but should not be waterlogged. Temperatures between 65°F and 90°F (18°C and 32°C) are optimal for growth. If you live in a colder climate, you can grow ginger indoors in a pot, providing it with adequate warmth and sunlight.
How do I prepare the ginger rhizome for planting?
Before planting, soak the ginger rhizome in water overnight to rehydrate it. This will help to stimulate growth. Cut the rhizome into pieces, ensuring that each piece has at least one or two “eyes” or buds. Allow the cut pieces to dry for a day or two to prevent rotting. This will help the cut surfaces to callous over, reducing the risk of fungal infections.
What kind of soil should I use for growing ginger?
Ginger prefers well-draining soil that is rich in organic matter. A good soil mix would include equal parts of potting soil, compost, and perlite or vermiculite. This combination provides the necessary nutrients, drainage, and aeration for healthy ginger growth. Avoid using heavy clay soil, as it can retain too much moisture and lead to root rot.
How often should I water my ginger plant?
Water your ginger plant regularly, keeping the soil consistently moist but not waterlogged. Check the soil moisture level by sticking your finger into the soil. If the top inch feels dry, it’s time to water. During hot, dry weather, you may need to water more frequently. Reduce watering during the winter months when the plant is dormant.
What kind of fertilizer should I use for ginger?
Ginger benefits from regular fertilization, especially during the growing season. Use a balanced organic fertilizer, such as compost tea or fish emulsion, every 2-3 weeks. Avoid using fertilizers that are high in nitrogen, as this can promote leafy growth at the expense of rhizome development.
How do I protect my ginger plant from pests and diseases?
Ginger is relatively pest-resistant, but it can be susceptible to certain pests, such as aphids and spider mites. Inspect your plants regularly for signs of infestation and treat them with insecticidal soap or neem oil if necessary. Root rot is a common disease that can affect ginger plants, especially in poorly draining soil. To prevent root rot, ensure that your soil is well-draining and avoid overwatering.
Can I grow ginger indoors?
Yes, you can successfully grow ginger indoors, especially if you live in a colder climate. Choose a pot that is at least 12 inches in diameter and fill it with well-draining potting mix. Place the pot in a warm, sunny location, such as a south-facing window. Water regularly and fertilize every 2-3 weeks. You may need to supplement with artificial light if your indoor environment is not bright enough.
How do I harvest ginger?
You can start harvesting small pieces of ginger after about 4 months by carefully digging around the plant and cutting off a section of the rhizome. For a full harvest, wait until the leaves start to turn yellow and die back, typically after 8-10 months. Gently dig up the entire plant and separate the rhizomes from the roots. Wash the rhizomes thoroughly and store them in a cool, dry place.
Leave a Comment