
Growing potatoes in bags is a game-changer for anyone dreaming of a bountiful harvest, regardless of space! Imagine plucking fresh, earthy potatoes straight from your patio or balcony – it’s easier than you think, and this DIY guide will show you how. Forget sprawling gardens; this method brings the farm to you!
The concept of container gardening, including growing potatoes in bags, has roots stretching back centuries. From the hanging gardens of Babylon to the resourceful “victory gardens” of wartime, humans have always found innovative ways to cultivate food in limited spaces. Today, with urban living on the rise, the need for accessible and efficient gardening techniques is more critical than ever.
Why should you embrace this DIY trick? Well, for starters, it’s incredibly space-saving. Apartment dwellers and those with small yards can finally enjoy the satisfaction of growing their own food. Plus, it’s a fantastic way to control soil quality and prevent common potato pests and diseases. I’ve personally found that growing potatoes in bags is also much easier on my back – no more endless digging! This guide will walk you through every step, from choosing the right bag to harvesting your delicious, homegrown potatoes. Get ready to experience the joy of fresh, homegrown potatoes, no matter where you live!
Grow Your Own Spuds: A Beginner’s Guide to Potato Bag Gardening
Hey there, fellow garden enthusiasts! Ever dreamed of harvesting your own fresh, delicious potatoes right from your backyard (or even your balcony!)? Well, you’re in luck! Growing potatoes in bags is a super easy and rewarding project, perfect for beginners and seasoned gardeners alike. It’s space-saving, manageable, and honestly, it’s just plain fun to watch those little spuds grow. So, grab your supplies, and let’s get started!
Why Grow Potatoes in Bags?
Before we dive into the how-to, let’s quickly touch on why bag gardening is such a great option for potatoes:
* Space-Saving: Perfect for small gardens, patios, balconies, or even indoors with enough sunlight.
* Easy to Manage: You have complete control over the soil and growing conditions.
* No Digging Required: Harvesting is a breeze – just tip the bag over!
* Fewer Pests and Diseases: Elevated growing reduces the risk of soil-borne problems.
* Early Harvest: You can often harvest potatoes earlier than in-ground planting.
What You’ll Need
Okay, let’s gather our supplies. Here’s what you’ll need to embark on your potato-growing adventure:
* Grow Bags: Choose bags that are at least 10 gallons in size. Fabric grow bags are ideal because they allow for good drainage and aeration. You can find them online or at your local garden center. I recommend getting a few so you can experiment with different potato varieties!
* Seed Potatoes: These aren’t seeds, but rather small potatoes specifically grown for planting. You can purchase certified seed potatoes from a reputable supplier. Look for varieties that are suitable for your climate and have good disease resistance. Red potatoes, Yukon Golds, and fingerling potatoes are all great choices for bag gardening.
* Potting Mix: Use a high-quality, well-draining potting mix. Avoid using garden soil, as it can become compacted in containers. A mix of peat moss, perlite, and compost works well.
* Compost: Compost is your potato plants’ best friend! It provides essential nutrients and helps retain moisture.
* Fertilizer: A balanced, slow-release fertilizer will give your potatoes a boost. Look for one with an NPK ratio of around 10-10-10 or 14-14-14.
* Watering Can or Hose: For keeping your potato plants hydrated.
* Scissors or Knife: For cutting the seed potatoes (if needed).
* Trowel or Shovel: For scooping soil and planting.
Preparing Your Seed Potatoes
This step is crucial for getting your potato plants off to a strong start.
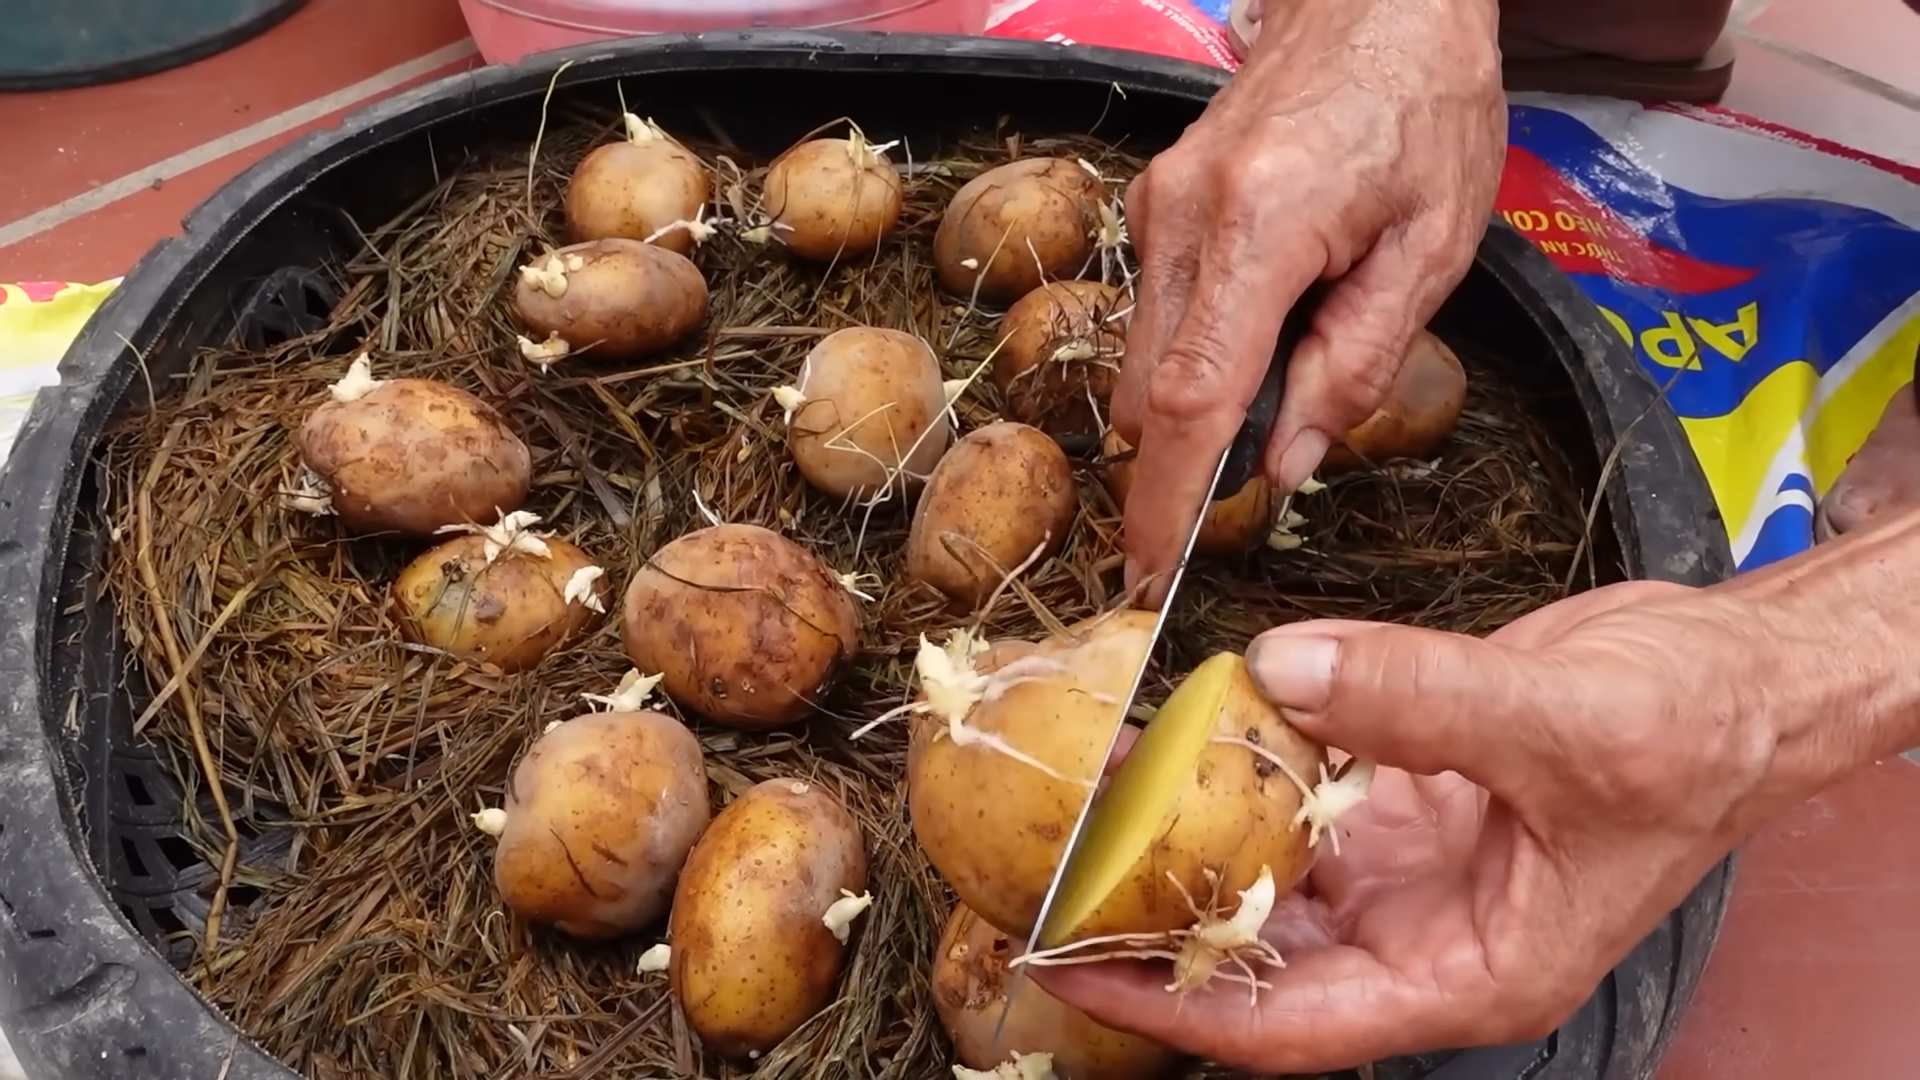
1. Chitting (Optional but Recommended): Chitting is the process of encouraging your seed potatoes to sprout before planting. This gives them a head start and can result in an earlier harvest. To chit your potatoes, place them in a cool, bright location (but not direct sunlight) for a few weeks. You’ll see small, green sprouts (called “eyes”) emerge from the potatoes.
2. Cutting (If Necessary): If your seed potatoes are large (bigger than an egg), you can cut them into smaller pieces. Make sure each piece has at least one or two “eyes.” Let the cut pieces dry for a day or two to allow the cut surfaces to callous over. This helps prevent rot. I usually cut mine into pieces about the size of a golf ball.
Planting Your Potatoes
Now for the fun part! Let’s get those potatoes in the ground (or, in this case, the bag!).
1. Fill the Bag: Start by filling the grow bag with about 4-6 inches of potting mix. Mix in a generous amount of compost and a sprinkle of slow-release fertilizer.
2. Plant the Seed Potatoes: Place the seed potato pieces (sprout-side up, if they’re chitted) on top of the soil, spacing them about 8-10 inches apart. If you’re only planting one potato per bag, place it in the center.
3. Cover with Soil: Cover the seed potatoes with another 4-6 inches of potting mix, compost, and fertilizer.
4. Water Thoroughly: Water the bag well until the soil is evenly moist.
“Hilling” Your Potatoes
This is where the magic happens! “Hilling” is the process of adding more soil to the bag as the potato plants grow. This encourages the plants to produce more potatoes along the stems.
1. Wait for Growth: Once the potato plants emerge from the soil and reach about 6-8 inches tall, it’s time to “hill” them.
2. Add More Soil: Add another 4-6 inches of potting mix, compost, and fertilizer to the bag, burying the lower part of the stems. Leave the top few inches of the plant exposed.
3. Repeat: Continue this process every few weeks as the plants grow, until the bag is almost full. This encourages the plant to produce more potatoes all along the buried stem.
4. Water Regularly: After each hilling, water the bag thoroughly.
Caring for Your Potato Plants
Proper care is essential for a bountiful harvest.
1. Watering: Potatoes need consistent moisture, especially during tuber formation. Water deeply whenever the top inch of soil feels dry. Avoid overwatering, as this can lead to rot.
2. Fertilizing: Continue to fertilize your potato plants every few weeks with a balanced fertilizer. You can also use a liquid fertilizer, such as fish emulsion or seaweed extract.
3. Sunlight: Potatoes need at least 6-8 hours of sunlight per day. Place your grow bags in a sunny location.
4. Pest Control: Keep an eye out for common potato pests, such as aphids, potato beetles, and flea beetles. Handpick them off the plants or use an organic insecticide if necessary.
5. Disease Prevention: To prevent diseases, ensure good air circulation around the plants and avoid overhead watering. If you notice any signs of disease, such as leaf spots or wilting, remove the affected leaves immediately.
Harvesting Your Potatoes
The moment you’ve been waiting for!
1. Timing: Potatoes are typically ready to harvest about 80-100 days after planting, depending on the variety. You can harvest “new potatoes” (small, tender potatoes) earlier, about 60-70 days after planting.
2. Signs of Readiness: The potato plants will start to flower, and the foliage will begin to yellow and die back. This is a sign that the potatoes are maturing.
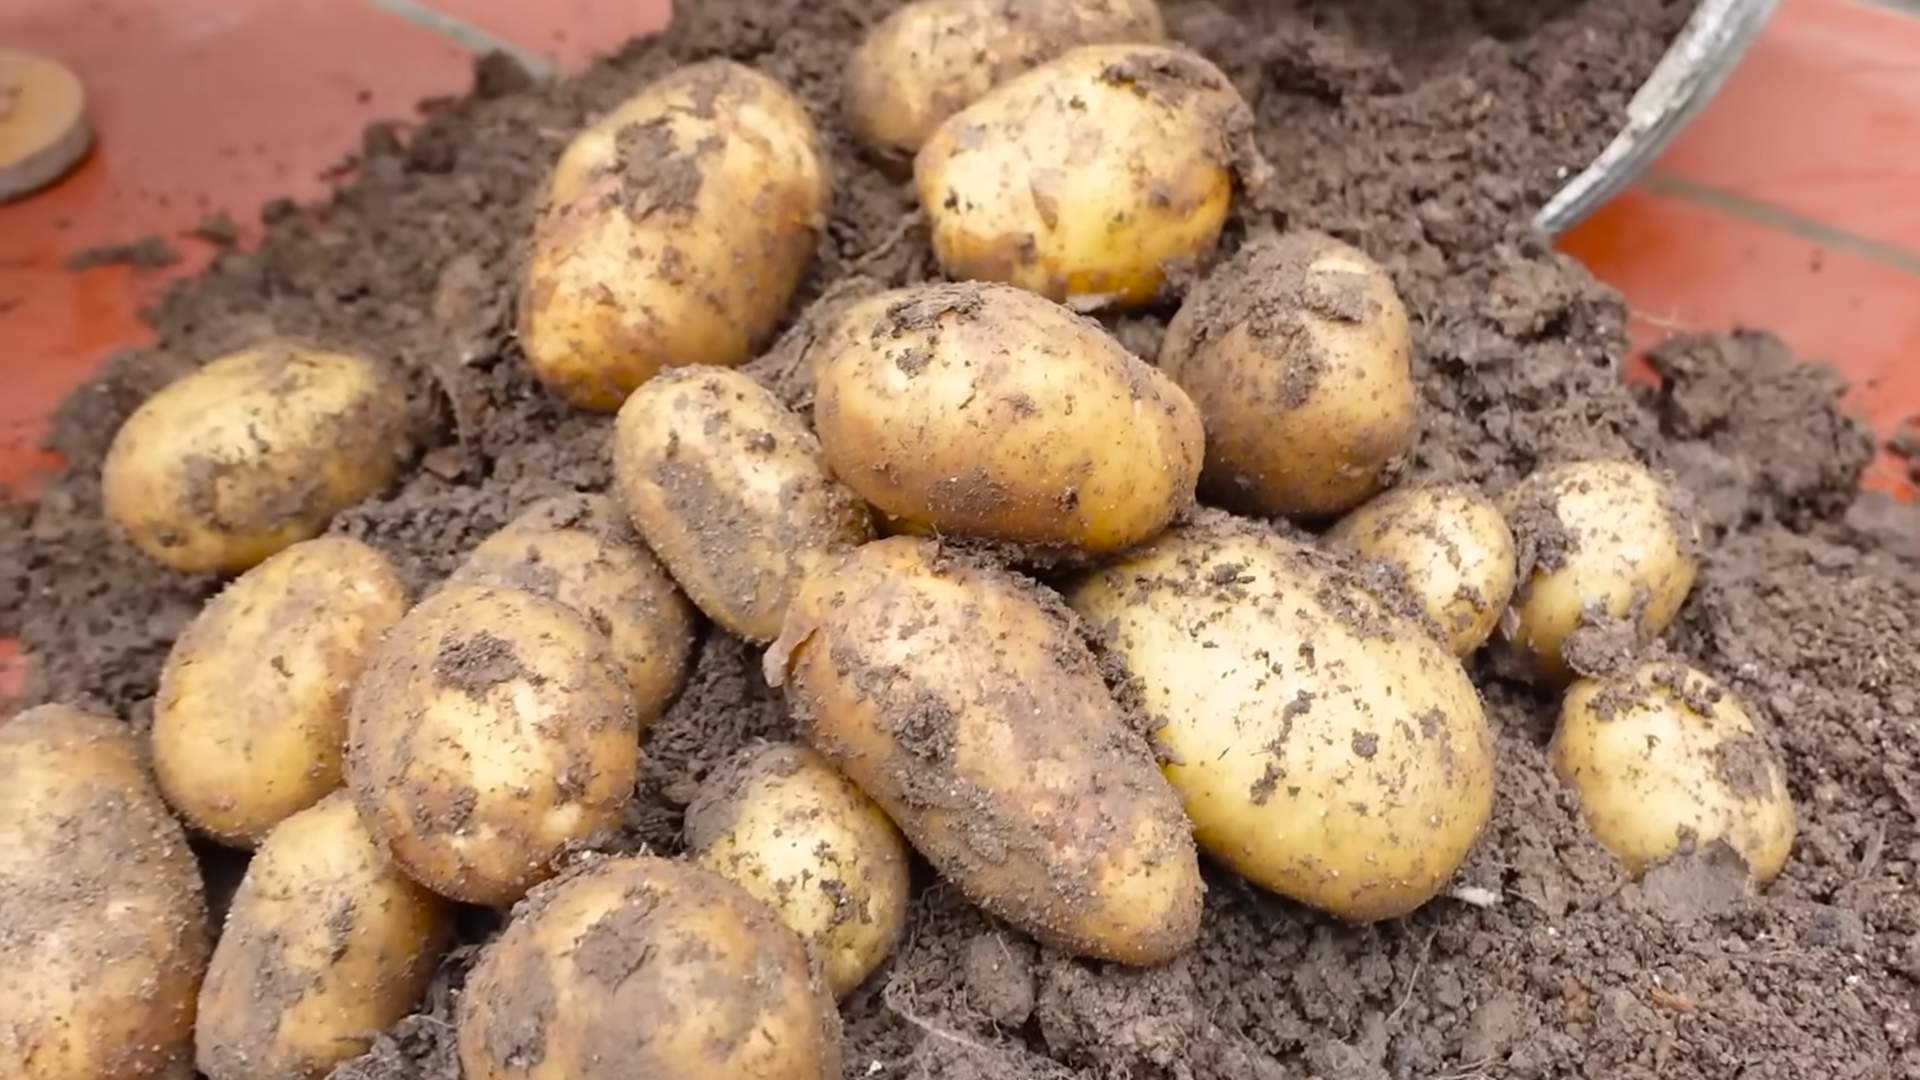
3. Harvesting: The easiest way to harvest potatoes from a grow bag is to simply tip the bag over and sift through the soil. You can also carefully dig around the plants with your hands or a trowel.
4. Curing: After harvesting, cure your potatoes by spreading them out in a cool, dark, and well-ventilated place for a week or two. This allows the skins to harden and helps prevent rot.
Troubleshooting
Even with the best care, you might encounter a few challenges along the way. Here are some common problems and how to address them:
* Yellowing Leaves: This could be a sign of overwatering, underwatering, nutrient deficiency, or disease. Check the soil moisture, fertilize the plants, and inspect for pests or diseases.
* Potato Beetles: These pesky beetles can quickly defoliate your potato plants. Handpick them off the plants or use an organic insecticide.
* Potato Blight: This fungal disease can cause leaf spots and wilting. Prevent blight by ensuring good air circulation and avoiding overhead watering. If you notice any signs of blight, remove the affected leaves immediately.
* Small Potatoes: This could be due to insufficient sunlight, water, or nutrients. Make sure your plants are getting enough sunlight, water regularly, and fertilize them every few weeks.
Potato Varieties to Try
There are tons of potato varieties out there, each with its own unique flavor and texture. Here are a few of my favorites for bag gardening:
* Yukon Gold: A classic all-purpose potato with a buttery flavor and smooth texture.
* Red Pontiac: A red-skinned potato with a creamy texture and slightly sweet flavor.
* Fingerling Potatoes: These small, elongated potatoes have a firm texture and nutty flavor. They’re great for roasting or grilling.
* Russian Banana: A popular fingerling variety with a yellow flesh and a slightly sweet flavor.
* All Blue: A unique potato with a blue skin and flesh. It has a slightly earthy flavor and is great for roasting or making colorful potato salads.
Enjoy Your Homegrown Potatoes!
And there you have it! You’ve successfully grown
Conclusion
So, there you have it! Growing potatoes in bags is not just a gardening trend; it’s a game-changer for anyone, regardless of space or experience. We’ve walked through the simple steps, highlighted the benefits, and hopefully, inspired you to ditch the traditional potato patch for a more manageable and rewarding approach.
Why is this DIY trick a must-try? Because it democratizes potato cultivation! No sprawling garden? No problem! A sunny balcony, a patio, or even a well-lit deck can become your personal potato farm. The ease of monitoring soil conditions, controlling pests, and harvesting your spuds without digging up half your yard is simply unparalleled. Plus, let’s be honest, there’s a certain satisfaction in watching those green shoots emerge from a bag, knowing that delicious, homegrown potatoes are on their way.
But the beauty of this method lies in its adaptability. Feel free to experiment! Try different potato varieties – Yukon Gold for creamy mashed potatoes, Red Pontiac for vibrant salads, or even fingerling potatoes for a gourmet touch. Consider adding companion plants like marigolds or basil to your bags to deter pests and enhance the flavor of your potatoes. You can also adjust the size of your bags to suit your space and desired yield. Smaller bags are perfect for beginners or those with limited space, while larger bags can accommodate more seed potatoes and produce a bigger harvest.
Don’t be afraid to get creative with your growing medium, too. While a mix of compost, garden soil, and peat moss is a reliable choice, you can also incorporate other organic materials like shredded leaves, coffee grounds, or even worm castings to enrich the soil and provide your potatoes with the nutrients they need to thrive.
Growing potatoes in bags offers a unique opportunity to connect with your food, learn about the growing process, and enjoy the unparalleled taste of freshly harvested, homegrown potatoes. It’s a rewarding experience that’s accessible to everyone, regardless of their gardening expertise.
We’re confident that once you try this method, you’ll be hooked. The convenience, the control, and the delicious results are simply too good to pass up. So, grab some seed potatoes, a few bags, and get ready to embark on a potato-growing adventure!
We’d love to hear about your experiences! Share your photos, tips, and triumphs with us in the comments below. Let’s create a community of bag-grown potato enthusiasts and inspire others to discover the joys of homegrown produce. Happy growing!
FAQ
What kind of bags should I use for growing potatoes?
The best bags for growing potatoes are typically made of durable, breathable materials like burlap, heavy-duty plastic, or even specialized grow bags designed specifically for this purpose. Burlap bags offer excellent drainage and aeration, but they may degrade over time. Plastic bags are more durable but require drainage holes to prevent waterlogging. Grow bags are often made of a fabric-like material that allows for good airflow and drainage while also being sturdy enough to support the weight of the soil and potatoes. The size of the bag depends on how many seed potatoes you want to plant and how large you want your harvest to be. A good starting point is a bag that’s at least 2 feet in diameter and 2 feet deep.
How many seed potatoes can I plant in one bag?
The number of seed potatoes you can plant in one bag depends on the size of the bag and the size of the seed potatoes. As a general rule, you can plant 2-3 seed potatoes in a bag that’s 2 feet in diameter and 2 feet deep. Make sure to space the seed potatoes evenly within the bag to allow for adequate growth. If you’re using smaller seed potatoes, you may be able to plant more. If you’re using larger seed potatoes, you may need to plant fewer.
What kind of soil should I use for growing potatoes in bags?
Potatoes thrive in well-draining, nutrient-rich soil. A good mix consists of equal parts compost, garden soil, and peat moss or coco coir. Compost provides essential nutrients, garden soil provides structure, and peat moss or coco coir helps retain moisture while ensuring good drainage. You can also add other organic materials like shredded leaves, coffee grounds, or worm castings to further enrich the soil. Avoid using heavy clay soil, as it can become waterlogged and hinder potato growth.
How often should I water my potatoes in bags?
Potatoes need consistent moisture to thrive, but overwatering can lead to rot. Water your potatoes when the top inch of soil feels dry to the touch. The frequency of watering will depend on the weather conditions and the type of bag you’re using. Burlap bags tend to dry out faster than plastic bags, so you may need to water them more frequently. During hot, dry weather, you may need to water your potatoes daily. During cooler, wetter weather, you may only need to water them every few days. Make sure to water deeply, allowing the water to reach the bottom of the bag.
How much sunlight do potatoes need when grown in bags?
Potatoes need at least 6-8 hours of sunlight per day to produce a good harvest. Choose a location for your bags that receives plenty of direct sunlight. If you live in a particularly hot climate, you may need to provide some afternoon shade to prevent the potatoes from overheating.
How do I “hill” potatoes in bags?
“Hilling” is the process of adding more soil to the bag as the potato plants grow. This encourages the plants to produce more potatoes along the buried stems. When the potato plants are about 6 inches tall, add a few inches of soil to the bag, covering the lower part of the stems. Repeat this process every few weeks as the plants continue to grow, until the bag is almost full.
How do I know when my potatoes are ready to harvest?
Potatoes are typically ready to harvest about 80-100 days after planting. You can start harvesting “new potatoes” (small, immature potatoes) a few weeks earlier. To check if your potatoes are ready, gently dig around in the soil and feel for potatoes. If the potatoes are the size you want, you can harvest them. You can also wait until the potato plants start to die back, which indicates that the potatoes are mature and ready to be harvested.
What are some common pests and diseases that affect potatoes grown in bags?
Common pests that can affect potatoes include aphids, potato beetles, and flea beetles. Diseases that can affect potatoes include blight, scab, and rot. To prevent pests and diseases, choose disease-resistant potato varieties, practice good sanitation, and monitor your plants regularly. If you notice any signs of pests or diseases, take action immediately. You can use organic pesticides or fungicides to control pests and diseases.
Can I reuse the soil from my potato bags?
Yes, you can reuse the soil from your potato bags, but it’s important to amend it with fresh compost and other organic materials to replenish the nutrients that were used by the potatoes. You should also check the soil for any signs of pests or diseases and treat it accordingly. It’s generally a good idea to rotate your crops each year, so avoid planting potatoes in the same bags year after year.
What are some variations on growing potatoes in bags?
Besides the standard method, you can try growing potatoes in other containers like trash cans, laundry baskets, or even old tires. You can also experiment with different growing mediums, such as straw or hay. Some gardeners even use a “lasagna gardening” method, layering different organic materials in the bag to create a rich and fertile growing environment. The possibilities are endless!

Leave a Comment