
Grow Cucumbers Indoors? Absolutely! Imagine biting into a crisp, refreshing cucumber you nurtured from seed, right in your own home, even when the snow is falling outside. Forget those bland, store-bought cucumbers – we’re talking about homegrown flavor bursting in every bite!
For centuries, cultivating food close to home has been a cornerstone of self-sufficiency and a connection to nature. From ancient rooftop gardens in Babylon to the victory gardens of World War II, the desire to nurture life and provide for ourselves has always been strong. Now, with modern techniques, we can extend that tradition indoors, bringing the bounty of the garden into our living spaces.
But why should you bother learning how to grow cucumbers indoors? Well, for starters, it gives you complete control over the growing environment, shielding your precious plants from pests, diseases, and unpredictable weather. Plus, it allows you to enjoy fresh cucumbers year-round, regardless of your climate. Let’s be honest, who wouldn’t want a constant supply of delicious cucumbers for salads, snacks, and even homemade pickles? In this article, I’m going to share some simple, yet effective DIY tricks and hacks that will have you harvesting your own indoor cucumber crop in no time. Get ready to unleash your inner gardener and enjoy the satisfaction of growing your own food, right in the comfort of your home!
Growing Cucumbers Indoors: Your Comprehensive DIY Guide
Hey plant friends! Are you tired of short summers and wish you could harvest fresh cucumbers all year round? Then you’ve come to the right place! I’ll show you how to successfully grow your own cucumbers indoors. It’s easier than you think, and with a little patience and the right tips, you’ll soon be enjoying your own crisp cucumbers.
What You Need: The Right Equipment for Your Indoor Cucumber Garden
Before we get started, let’s make sure we have everything we need. Here is a list of the most important items:
- Cucumber seeds: Choose a variety that is suitable for growing in pots. Bush or mini cucumber varieties are ideal. I personally like “Spacemaster” or “Bush Champion” varieties.
- Pots: Large pots are important! They should have at least a 20-liter (5-gallon) capacity to give the roots enough space.
- High-quality potting soil: Use a well-draining potting soil that is rich in nutrients. You can also mix in some compost or coco coir.
- Grow light: Cucumbers need a lot of light! An LED grow light is ideal to give them the required hours of sun.
- Support/Trellis: Cucumbers are climbing plants, so they need something to hold onto. A trellis, bamboo stakes, or a lattice are perfect.
- Fertilizer: A liquid fertilizer specifically for vegetables is important to supply the plants with enough nutrients.
- Spray bottle: To increase humidity and moisten the leaves.
- Thermometer and hygrometer: To keep an eye on temperature and humidity.
Step-by-Step Guide: How to Grow Your Cucumbers Indoors
Now let’s get down to it! Here is a detailed guide on how to grow your cucumbers indoors:
1. Preparing and Sowing the Seeds
- Soak the seeds: Place the cucumber seeds in lukewarm water for 24 hours. This helps to speed up germination.
- Sowing: Fill small starter pots with seed-starting mix. Lightly press the soil down and sow 2-3 seeds per pot about 1-2 cm (0.5-1 inch) deep.
- Watering: Gently moisten the soil with a spray bottle. It should be damp, but not wet.
- Keep them warm: Place the starter pots in a warm place (approx. 20-25°C / 68-77°F). A heat mat can help keep the temperature constant.
- Cover: Cover the pots with plastic wrap or a mini-greenhouse to increase humidity. Don’t forget to ventilate regularly to prevent mold.
2. Caring for the Seedlings
- Observe: The first seedlings should appear after about 5-10 days.
- Ventilate: As soon as the seedlings appear, remove the cover and place the pots in a bright location.
- Watering: Keep the soil moist, but avoid waterlogging. It’s best to water in the morning so the leaves can dry during the day.
- Thinning: If several seedlings have grown in one pot, remove the weakest ones so the strongest seedling has enough space.
3. Transplanting the Young Plants
- Prepare: When the young plants are about 10-15 cm (4-6 inches) tall and have 2-3 true leaves, it’s time to transplant them into the large pots.
- Transplanting: Fill the large pots with potting soil. Dig a hole in the soil large enough to accommodate the root ball of the young plant.
- Placing: Carefully lift the young plant out of the starter pot and place it in the hole in the large pot. Fill the pot with soil and press it down lightly.
- Watering: Water the young plant thoroughly after transplanting.
4. Caring for the Cucumber Plants: Light, Water, and Nutrients
- Light: Place the pots under the grow light. Cucumbers need at least 6-8 hours of light per day. The lamp should hang about 30-50 cm (12-20 inches) above the plants.
- Watering: Water the cucumber plants regularly, especially during flowering and fruit formation. The soil should always be slightly moist, but not wet.
- Fertilizing: Fertilize the plants every 2-3 weeks with a liquid fertilizer specifically for vegetables. Follow the instructions on the packaging.
- Humidity: Cucumbers love high humidity. Spray the leaves regularly with water or place a bowl of water near the plants.
- Support: Offer the plants a support so they can cling to it. Gently guide the shoots along the support.
- Pollination: Since you are growing cucumbers indoors, you may need to pollinate them yourself. Use a small brush to transfer pollen from the male flowers to the female flowers. Male flowers have a thin stem, while female flowers have a small, undeveloped fruit directly behind the blossom.
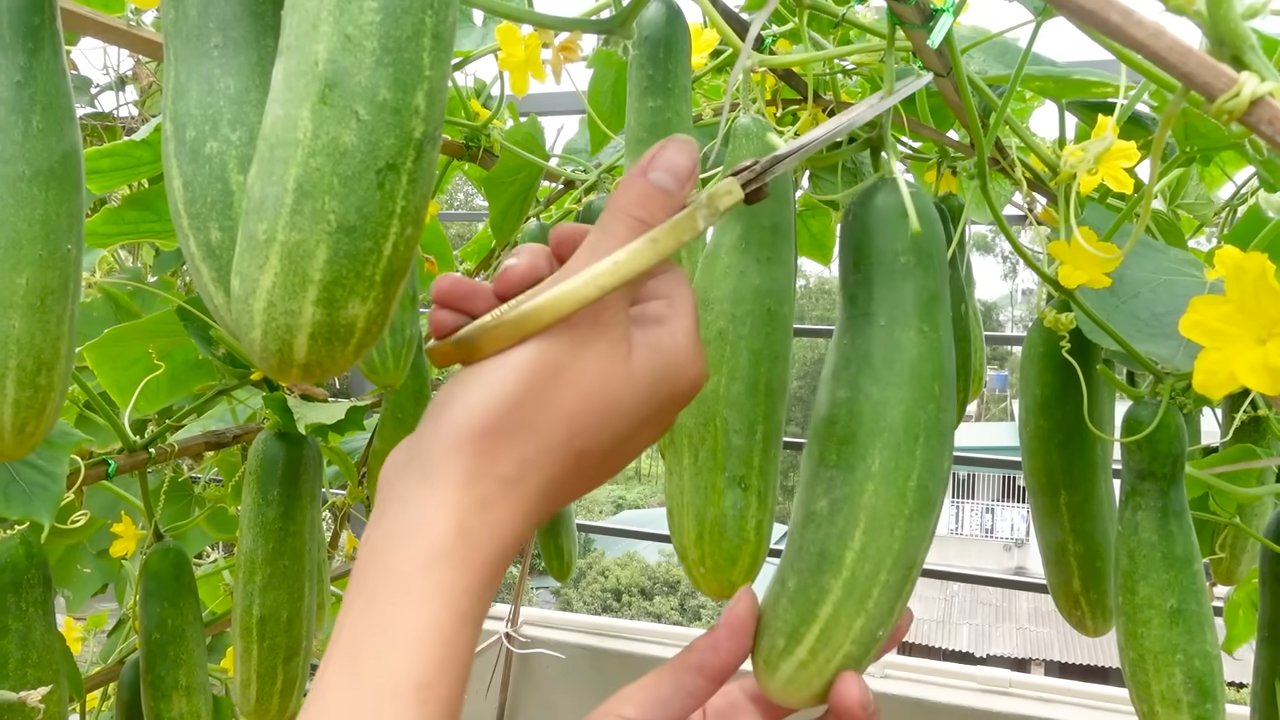
5. Harvest Time: Enjoy Your Homegrown Cucumbers
- Observe: Watch the cucumbers closely. They are ripe when they have reached the desired size and color.
- Harvest: Cut the cucumbers with a sharp knife or scissors, leaving a small stem on the cucumber.
- Enjoy: Enjoy your homegrown cucumbers fresh from the “garden”! They taste best when eaten right after harvesting.
Challenges and Solutions: Tips for Successful Cultivation
Challenges can also arise when growing cucumbers indoors. Here are some common problems and how you can solve them:
- Yellow leaves: Yellow leaves can be a sign of nutrient deficiency, overwatering, or too little light. Check your watering, fertilize the plants, and make sure they get enough light.
- Pests: Aphids, spider mites, and whiteflies can infest cucumber plants. Check the plants regularly and combat pests with natural remedies like neem oil or a soap solution.
- Mold: Mold can be caused by too much humidity and poor ventilation. Ensure good ventilation and reduce the humidity.
- No fruit: If the plants are flowering but not producing fruit, it may be due to a lack of pollination. Pollinate the flowers yourself or ensure good ventilation so insects can do the job.
Additional Tips for Growing Cucumbers Indoors
Patience: Growing cucumbers indoors requires patience. Don’t give up if it doesn’t work right away. With a little practice, you will soon be able to harvest your own delicious cucumbers.
Variety selection: Choose varieties that have been specifically bred for growing in pots. These varieties are more compact and bear fruit earlier.
Pruning: Prune the side shoots of the cucumber plants to encourage fruit production. Also, remove any yellow or diseased leaves.
Rotation: Replace the soil in the pots every year to prevent nutrient deficiencies and diseases.

Conclusion
So, there you have it! Growing cucumbers indoors might seem like a daunting task, but with a little planning, the right setup, and consistent care, you can enjoy fresh, crisp cucumbers even when the weather outside is frightful. This DIY approach to cucumber cultivation offers a rewarding experience, connecting you with the food you eat and providing a sustainable source of deliciousness right in your home.
Why is this DIY trick a must-try? Because it empowers you to take control of your food source, bypass the uncertainties of commercially grown produce, and savor the unmatched flavor of homegrown cucumbers. Imagine the satisfaction of harvesting your own cucumbers in the dead of winter, adding them to salads, sandwiches, or enjoying them as a refreshing snack. It’s a game-changer!
But the benefits extend beyond just fresh cucumbers. Indoor gardening is a fantastic stress reliever, a mood booster, and a way to bring a touch of nature into your living space. The vibrant green vines and the promise of a bountiful harvest can brighten even the dreariest of days. Plus, you’ll be reducing your carbon footprint by minimizing your reliance on transportation and packaging associated with store-bought cucumbers.
Ready to take your indoor cucumber garden to the next level? Consider experimenting with different cucumber varieties. Bush varieties, like Spacemaster or Bush Champion, are particularly well-suited for container gardening due to their compact size. You can also explore different trellising methods to maximize space and support the growing vines. Vertical gardening is your friend!
Don’t be afraid to get creative with your setup. If you don’t have a sunny windowsill, invest in a grow light to provide the necessary illumination. You can also experiment with different soil mixes to find the perfect blend for your cucumbers. Remember to monitor your plants closely for any signs of pests or diseases and take action promptly to prevent problems from escalating.
Growing cucumbers indoors is an adventure, a learning experience, and a delicious way to connect with nature. It’s a project that offers tangible rewards and a sense of accomplishment. So, gather your supplies, prepare your space, and get ready to embark on your indoor cucumber-growing journey.
We’re confident that you’ll be amazed by the results. And we want to hear all about your experience! Share your tips, tricks, and triumphs in the comments below. Let’s create a community of indoor cucumber growers and inspire others to embrace the joy of homegrown goodness. Don’t forget to share pictures of your thriving cucumber plants! Let’s see those green beauties!
This DIY guide to grow cucumbers indoors is just the beginning. The possibilities are endless, and the rewards are plentiful. So, what are you waiting for? Get growing!
Frequently Asked Questions (FAQ)
What are the best cucumber varieties to grow indoors?
Choosing the right cucumber variety is crucial for success when growing indoors. Bush or compact varieties are generally the best choice because they require less space and are better suited for container gardening. Some excellent options include:
* Spacemaster: A popular bush variety that produces high yields of crisp, flavorful cucumbers.
* Bush Champion: Another compact variety known for its disease resistance and abundant harvests.
* Patio Snacker: A small, prolific variety perfect for growing in pots on patios or balconies.
* Salad Bush: A compact plant that produces delicious, burpless cucumbers ideal for salads.
* Little Leaf: A unique variety with small leaves and a compact growth habit, making it well-suited for small spaces.
When selecting a variety, consider factors such as size, yield, disease resistance, and flavor. Read reviews and consult with local gardening experts to find the best option for your specific needs and growing conditions.
How much sunlight do indoor cucumbers need?
Cucumbers require a significant amount of sunlight to thrive, typically at least 6-8 hours per day. If you don’t have a south-facing window that provides ample sunlight, you’ll need to supplement with artificial grow lights.
Grow lights are essential for indoor cucumber growing, especially during the winter months. Full-spectrum LED grow lights are a great option because they provide the necessary wavelengths of light for plant growth and are energy-efficient. Position the grow lights about 6-12 inches above the plants and adjust the height as the plants grow.
Monitor your plants closely for signs of insufficient light, such as leggy growth, pale leaves, and reduced fruit production. If you notice these symptoms, increase the amount of light your plants are receiving.
What type of soil is best for growing cucumbers in containers?
Cucumbers need well-draining soil that is rich in organic matter. A good potting mix for cucumbers should contain a blend of peat moss, perlite, and vermiculite. You can also amend the soil with compost or aged manure to provide additional nutrients.
Avoid using garden soil in containers, as it can become compacted and poorly drained. This can lead to root rot and other problems. Choose a high-quality potting mix specifically formulated for container gardening.
Ensure your containers have drainage holes to prevent water from accumulating at the bottom. This is crucial for preventing root rot and ensuring healthy plant growth.
How often should I water my indoor cucumber plants?
Cucumbers are thirsty plants and require consistent watering, especially during hot weather. Water your plants deeply whenever the top inch of soil feels dry to the touch. Avoid overwatering, as this can lead to root rot.
The frequency of watering will depend on factors such as the size of the container, the type of soil, and the temperature and humidity levels in your home. Check the soil moisture regularly and adjust your watering schedule accordingly.
Consider using a self-watering container or adding a layer of mulch to help retain moisture in the soil. This can reduce the frequency of watering and keep your plants hydrated.
How do I pollinate my indoor cucumber plants?
Cucumbers are typically pollinated by bees and other insects. Since you’re growing indoors, you’ll need to hand-pollinate your plants to ensure fruit production.
To hand-pollinate cucumbers, use a small paintbrush or cotton swab to transfer pollen from the male flowers to the female flowers. Male flowers have a long, thin stem, while female flowers have a small cucumber-like structure at the base.
Gently brush the pollen from the stamen of the male flower onto the stigma of the female flower. Repeat this process for all the female flowers on your plants.
You can also use a small electric toothbrush to vibrate the pollen loose from the male flowers and then transfer it to the female flowers. This method can be more efficient than using a paintbrush or cotton swab.
What are some common pests and diseases that affect indoor cucumbers?
Indoor cucumbers can be susceptible to pests such as aphids, spider mites, and whiteflies. These pests can suck the sap from the leaves, causing them to become yellow and distorted.
To control pests, you can use insecticidal soap, neem oil, or horticultural oil. Apply these treatments according to the manufacturer’s instructions. You can also try introducing beneficial insects, such as ladybugs or lacewings, to your indoor garden.
Cucumbers can also be affected by diseases such as powdery mildew and downy mildew. These diseases can cause white or gray patches to appear on the leaves.
To prevent diseases, provide good air circulation around your plants and avoid overwatering. You can also use a fungicide to control diseases if they occur.
How long does it take for cucumbers to mature indoors?
The time it takes for cucumbers to mature indoors depends on the variety and growing conditions. Generally, it takes about 50-70 days from planting to harvest.
Monitor your plants closely and harvest the cucumbers when they reach the desired size and color. Overripe cucumbers can become bitter and seedy.
Harvest cucumbers regularly to encourage continued fruit production. The more you harvest, the more cucumbers your plants will produce.

Leave a Comment