
Grow Corn Kitchen Garden: Imagine stepping outside your back door and harvesting fresh, sweet corn just minutes before dinner! Sounds like a dream, right? Well, it doesn’t have to be! For centuries, cultures around the world have cultivated corn, or maize, not just in vast fields, but also in smaller, more manageable spaces. From the ancient Aztecs who revered corn as a life-giving staple to modern-day gardeners seeking sustainable food sources, the desire to grow this versatile grain close to home has always been strong.
But let’s be honest, the thought of growing corn might seem intimidating, especially if you’re working with a limited area. That’s where this DIY guide comes in! I’m going to share some simple yet effective tricks and hacks to help you successfully grow corn kitchen garden, even if you only have a small backyard, patio, or balcony. Forget the sprawling farm; we’re bringing the cornfield to you, one pot (or raised bed!) at a time.
Why do you need these DIY tricks? Because fresh, homegrown corn tastes infinitely better than anything you can buy at the store. Plus, gardening is a fantastic way to de-stress, connect with nature, and teach your kids about where their food comes from. So, grab your gardening gloves, and let’s get started on this exciting journey to cultivate your very own corn patch right outside your kitchen door!
Mais Anbauen im eigenen Küchengarten: Ein DIY-Leitfaden
Hallo Gartenfreunde! Habt ihr jemals davon geträumt, euren eigenen Mais im Garten anzubauen? Es ist einfacher als ihr denkt und das Ergebnis ist unglaublich lecker! In diesem Artikel zeige ich euch, wie ihr das ganz einfach selbst machen könnt. Lasst uns gemeinsam in dieses spannende Projekt eintauchen!
Was ihr für den Maisanbau benötigt
Bevor wir loslegen, hier eine Liste der Dinge, die ihr braucht:
* Maissamen: Wählt eine Sorte, die für eure Region geeignet ist. Es gibt viele verschiedene Sorten, von Zuckermais bis hin zu Popcornmais.
* Gartenwerkzeug: Eine Schaufel, eine Harke und eventuell ein Pflanzholz.
* Gartenhandschuhe: Um eure Hände sauber zu halten.
* Kompost oder Dünger: Mais ist ein Starkzehrer und benötigt viele Nährstoffe.
* Gießkanne oder Gartenschlauch: Für die Bewässerung.
* Mulchmaterial: Stroh oder Holzhackschnitzel, um die Feuchtigkeit im Boden zu halten und Unkraut zu unterdrücken.
* Geduld: Mais braucht Zeit zum Wachsen!
Die Vorbereitung des Bodens
Ein guter Start ist die halbe Miete! Die richtige Bodenvorbereitung ist entscheidend für eine erfolgreiche Maisernte.
1. Standortwahl: Mais braucht viel Sonne, mindestens 6-8 Stunden pro Tag. Wählt also einen sonnigen Platz in eurem Garten.
2. Bodenbearbeitung: Lockert den Boden mit einer Schaufel oder Grabegabel auf. Entfernt Steine und Unkraut. Der Boden sollte gut durchlässig sein.
3. Bodenverbesserung: Mais ist ein Starkzehrer, das heißt, er benötigt viele Nährstoffe. Mischt reichlich Kompost oder organischen Dünger in den Boden ein. Das sorgt für eine gute Grundlage.
4. Boden ebnen: Harkt den Boden glatt, damit er bereit für die Aussaat ist.
Die Aussaat des Mais
Jetzt kommt der spannende Teil: die Aussaat!
1. Zeitpunkt: Mais ist frostempfindlich. Wartet also, bis keine Frostgefahr mehr besteht. In der Regel ist das ab Mitte Mai der Fall.
2. Aussaatmethode: Mais wird direkt ins Freiland gesät. Macht mit einem Pflanzholz oder euren Fingern kleine Löcher in den Boden. Die Löcher sollten etwa 3-5 cm tief sein.
3. Abstand: Der Abstand zwischen den Löchern sollte etwa 20-30 cm betragen. Der Abstand zwischen den Reihen sollte etwa 60-75 cm betragen. Mais wird am besten in Blöcken angebaut, da er Windbestäubung benötigt.
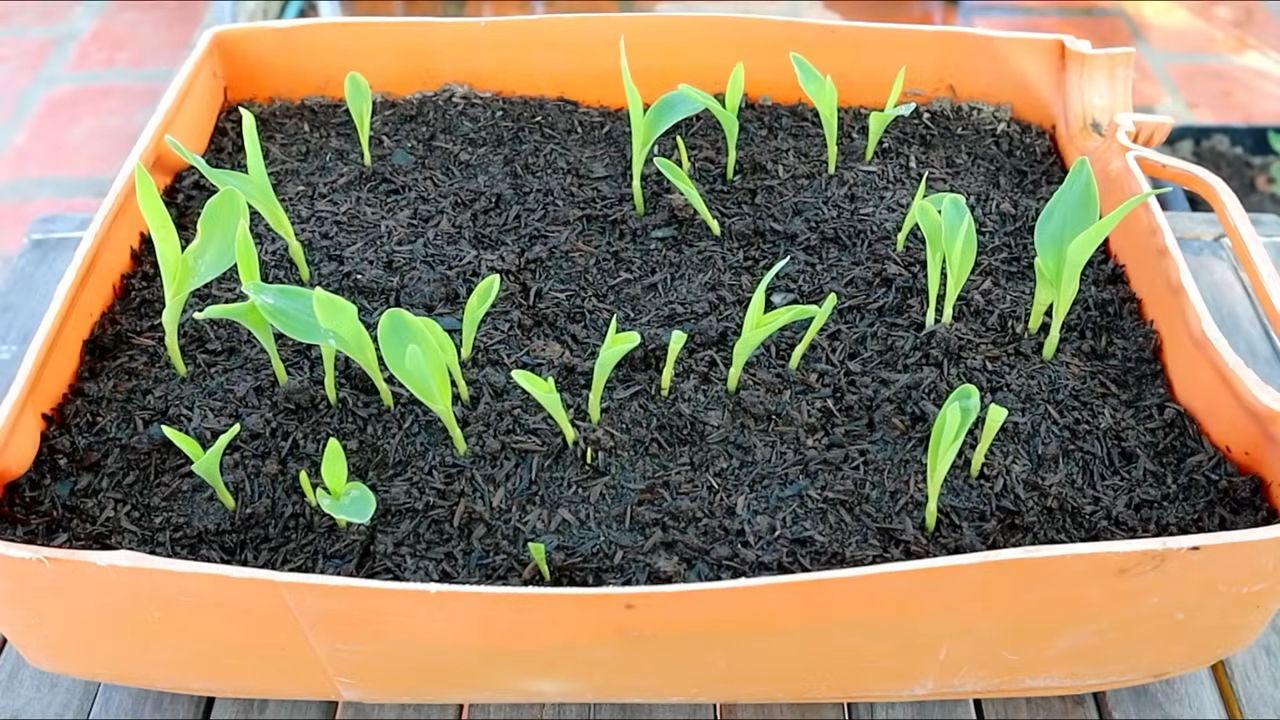
4. Aussaat: Legt in jedes Loch 2-3 Maissamen. Das erhöht die Wahrscheinlichkeit, dass mindestens ein Samen keimt.
5. Bedecken: Bedeckt die Samen mit Erde und drückt sie leicht an.
6. Bewässerung: Gießt die Erde vorsichtig an, damit die Samen nicht weggeschwemmt werden.
Die Pflege des Mais
Nach der Aussaat ist vor der Pflege! Mais braucht regelmäßige Pflege, um gut zu wachsen.
1. Bewässerung: Mais benötigt viel Wasser, besonders während der Blütezeit. Gießt regelmäßig, besonders bei Trockenheit. Achtet darauf, dass der Boden nicht austrocknet.
2. Unkrautbekämpfung: Entfernt regelmäßig Unkraut, das um die Nährstoffe konkurriert. Mulchen hilft, Unkraut zu unterdrücken.
3. Düngung: Düngt den Mais während der Wachstumsphase mit einem organischen Dünger oder Kompost. Eine zweite Düngung während der Blütezeit ist empfehlenswert.
4. Ausgeizen: Entfernt Seitentriebe (Geiztriebe), die sich an der Basis der Pflanze bilden. Diese nehmen der Pflanze unnötig Kraft.
5. Stützen: Bei starkem Wind kann es sinnvoll sein, die Maispflanzen zu stützen, damit sie nicht umknicken.
Schutz vor Schädlingen und Krankheiten
Auch Mais ist nicht vor Schädlingen und Krankheiten gefeit. Hier sind einige Tipps, wie ihr eure Pflanzen schützen könnt:
* Maiszünsler: Der Maiszünsler ist ein häufiger Schädling. Ihr könnt ihn mit Nützlingen wie Schlupfwespen bekämpfen oder mit biologischen Insektiziden.
* Vögel: Vögel können die jungen Keimlinge fressen. Schützt die Pflanzen mit einem Netz oder Vlies.
* Pilzkrankheiten: Bei feuchtem Wetter können Pilzkrankheiten auftreten. Sorgt für eine gute Belüftung und entfernt befallene Blätter.
Die Ernte des Mais
Endlich ist es soweit: die Ernte!
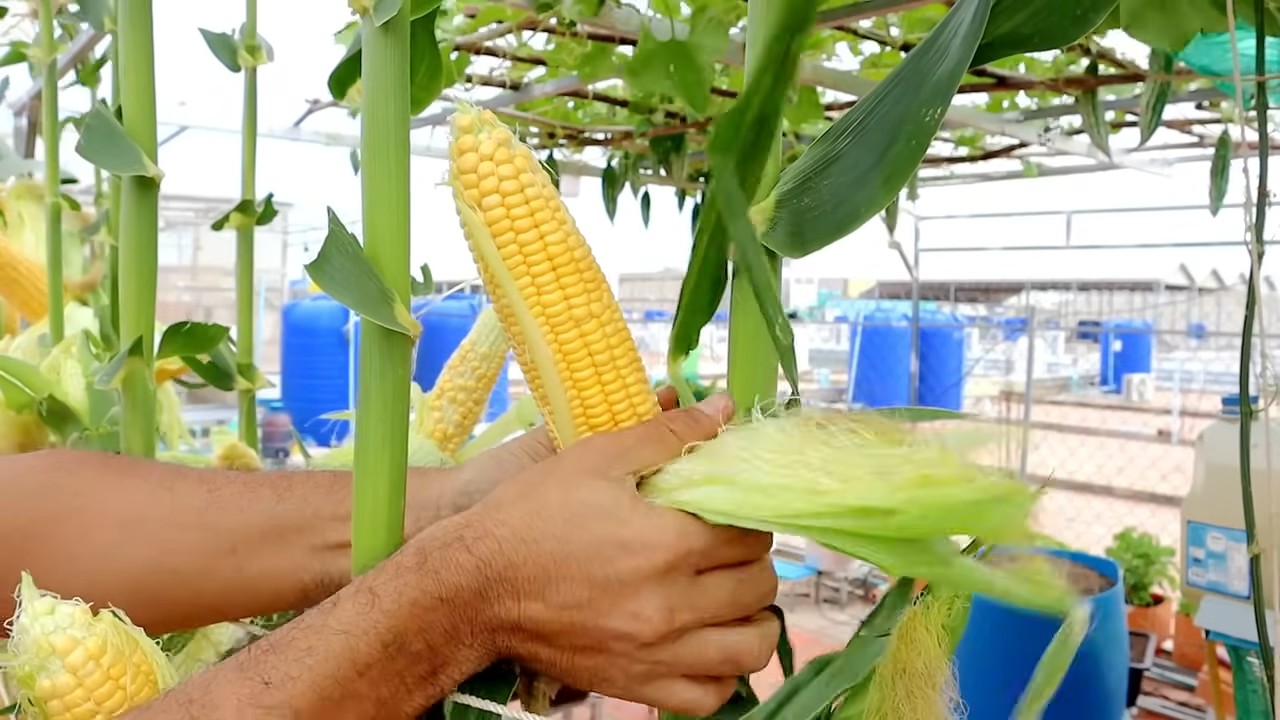
1. Zeitpunkt: Der Zeitpunkt der Ernte hängt von der Maissorte ab. Zuckermais ist erntereif, wenn die Hüllblätter der Kolben trocken und braun sind und die Körner prall und saftig sind. Popcornmais wird erst geerntet, wenn die Kolben vollständig trocken sind.
2. Erntemethode: Brecht die Kolben vorsichtig von der Pflanze ab.
3. Lagerung: Zuckermais sollte möglichst bald nach der Ernte verzehrt werden, da er schnell an Süße verliert. Popcornmais kann mehrere Monate gelagert werden, wenn er trocken ist.
Zusätzliche Tipps und Tricks
Hier noch ein paar zusätzliche Tipps, die euch beim Maisanbau helfen können:
* Fruchtfolge: Baut Mais nicht jedes Jahr am selben Standort an. Eine Fruchtfolge hilft, den Boden gesund zu halten und Krankheiten vorzubeugen.
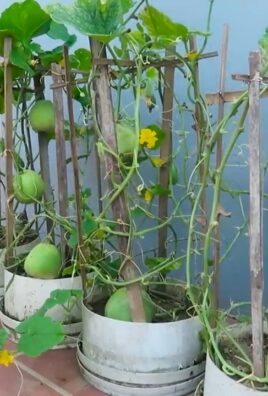
* Beetnachbarn: Gute Beetnachbarn für Mais sind Bohnen, Kürbis und Gurken. Sie unterstützen sich gegenseitig im Wachstum.
* Komposttee: Gießt eure Maispflanzen regelmäßig mit Komposttee. Das stärkt sie und versorgt sie mit wichtigen Nährstoffen.
* Experimentieren: Probiert verschiedene Maissorten aus und findet heraus, welche am besten in eurem Garten wachsen.
Häufige Fehler beim Maisanbau
Um euch vor unnötigen Fehlern zu bewahren, hier eine Liste der häufigsten Fehler beim Maisanbau:
* Zu frühe Aussaat: Mais ist frostempfindlich. Wartet, bis keine Frostgefahr mehr besteht.
* Zu wenig Sonne: Mais braucht viel Sonne. Wählt einen sonnigen Standort.
* Zu wenig Wasser: Mais benötigt viel Wasser, besonders während der Blütezeit.
* Zu wenig Dünger: Mais ist ein Starkzehrer und benötigt viele Nährstoffe.
* Vernachlässigung der Unkrautbekämpfung: Unkraut konkurriert um die Nährstoffe.
* Keine Stützung bei starkem Wind: Maispflanzen können bei starkem Wind umknicken.
Warum Maisanbau im eigenen Garten so lohnenswert ist
Der Anbau von Mais im eigenen Garten ist nicht nur eine lohnende Erfahrung, sondern bietet auch viele Vorteile:
* Frischer und leckerer Mais: Selbst angebauter Mais schmeckt einfach besser als gekaufter Mais.
* Nachhaltigkeit: Ihr wisst genau, was in eurem Mais steckt und könnt auf Pestizide verzichten.
* Gartenarbeit als Hobby: Der Maisanbau ist eine tolle Möglichkeit, Zeit im Garten zu verbringen und sich zu entspannen.
* Lerneffekt: Ihr lernt viel über Pflanzen und die Natur.
* Stolz: Es ist ein tolles Gefühl, seinen eigenen Mais zu ernten und zu genießen.
Fazit
Ich hoffe, dieser Leitfaden hat euch Mut gemacht, euren eigenen Mais im Garten anzubauen. Es ist ein spannendes Projekt, das mit etwas Geduld und Pflege zum Erfolg führt. Viel Spaß beim Gärtnern und eine reiche Ernte! Und denkt daran: Jede selbst angebaute Pflanze ist ein kleiner Beitrag zu einer nachhaltigeren Welt. Also, ran an die Schaufel und los geht’s!
Conclusion
So, there you have it! Growing your own corn, even in a limited space, is not only achievable but also incredibly rewarding. This DIY kitchen garden trick transforms the way you think about fresh produce and brings the joy of homegrown goodness right to your doorstep. Forget those bland, mass-produced ears of corn from the supermarket. Imagine sinking your teeth into sweet, juicy kernels that you nurtured from seed to harvest. The difference in flavor is simply unparalleled.
This method isn’t just about convenience; it’s about connecting with nature, understanding the growing process, and enjoying the fruits (or rather, vegetables!) of your labor. It’s a sustainable way to supplement your diet, reduce your carbon footprint, and add a touch of green to your living space. Plus, it’s a fantastic conversation starter!
But the benefits don’t stop there. This DIY approach to growing corn allows for incredible customization. Want to try a different variety? Go for it! Experiment with heirloom seeds for unique colors and flavors. Add companion plants like beans or squash to create a thriving mini-ecosystem. You can even adjust the container size and spacing to suit your specific needs and preferences.
Consider these variations to elevate your corn-growing experience:
* Succession Planting: Plant new seeds every few weeks to ensure a continuous harvest throughout the growing season.
* Vertical Gardening: If space is truly limited, explore vertical gardening options using trellises or stacked planters to maximize your yield.
* Companion Planting Power: Marigolds can help deter pests, while legumes like beans fix nitrogen in the soil, benefiting your corn plants.
* Composting Magic: Use homemade compost to enrich your soil and provide essential nutrients for healthy growth.
Ultimately, this DIY kitchen garden trick for growing corn is more than just a gardening project; it’s an investment in your health, your well-being, and your connection to the natural world. It’s a chance to learn, experiment, and enjoy the simple pleasure of growing your own food.
We wholeheartedly encourage you to give this a try. Don’t be intimidated if you’re a beginner. Corn is surprisingly resilient, and with a little care and attention, you’ll be amazed at what you can achieve. And most importantly, we want to hear about your experience! Share your photos, tips, and stories with us in the comments below. Let’s create a community of DIY corn growers and inspire others to embrace the joys of homegrown goodness. What are you waiting for? Grab some seeds, get your hands dirty, and start growing your own delicious corn today! This is the best way to get fresh **grow corn kitchen garden** produce.
Frequently Asked Questions (FAQ)
Q: What kind of corn is best for growing in containers?
A: While you can technically grow any type of corn in a container, dwarf or short-stalk varieties are generally recommended. These varieties are specifically bred to be more compact and manageable, making them ideal for smaller spaces. Some popular choices include ‘On Deck’, ‘Golden Bantam’, and ‘Trinity’. These varieties mature quickly and produce smaller ears, which are perfect for container gardening. Avoid taller varieties like ‘Silver Queen’ or ‘Country Gentleman’, as they require more space and may become unstable in containers.
Q: How much sunlight does my container corn need?
A: Corn is a sun-loving plant and requires at least 6-8 hours of direct sunlight per day to thrive. Choose a location for your containers that receives ample sunlight throughout the day. If you live in a particularly hot climate, you may want to provide some afternoon shade to prevent the plants from overheating. If you don’t have a sunny spot outdoors, you can supplement with grow lights.
Q: What type of soil should I use for growing corn in containers?
A: Use a well-draining potting mix that is rich in organic matter. Avoid using garden soil, as it can become compacted in containers and hinder drainage. A good potting mix will provide the necessary nutrients and aeration for healthy root growth. You can also amend your potting mix with compost or other organic materials to further improve its fertility.
Q: How often should I water my container corn?
A: Corn requires consistent moisture, especially during the critical stages of pollination and ear development. Water deeply whenever the top inch of soil feels dry to the touch. Avoid overwatering, as this can lead to root rot. The frequency of watering will depend on the weather conditions, the size of your containers, and the type of potting mix you are using. Check the soil moisture regularly and adjust your watering schedule accordingly.
Q: How do I pollinate my corn if I’m growing it in a container?
A: Corn is wind-pollinated, so if you’re growing it outdoors, the wind will usually take care of pollination. However, if you’re growing it indoors or in a sheltered location, you may need to hand-pollinate. To do this, gently shake the tassels (the male flowers at the top of the plant) to release pollen. Then, use a small brush or cotton swab to collect the pollen and transfer it to the silks (the female flowers that emerge from the developing ears). Repeat this process every day for several days to ensure successful pollination.
Q: When is the right time to harvest my corn?
A: The best time to harvest corn is when the silks have turned brown and dry, and the kernels are plump and milky. To test for ripeness, peel back a portion of the husk and puncture a kernel with your fingernail. If the liquid that comes out is milky, the corn is ready to harvest. If it’s clear, the corn needs more time to mature. If it’s thick and pasty, the corn is overripe.
Q: What kind of fertilizer should I use for my container corn?
A: Corn is a heavy feeder and requires regular fertilization to thrive. Use a balanced fertilizer with a ratio of 10-10-10 or 14-14-14. Apply the fertilizer according to the package directions, usually every 2-3 weeks. You can also supplement with organic fertilizers like compost tea or fish emulsion.
Q: How can I prevent pests and diseases from affecting my container corn?
A: Regularly inspect your plants for signs of pests or diseases. Common pests that affect corn include aphids, corn earworms, and spider mites. You can control these pests with insecticidal soap, neem oil, or by handpicking them off the plants. Common diseases that affect corn include rust and smut. You can prevent these diseases by providing good air circulation, avoiding overwatering, and using disease-resistant varieties.
Q: Can I grow corn in the same container year after year?
A: While it’s possible to reuse containers, it’s generally recommended to refresh the potting mix each year. This will help to replenish nutrients and prevent the buildup of pests and diseases. You can also amend the old potting mix with compost or other organic materials to improve its fertility.
Q: What are some good companion plants for corn in containers?
A: Companion planting can help to improve the health and yield of your corn plants. Some good companion plants for corn include beans, squash, marigolds, and herbs like basil and oregano. Beans fix nitrogen in the soil, which benefits the corn. Squash provides ground cover, which helps to suppress weeds and retain moisture. Marigolds deter pests, and herbs attract beneficial insects.
Leave a Comment