
Grow Chives in Your Kitchen: Imagine snipping fresh, flavorful chives right from your windowsill to garnish your omelets, salads, or baked potatoes. No more last-minute grocery store runs or settling for dried herbs! For centuries, chives have been a staple in gardens and kitchens worldwide, dating back to ancient Rome where they were believed to ward off evil spirits and even soothe sunburns. While we can’t guarantee those magical properties, we *can* promise a burst of delicious flavor and a touch of green to brighten your indoor space.
In today’s busy world, having fresh herbs readily available is a game-changer. This DIY project isn’t just about convenience; it’s about connecting with nature, even in the heart of your home. Many people struggle with keeping herbs alive, often due to lack of space, poor soil, or forgetting to water them. That’s where this simple yet effective trick comes in. I’m going to show you how to grow chives in your kitchen with minimal effort and maximum reward. Get ready to transform your kitchen into a mini herb garden and elevate your culinary creations!
Growing Chives in the Kitchen: Your Simple DIY Guide
Hey plant friends! Do you want to always have fresh chives on hand without constantly running to the supermarket? Then you’ve come to the right place! I’ll show you how you can easily grow chives in your kitchen. It’s super simple, fun, and you’ll always have fresh herbs for your favorite dishes. Let’s get started!
What you’ll need:
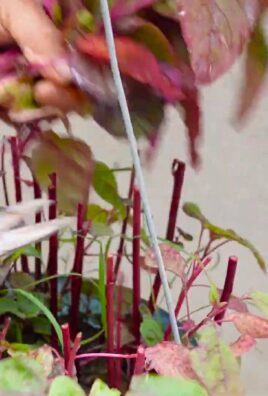
- Chive seeds or a chive plant from the garden center
- A pot (at least 15 cm / 6 inches in diameter)
- High-quality potting soil or herb soil
- Small stones or clay shards for drainage
- A watering can or spray bottle
- A bright location (a windowsill is ideal)
- Optional: Liquid fertilizer for herbs
Growing Chives from Seed: A Step-by-Step Guide
If you want to start from scratch and grow your own chives from seed, it’s no problem at all. Although it takes a bit longer until you can harvest, it’s a great feeling to accompany the plant from the very beginning.
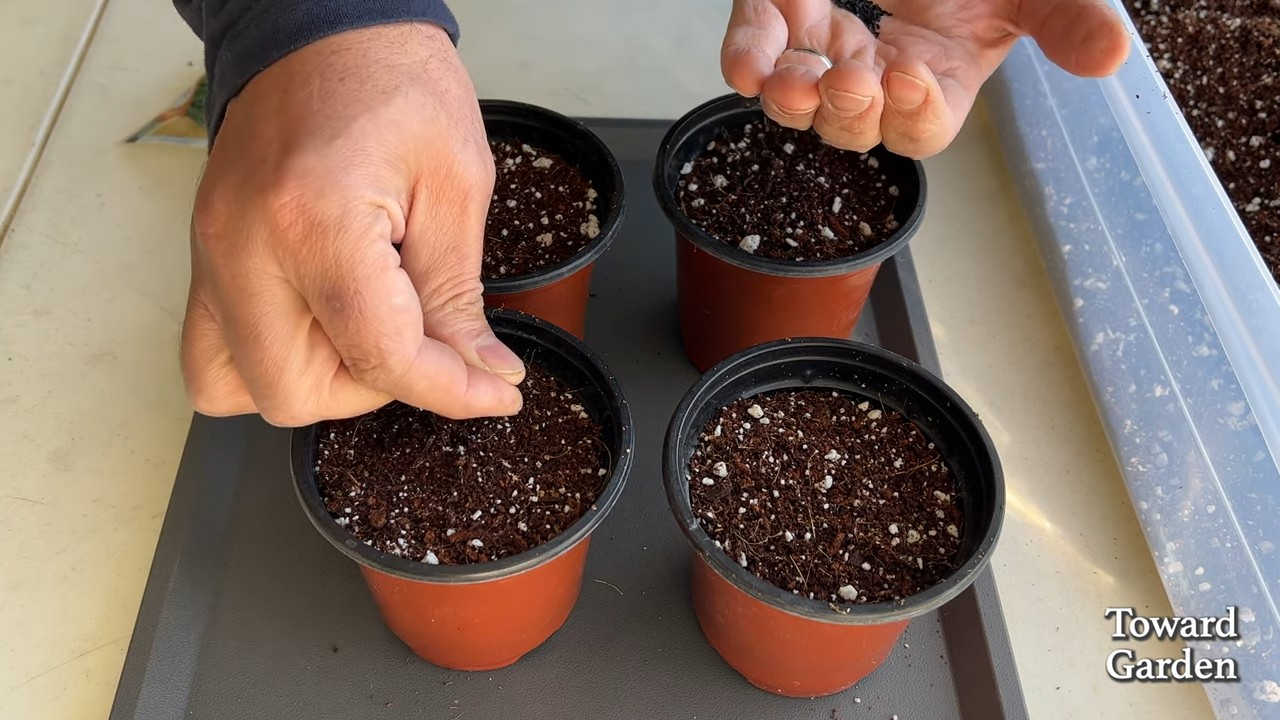
- Prepare the pot: First, we’ll take care of the pot. Place a layer of small stones or clay shards at the bottom of the pot. This ensures good drainage and prevents waterlogging, which chives do not like at all.
- Fill with soil: Fill the pot with potting soil or herb soil. Leave about 2-3 cm (1 inch) of space to the rim. The soil should be loose and airy.
- Sow the seeds: Sprinkle the chive seeds evenly over the soil. Press them down lightly, but don’t cover them too thickly with soil. A thin layer (about 0.5 cm / 0.2 inches) is perfectly sufficient.
- Water: Gently moisten the soil with a watering can or spray bottle. The soil should be damp, but not wet.
- Location: Place the pot in a bright and warm location. A windowsill is ideal, especially if it faces south or east.
- Patience is key: Now it’s time to wait. It can take 1-3 weeks for the seeds to germinate. Keep the soil moist during this time, but avoid waterlogging.
- Thinning (optional): When the seedlings are large enough (about 5 cm / 2 inches high), you can thin them out if they are too close together. This gives the individual plants more space to grow.
- Care: Water the chives regularly, but not too much. The soil should always be slightly moist. Fertilize the chives every few weeks with a liquid fertilizer for herbs.
Repotting Chives from a Plant: Here’s How
If you’re in a hurry or just don’t want to wait that long, you can also buy a chive plant from the garden center and repot it into a larger pot. This is super easy, and you’ll be able to harvest soon!
- Prepare the pot: Just as with sowing, you’ll start by preparing the pot. Place a layer of small stones or clay shards at the bottom of the pot for good drainage.
- Fill with soil: Fill the pot with potting soil or herb soil. Leave enough space to insert the chive plant.
- Carefully remove the plant: Carefully take the chive plant out of its old pot. Try to damage the roots as little as possible. If the roots are very dense, you can gently loosen them a bit.
- Insert the plant: Place the chive plant in the new pot. The top of the root ball should be roughly level with the soil surface.
- Fill with soil: Fill the pot with soil and press it down lightly.
- Water: Water the plant thoroughly until water runs out of the drainage holes.
- Location: Place the pot in a bright and warm location.
- Care: Water the chives regularly, but not too much. The soil should always be slightly moist. Fertilize the chives every few weeks with a liquid fertilizer for herbs.
The Right Care for Your Chives
Whether you grew your chives from seed or repotted a plant, proper care is crucial for healthy growth and a bountiful harvest.
- Watering: Chives like it moist, but not wet. Water them regularly, but avoid waterlogging. Check the soil regularly and water when it feels dry.
- Fertilizing: Chives are not particularly demanding, but regular fertilizing promotes growth. Use a liquid fertilizer for herbs and feed every few weeks.
- Location: Chives need a lot of light. Place them in a bright spot, ideally on a windowsill.
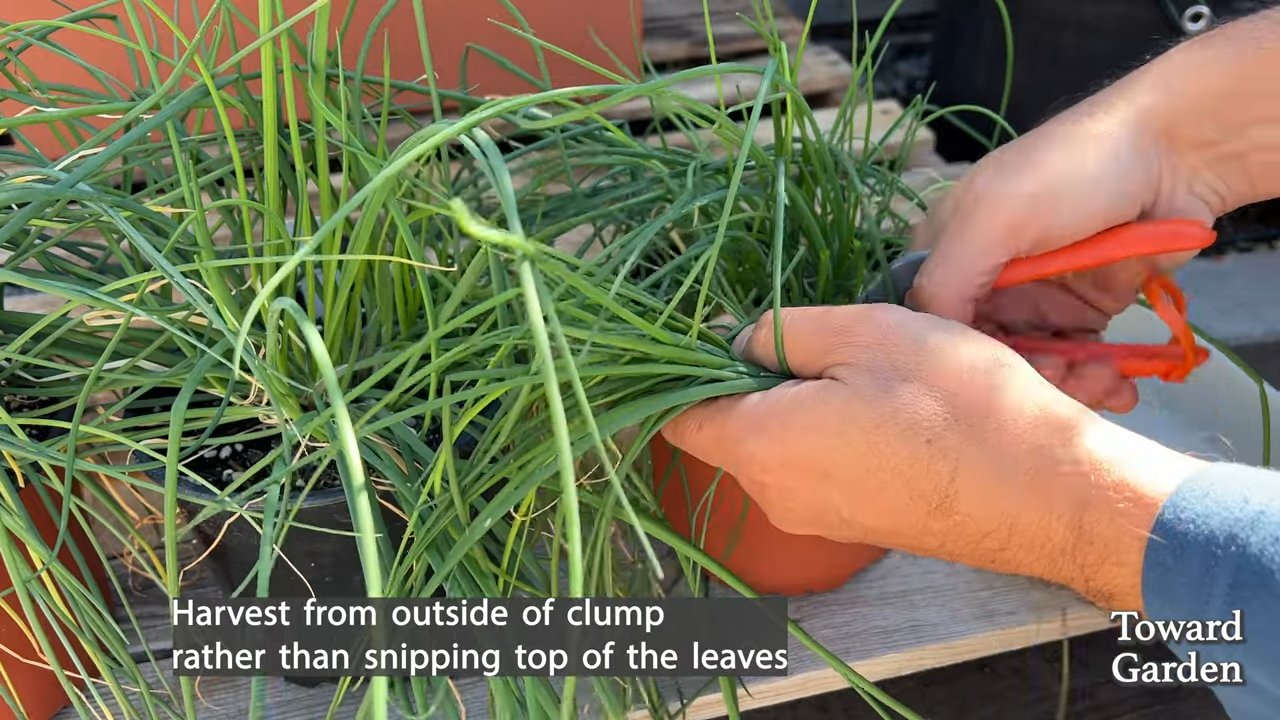
- Cutting: Regular cutting promotes growth and prevents the chives from flowering. Simply cut the stalks with scissors, just above the soil.
- Removing flowers: When chives bloom, the stalks become tough and lose their flavor. Remove the flowers to promote the growth of the stalks.
- Overwintering: Chives are hardy and can overwinter outdoors. If you have them in a pot, you can move them to a cool but frost-free location. Water them only sparingly during the winter.
Harvesting and Using Chives
The best thing about your own chives is, of course, that you can harvest and use them at any time.
- Harvesting: Cut the stalks with scissors, just above the soil. You can harvest as much as you need.
- Use: Chives are versatile. They pair excellently with salads, soups, egg dishes, dips, and much more. You can use them fresh or freeze them.
- Freezing: To freeze chives, cut them into small rings and freeze them in a freezer bag or a container. They will keep for several months this way.
Common Problems and Solutions
Even when growing chives, problems can sometimes occur. Here are some common problems and how you can solve them:
- Yellow leaves: Yellow leaves can be a sign of too much or too little water. Check the soil and adjust your watering accordingly.
- Poor growth: Poor growth can be due to too little light or nutrients. Move the chives to a brighter location and fertilize them regularly.
- Pests: Chives are relatively resistant to pests, but occasionally aphids may appear. Spray the plant with a mild soap solution to combat the pests.
Additional Tips and Tricks
Creative planters: Use creative planters to showcase your chives. Old cups, cans, or even shoes can serve as planters.
Different varieties: There are different chive varieties that differ in taste and appearance. Try different types to find your favorite.
Propagating chives: Chives are easily propagated by division. Divide the plant in the spring or fall and plant the individual parts in separate pots.
Chives outdoors: Chives can also be grown outdoors. Choose a sunny location with well-draining soil.
Conclusion
So, there you have it! Growing chives in your kitchen isn’t just a fun project; it’s a game-changer for anyone who loves fresh, flavorful ingredients at their fingertips. Forget those sad, wilted bunches from the grocery store. Imagine snipping vibrant, aromatic chives whenever you need them, adding a burst of oniony goodness to your omelets, salads, soups, or baked potatoes. This simple DIY trick transforms your kitchen into a mini herb garden, providing a constant supply of fresh chives that are far superior in taste and quality to anything you can buy.
Why is this a must-try? Because it’s incredibly easy, cost-effective, and rewarding. You don’t need a green thumb or a large garden to enjoy the benefits of homegrown herbs. A sunny windowsill, a pot, some soil, and a little water are all you need to embark on this culinary adventure. Plus, it’s a sustainable way to reduce your reliance on store-bought produce, minimizing waste and maximizing freshness.
Looking for variations? Absolutely! You can experiment with different types of chives, such as garlic chives for a milder, garlicky flavor. Consider companion planting in your pot. Small marigolds can help deter pests, and basil can thrive alongside chives, creating a fragrant and productive herb garden. You can also use different types of containers, from repurposed yogurt containers to decorative ceramic pots, to match your kitchen decor. Get creative and personalize your chive-growing experience!
Don’t just take our word for it. We wholeheartedly encourage you to try this DIY trick and experience the joy of growing your own chives. It’s a small investment of time and effort that yields a significant return in flavor and satisfaction. Once you’ve tasted the difference between homegrown and store-bought chives, you’ll never go back.
We’re eager to hear about your experiences! Share your photos, tips, and stories in the comments below. Let us know what dishes you’ve enhanced with your freshly grown chives and any challenges you encountered along the way. Together, we can create a community of indoor gardeners, sharing our knowledge and inspiring others to embrace the joys of homegrown herbs. So, grab a pot, some soil, and those chive seeds, and get growing! You’ll be amazed at how easy it is to bring a little bit of the garden into your kitchen and elevate your culinary creations with the vibrant flavor of fresh, homegrown chives. This is truly the best way to ensure you always have fresh chives on hand.
Frequently Asked Questions (FAQ)
1. What kind of soil is best for growing chives indoors?
The best soil for growing chives indoors is a well-draining potting mix. Avoid using garden soil, as it can be too heavy and may contain pests or diseases. Look for a potting mix that contains ingredients like peat moss, perlite, and vermiculite, which will provide good drainage and aeration. You can also amend your potting mix with compost to add nutrients and improve its water-holding capacity. A slightly acidic to neutral pH (around 6.0 to 7.0) is ideal for chives.
2. How much sunlight do chives need when grown indoors?
Chives need at least 6-8 hours of direct sunlight per day to thrive indoors. Place your chive pot on a sunny windowsill, preferably one that faces south or west. If you don’t have a sunny windowsill, you can supplement with a grow light. Position the grow light a few inches above the chives and keep it on for 12-14 hours per day. Insufficient sunlight can lead to leggy growth and reduced flavor.
3. How often should I water my indoor chives?
Water your indoor chives when the top inch of soil feels dry to the touch. Avoid overwatering, as this can lead to root rot. Water thoroughly until water drains out of the bottom of the pot. Allow the soil to dry out slightly between waterings. The frequency of watering will depend on factors such as the size of the pot, the type of soil, and the temperature and humidity of your home. Check the soil moisture regularly and adjust your watering schedule accordingly.
4. How do I harvest chives without damaging the plant?
To harvest chives, use sharp scissors or kitchen shears to snip the leaves about an inch above the soil line. Avoid pulling the leaves, as this can damage the roots. Harvest from the outer leaves first, allowing the inner leaves to continue growing. You can harvest chives regularly throughout the growing season, as needed. Regular harvesting encourages new growth and keeps the plant healthy and productive.
5. Can I grow chives from seed indoors?
Yes, you can grow chives from seed indoors. Start the seeds indoors 6-8 weeks before the last expected frost. Sow the seeds about ¼ inch deep in a seed-starting mix. Keep the soil moist and warm (around 70-75°F). The seeds should germinate in 7-14 days. Once the seedlings have developed a few sets of true leaves, transplant them into individual pots filled with well-draining potting mix.
6. How do I fertilize my indoor chives?
Fertilize your indoor chives every 2-3 weeks during the growing season with a balanced liquid fertilizer diluted to half strength. Avoid over-fertilizing, as this can lead to leggy growth and reduced flavor. You can also amend the soil with compost or worm castings to provide slow-release nutrients.
7. What are some common pests and diseases that affect indoor chives?
Common pests that can affect indoor chives include aphids, spider mites, and fungus gnats. Inspect your chives regularly for signs of infestation. If you find pests, you can try washing them off with a strong stream of water or using insecticidal soap. Overwatering can lead to fungal diseases such as root rot. Ensure that your chives are planted in well-draining soil and avoid overwatering.
8. Can I move my indoor chives outdoors during the summer?
Yes, you can move your indoor chives outdoors during the summer, but be sure to acclimate them gradually to the outdoor conditions. Start by placing them in a shady spot for a few hours each day, gradually increasing the amount of sunlight they receive. Protect them from strong winds and heavy rain. Bring them back indoors before the first frost.
9. How long will my indoor chive plant last?
With proper care, an indoor chive plant can last for several years. Chives are perennial plants, meaning they can live for more than two years. To keep your chive plant healthy and productive, repot it every year or two into a larger pot with fresh potting mix. Divide the plant if it becomes overcrowded.
10. My chives are flowering. Should I cut off the flowers?
Chives produce attractive purple flowers that are also edible. However, flowering can reduce the flavor of the leaves. If you want to maximize the flavor of your chives, you can cut off the flower buds before they open. You can also let the flowers bloom and enjoy their beauty. The flowers can be used in salads or as a garnish.
Leave a Comment