
Grow Chili Peppers in Pots and ignite your culinary adventures! Have you ever dreamed of plucking fiery peppers straight from your own garden, ready to spice up your favorite dishes? It’s easier than you think, and this DIY guide will show you how to cultivate a thriving chili pepper patch, even if you only have a small balcony or patio.
For centuries, chili peppers have been cherished across cultures, not just for their heat, but also for their vibrant colors and medicinal properties. From the ancient Aztecs using them in rituals to the vibrant street food of Southeast Asia, these fiery fruits have a rich and fascinating history. But you don’t need to be an expert gardener to enjoy the fruits (or peppers!) of your labor.
Many people are intimidated by the thought of growing their own food, but trust me, grow chili peppers in pots is a rewarding and surprisingly simple project. Imagine the satisfaction of harvesting your own fresh, organic peppers, knowing exactly where they came from and how they were grown. Plus, it’s a fantastic way to add a touch of personality and greenery to your outdoor space. This DIY guide will provide you with all the essential tips and tricks to successfully grow chili peppers in pots, from choosing the right varieties to troubleshooting common problems. So, grab your gardening gloves, and let’s get started!
Growing Fiery Chili Peppers in Pots: A DIY Guide
Okay, chili pepper enthusiasts, gather ’round! I’m going to walk you through the exciting journey of growing your own chili peppers in pots. Trust me, there’s nothing quite like the satisfaction of harvesting your own spicy bounty, ready to add a kick to your favorite dishes. This guide is designed to be super comprehensive, so even if you’re a complete beginner, you’ll be well on your way to chili pepper success.
Choosing Your Chili Pepper Variety
First things first, let’s talk about variety! The world of chili peppers is vast and exciting, ranging from mild and fruity to scorching hot. Consider your heat tolerance and what you plan to use the peppers for. Here are a few popular choices:
* **Jalapeño:** A classic, medium-heat pepper perfect for salsas, poppers, and pickling.
* **Serrano:** A bit hotter than jalapeños, great for adding a punch to sauces and stews.
* **Cayenne:** A versatile pepper often dried and ground into powder, ideal for seasoning.
* **Habanero:** Known for its intense heat and fruity flavor, use sparingly!
* **Ghost Pepper (Bhut Jolokia):** Enter at your own risk! One of the hottest peppers in the world.
* **Bell Pepper:** Okay, not spicy, but a great option if you want to grow something mild.
Once you’ve chosen your variety, you can either buy seeds or seedlings. Seeds are more economical, but seedlings will give you a head start.
Gathering Your Supplies
Before we dive into the planting process, let’s make sure you have everything you need. Here’s a checklist:
* **Pots:** Choose pots that are at least 12 inches in diameter and depth. Larger pots are better, as they provide more room for the roots to grow. Make sure they have drainage holes!
* **Potting Mix:** Use a high-quality potting mix specifically formulated for vegetables. Avoid using garden soil, as it can compact and drain poorly in pots.
* **Chili Pepper Seeds or Seedlings:** As discussed above, select your desired variety.
* **Watering Can or Hose:** For watering your plants.
* **Fertilizer:** A balanced fertilizer (e.g., 10-10-10) or a fertilizer specifically formulated for tomatoes and peppers.
* **Optional: Seed Starting Tray and Dome:** If you’re starting from seeds.
* **Optional: Plant Labels:** To keep track of your different varieties.
* **Optional: Gardening Gloves:** To protect your hands.
* **Optional: Support Stakes or Cages:** For taller varieties that may need support.
Starting from Seeds (Optional)
If you’re starting from seeds, here’s how to do it:
1. **Sow the Seeds:** Fill a seed starting tray with potting mix. Moisten the mix and sow the seeds about 1/4 inch deep. Gently cover the seeds with soil.
2. **Provide Warmth and Moisture:** Cover the tray with a dome or plastic wrap to create a humid environment. Place the tray in a warm location (around 70-80°F). Use a heat mat if needed.
3. **Keep the Soil Moist:** Water the seeds gently to keep the soil consistently moist, but not soggy.
4. **Wait for Germination:** Chili pepper seeds can take anywhere from 7 to 21 days to germinate, depending on the variety and conditions.
5. **Provide Light:** Once the seedlings emerge, remove the dome and place the tray under a grow light or in a sunny window.
6. **Thin the Seedlings:** If multiple seedlings emerge in the same cell, thin them out, leaving only the strongest seedling.
7. **Harden Off the Seedlings:** Before transplanting the seedlings outdoors, you need to “harden them off.” This means gradually exposing them to outdoor conditions over a period of 7-10 days. Start by placing them in a sheltered location for a few hours each day, gradually increasing the amount of time they spend outdoors.
Planting Your Chili Peppers
Whether you’re transplanting seedlings you started yourself or purchased from a nursery, here’s how to plant them in pots:
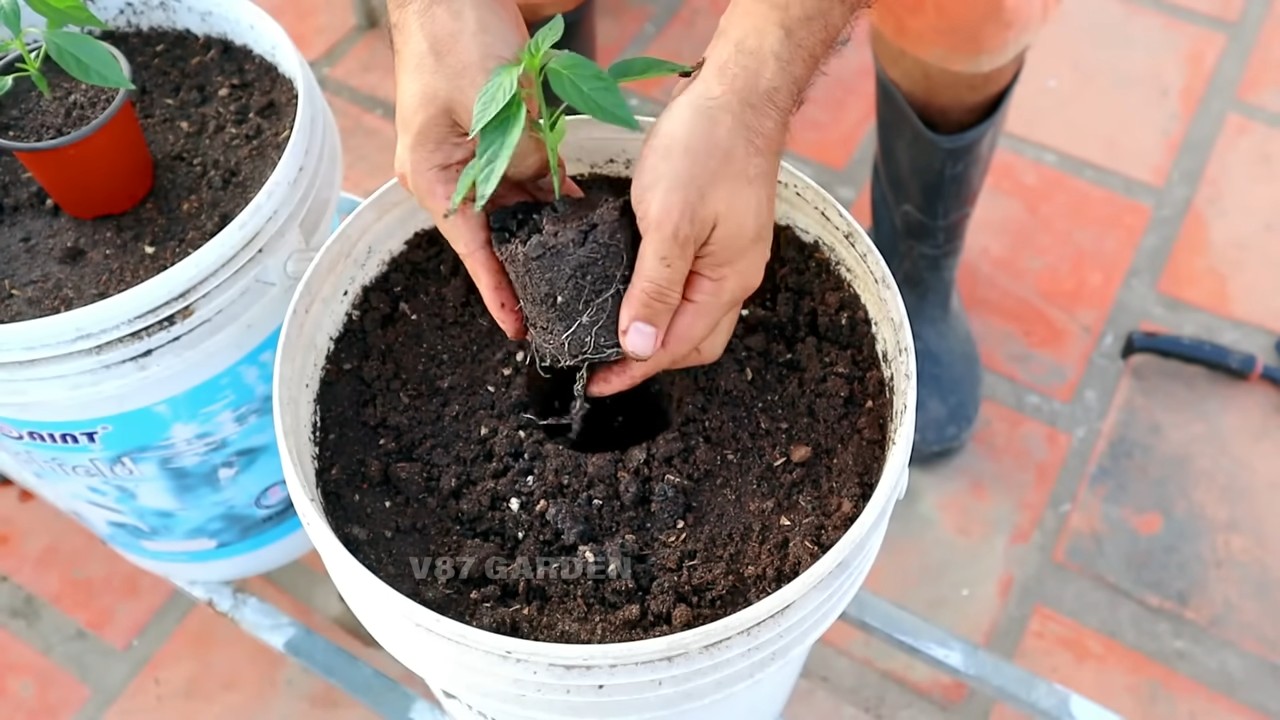
1. **Prepare the Pot:** Fill the pot with potting mix, leaving about an inch of space at the top.
2. **Dig a Hole:** Dig a hole in the center of the pot that is large enough to accommodate the root ball of the seedling.
3. **Remove the Seedling:** Gently remove the seedling from its container. If the roots are tightly bound, gently loosen them before planting.
4. **Plant the Seedling:** Place the seedling in the hole and backfill with potting mix. Gently firm the soil around the base of the plant.
5. **Water Thoroughly:** Water the plant thoroughly after planting.
Caring for Your Chili Peppers
Now that your chili peppers are planted, it’s time to provide them with the care they need to thrive.
1. **Sunlight:** Chili peppers need at least 6-8 hours of sunlight per day. Place your pots in a sunny location. If you don’t have enough sunlight, you can supplement with grow lights.
2. **Watering:** Water your chili peppers regularly, especially during hot, dry weather. The soil should be consistently moist, but not soggy. Check the soil moisture by sticking your finger into the soil. If the top inch of soil is dry, it’s time to water.
3. **Fertilizing:** Fertilize your chili peppers every 2-3 weeks with a balanced fertilizer or a fertilizer specifically formulated for tomatoes and peppers. Follow the instructions on the fertilizer label.
4. **Pruning:** Pruning can help to improve air circulation and encourage bushier growth. Remove any yellowing or dead leaves. You can also pinch off the tips of the branches to encourage branching.
5. **Pest and Disease Control:** Keep an eye out for pests and diseases. Common pests include aphids, spider mites, and whiteflies. Common diseases include blossom end rot and fungal infections. Treat any problems promptly with appropriate insecticides or fungicides.
6. **Support:** Taller varieties of chili peppers may need support to prevent them from falling over. Use stakes or cages to provide support.
Dealing with Common Problems
Even with the best care, you may encounter some problems along the way. Here are a few common issues and how to address them:
* **Blossom End Rot:** This is a condition where the bottom of the fruit turns black and leathery. It’s usually caused by a calcium deficiency. To prevent blossom end rot, make sure your soil is well-drained and that you’re providing your plants with adequate calcium. You can add calcium to the soil by using bone meal or eggshells.
* **Aphids:** These tiny insects can suck the sap from your plants, causing them to weaken and become distorted. You can control aphids by spraying them with insecticidal soap or neem oil.
* **Spider Mites:** These tiny pests can also suck the sap from your plants, causing them to develop yellow spots and webbing. You can control spider mites by spraying them with insecticidal soap or neem oil.
* **Fungal Infections:** Fungal infections can cause spots on the leaves and stems of your plants. To prevent fungal infections, make sure your plants have good air circulation and avoid overwatering. You can treat fungal infections with fungicides.
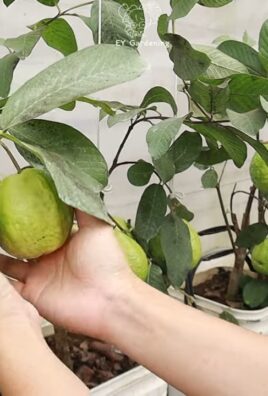
Harvesting Your Chili Peppers
The moment you’ve been waiting for! It’s time to harvest your chili peppers. The time it takes for chili peppers to mature depends on the variety. Generally, they are ready to harvest when they have reached their mature color and size.
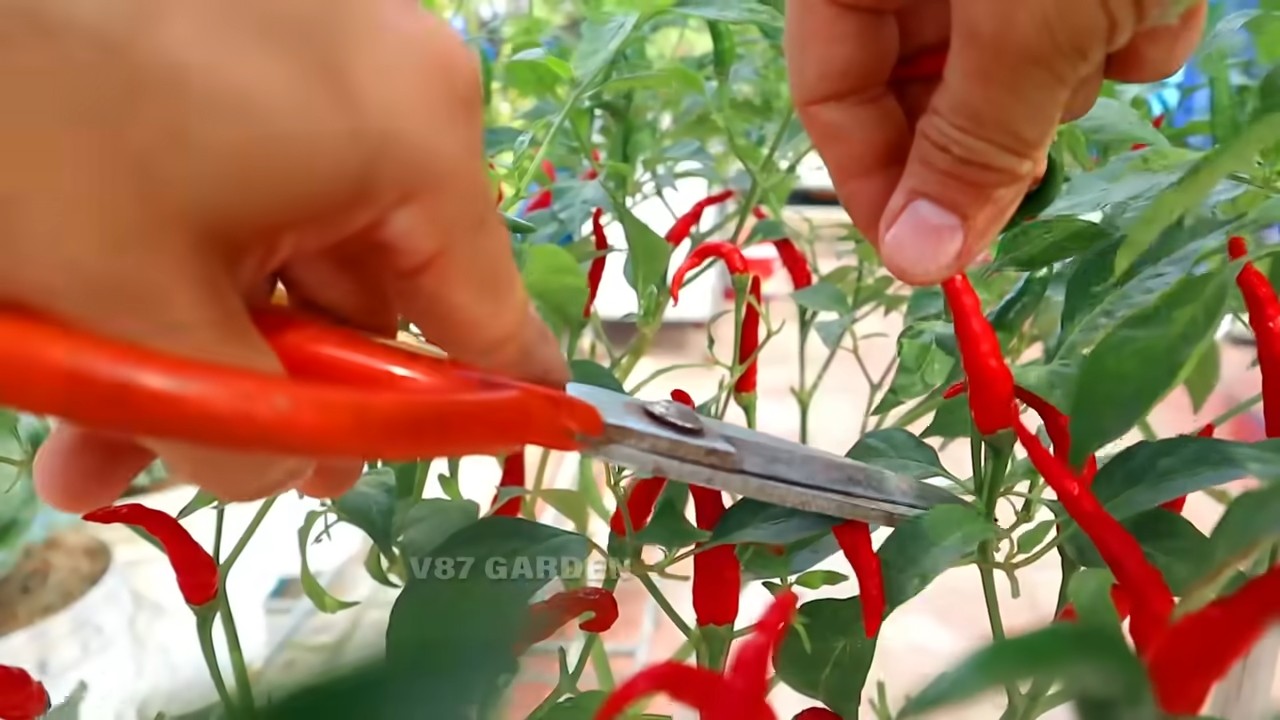
1. **Use Pruning Shears or Scissors:** Use pruning shears or scissors to cut the peppers from the plant.
2. **Handle with Care:** Be careful when handling chili peppers, especially hot varieties. Wear gloves to protect your hands from the oils that can cause burning.
3. **Enjoy Your Harvest:** Use your chili peppers fresh, or dry them for later use. You can also freeze them or pickle them.
Drying Chili Peppers
Drying chili peppers is a great way to preserve them for long-term storage. Here are a few methods:
* **Air Drying:** String the peppers together and hang them in a dry, well-ventilated area. This can take several weeks.
* **Oven Drying:** Place the peppers on a baking sheet and dry them in a low oven (around 170°F) for several hours, until they are brittle.
* **Dehydrator:** Use a food dehydrator to dry the peppers according to the manufacturer’s instructions.
Storing Your Chili Peppers
Once your chili peppers are dried, store them in an airtight container in a cool, dark place. They should last for several months. Fresh chili peppers can be stored in the refrigerator for a week or two. You can also freeze them for longer storage.
Enjoying Your Homegrown Chili Peppers
Now that you’ve grown and harvested your own chili peppers, it’s
Conclusion
So, there you have it! Growing chili peppers in pots isn’t just a gardening trend; it’s a gateway to a world of fresh, fiery flavors right at your fingertips. We’ve walked you through the essential steps, from selecting the perfect pot and choosing the right chili variety to nurturing your plants and harvesting your spicy bounty. But why is this DIY trick a must-try?
Firstly, it’s incredibly accessible. Whether you have a sprawling garden or a tiny balcony, container gardening allows you to cultivate chili peppers regardless of your space constraints. Secondly, it offers unparalleled control. You dictate the soil composition, watering schedule, and sun exposure, creating the ideal environment for your peppers to thrive. This level of control often translates to healthier, more productive plants. Thirdly, it’s immensely rewarding. There’s something deeply satisfying about nurturing a plant from seed to harvest, especially when that harvest yields the ingredients for your favorite spicy dishes.
But the beauty of growing chili peppers in pots lies in its adaptability. Feel free to experiment with different varieties. Perhaps you’re a fan of the intense heat of habaneros, or maybe you prefer the milder kick of jalapeños. The choice is yours! You can also explore different potting mixes to find what works best for your climate and growing conditions. Consider adding companion plants like basil or marigolds to your pots to deter pests and attract beneficial insects.
And don’t be afraid to get creative with your pot selection. While terracotta pots are a classic choice, you can also use plastic containers, repurposed buckets, or even grow bags. Just ensure that your chosen container has adequate drainage.
Ultimately, growing chili peppers in pots is an adventure. It’s a chance to connect with nature, learn new skills, and add a touch of spice to your life. So, grab your gardening gloves, select your favorite chili seeds, and embark on this exciting journey. We’re confident that you’ll be amazed by the results.
We encourage you to try this DIY trick and share your experience with us. Post photos of your chili pepper plants on social media using #HomegrownHeat or #PottedPeppers. Tell us about your favorite chili varieties, your biggest gardening challenges, and your most successful harvests. We’re eager to learn from your experiences and build a community of passionate chili pepper growers. Remember, even if you encounter a few bumps along the road, don’t give up! Gardening is a learning process, and every mistake is an opportunity to grow. So, get out there, get your hands dirty, and start growing your own chili peppers today! You’ll be amazed at how easy and rewarding it is to add a little spice to your life. This method of **growing chili peppers in pots** is a game changer for any spice lover.
Frequently Asked Questions (FAQ)
What is the best size pot for growing chili peppers?
The ideal pot size for growing chili peppers depends on the variety you choose. Smaller chili pepper varieties, like Thai chilies or ornamental peppers, can thrive in pots as small as 5 gallons. However, larger varieties, such as bell peppers or jalapeños, will require at least a 10-gallon pot to accommodate their extensive root systems. A good rule of thumb is to choose a pot that is at least 12 inches in diameter and 12 inches deep. Larger pots are always better, as they provide more room for root growth and help to retain moisture. Remember to consider the mature size of the chili pepper plant when selecting your pot.
What type of soil is best for chili peppers in pots?
Chili peppers thrive in well-draining, nutrient-rich soil. A good potting mix should consist of a blend of peat moss, perlite, and vermiculite. Peat moss helps to retain moisture, while perlite and vermiculite improve drainage and aeration. You can also add compost or other organic matter to your potting mix to provide essential nutrients for your chili pepper plants. Avoid using garden soil in pots, as it can become compacted and poorly drained. Look for potting mixes specifically formulated for vegetables or herbs, as these are often enriched with the nutrients that chili peppers need to flourish.
How often should I water my chili peppers in pots?
Watering frequency depends on several factors, including the size of your pot, the type of potting mix you use, the climate, and the stage of growth of your chili pepper plants. As a general rule, water your chili peppers when the top inch of soil feels dry to the touch. Avoid overwatering, as this can lead to root rot. During hot, dry weather, you may need to water your plants daily. During cooler, wetter weather, you may only need to water them every few days. When watering, water deeply, ensuring that the entire root ball is saturated. Allow excess water to drain out of the bottom of the pot.
How much sunlight do chili peppers need?
Chili peppers need at least 6-8 hours of direct sunlight per day to thrive. Choose a location for your potted chili peppers that receives plenty of sunlight throughout the day. If you live in a particularly hot climate, you may need to provide some afternoon shade to prevent your plants from scorching. If you are growing your chili peppers indoors, you will need to supplement with artificial lighting, such as grow lights. Position your grow lights about 6-12 inches above your plants and provide them with 14-16 hours of light per day.
What kind of fertilizer should I use for chili peppers?
Chili peppers are heavy feeders and require regular fertilization to produce a bountiful harvest. Use a balanced fertilizer with an NPK ratio of 10-10-10 or 14-14-14. You can also use a fertilizer specifically formulated for tomatoes or vegetables. Fertilize your chili pepper plants every 2-3 weeks during the growing season. Follow the instructions on the fertilizer package carefully. Avoid over-fertilizing, as this can burn the roots of your plants. You can also supplement with organic fertilizers, such as compost tea or fish emulsion.
How do I protect my chili peppers from pests and diseases?
Chili peppers are susceptible to a variety of pests and diseases, including aphids, spider mites, whiteflies, and fungal diseases. To prevent pest and disease problems, start with healthy plants and provide them with optimal growing conditions. Inspect your plants regularly for signs of pests or diseases. If you spot any problems, take action immediately. You can use insecticidal soap or neem oil to control pests. For fungal diseases, use a fungicide. You can also try companion planting to deter pests and attract beneficial insects.
When should I harvest my chili peppers?
The timing of harvest depends on the variety of chili pepper you are growing and your personal preference. Most chili peppers are ready to harvest when they have reached their mature size and color. Some chili peppers will turn from green to red, while others will turn from yellow to orange. You can harvest chili peppers at any stage of ripeness, but they will be hotter and more flavorful when they are fully ripe. To harvest, simply cut the chili pepper from the plant using a sharp knife or scissors.
Can I overwinter my chili pepper plants?
Yes, you can overwinter your chili pepper plants indoors. Before the first frost, prune your plants back to about 6-8 inches tall and repot them into smaller containers. Bring your plants indoors and place them in a sunny location. Water them sparingly throughout the winter. In the spring, gradually acclimate your plants to outdoor conditions before transplanting them back into larger pots.
What are some common problems when growing chili peppers in pots?
Some common problems when growing chili peppers in pots include:
* **Yellowing leaves:** This can be caused by overwatering, underwatering, nutrient deficiencies, or pests.
* **Blossom drop:** This can be caused by temperature stress, lack of pollination, or nutrient deficiencies.
* **Root rot:** This is caused by overwatering and poor drainage.
* **Pest infestations:** Chili peppers are susceptible to a variety of pests, including aphids, spider mites, and whiteflies.
* **Fungal diseases:** Chili peppers can be affected by fungal diseases, such as powdery mildew and leaf spot.
By addressing these problems promptly, you can ensure a healthy and productive chili pepper harvest.
Leave a Comment