
Grow Carrots Indoors? Absolutely! Forget waiting for the perfect spring weather or battling garden pests. I’m here to tell you that enjoying fresh, homegrown carrots is possible year-round, right from the comfort of your own home. For centuries, humans have cultivated carrots, tracing their origins back to Afghanistan. Initially, they weren’t even orange! But through careful selection and cultivation, we’ve arrived at the sweet, vibrant root vegetable we know and love today.
But why bother growing them indoors? Well, maybe you’re short on outdoor space, live in an apartment, or simply want a fun and rewarding project. Perhaps you’re tired of store-bought carrots that lack that fresh, earthy flavor. Whatever your reason, this DIY guide is your ticket to a bountiful indoor carrot harvest. I’ll walk you through every step, from choosing the right container and soil to providing the perfect lighting and watering schedule.
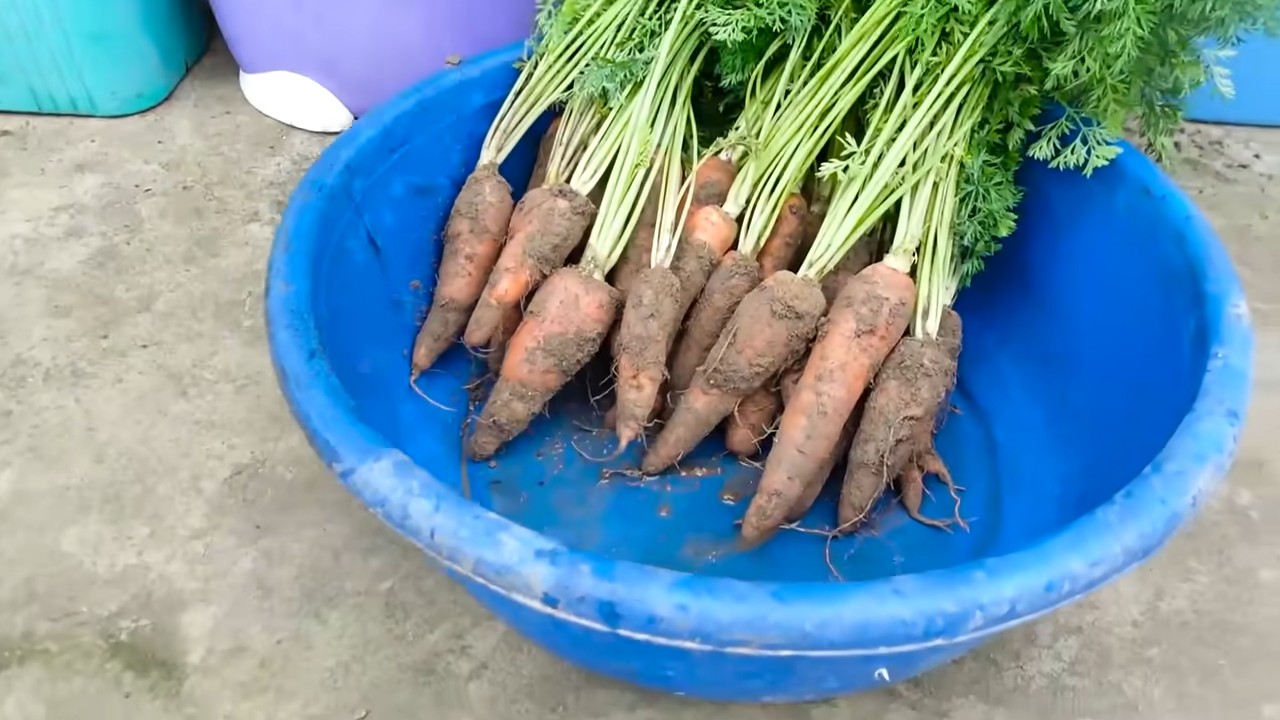
Imagine the satisfaction of pulling up your own juicy, sweet carrots on a cold winter day. No more trips to the grocery store for bland, mass-produced vegetables! With these simple tricks and hacks, you can grow carrots indoors and enjoy the taste of homegrown goodness all year long. So, grab your gardening gloves, and let’s get started!
Growing Carrots Indoors: Your DIY Guide for a Year-Round Harvest
Hey gardening friends! Do you want to harvest fresh, crisp carrots even in winter? Then you’ve come to the right place! I’ll show you how you can easily grow carrots indoors. It’s easier than you think and a lot of fun. Let’s get started!
What You Need: The Preparation
Before we start planting, we naturally need the right equipment. Here is a list of everything you’ll need for your indoor carrot project:
- Carrot seeds: It’s best to choose varieties that are suitable for growing in pots. Short, round varieties like ‘Paris Market’ or ‘Thumbelina’ are ideal.
- Large pots or containers: Carrots need space! The pots should be at least 20-30 cm (8-12 inches) deep to give the roots enough room to develop.
- High-quality potting soil: Use a loose, well-draining potting soil. You can also use special vegetable soil or make your own mix of potting soil, compost, and sand.
- Drainage material: Pebbles, clay shards, or expanded clay for the bottom of the pots to prevent waterlogging.
- Grow light (optional): If you don’t have enough sunlight, a grow light is a great addition.
- Watering can or spray bottle: For watering the carrots.
- Fertilizer (optional): An organic liquid fertilizer can promote growth.
Step-by-Step Guide: Sowing and Caring for Carrots
Now let’s get down to it! Here is a detailed guide on how to grow your carrots indoors:
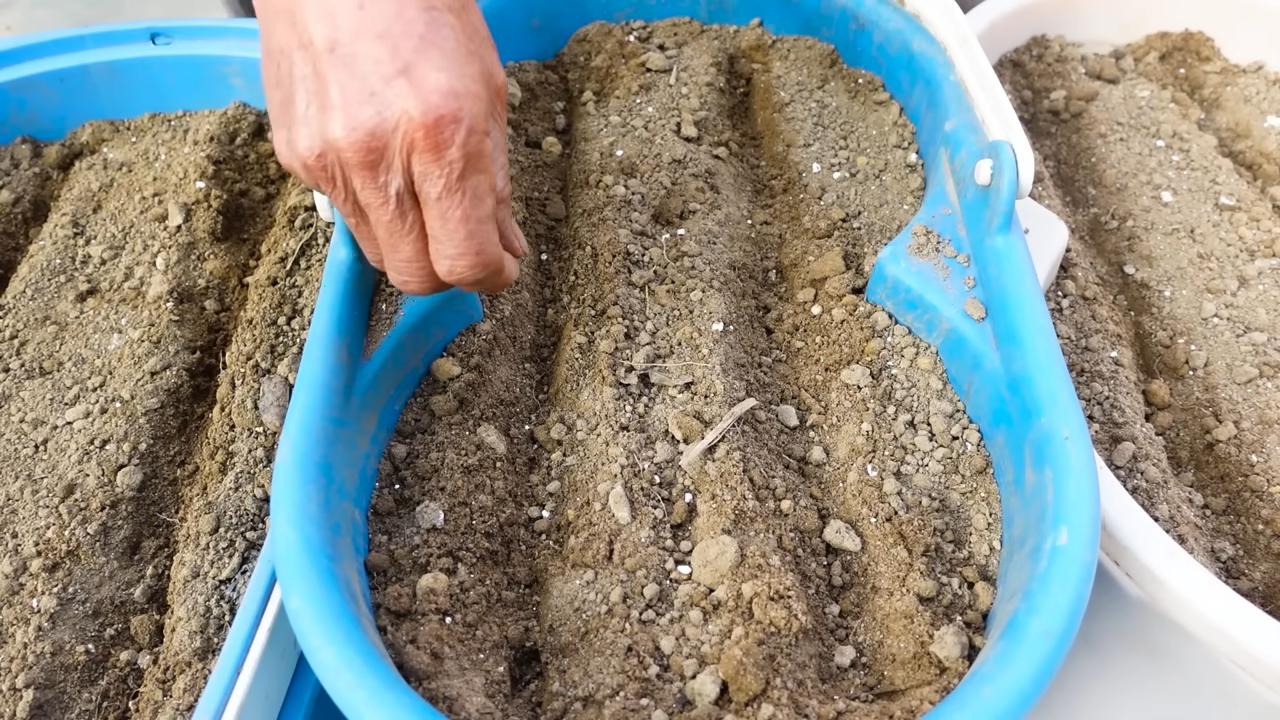
1. Prepare the Pots:
- Place a layer of drainage material (pebbles, clay shards, or expanded clay) at the bottom of the pots. This ensures good drainage and prevents waterlogging.
- Fill the pots with potting soil. Leave about 2-3 cm (1 inch) of space at the top.
- Lightly moisten the soil with a spray bottle. It should be damp, but not wet.
2. Sow the Carrot Seeds:
- Sprinkle the carrot seeds evenly over the surface of the soil. Since carrots have very small seeds, it’s important not to sow too many at once.
- Cover the seeds with a thin layer of soil (about 0.5 cm or 0.2 inches).
- Gently press the soil down and moisten it again with the spray bottle.
3. Germination:
- Place the pots in a warm, bright place. A temperature between 18 and 24 degrees Celsius (65-75°F) is ideal.
- Keep the soil moist, but not wet. Spray it regularly with water.
- Germination usually takes 10-21 days. Be patient!
4. Thinning:
- Once the seedlings are about 2-3 cm (1 inch) tall, you need to thin them out. This means you remove the weakest seedlings so the stronger ones have enough space to grow.
- Leave about 3-5 cm (1-2 inches) of space between the individual plants.
- Be careful when thinning to avoid damaging the roots of the remaining plants.
5. Care:
- Watering: Water the carrots regularly, but avoid waterlogging. The soil should always be slightly moist.
- Light: Carrots need a lot of light. Place the pots in a sunny spot or use a grow light.
- Fertilizing: Fertilize the carrots every 2-3 weeks with an organic liquid fertilizer. Follow the instructions on the packaging.
- Ventilation: Ensure good air circulation to prevent fungal diseases.
Challenges and Solutions: What to Do When Things Go Wrong?
Even with indoor gardening, there are sometimes challenges. Here are some common problems and how you can solve them:
- Poor Germination:
- Cause: Seeds are too old, soil is too dry or too wet, temperature is too low.
- Solution: Use fresh seeds, ensure proper moisture and temperature.
- Yellow Leaves:
- Cause: Nutrient deficiency, too much water, too little light.
- Solution: Fertilize the carrots, ensure proper watering, and move them to a brighter location.
- Crooked or Small Carrots:
- Cause: Not enough space, soil is too rocky, not enough fertilizer.
- Solution: Use larger pots, loosen the soil, and fertilize the carrots regularly.
- Pests:
- Cause: Aphids, spider mites, or other pests.
- Solution: Spray the plants with a mild soap solution or use a biological pesticide.
Harvest Time: When Are the Carrots Ready?
The harvest time depends on the variety you’ve grown. Generally, carrots are ready after 60-80 days. You’ll know they’re ready when the carrots have reached the desired size and the leaves start to turn yellow.
How to Harvest Your Carrots:
- Loosen the soil around the carrots.
- Gently pull the carrots out of the soil by their green tops.
- Remove the soil and cut off the greens.
- Wash the carrots and enjoy them fresh!
Additional Tips for Success:
- Rotate the pots regularly: So that all sides of the plants get even light.
- Use rainwater for watering: Rainwater is softer and contains no harmful chemicals.
- Observe your plants closely: Watch for changes and react quickly if you notice problems.
- Have fun! Gardening should be enjoyable. Experiment and learn from your mistakes.
Variety Recommendations for Indoor Growing:
As mentioned, short, round carrot varieties are best for growing in pots. Here are some of my favorites:
- ‘Paris Market’: Small, round carrots with a sweet taste.
- ‘Thumbelina’: Very small, spherical carrots, ideal for growing in small pots.
- ‘Short ‘n Sweet’: Short, thick carrots with a sweet taste.
- ‘Little Finger’: Long, slender carrots that also grow well in pots.
The Right Soil: The Key to Healthy Carrots
Choosing the right soil is crucial for the success of your indoor carrot project. Carrots need a loose, well-draining soil that is rich in nutrients.
You have several options:
- Vegetable soil: Special vegetable soil is already enriched with the right nutrients and has a good structure.
- Potting soil with compost and sand: You can also make your own mix of potting soil, compost, and sand. Mix about 2 parts potting soil, 1 part compost, and 1 part sand. The compost provides nutrients, and the sand ensures good drainage.
- Coco coir: Coco coir is an environmentally friendly alternative to potting soil. It is light, well-draining, and retains moisture. You can use pure coco coir or mix it with compost and sand.
Important: Avoid heavy, clay-like soil, as this can hinder root development.
Conclusion
So, there you have it! Growing carrots indoors isn’t just a whimsical idea; it’s a genuinely achievable and rewarding project that brings a touch of the garden into your home, regardless of the season. We’ve walked through the essential steps, from selecting the right carrot varieties to providing optimal lighting and ensuring proper drainage. But why should you actually take the plunge and try this DIY trick?
First and foremost, growing carrots indoors offers a continuous supply of fresh, organic produce right at your fingertips. Imagine the satisfaction of harvesting your own sweet, crisp carrots for salads, snacks, or even a hearty winter stew, knowing exactly where they came from and what went into growing them. No more trips to the grocery store for subpar carrots that lack flavor and freshness!
Beyond the convenience and quality, indoor carrot gardening is a fantastic way to connect with nature, especially during colder months when outdoor gardening is limited. It’s a therapeutic activity that can reduce stress, improve your mood, and provide a sense of accomplishment as you watch your tiny seeds sprout and transform into vibrant, edible roots. Plus, it’s a wonderful educational opportunity for children (and adults!) to learn about plant life cycles and the importance of sustainable food practices.
But the benefits don’t stop there. Indoor carrot growing allows you to control the growing environment, minimizing the risk of pests, diseases, and unpredictable weather conditions that can plague outdoor gardens. You can fine-tune the temperature, humidity, and light levels to create the perfect conditions for your carrots to thrive.
Now, let’s talk about variations. While we’ve focused on the basics, there’s plenty of room for experimentation and customization. Consider trying different carrot varieties to discover your favorites. Nantes and Thumbelina carrots are particularly well-suited for indoor growing due to their shorter length. You can also experiment with different soil mixes to find the one that works best for your growing conditions. Some gardeners swear by a mix of peat moss, vermiculite, and perlite, while others prefer a soilless mix specifically designed for container gardening.
Another exciting variation is hydroponic carrot growing. While it requires a bit more setup and investment, hydroponics can significantly accelerate growth and produce even larger, more flavorful carrots. If you’re feeling adventurous, research hydroponic systems and give it a try!
Finally, don’t be afraid to get creative with your containers. While standard pots work perfectly well, you can also use repurposed containers like plastic tubs, buckets, or even old drawers. Just make sure the container is deep enough to accommodate the carrot roots and has adequate drainage holes.
We wholeheartedly encourage you to embark on this indoor carrot growing adventure. It’s a rewarding experience that will bring joy, fresh produce, and a touch of green into your home. Remember to be patient, observant, and willing to learn from your mistakes. Gardening is a journey, not a destination, and there’s always something new to discover.
And most importantly, we want to hear about your experiences! Share your successes, your challenges, and your tips with us and other readers. Post photos of your indoor carrot gardens on social media using relevant hashtags, or leave a comment below to share your story. Together, we can create a community of indoor gardeners who are passionate about growing their own food and connecting with nature. So, grab your seeds, your soil, and your containers, and get ready to grow carrots indoors like a pro! You’ll be amazed at what you can achieve.
Frequently Asked Questions (FAQ)
1. What are the best carrot varieties to grow indoors?
The best carrot varieties for indoor growing are typically shorter, more compact types that don’t require as much space. Nantes and Thumbelina carrots are excellent choices. Nantes carrots are known for their sweet flavor and cylindrical shape, while Thumbelina carrots are small, round, and perfect for container gardening. Other good options include Parisian carrots and Chantenay carrots. Avoid long, thin varieties like Imperator carrots, as they may not have enough room to develop properly in a container.
2. How much light do indoor carrots need?
Carrots need at least 6-8 hours of direct sunlight per day to thrive. If you don’t have a sunny windowsill, you’ll need to supplement with artificial grow lights. LED grow lights are a great option because they are energy-efficient and provide the full spectrum of light that plants need. Place the grow lights about 6-12 inches above the carrot seedlings and adjust the height as they grow. You can also use fluorescent grow lights, but they are less energy-efficient than LEDs.
3. What type of soil is best for growing carrots indoors?
Carrots need loose, well-draining soil to develop properly. Avoid heavy clay soils, as they can restrict root growth. A good soil mix for indoor carrots is a combination of peat moss, vermiculite, and perlite. You can also use a soilless mix specifically designed for container gardening. Make sure the soil is slightly acidic, with a pH of around 6.0 to 6.8. Before planting, amend the soil with compost or other organic matter to improve drainage and fertility.
4. How often should I water my indoor carrots?
Water your indoor carrots regularly, keeping the soil consistently moist but not waterlogged. Overwatering can lead to root rot, while underwatering can stunt growth. Check the soil moisture by sticking your finger about an inch into the soil. If it feels dry, it’s time to water. Water deeply, allowing the water to drain out of the bottom of the container. Avoid getting the foliage wet, as this can promote fungal diseases.
5. How long does it take for carrots to grow indoors?
Carrots typically take 60-80 days to mature, depending on the variety and growing conditions. You can start harvesting carrots when they reach the desired size. To harvest, gently loosen the soil around the carrot and pull it out of the ground. You can also use a garden fork to lift the carrots out of the soil.
6. What are some common problems when growing carrots indoors, and how can I fix them?
Some common problems when growing carrots indoors include:
* **Poor germination:** Make sure the seeds are fresh and the soil is warm enough for germination.
* **Leggy seedlings:** Provide more light to prevent seedlings from becoming leggy.
* **Root rot:** Avoid overwatering and ensure the soil has good drainage.
* **Pests:** Inspect your plants regularly for pests like aphids or spider mites. Treat infestations with insecticidal soap or neem oil.
* **Forked roots:** This can be caused by rocky soil or overcrowding. Thin out the seedlings and make sure the soil is loose and free of rocks.
7. Can I grow carrots in the same container as other plants?
While it’s possible to grow carrots in the same container as other plants, it’s generally best to grow them separately. Carrots need plenty of space to develop their roots, and overcrowding can lead to stunted growth. If you do choose to grow carrots with other plants, select companion plants that don’t compete for resources and that can even benefit the carrots. Good companion plants for carrots include onions, garlic, and marigolds.
8. How do I thin out my carrot seedlings?
Thinning out carrot seedlings is essential to ensure that each plant has enough space to grow. When the seedlings are about 2 inches tall, thin them out so that they are about 1-2 inches apart. You can use scissors or your fingers to gently remove the excess seedlings. Be careful not to disturb the roots of the remaining plants.
9. Do I need to fertilize my indoor carrots?
Yes, carrots benefit from regular fertilization. Use a balanced fertilizer with equal amounts of nitrogen, phosphorus, and potassium. You can also use a fertilizer specifically formulated for root vegetables. Fertilize every 2-3 weeks, following the instructions on the fertilizer label. Avoid over-fertilizing, as this can lead to excessive foliage growth and poor root development.
10. Can I save seeds from my indoor carrots?
Saving seeds from carrots is a bit more complicated than saving seeds from other vegetables. Carrots are biennials, meaning they take two years to complete their life cycle. In the first year, they produce roots, and in the second year, they produce flowers and seeds. To save seeds from your indoor carrots, you’ll need to overwinter them and allow them to flower in the second year. This can be challenging indoors, as carrots need a period of cold dormancy to trigger flowering. If you’re determined to save seeds, research the specific requirements for your carrot variety and be prepared to provide the necessary conditions.
Leave a Comment