
Grow cabbage at home, even if you think you don’t have a green thumb! Have you ever dreamt of strolling into your backyard and harvesting a crisp, vibrant cabbage for a delicious homemade coleslaw or a hearty winter stew? Well, dream no more! This DIY guide is packed with simple, effective tricks and hacks that will transform your garden (or even your balcony!) into a cabbage-growing haven.
Cabbage, a staple in cuisines worldwide, boasts a rich history dating back thousands of years. From ancient Rome, where it was prized for its medicinal properties, to medieval Europe, where it sustained communities through harsh winters, cabbage has always been a symbol of resilience and nourishment. Today, with rising grocery costs and a growing desire for fresh, locally sourced food, learning to grow cabbage at home is more relevant than ever.
But let’s be honest, gardening can sometimes feel intimidating. Pests, diseases, and unpredictable weather can quickly turn your gardening aspirations into a frustrating experience. That’s where these DIY tricks come in! I’m going to share my tried-and-true methods for overcoming common cabbage-growing challenges, ensuring you enjoy a bountiful harvest without breaking the bank or spending hours toiling in the garden. Get ready to unlock the secrets to successful home-grown cabbage – it’s easier than you think!
Growing Cabbage at Home: A Beginner’s Guide
Hey there, fellow gardening enthusiasts! Ever thought about growing your own cabbage? It’s surprisingly rewarding, and nothing beats the taste of fresh, homegrown veggies. I’ve been growing cabbage in my backyard for a few years now, and I’m excited to share my tips and tricks with you. This guide will walk you through everything you need to know, from choosing the right variety to harvesting your delicious cabbage heads.
Choosing Your Cabbage Variety
First things first, let’s talk about cabbage varieties. There are tons of options out there, each with its own unique characteristics. Consider your climate and the amount of space you have when making your selection. Here are a few popular choices:
- Early Cabbage: These mature quickly (around 50-60 days) and are great for early harvests. Varieties like ‘Golden Acre’ and ‘Early Jersey Wakefield’ are excellent choices.
- Mid-Season Cabbage: These take a bit longer to mature (around 70-80 days) and offer a good balance between size and flavor. ‘Copenhagen Market’ is a reliable option.
- Late-Season Cabbage: These are the big boys, taking 80-100 days to mature. They’re perfect for storing over the winter. ‘Danish Ballhead’ and ‘January King’ are popular choices.
- Savoy Cabbage: Known for their crinkled leaves and mild flavor, Savoy cabbages add a unique touch to your garden. ‘Savoy Ace’ is a great option.
- Red Cabbage: These add a pop of color to your garden and are packed with antioxidants. ‘Red Acre’ is a classic choice.
Starting Your Cabbage: Seeds vs. Transplants
You have two main options for starting your cabbage: from seeds or from transplants. Both have their pros and cons.
- Starting from Seeds: This gives you more control over the entire process and is generally more economical. However, it requires more time and effort.
- Using Transplants: This is a quicker and easier option, especially for beginners. You can purchase transplants from your local garden center.
I personally prefer starting from seeds, as I find it more rewarding. But if you’re short on time or new to gardening, transplants are a great way to go.
Starting Cabbage from Seeds: A Step-by-Step Guide
If you’re going the seed route, here’s how to do it:
Phase 1: Indoor Seed Starting (6-8 Weeks Before Last Frost)
1. Gather Your Supplies: You’ll need seed starting trays or small pots, seed starting mix (a light, well-draining mix is crucial), cabbage seeds, a spray bottle, and a heat mat (optional, but helpful).
2. Prepare Your Trays: Fill your seed starting trays or pots with the seed starting mix. Gently pat it down to remove any air pockets.
3. Sow the Seeds: Make a small indentation (about ¼ inch deep) in the soil of each cell or pot. Place 2-3 cabbage seeds in each indentation. Cover the seeds with a thin layer of seed starting mix.
4. Water Gently: Use a spray bottle to gently moisten the soil. Avoid overwatering, as this can lead to damping off (a fungal disease that can kill seedlings).
5. Provide Warmth and Light: Place the trays or pots on a heat mat (if using) and under grow lights or in a sunny window. Cabbage seeds need warmth and light to germinate. Aim for a temperature of around 70-75°F (21-24°C).
6. Keep the Soil Moist: Check the soil moisture daily and water as needed to keep it consistently moist, but not soggy.
7. Thin the Seedlings: Once the seedlings have developed their first true leaves (the leaves that appear after the initial seed leaves), thin them to one seedling per cell or pot. Choose the strongest, healthiest-looking seedling and snip off the others at the soil line.
Phase 2: Hardening Off the Seedlings
Hardening off is the process of gradually acclimating your seedlings to outdoor conditions. This is crucial to prevent shock when you transplant them into the garden.
1. Start Slowly: About a week before you plan to transplant your seedlings, begin taking them outside for a few hours each day. Start with just an hour or two in a sheltered location, away from direct sunlight and strong winds.
2. Gradually Increase Exposure: Each day, gradually increase the amount of time the seedlings spend outdoors and expose them to more sunlight.
3. Monitor the Seedlings: Keep a close eye on your seedlings for any signs of stress, such as wilting or sunburn. If they show signs of stress, bring them back indoors and reduce their exposure to the elements.
4. Water Regularly: Continue to water the seedlings regularly during the hardening off process.
Transplanting Your Cabbage
Whether you started from seeds or purchased transplants, the transplanting process is the same.
1. Choose the Right Time: Transplant your cabbage seedlings or transplants outdoors after the last frost, when the soil has warmed up to at least 50°F (10°C).
2. Prepare the Soil: Cabbage prefers well-drained, fertile soil with a pH of 6.0-7.0. Amend the soil with compost or well-rotted manure to improve its fertility and drainage.
3. Space the Plants: Space your cabbage plants 12-24 inches apart, depending on the variety. Smaller varieties can be planted closer together, while larger varieties need more space.
4. Dig the Holes: Dig holes that are slightly larger than the root ball of your seedlings or transplants.
5. Plant the Cabbage: Gently remove the seedlings or transplants from their containers and place them in the holes. Make sure the top of the root ball is level with the surrounding soil.
6. Fill the Holes: Fill the holes with soil and gently firm it around the plants.
7. Water Thoroughly: Water the newly transplanted cabbage plants thoroughly to help them settle in.
Caring for Your Cabbage
Once your cabbage plants are in the ground, it’s important to provide them with proper care to ensure a healthy and bountiful harvest.
- Watering: Cabbage needs consistent moisture, especially during head formation. Water deeply and regularly, especially during dry spells. Aim for about 1-1.5 inches of water per week.
- Fertilizing: Cabbage is a heavy feeder, so it needs regular fertilization. Apply a balanced fertilizer (such as 10-10-10) every 2-3 weeks. You can also side-dress with compost or well-rotted manure.
- Weeding: Keep the area around your cabbage plants free of weeds, as weeds can compete for nutrients and water. Mulching can help suppress weeds and retain moisture.
- Pest Control: Cabbage can be susceptible to various pests, such as cabbage worms, aphids, and flea beetles. Monitor your plants regularly and take action if you see any signs of infestation. You can use organic pest control methods, such as insecticidal soap or Bacillus thuringiensis (Bt).
- Disease Control: Cabbage can also be affected by diseases, such as black rot and clubroot. Choose disease-resistant varieties and practice good sanitation to prevent disease problems.
Dealing with Common Cabbage Pests
Cabbage pests can be a real headache, but don’t worry, I’ve got you covered! Here are some common pests and how to deal with them:
- Cabbage Worms: These green caterpillars can devour your cabbage leaves in no time. Handpicking them off the plants is effective for small infestations. For larger infestations, use Bacillus thuringiensis (Bt), a natural bacteria that kills caterpillars.
- Cabbage Loopers: Similar to cabbage worms, cabbage loopers are another type of caterpillar that can damage your cabbage plants. Use the same control methods as for cabbage worms.
- Aphids: These tiny insects suck the sap from your cabbage leaves, causing them to curl and distort. Spray aphids with insecticidal soap or neem oil.
- Flea Beetles: These small, jumping beetles can create tiny holes in your cabbage leaves. Cover your plants with row covers to prevent flea beetles from reaching them. You can also use insecticidal soap or diatomaceous earth.
Harvesting Your Cabbage
The moment you’ve been waiting for! Harvesting your cabbage is the most rewarding part of the process.
1. Check for Maturity: Cabbage is ready to harvest when the head is firm and solid. The size of the head will vary depending on the variety.
2. Cut the Head: Use a sharp knife

Conclusion
So, there you have it! Growing cabbage at home isn’t just a whimsical gardening dream; it’s a tangible reality that can bring fresh, flavorful, and nutritious produce right to your kitchen table. We’ve walked through the essential steps, from selecting the right variety for your climate to nurturing those seedlings and protecting your precious crop from pests. But why should you actually dedicate your time and effort to this endeavor?
The answer lies in the unparalleled freshness and flavor you simply can’t replicate with store-bought cabbage. Imagine the crisp, sweet taste of a freshly harvested head, still cool from the morning dew. Think of the vibrant colors and the satisfying crunch as you chop it for salads, slaws, or your favorite cooked dishes. This is the reward for your efforts, a culinary experience that elevates your meals and nourishes your body.
Beyond the superior taste, growing your own cabbage offers a sense of accomplishment and connection to nature. There’s something deeply satisfying about nurturing a plant from seed to harvest, witnessing its growth, and knowing that you played a vital role in its development. It’s a therapeutic activity that can reduce stress, boost your mood, and connect you with the rhythms of the natural world.
And let’s not forget the economic benefits! While there’s an initial investment in seeds, soil, and perhaps some basic gardening tools, you’ll quickly recoup those costs by reducing your grocery bills. Plus, you’ll have the satisfaction of knowing exactly where your food comes from and how it was grown, free from harmful pesticides and chemicals.
But the journey doesn’t end here. Feel free to experiment with different varieties of cabbage to discover your favorites. Try growing red cabbage for its vibrant color and slightly peppery flavor, or savoy cabbage for its crinkled leaves and delicate texture. Consider succession planting to extend your harvest season, ensuring a continuous supply of fresh cabbage throughout the year. You can also explore companion planting, pairing your cabbage with beneficial herbs and flowers that deter pests and attract pollinators.
For example, try interplanting your cabbage with dill or chamomile to attract beneficial insects like ladybugs and lacewings, which prey on aphids and other common cabbage pests. Or, plant marigolds around the perimeter of your garden to repel nematodes and other soil-borne pests.
Don’t be afraid to get creative and adapt the techniques we’ve discussed to suit your specific growing conditions and preferences. Gardening is a learning process, and there’s always something new to discover.
So, what are you waiting for? Grab some seeds, prepare your soil, and embark on your own cabbage-growing adventure. We’re confident that you’ll be amazed by the results. And once you’ve harvested your first head of homegrown cabbage, be sure to share your experience with us! We’d love to hear your tips, tricks, and favorite recipes. Share your photos and stories on social media using [Your Hashtag Here], and let’s inspire others to discover the joys of growing their own food. Let’s all learn how to **grow cabbage at home** together!
Frequently Asked Questions (FAQ)
1. What is the best time of year to start growing cabbage?
The timing for planting cabbage depends largely on your climate. Cabbage is a cool-season crop, meaning it thrives in temperatures between 60°F and 70°F (15°C and 21°C). In regions with mild winters, you can plant cabbage in the fall for a winter or early spring harvest. In colder climates, start seeds indoors 6-8 weeks before the last expected frost and transplant them outdoors in the spring. A general rule of thumb is to plant spring cabbage varieties in early spring and fall cabbage varieties in mid-to-late summer. Check your local extension office for specific planting recommendations for your area.
2. What kind of soil is best for growing cabbage?
Cabbage prefers well-drained, fertile soil that is rich in organic matter. The ideal soil pH is between 6.0 and 7.0. Before planting, amend your soil with compost, aged manure, or other organic amendments to improve its fertility and drainage. Cabbage is a heavy feeder, so it’s important to provide it with adequate nutrients. Consider adding a slow-release fertilizer at planting time or side-dressing your plants with a nitrogen-rich fertilizer every few weeks.
3. How much sunlight does cabbage need?
Cabbage needs at least 6 hours of direct sunlight per day to thrive. Choose a planting location that receives full sun for most of the day. If you live in a hot climate, some afternoon shade can be beneficial to prevent the leaves from scorching.
4. How often should I water my cabbage plants?
Cabbage needs consistent moisture to grow properly. Water your plants deeply and regularly, especially during dry periods. Aim to keep the soil consistently moist but not waterlogged. A good rule of thumb is to water when the top inch of soil feels dry to the touch. Mulching around your plants can help to retain moisture and suppress weeds.
5. What are some common pests and diseases that affect cabbage?
Cabbage is susceptible to a variety of pests and diseases, including cabbage worms, aphids, flea beetles, clubroot, and black rot. To prevent pest and disease problems, practice good garden hygiene, such as removing plant debris and weeds regularly. Inspect your plants regularly for signs of pests or diseases and take action promptly.
For cabbage worms, handpicking them off the plants or using Bacillus thuringiensis (Bt), a biological insecticide, can be effective. Aphids can be controlled with insecticidal soap or neem oil. Clubroot is a soilborne disease that can be prevented by rotating your crops and maintaining a soil pH above 7.0. Black rot is a bacterial disease that can be prevented by using disease-resistant varieties and avoiding overhead watering.
6. How do I know when my cabbage is ready to harvest?
Cabbage is ready to harvest when the head is firm and solid to the touch. The size of the head will vary depending on the variety, but a mature head is typically 6-12 inches in diameter. To harvest, use a sharp knife to cut the head from the stem, leaving a few outer leaves attached.
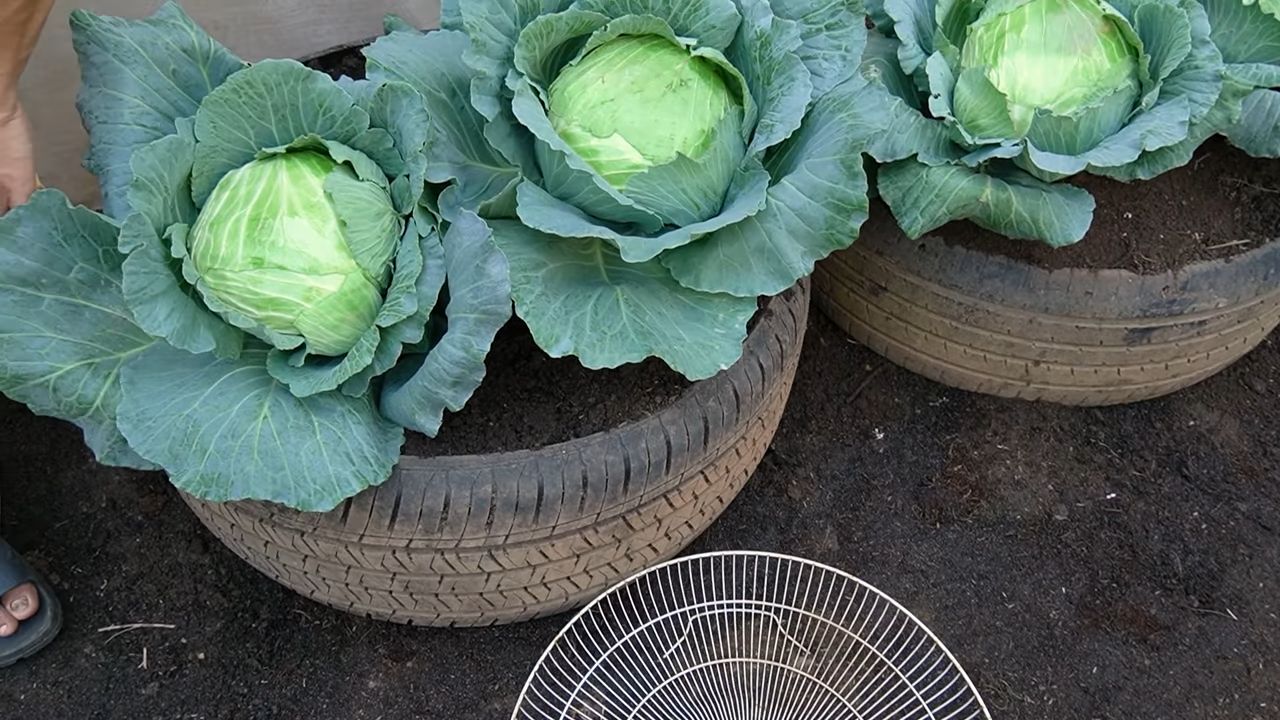
7. Can I grow cabbage in containers?
Yes, you can grow cabbage in containers, but you’ll need to choose a large container that is at least 12 inches in diameter and 12 inches deep. Use a well-draining potting mix and provide your plants with plenty of sunlight and water. Container-grown cabbage may need to be fertilized more frequently than cabbage grown in the ground.
8. What are some good companion plants for cabbage?
Companion planting can help to deter pests, attract beneficial insects, and improve the overall health of your cabbage plants. Some good companion plants for cabbage include:
* Dill
* Chamomile
* Marigolds
* Nasturtiums
* Rosemary
* Thyme
* Onions
* Garlic
9. Can I save seeds from my cabbage plants?
Saving seeds from cabbage is possible, but it requires a bit of effort. Cabbage is a biennial plant, meaning it takes two years to produce seeds. You’ll need to overwinter your cabbage plants and allow them to flower and produce seeds in the second year. However, cabbage is also cross-pollinated, so if you’re growing multiple varieties, the seeds may not be true to type.
10. How do I store harvested cabbage?
Harvested cabbage can be stored in the refrigerator for several weeks. Wrap the head in plastic wrap or store it in a plastic bag to prevent it from drying out. You can also store cabbage in a root cellar or other cool, dark place. For longer-term storage, consider fermenting your cabbage into sauerkraut or kimchi.


Leave a Comment