
Grow Brussels Sprouts Kitchen: Ever dreamt of plucking fresh, vibrant Brussels sprouts right from your own kitchen? I know I have! Forget those sad, pre-packaged sprouts from the grocery store – imagine the satisfaction of nurturing your own little sprout factory, just steps away from your dinner plate.
While Brussels sprouts might not have a particularly romantic history (they were popularized in Belgium, hence the name!), their nutritional value and unique flavor have made them a staple in cuisines worldwide. But let’s be honest, growing them can seem intimidating. That’s where this DIY guide comes in!
In today’s fast-paced world, we’re often disconnected from the food we eat. This DIY trick isn’t just about saving money (though that’s a definite perk!). It’s about reconnecting with nature, understanding the growing process, and enjoying the unparalleled taste of homegrown produce. Plus, grow Brussels Sprouts Kitchen is a fantastic way to add a touch of green to your indoor space, especially if you’re short on outdoor gardening space. I’m going to show you how to cultivate these mini cabbages indoors, even if you’ve never grown anything before. Get ready to unleash your inner gardener!
Growing Brussels Sprouts Indoors: A Beginner’s Guide
Okay, so you want to grow Brussels sprouts indoors? Awesome! It might seem a little daunting, but trust me, with a little patience and the right setup, you can totally do it. I’ve done it myself, and I’m here to share all my secrets (well, not really secrets, just tips and tricks I’ve learned along the way!). This guide will walk you through everything, from choosing the right seeds to harvesting your very own mini cabbages.
What You’ll Need
Before we dive in, let’s gather our supplies. Here’s a checklist of everything you’ll need to get started:
* Brussels Sprouts Seeds: Choose a variety that’s known for its compact growth and shorter maturity time. ‘Early Dwarf Improved’ or ‘Long Island Improved’ are good options.
* Seed Starting Trays or Small Pots: These will be used to germinate your seeds.
* Seed Starting Mix: This is a light, sterile soil mix that’s perfect for delicate seedlings.
* Larger Pots (at least 12 inches in diameter): You’ll need these when you transplant your seedlings.
* Potting Soil: A good quality potting mix that drains well is essential.
* Grow Lights: Brussels sprouts need a lot of light, so grow lights are a must for indoor growing.
* Fertilizer: A balanced liquid fertilizer will help your plants thrive.
* Watering Can or Spray Bottle: For gentle watering.
* Spray Bottle with Water: For misting the plants to maintain humidity.
* Optional: Heat mat to speed up germination.
Phase 1: Starting Your Seeds
This is where the magic begins! We’re going to coax those tiny seeds into becoming Brussels sprouts plants.
1. Prepare Your Seed Starting Trays: Fill your seed starting trays or small pots with seed starting mix. Gently pat it down to remove any air pockets.
2. Sow the Seeds: Make a small indentation (about ¼ inch deep) in the soil of each cell or pot. Place one or two seeds in each indentation. Cover the seeds with a thin layer of seed starting mix.
3. Water Gently: Use a spray bottle to gently moisten the soil. You don’t want to soak it, just make sure it’s evenly damp.
4. Provide Warmth: Brussels sprouts seeds germinate best in warm conditions (around 65-75°F). If you have a heat mat, place your seed starting trays on it. If not, find a warm spot in your house.
5. Maintain Moisture: Keep the soil consistently moist, but not soggy. Check the soil daily and mist with water as needed.
6. Wait for Germination: Be patient! It usually takes about 5-10 days for Brussels sprouts seeds to germinate. Once you see those little green sprouts popping up, you’re on your way!
Phase 2: Caring for Your Seedlings
Now that your seeds have sprouted, it’s time to nurture those little seedlings and help them grow strong.
1. Provide Plenty of Light: As soon as your seedlings emerge, they need plenty of light. Place them under your grow lights, making sure the lights are positioned close enough to the plants (usually a few inches above the seedlings). Aim for at least 14-16 hours of light per day.
2. Water Regularly: Keep the soil consistently moist, but not waterlogged. Water when the top inch of soil feels dry to the touch.
3. Thin the Seedlings: If you planted two seeds in each cell or pot, thin them out by snipping off the weaker seedling at the soil line. This will give the remaining seedling more room to grow.
4. Fertilize Gently: Once your seedlings have developed their first true leaves (the leaves that look like miniature Brussels sprouts leaves), you can start fertilizing them with a diluted liquid fertilizer. Follow the instructions on the fertilizer package.
5. Harden Off the Seedlings (Optional): If you plan to eventually move your Brussels sprouts plants outdoors (even just for part of the day), you’ll need to harden them off. This means gradually exposing them to outdoor conditions over a period of a week or two. Start by placing them outside for an hour or two each day, and gradually increase the amount of time they spend outdoors.
Phase 3: Transplanting and Growing On
Okay, your seedlings are looking strong and healthy. It’s time to give them some more room to grow!
1. Prepare Your Larger Pots: Fill your larger pots (at least 12 inches in diameter) with a good quality potting mix.
2. Transplant the Seedlings: Gently remove the seedlings from their seed starting trays or small pots. Be careful not to damage the roots.
3. Plant the Seedlings: Make a hole in the potting mix that’s large enough to accommodate the root ball of the seedling. Place the seedling in the hole and gently backfill with potting mix.
4. Water Thoroughly: Water the transplanted seedlings thoroughly to help them settle in.
5. Provide Support (Optional): As your Brussels sprouts plants grow taller, they may need some support to prevent them from falling over. You can use stakes or tomato cages to provide support.
6. Maintain Consistent Watering: Brussels sprouts need consistent moisture to thrive. Water when the top inch of soil feels dry to the touch.
7. Fertilize Regularly: Continue to fertilize your Brussels sprouts plants with a balanced liquid fertilizer every two weeks.
8. Provide Plenty of Light: Make sure your Brussels sprouts plants are getting plenty of light. If you’re growing them indoors, keep them under your grow lights for at least 14-16 hours per day.
9. Monitor for Pests and Diseases: Keep an eye out for pests and diseases. Aphids, cabbage worms, and whiteflies are common pests that can affect Brussels sprouts. If you see any pests, you can try spraying them with insecticidal soap or neem oil.
Phase 4: Harvesting Your Brussels Sprouts
The moment you’ve been waiting for! It’s time to harvest your homegrown Brussels sprouts.
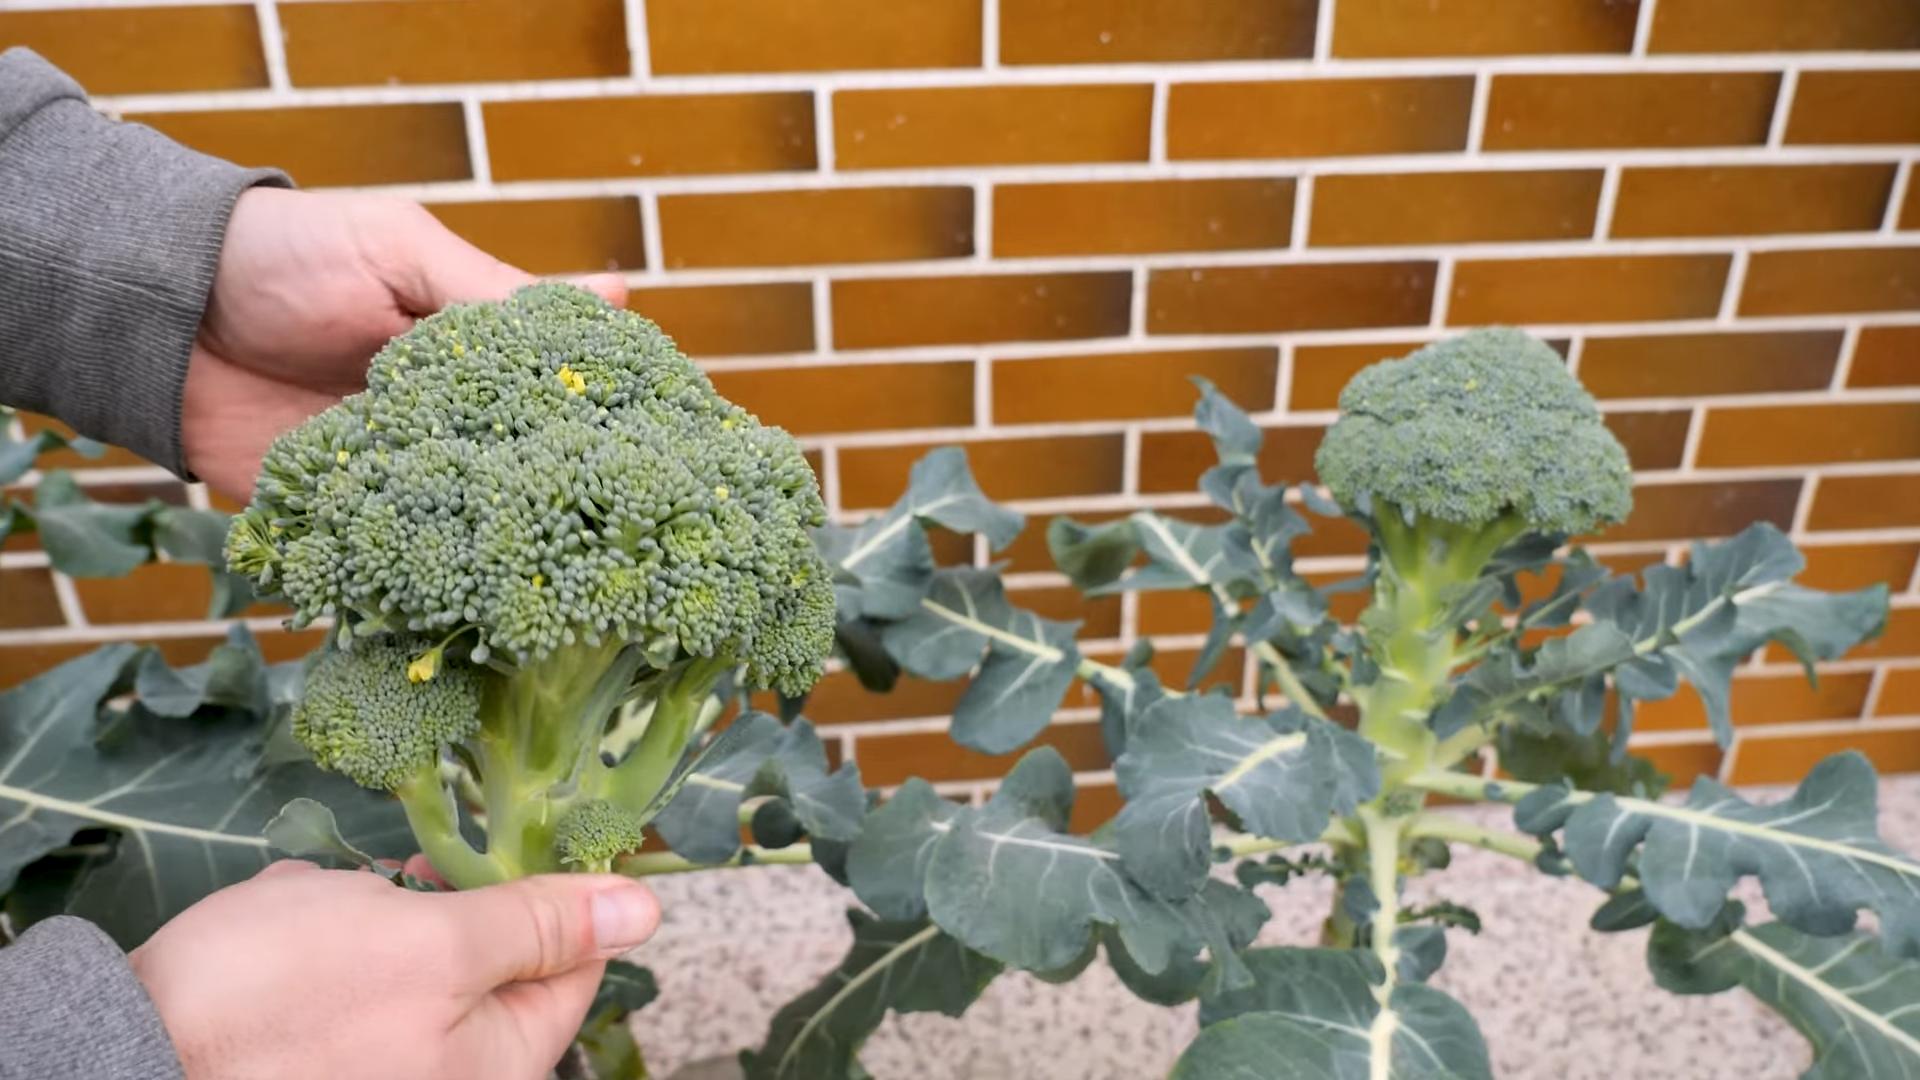
1. Check for Maturity: Brussels sprouts are typically ready to harvest when the sprouts are firm, green, and about 1-2 inches in diameter.
2. Harvest from the Bottom Up: Start harvesting the sprouts from the bottom of the plant, as these are the ones that will mature first.
3. Twist or Cut Off the Sprouts: You can either twist the sprouts off the stem or cut them off with a sharp knife.
4. Remove Yellowing Leaves: As you harvest the sprouts, remove any yellowing or damaged leaves from the plant.
5. Continue Harvesting: Continue harvesting the sprouts as they mature, working your way up the stem.
6. Enjoy Your Harvest: Now it’s time to enjoy the fruits (or rather, vegetables) of your labor! Brussels sprouts can be roasted, steamed, sautéed, or even eaten raw.
Troubleshooting Tips
Even with the best planning, things can sometimes go wrong. Here are a few common problems you might encounter and how to fix them:
* Leggy Seedlings: If your seedlings are tall and spindly, they’re probably not getting enough light. Move them closer to your grow lights or provide more light.
* Yellowing Leaves: Yellowing leaves can be a sign of overwatering, underwatering, or nutrient deficiency. Check the soil moisture and adjust your watering accordingly. If you suspect a nutrient deficiency, fertilize your plants with a balanced liquid fertilizer.
* Pests: Keep an eye out for pests like aphids, cabbage worms, and w
Okay, so you want to grow Brussels sprouts indoors? Awesome! It might seem a little daunting, but trust me, with a little patience and the right setup, you can totally do it. I’ve done it myself, and I’m here to share all my secrets (well, not really secrets, just tips and tricks I’ve learned along the way!). This guide will walk you through everything, from choosing the right seeds to harvesting your very own mini cabbages.
What You’ll Need
Before we dive in, let’s gather our supplies. Here’s a checklist of everything you’ll need to get started:
* Brussels Sprouts Seeds: Choose a variety that’s known for its compact growth and shorter maturity time. ‘Early Dwarf Improved’ or ‘Long Island Improved’ are good options.
* Seed Starting Trays or Small Pots: These will be used to germinate your seeds.
* Seed Starting Mix: This is a light, sterile soil mix that’s perfect for delicate seedlings.
* Larger Pots (at least 12 inches in diameter): You’ll need these when you transplant your seedlings.
* Potting Soil: A good quality potting mix that drains well is essential.
* Grow Lights: Brussels sprouts need a lot of light, so grow lights are a must for indoor growing.
* Fertilizer: A balanced liquid fertilizer will help your plants thrive.
* Watering Can or Spray Bottle: For gentle watering.
* Spray Bottle with Water: For misting the plants to maintain humidity.
* Optional: Heat mat to speed up germination.
Phase 1: Starting Your Seeds
This is where the magic begins! We’re going to coax those tiny seeds into becoming Brussels sprouts plants.
1. Prepare Your Seed Starting Trays: Fill your seed starting trays or small pots with seed starting mix. Gently pat it down to remove any air pockets.
2. Sow the Seeds: Make a small indentation (about ¼ inch deep) in the soil of each cell or pot. Place one or two seeds in each indentation. Cover the seeds with a thin layer of seed starting mix.
3. Water Gently: Use a spray bottle to gently moisten the soil. You don’t want to soak it, just make sure it’s evenly damp.
4. Provide Warmth: Brussels sprouts seeds germinate best in warm conditions (around 65-75°F). If you have a heat mat, place your seed starting trays on it. If not, find a warm spot in your house.
5. Maintain Moisture: Keep the soil consistently moist, but not soggy. Check the soil daily and mist with water as needed.
6. Wait for Germination: Be patient! It usually takes about 5-10 days for Brussels sprouts seeds to germinate. Once you see those little green sprouts popping up, you’re on your way!
Phase 2: Caring for Your Seedlings
Now that your seeds have sprouted, it’s time to nurture those little seedlings and help them grow strong.
1. Provide Plenty of Light: As soon as your seedlings emerge, they need plenty of light. Place them under your grow lights, making sure the lights are positioned close enough to the plants (usually a few inches above the seedlings). Aim for at least 14-16 hours of light per day.
2. Water Regularly: Keep the soil consistently moist, but not waterlogged. Water when the top inch of soil feels dry to the touch.
3. Thin the Seedlings: If you planted two seeds in each cell or pot, thin them out by snipping off the weaker seedling at the soil line. This will give the remaining seedling more room to grow.
4. Fertilize Gently: Once your seedlings have developed their first true leaves (the leaves that look like miniature Brussels sprouts leaves), you can start fertilizing them with a diluted liquid fertilizer. Follow the instructions on the fertilizer package.
5. Harden Off the Seedlings (Optional): If you plan to eventually move your Brussels sprouts plants outdoors (even just for part of the day), you’ll need to harden them off. This means gradually exposing them to outdoor conditions over a period of a week or two. Start by placing them outside for an hour or two each day, and gradually increase the amount of time they spend outdoors.
Phase 3: Transplanting and Growing On
Okay, your seedlings are looking strong and healthy. It’s time to give them some more room to grow!
1. Prepare Your Larger Pots: Fill your larger pots (at least 12 inches in diameter) with a good quality potting mix.
2. Transplant the Seedlings: Gently remove the seedlings from their seed starting trays or small pots. Be careful not to damage the roots.
3. Plant the Seedlings: Make a hole in the potting mix that’s large enough to accommodate the root ball of the seedling. Place the seedling in the hole and gently backfill with potting mix.
4. Water Thoroughly: Water the transplanted seedlings thoroughly to help them settle in.
5. Provide Support (Optional): As your Brussels sprouts plants grow taller, they may need some support to prevent them from falling over. You can use stakes or tomato cages to provide support.
6. Maintain Consistent Watering: Brussels sprouts need consistent moisture to thrive. Water when the top inch of soil feels dry to the touch.
7. Fertilize Regularly: Continue to fertilize your Brussels sprouts plants with a balanced liquid fertilizer every two weeks.
8. Provide Plenty of Light: Make sure your Brussels sprouts plants are getting plenty of light. If you’re growing them indoors, keep them under your grow lights for at least 14-16 hours per day.
9. Monitor for Pests and Diseases: Keep an eye out for pests and diseases. Aphids, cabbage worms, and whiteflies are common pests that can affect Brussels sprouts. If you see any pests, you can try spraying them with insecticidal soap or neem oil.
Phase 4: Harvesting Your Brussels Sprouts
The moment you’ve been waiting for! It’s time to harvest your homegrown Brussels sprouts.
1. Check for Maturity: Brussels sprouts are typically ready to harvest when the sprouts are firm, green, and about 1-2 inches in diameter.
2. Harvest from the Bottom Up: Start harvesting the sprouts from the bottom of the plant, as these are the ones that will mature first.
3. Twist or Cut Off the Sprouts: You can either twist the sprouts off the stem or cut them off with a sharp knife.
4. Remove Yellowing Leaves: As you harvest the sprouts, remove any yellowing or damaged leaves from the plant.
5. Continue Harvesting: Continue harvesting the sprouts as they mature, working your way up the stem.
6. Enjoy Your Harvest: Now it’s time to enjoy the fruits (or rather, vegetables) of your labor! Brussels sprouts can be roasted, steamed, sautéed, or even eaten raw.
Troubleshooting Tips
Even with the best planning, things can sometimes go wrong. Here are a few common problems you might encounter and how to fix them:
* Leggy Seedlings: If your seedlings are tall and spindly, they’re probably not getting enough light. Move them closer to your grow lights or provide more light.
* Yellowing Leaves: Yellowing leaves can be a sign of overwatering, underwatering, or nutrient deficiency. Check the soil moisture and adjust your watering accordingly. If you suspect a nutrient deficiency, fertilize your plants with a balanced liquid fertilizer.
* Pests: Keep an eye out for pests like aphids, cabbage worms, and whiteflies. If you see any pests, you can try spraying them with insecticidal soap or neem oil.
* Sprouts Not Forming: Sometimes, Brussels sprouts plants will grow tall and leafy but won’t produce any sprouts. This can be caused by a lack of light, improper fertilization, or temperatures that are too warm. Make sure your plants are getting plenty of light, fertilize them regularly, and try to keep the temperature around 60-70°F.
Choosing the Right Brussels Sprouts Variety
Not all Brussels sprouts are created equal! When growing indoors, it’s important to choose a variety that’s well-suited for container gardening and has a shorter maturity time. Here are a few varieties that I recommend:
* ‘Early Dwarf Improved’: This variety is known for its compact growth and early maturity. It’s a great choice for indoor growing.
* ‘Long Island Improved’: This is a classic Brussels sprouts variety that’s reliable and productive. It’s also relatively compact, making it a good choice for containers.
* ‘Jade Cross’: This hybrid variety is known for its uniform sprouts and disease resistance. It’s

Conclusion
So, there you have it! Growing Brussels sprouts in your kitchen might sound like a whimsical endeavor, but it’s surprisingly achievable and incredibly rewarding. This DIY trick isn’t just about saving money; it’s about connecting with your food on a deeper level, understanding the growth cycle, and enjoying the unparalleled freshness of homegrown produce. Imagine plucking perfectly formed Brussels sprouts right from your indoor garden, knowing exactly where they came from and what went into nurturing them. That’s a level of satisfaction you simply can’t get from store-bought vegetables.
This method offers a fantastic way to introduce children to gardening and healthy eating habits. It’s a hands-on learning experience that teaches responsibility, patience, and the wonders of nature. Plus, it’s a great conversation starter! Your friends and family will be amazed by your indoor gardening prowess.
But the benefits don’t stop there. By growing your own Brussels sprouts, you’re reducing your carbon footprint. You’re eliminating the need for transportation, packaging, and refrigeration, all of which contribute to environmental pollution. You’re also avoiding the use of harmful pesticides and herbicides, ensuring that your Brussels sprouts are as healthy and nutritious as possible.
Why is this DIY trick a must-try? Because it’s a sustainable, educational, and delicious way to enjoy fresh Brussels sprouts year-round, regardless of your outdoor climate or gardening experience. It’s a simple project that yields impressive results, transforming your kitchen into a miniature farm.
Variations and Suggestions
Don’t be afraid to experiment! Once you’ve mastered the basic technique, you can explore different varieties of Brussels sprouts to find your favorite. Try growing ‘Long Island Improved’ for its classic flavor or ‘Redarling’ for its beautiful color and slightly sweeter taste.
Consider using different types of growing mediums. While soil is the most common choice, you can also try hydroponics or aquaponics for a more advanced and efficient growing system. These methods can provide even faster growth and higher yields.
You can also adjust the lighting to influence the growth and flavor of your Brussels sprouts. Experiment with different types of grow lights to see which ones produce the best results. Remember that Brussels sprouts need plenty of light to thrive, so make sure they’re getting at least 6-8 hours of direct sunlight or artificial light per day.
Finally, don’t forget to fertilize your Brussels sprouts regularly. A balanced fertilizer will provide them with the nutrients they need to grow strong and healthy. Look for a fertilizer that’s specifically designed for vegetables, and follow the instructions on the label carefully.
We wholeheartedly encourage you to give this DIY trick a try. It’s a fun, rewarding, and sustainable way to enjoy fresh Brussels sprouts all year round. Once you’ve harvested your first batch, we’d love to hear about your experience! Share your photos, tips, and tricks in the comments below. Let’s create a community of indoor Brussels sprouts growers and inspire others to embrace the joys of homegrown produce. Let us know how your kitchen garden of grow Brussels sprouts is doing!
Frequently Asked Questions (FAQ)
Q: How long does it take to grow Brussels sprouts indoors?
A: Growing Brussels sprouts indoors typically takes around 120-180 days from seed to harvest. This is slightly longer than growing them outdoors, as indoor conditions may not be as optimal as natural sunlight and weather. However, with proper care and attention, you can still achieve a successful harvest. The exact time will depend on the variety of Brussels sprouts you’re growing, the amount of light they receive, and the temperature of your kitchen. Be patient and monitor their growth regularly.
Q: What kind of lighting do Brussels sprouts need indoors?
A: Brussels sprouts require a significant amount of light to thrive. Ideally, they need at least 6-8 hours of direct sunlight per day. If you don’t have a sunny window, you’ll need to supplement with artificial grow lights. Fluorescent or LED grow lights are excellent choices, as they provide the full spectrum of light that plants need for photosynthesis. Position the lights about 6-12 inches above the plants and adjust as they grow taller.
Q: What is the best soil for growing Brussels sprouts in containers?
A: The best soil for growing Brussels sprouts in containers is a well-draining, nutrient-rich potting mix. Avoid using garden soil, as it can be too heavy and compact, which can hinder root growth. Look for a potting mix that contains a blend of peat moss, perlite, and vermiculite. You can also add compost or other organic matter to improve the soil’s fertility. Ensure the container has drainage holes to prevent waterlogging.
Q: How often should I water my indoor Brussels sprouts?
A: Water your indoor Brussels sprouts regularly, keeping the soil consistently moist but not waterlogged. Check the soil moisture level daily by sticking your finger about an inch into the soil. If it feels dry, it’s time to water. Water deeply, allowing the excess water to drain out of the bottom of the container. Avoid overwatering, as this can lead to root rot. The frequency of watering will depend on the temperature and humidity of your kitchen, as well as the size of your container.
Q: Do I need to fertilize my indoor Brussels sprouts?
A: Yes, Brussels sprouts are heavy feeders and require regular fertilization to grow properly. Use a balanced fertilizer that’s specifically designed for vegetables. Follow the instructions on the label carefully, and avoid over-fertilizing, as this can damage the plants. You can also use organic fertilizers, such as compost tea or fish emulsion. Fertilize every 2-3 weeks during the growing season.
Q: How do I prevent pests and diseases from affecting my indoor Brussels sprouts?
A: While indoor gardening reduces the risk of pests and diseases, it’s still important to take precautions. Inspect your plants regularly for any signs of infestation or disease. Common pests that can affect Brussels sprouts include aphids, cabbage worms, and spider mites. You can control these pests with insecticidal soap or neem oil. To prevent diseases, ensure good air circulation and avoid overwatering. Remove any infected leaves or plants immediately.
Q: Can I grow Brussels sprouts from cuttings?
A: While it’s possible to propagate Brussels sprouts from cuttings, it’s not the most common or reliable method. It’s generally easier and more successful to grow them from seeds. However, if you want to try growing from cuttings, take a 4-6 inch cutting from a healthy plant and remove the lower leaves. Dip the cut end in rooting hormone and plant it in a well-draining potting mix. Keep the soil moist and provide plenty of light. It may take several weeks for the cutting to root.
Q: How do I know when my Brussels sprouts are ready to harvest?
A: Brussels sprouts are ready to harvest when the sprouts are firm, green, and about 1-2 inches in diameter. Start harvesting from the bottom of the plant, as these sprouts will mature first. Twist or cut the sprouts off the stem, leaving the upper sprouts to continue growing. You can harvest Brussels sprouts over several weeks, as they mature at different rates.
Q: Can I eat the leaves of my Brussels sprouts plant?
A: Yes, the leaves of Brussels sprouts plants are edible and can be used in salads, stir-fries, or other dishes. They have a similar flavor to cabbage and are a good source of vitamins and minerals. Harvest the leaves from the bottom of the plant, as these are the oldest and most mature.
Q: What are some common problems when growing Brussels sprouts indoors and how can I fix them?
A: Some common problems include:
* **Leggy growth:** This is usually caused by insufficient light. Provide more light by moving the plants to a sunnier location or using grow lights.
* **Small sprouts:** This can be caused by insufficient nutrients or water. Fertilize regularly and water deeply.
* **Yellowing leaves:** This can be caused by overwatering or nutrient deficiencies. Adjust your watering schedule and fertilize as needed.
* **Pest infestations:** Treat with insecticidal soap or neem oil.
By addressing these issues promptly, you can ensure a healthy and productive indoor Brussels sprouts garden.
Leave a Comment