
Grow Bok Choy Indoors? Absolutely! Imagine fresh, crisp bok choy, bursting with flavor, ready to harvest right from your kitchen windowsill. Forget those bland, wilted greens from the grocery store – we’re talking vibrant, homegrown goodness, even if you don’t have a sprawling garden. For centuries, cultivating vegetables indoors has been a practice rooted in necessity and ingenuity, allowing communities to thrive even in harsh climates. Think of the ancient Egyptians growing herbs in pots or the Victorian era’s obsession with indoor ferns. Now, it’s our turn to embrace this tradition with a modern twist!
Let’s be honest, life gets busy. We all crave healthy, delicious meals, but finding the time (and energy!) to shop for fresh produce can feel like a chore. That’s where this DIY guide comes in. Learning how to grow bok choy indoors is a game-changer. It’s not just about convenience; it’s about connecting with nature, reducing your carbon footprint, and enjoying the unparalleled taste of freshly harvested vegetables. Plus, it’s incredibly rewarding to nurture a plant from seed to table. I’m here to show you that with a few simple tricks and readily available materials, you can easily cultivate your own thriving indoor bok choy garden. So, grab your gardening gloves (or don’t – it’s indoor gardening, after all!), and let’s get started!
Growing Bok Choy Indoors: A Beginner’s Guide
Hey there, fellow plant enthusiasts! Are you craving fresh, crisp bok choy but don’t have the outdoor space or the right climate? No problem! I’m going to walk you through the surprisingly simple process of growing your own bok choy indoors. Trust me, it’s easier than you think, and the reward of harvesting your own delicious greens is totally worth it.
What You’ll Need
Before we dive in, let’s gather our supplies. Here’s a checklist of everything you’ll need to successfully grow bok choy indoors:
* Bok Choy Seeds: Choose a variety that’s well-suited for indoor growing. Dwarf varieties like ‘Toy Choy’ or ‘Baby Bok Choy’ are excellent choices because they don’t require as much space.
* Seed Starting Trays or Small Pots: These will be used to germinate your seeds.
* Seed Starting Mix: This is a light, sterile soil mix that’s perfect for delicate seedlings.
* Larger Pots (at least 6 inches in diameter): These will be the permanent homes for your bok choy plants.
* Potting Soil: A good quality potting mix that drains well is essential.
* Grow Lights: Bok choy needs plenty of light, so grow lights are a must, especially if you don’t have a sunny windowsill.
* Watering Can or Spray Bottle: For gentle watering.
* Fertilizer: A balanced liquid fertilizer to feed your plants.
* Spray Bottle with Water: For misting the leaves.
* Well-ventilated Space: Good air circulation is important to prevent diseases.
Starting Your Seeds
This is where the magic begins! Getting your seeds started properly is crucial for a healthy harvest.
1. Prepare Your Seed Starting Trays: Fill your seed starting trays or small pots with seed starting mix. Gently pat it down to remove any air pockets.
2. Sow the Seeds: Sprinkle 2-3 seeds into each cell or pot. Cover them with a thin layer of seed starting mix (about 1/4 inch).
3. Water Gently: Use a spray bottle or watering can with a gentle nozzle to thoroughly moisten the soil. Avoid overwatering, which can lead to damping-off disease.
4. Provide Warmth: Bok choy seeds germinate best in temperatures between 65-75°F (18-24°C). You can use a heat mat to provide consistent warmth, or simply place the trays in a warm location.
5. Maintain Moisture: Keep the soil consistently moist, but not soggy. You can cover the trays with a clear plastic dome or plastic wrap to help retain moisture. Just be sure to remove the cover once the seedlings emerge to prevent fungal growth.
6. Provide Light: Once the seedlings emerge (usually within 5-7 days), they’ll need plenty of light. Place them under grow lights or in a very sunny windowsill. If using grow lights, position them a few inches above the seedlings and keep them on for 14-16 hours per day.
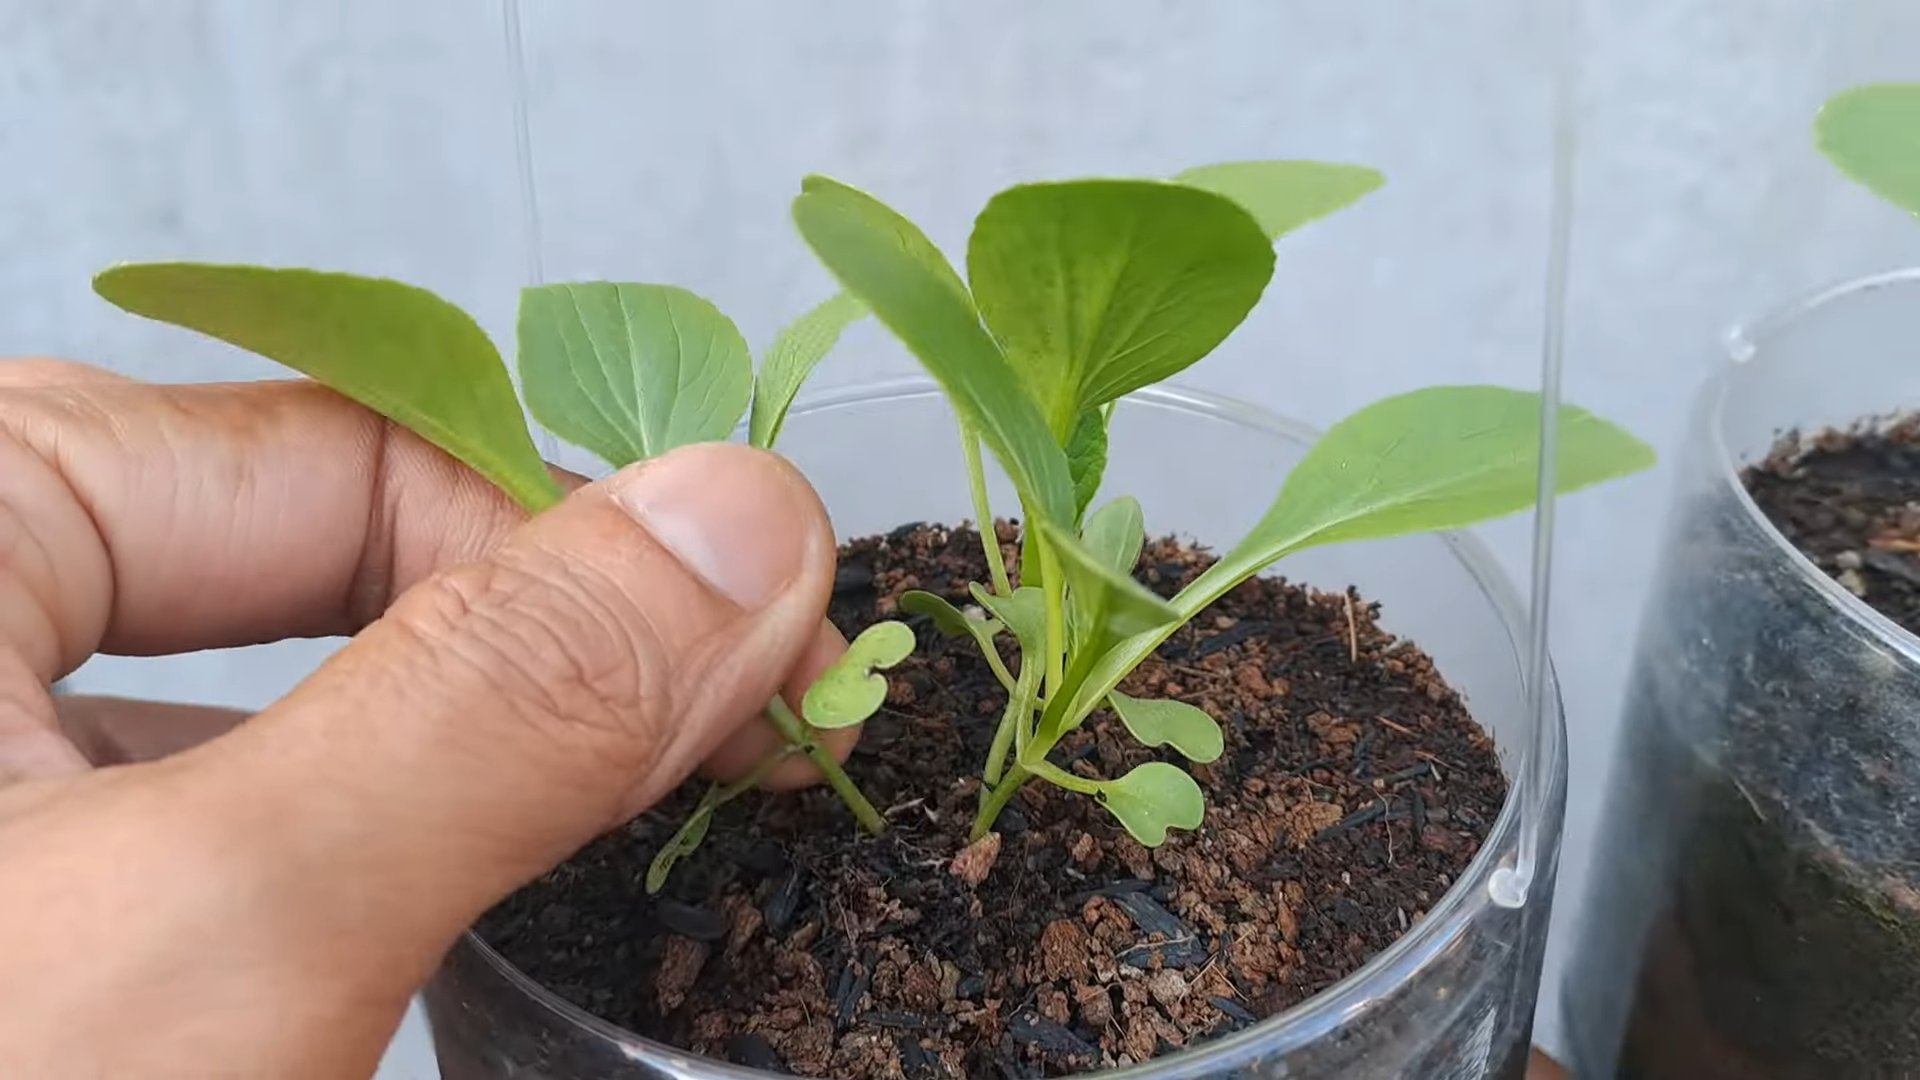
Transplanting Your Seedlings
Once your seedlings have developed a few sets of true leaves (the leaves that look like miniature bok choy leaves), it’s time to transplant them into larger pots.
1. Prepare Your Pots: Fill your larger pots (at least 6 inches in diameter) with potting soil. Leave about an inch of space at the top of the pot.
2. Gently Remove Seedlings: Carefully remove the seedlings from the seed starting trays or small pots. Try to disturb the roots as little as possible. You can use a small trowel or spoon to help you. If you planted multiple seeds in one cell, choose the strongest seedling and gently snip off the others at the soil line.
3. Plant the Seedlings: Make a small hole in the center of the potting soil and gently place the seedling into the hole. The top of the root ball should be level with the surface of the soil.
4. Fill and Water: Fill in the hole with potting soil and gently pat it down. Water thoroughly until water drains out of the bottom of the pot.
Caring for Your Bok Choy Plants
Now that your bok choy plants are in their permanent homes, it’s time to provide them with the care they need to thrive.
1. Light: Bok choy needs at least 6 hours of direct sunlight per day, or 12-14 hours of light from grow lights. If using grow lights, position them a few inches above the plants and adjust the height as the plants grow.
2. Watering: Water your bok choy plants regularly, keeping the soil consistently moist but not soggy. Check the soil moisture by sticking your finger into the soil. If the top inch feels dry, it’s time to water. Avoid overwatering, which can lead to root rot.
3. Fertilizing: Feed your bok choy plants every 2-3 weeks with a balanced liquid fertilizer. Follow the instructions on the fertilizer label.
4. Temperature: Bok choy prefers cooler temperatures, ideally between 60-70°F (15-21°C). Avoid exposing your plants to temperatures above 80°F (27°C), as this can cause them to bolt (go to seed).
5. Humidity: Bok choy prefers moderate humidity. You can increase the humidity around your plants by misting them with water regularly or by placing a tray of water near the plants.
6. Air Circulation: Good air circulation is important to prevent diseases. Make sure your plants have plenty of space around them and that the area is well-ventilated. You can also use a small fan to improve air circulation.
7. Pest Control: Keep an eye out for pests such as aphids, spider mites, and cabbage worms. If you spot any pests, you can try washing them off with a strong stream of water or using an insecticidal soap.
Harvesting Your Bok Choy
The best part! You can start harvesting your bok choy when the leaves are about 6-8 inches long.
1. Harvesting Individual Leaves: You can harvest individual leaves as needed by cutting them off at the base of the plant. This will allow the plant to continue producing new leaves.
2. Harvesting the Entire Plant: If you want to harvest the entire plant, cut it off at the base of the stem.
3. Succession Planting: To ensure a continuous harvest, sow new seeds every 2-3 weeks. This is called succession planting.
Troubleshooting
Even with the best care, you might encounter some problems along the way. Here are a few common issues and how to address them:
* Yellowing Leaves: This could be a sign of overwatering, underwatering, or nutrient deficiency. Check the soil moisture and adjust your watering accordingly. If the soil is consistently moist, you may be overwatering. If the soil is dry, you may be underwatering. You can also try fertilizing your plants with a balanced liquid fertilizer.
* Leggy Growth: This is usually a sign of insufficient light. Make sure your plants are getting enough light, either from direct sunlight or grow lights.
* Bolting (Going to Seed): This can happen if the plants are exposed to high temperatures or stress. Try to keep the temperature consistent and avoid stressing the plants.
* Pests: As mentioned earlier, keep an eye out for pests and take action as soon as you spot them.
Enjoy Your Homegrown Bok Choy!
And there you have it! You’ve successfully grown bok choy indoors. Now you can enjoy your fresh, delicious greens in stir-fries, soups, salads, or any other dish you like. I hope this guide has been helpful. Happy gardening!
Conclusion
So, there you have it! Growing your own bok choy indoors is not only achievable, but it’s also a surprisingly rewarding experience. Forget those limp, overpriced heads of bok choy at the grocery store. Imagine stepping into your kitchen and harvesting crisp, vibrant leaves whenever you need them. This DIY trick transforms your windowsill into a miniature, edible garden, providing you with a constant supply of fresh, nutritious greens.
Why is this a must-try? Beyond the convenience and cost savings, growing bok choy indoors offers a connection to your food that’s often missing in our modern lives. You get to witness the entire life cycle of the plant, from tiny seedling to leafy vegetable. Plus, you have complete control over the growing environment, ensuring that your bok choy is free from harmful pesticides and herbicides. It’s a healthier, more sustainable way to enjoy this delicious vegetable.
But the benefits don’t stop there. This indoor gardening project is incredibly versatile. You can experiment with different varieties of bok choy, from the classic green-stemmed type to the petite and tender baby bok choy. You can also adjust the growing conditions to influence the flavor and texture of the leaves. Want a slightly sweeter taste? Try increasing the amount of light your plants receive. Prefer a more robust flavor? Let the soil dry out slightly between waterings.
Consider these variations to personalize your indoor bok choy garden:
* Succession Planting: Plant new seeds every few weeks to ensure a continuous harvest throughout the year.
* Companion Planting: Grow bok choy alongside other compatible herbs and vegetables, such as basil or chives, to deter pests and enhance flavor.
* Hydroponics: For a more advanced approach, try growing bok choy hydroponically. This method eliminates the need for soil and can result in faster growth rates.
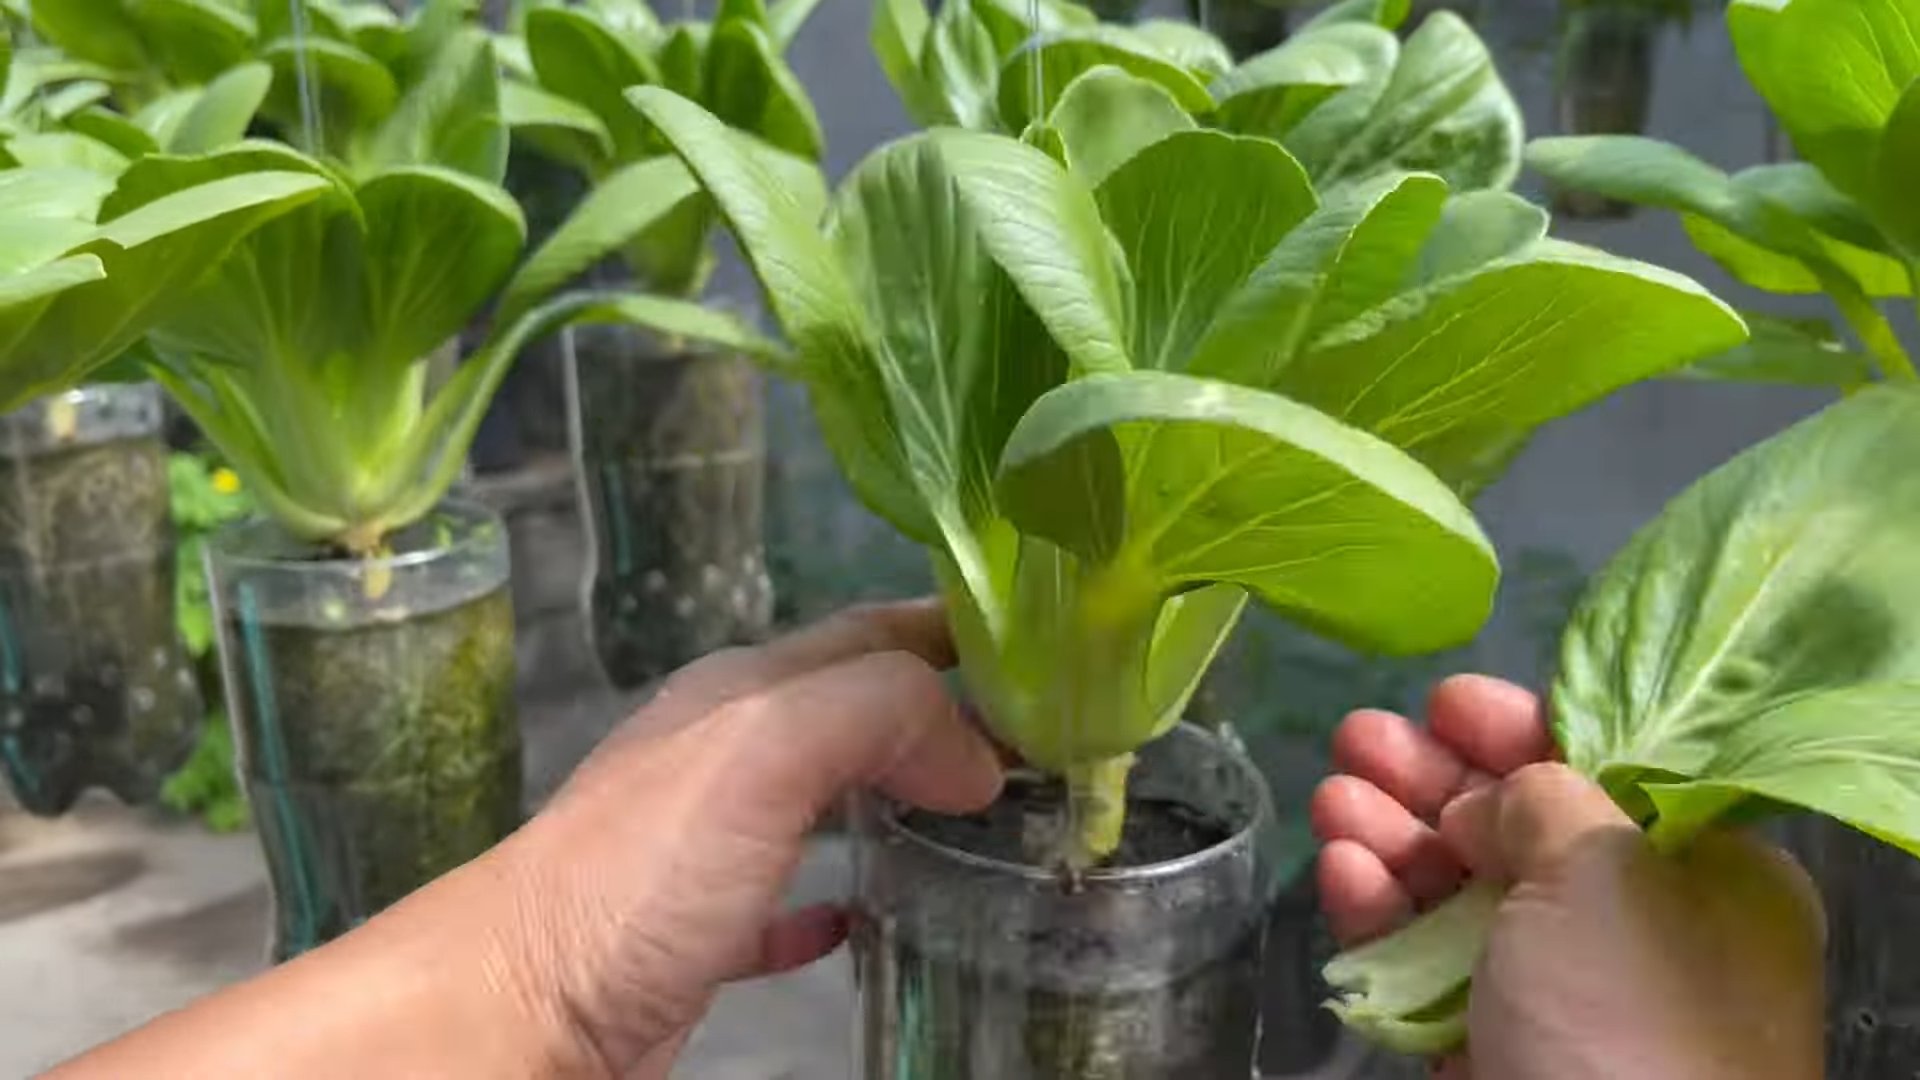
* Container Gardening: Get creative with your containers! Use repurposed jars, decorative pots, or even hanging baskets to add a touch of personality to your indoor garden.
Ultimately, growing bok choy indoors is about more than just having fresh vegetables on hand. It’s about embracing a more sustainable lifestyle, connecting with nature, and enjoying the satisfaction of growing your own food. It’s a simple yet profound way to bring a little bit of the garden into your home.
We wholeheartedly encourage you to give this DIY trick a try. It’s easier than you might think, and the rewards are well worth the effort. Don’t be afraid to experiment, learn from your mistakes, and most importantly, have fun!
Once you’ve harvested your first batch of homegrown bok choy, we’d love to hear about your experience. Share your tips, tricks, and photos with us in the comments below. Let’s create a community of indoor bok choy growers and inspire others to embark on this rewarding journey. Happy gardening!
Frequently Asked Questions (FAQ)
What kind of soil is best for growing bok choy indoors?
A well-draining potting mix is crucial for growing bok choy indoors. Avoid using garden soil, as it can become compacted and waterlogged in containers. Look for a potting mix that contains a blend of peat moss, perlite, and vermiculite. These ingredients help to improve drainage and aeration, which are essential for healthy root growth. You can also amend your potting mix with compost to provide additional nutrients. A slightly acidic to neutral pH (around 6.0 to 7.0) is ideal for bok choy.
How much light does bok choy need when grown indoors?
Bok choy thrives in bright light, so providing adequate light is essential for successful indoor growing. Aim for at least 6 hours of direct sunlight per day. If you don’t have a sunny windowsill, you can supplement with artificial grow lights. Fluorescent or LED grow lights are excellent options. Position the lights a few inches above the plants and keep them on for 12-14 hours per day. Rotate your plants regularly to ensure that all sides receive equal light exposure. Insufficient light can result in leggy growth and pale leaves.
How often should I water my indoor bok choy plants?
Watering frequency depends on several factors, including the size of your container, the type of potting mix, and the ambient temperature. As a general rule, water your bok choy plants when the top inch of soil feels dry to the touch. Avoid overwatering, as this can lead to root rot. When you water, water thoroughly until excess water drains out of the bottom of the container. Empty the saucer beneath the container to prevent the plants from sitting in water. During warmer months, you may need to water more frequently.
What are some common pests and diseases that affect indoor bok choy?
While indoor bok choy plants are generally less susceptible to pests and diseases than outdoor plants, they can still be affected. Common pests include aphids, spider mites, and whiteflies. Regularly inspect your plants for signs of infestation, such as small insects, webbing, or sticky residue. If you spot any pests, you can try washing them off with a strong stream of water or using insecticidal soap. Diseases such as damping-off and root rot can also occur, especially in overly moist conditions. Ensure good air circulation and avoid overwatering to prevent these problems.
How long does it take for bok choy to mature when grown indoors?
The time it takes for bok choy to mature indoors depends on the variety and growing conditions. Generally, you can expect to harvest your first leaves in about 30-45 days from planting. Baby bok choy varieties may mature even faster. You can harvest individual leaves as needed, or you can harvest the entire head at once. To harvest individual leaves, simply snip them off near the base of the plant. To harvest the entire head, cut it off at the base of the stem.
Can I grow bok choy from seed indoors?
Yes, growing bok choy from seed indoors is a great way to start your indoor garden. Sow the seeds directly into your potting mix, about ¼ inch deep. Keep the soil moist but not soggy. The seeds should germinate within a week or two. Once the seedlings have developed a few sets of true leaves, you can thin them out, leaving only the strongest plants.
How do I fertilize my indoor bok choy plants?
Bok choy is a relatively heavy feeder, so regular fertilization is important for optimal growth. Use a balanced liquid fertilizer, diluted to half strength, every two to three weeks. You can also amend your potting mix with compost or other organic fertilizers. Avoid over-fertilizing, as this can lead to excessive leaf growth and reduced flavor.
Is it possible to regrow bok choy from its base?
Yes, you can regrow bok choy from its base, similar to how you can regrow lettuce or celery. After harvesting the head of bok choy, place the base in a shallow dish of water. Make sure the cut end is submerged. Place the dish in a bright location and change the water every day or two. Within a few days, you should start to see new leaves emerging from the center of the base. Once the leaves have grown a few inches, you can transplant the base into a pot of soil.
What are some creative ways to use my homegrown bok choy?
Homegrown bok choy is incredibly versatile and can be used in a variety of dishes. It’s delicious stir-fried, steamed, sautéed, or added to soups and stews. You can also use it in salads, slaws, or as a topping for tacos and sandwiches. The tender leaves are great raw, while the thicker stems are best cooked. Don’t be afraid to experiment and try new recipes!
How do I prevent my indoor bok choy from bolting (going to seed)?
Bolting is a common problem with bok choy, especially in warm weather. To prevent bolting, keep your plants cool and well-watered. Provide shade during the hottest part of the day and avoid letting the soil dry out completely. You can also choose bolt-resistant varieties of bok choy. If your plants do start to bolt, you can still harvest the leaves, but they may become slightly bitter.

Leave a Comment