
Grow Bell Peppers Indoors? Absolutely! Imagine plucking fresh, vibrant bell peppers right from your own indoor garden, even when the snow is falling outside. Forget those bland, expensive grocery store peppers – with a few simple tricks, you can cultivate your own delicious supply year-round. For centuries, humans have sought ways to extend growing seasons and bring the bounty of the garden indoors. From ancient Roman greenhouses to modern hydroponic systems, the desire to nurture plants within our homes has always been strong.
But why should you learn to grow bell peppers indoors? Well, for starters, it’s incredibly rewarding! There’s nothing quite like the satisfaction of watching a tiny seed sprout and blossom into a plant laden with colorful peppers. Plus, it’s a fantastic way to ensure you have access to fresh, healthy produce, free from harmful pesticides. This DIY guide will walk you through every step, from choosing the right varieties to providing the perfect light and nutrients. I’ll share my favorite hacks and troubleshooting tips, so you can avoid common pitfalls and enjoy a thriving indoor bell pepper garden. Let’s get started and unlock the secrets to successfully grow bell peppers indoors!
Growing Peppers Indoors: Your Comprehensive DIY Guide
Hey plant friends! Are you tired of expensive, flavorless peppers from the supermarket? Me too! That’s why I decided to grow my own peppers indoors. And you know what? It’s easier than you think! In this article, I’ll show you step-by-step how to grow your own juicy, aromatic peppers right in your apartment. Let’s get started!
What You Need: The Right Equipment
Before we begin, we naturally need the right equipment. Here is a list of things you will definitely need:
- Pepper seeds: Choose your favorite varieties! There are countless types of peppers, from mild bell peppers to fiery chilis. Make sure the seeds are of good quality.
- Seedling pots or trays: Small pots or trays are ideal for starting the seeds.
- Seed-starting mix: This soil is specially designed for growing seedlings and contains fewer nutrients to promote root development.
- Planters: Larger pots (at least 20 cm / 8 inches in diameter) for the mature pepper plants.
- Potting soil: High-quality potting soil with good drainage.
- Grow light (optional): If you don’t have enough sunlight, a grow light is a good investment.
- Spray bottle: For moistening the soil.
- Fertilizer: Liquid fertilizer specifically for vegetables or tomatoes.
- Plant stakes or trellises: To support the plants as they get taller.
- Thermometer: To keep an eye on the temperature.
Phase 1: Starting the Pepper Seeds
Starting the seeds is the first and most important step. Here we lay the foundation for a successful pepper harvest.
- Prepare the seedling pots: Fill the seedling pots or trays with seed-starting mix. Press the soil down lightly.
- Sow the seeds: Place 2-3 seeds per pot on the soil. Cover the seeds with a thin layer of soil (about 0.5 cm / 0.2 inches).
- Water: Gently moisten the soil with a spray bottle. The soil should be damp, but not wet.
- Cover: Cover the pots with plastic wrap or a transparent lid to increase humidity.
- Location: Place the pots in a warm spot (22-25°C / 72-77°F). A windowsill above a heater is ideal.
- Observation: Check the soil daily and moisten it if necessary. The first seedlings should appear after 7-14 days.
- Remove the cover: As soon as the seedlings appear, remove the cover to prevent mold.
- Light: Place the pots in a bright location. If you don’t have enough sunlight, use a grow light.
- Thinning: When the seedlings have 2-3 leaves, thin them by removing the weakest seedling from each pot.
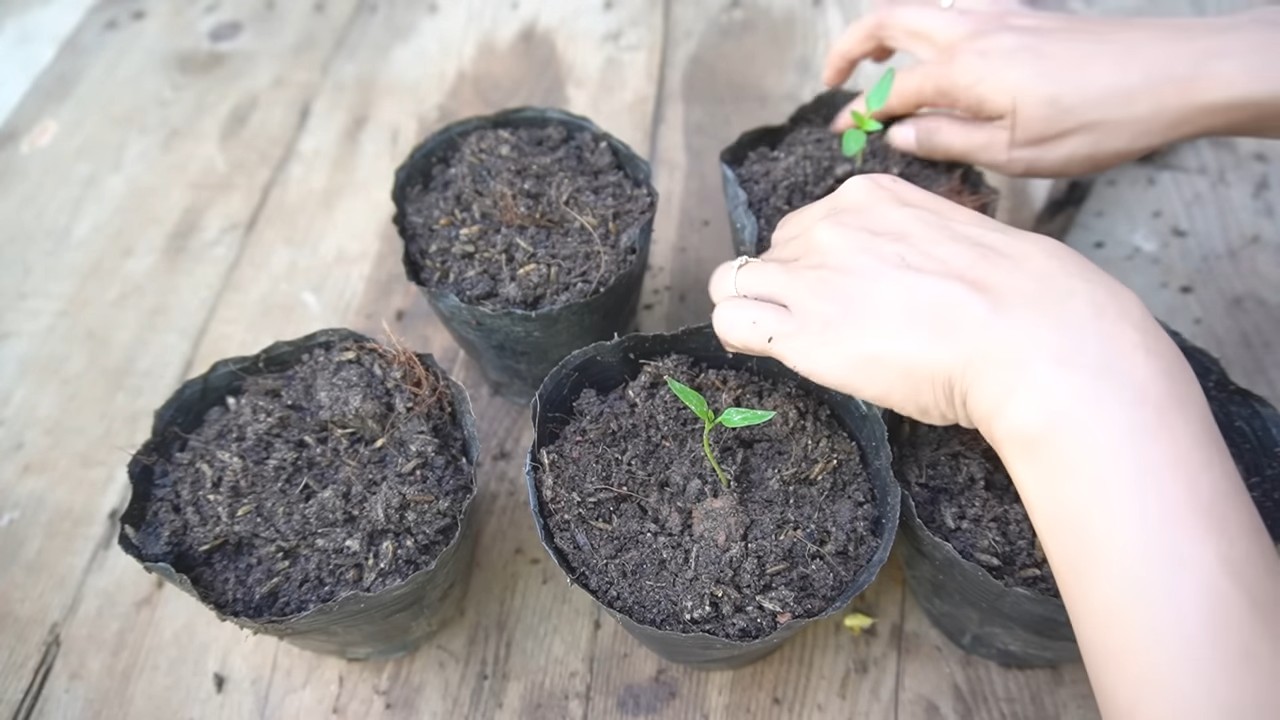
Phase 2: Transplanting into Larger Pots
Once the seedlings are strong enough, it’s time to transplant them into larger pots.
- Prepare the planters: Fill the planters with potting soil. Make sure the pots have drainage holes so excess water can run off.
- Remove the seedlings: Carefully take the seedlings out of the seedling pots. Be careful not to damage the roots.
- Planting: Place the seedlings in the planters. The top of the root ball should be level with the surface of the soil.
- Watering: Water the plants thoroughly.
- Location: Place the pots in a bright, warm location. Peppers need at least 6 hours of sunlight per day.
- Fertilizing: Start fertilizing the plants regularly. Use a liquid fertilizer specifically for vegetables or tomatoes. Follow the instructions on the packaging.
Phase 3: Caring for the Pepper Plants
Proper care is crucial for a bountiful harvest.
- Watering: Water the plants regularly, but avoid waterlogging. The soil should always be slightly moist.
- Fertilizing: Fertilize the plants every 2-3 weeks with a liquid fertilizer.
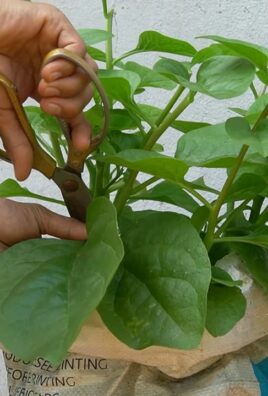
- Pruning: Regularly remove side shoots to encourage fruit production.
- Pollination: Peppers are self-pollinating, but you can assist pollination by gently shaking the flowers or pollinating them with a brush.
- Supporting: As the plants get taller, they may need support. Use plant stakes or trellises to support the plants.
- Pest control: Check the plants regularly for pests. If infested, you can use natural pesticides.
- Temperature: Peppers like warm temperatures. The ideal temperature is between 20 and 28°C (68-82°F).
- Humidity: Peppers like high humidity. You can increase humidity by regularly spraying the plants with water or using a humidifier.
Phase 4: Harvesting the Peppers
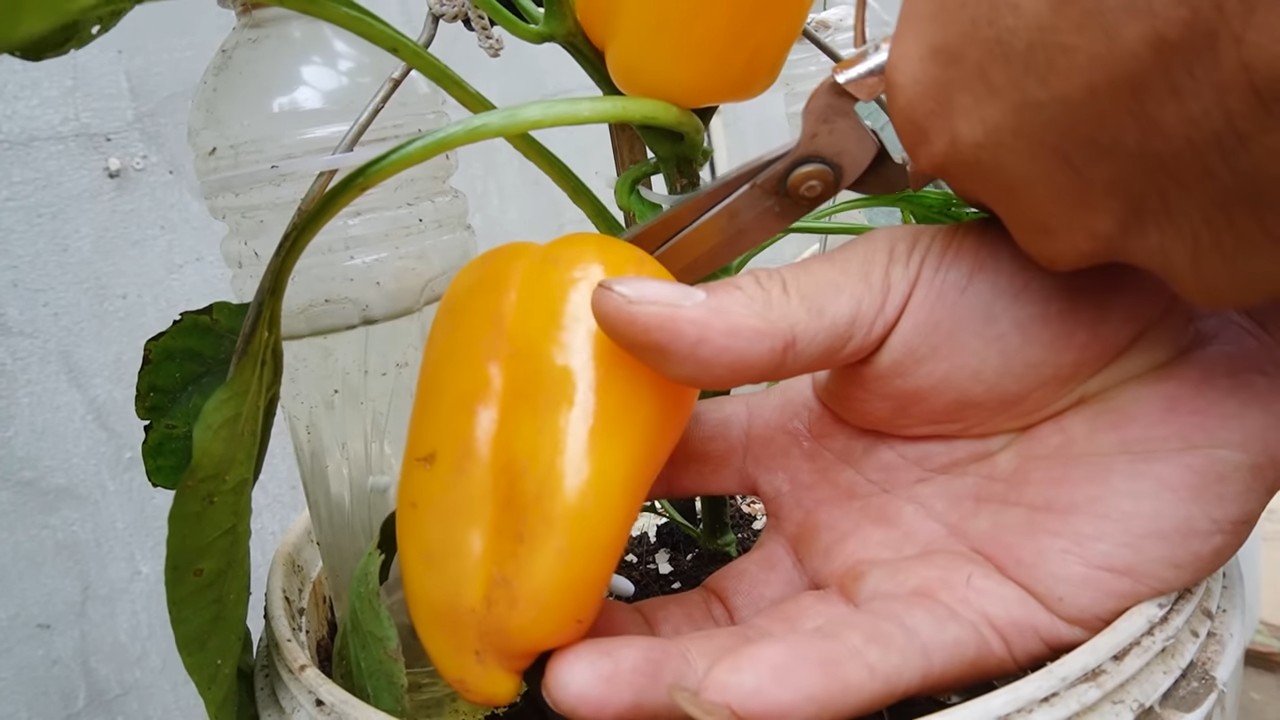
The time has finally come! The peppers are ripe and can be harvested.
- Signs of ripeness: The peppers are ripe when they have reached their final color and feel firm.
- Harvesting: Cut the peppers with a sharp knife or scissors.
- Storage: Store the peppers in the refrigerator. They will keep for several days there.
Additional Tips for a Successful Pepper Harvest
- Choose the right variety: Some pepper varieties are better suited for indoor growing than others. Research the different varieties before buying.
- Use high-quality soil: The quality of the soil is crucial for the growth of the plants. Use high-quality potting soil with good drainage.
- Provide sufficient light: Peppers need a lot of light. If you don’t have enough sunlight, use a grow light.
- Fertilize regularly: Peppers are heavy feeders. Fertilize the plants regularly to provide them with enough nutrients.
- Watch for pests: Check the plants regularly for pests and combat them if necessary.
- Be patient: Growing peppers takes time and patience. Don’t give up if it doesn’t work right away.
Common Problems and Solutions
Mold: Mold can be caused by excessive humidity. Ensure good ventilation and avoid waterlogging.
Yellow leaves: Yellow leaves can be a sign of a nutrient deficiency. Fertilize the plants with a liquid fertilizer.
Aphids: Aphids are common pests on pepper plants. You can rinse them off with a jet of water or use natural pesticides.
Fruit drop: Fruit drop can be caused by stress, e.g., from too little light, temperatures that are too high or too low, or irregular watering. Ensure optimal conditions to prevent fruit drop.
Conclusion
So, there you have it! Growing bell peppers indoors might seem like a daunting task, but with a little patience, the right setup, and these simple DIY tricks, you can enjoy fresh, vibrant bell peppers right from the comfort of your home, regardless of the season. This isn’t just about having access to fresh produce; it’s about the satisfaction of nurturing life, the joy of watching your plants thrive, and the pride of harvesting your own homegrown goodness.
Why is this DIY approach a must-try? Because it empowers you to take control of your food source, reduces your reliance on store-bought produce (which can often be expensive and lack flavor), and offers a sustainable way to enjoy the taste of summer all year round. Plus, it’s a fantastic hobby that connects you with nature and provides a rewarding sense of accomplishment.
Don’t be afraid to experiment with different varieties of bell peppers. While the instructions focus on standard bell peppers, you can easily adapt them to grow mini bell peppers, sweet Italian peppers, or even slightly spicier varieties. Consider using different types of grow lights to see which yields the best results for your specific environment. You can also explore different soil mixes to find the perfect balance of drainage and nutrient retention.
For those looking to maximize their yield, consider companion planting. Basil, for example, is known to repel pests and improve the flavor of bell peppers. Marigolds are another excellent choice for pest control.
And remember, growing bell peppers indoors is a learning process. Don’t get discouraged if your first attempt isn’t perfect. Observe your plants, adjust your techniques, and learn from your mistakes. The more you experiment, the better you’ll become at creating the ideal environment for your bell peppers to flourish.
We strongly encourage you to give this DIY trick a try. Imagine the satisfaction of adding freshly picked bell peppers to your salads, stir-fries, and other favorite dishes. Imagine the vibrant colors and delicious flavors that will brighten up your meals.
But most importantly, we want to hear about your experience! Share your tips, tricks, and challenges in the comments below. Let us know what worked for you, what didn’t, and any variations you tried. Your feedback will not only help other readers but also contribute to a community of indoor gardening enthusiasts. Let’s cultivate a greener, healthier, and more flavorful world, one bell pepper at a time. Growing bell peppers indoors is an achievable goal, and we’re here to support you every step of the way. So, grab your seeds, prepare your soil, and get ready to embark on a rewarding gardening adventure!
Frequently Asked Questions (FAQ)
Q: What kind of grow lights are best for growing bell peppers indoors?
A: The best grow lights for indoor bell peppers are typically LED grow lights. They are energy-efficient, produce less heat than traditional incandescent or fluorescent lights, and provide the full spectrum of light that bell peppers need to thrive. Look for LED grow lights specifically designed for plants, with a color temperature of around 6400K for vegetative growth and 2700K for flowering and fruiting. T5 fluorescent lights can also be used, but they are less energy-efficient than LEDs. High-Pressure Sodium (HPS) and Metal Halide (MH) lights are powerful but generate a lot of heat and are generally not recommended for small indoor setups. The key is to provide sufficient light intensity and duration (around 14-16 hours per day) to mimic natural sunlight.
Q: How often should I water my indoor bell pepper plants?
A: Watering frequency depends on several factors, including the size of the pot, the type of soil, the temperature, and the humidity. As a general rule, water your bell pepper plants when the top inch of soil feels dry to the touch. Avoid overwatering, as this can lead to root rot. When you water, water deeply until water drains out of the bottom of the pot. This ensures that the entire root system is adequately hydrated. During hotter months or when the plants are actively growing and fruiting, you may need to water more frequently. Conversely, during cooler months or when the plants are dormant, you may need to water less often. Always check the soil moisture before watering to avoid over or under-watering.
Q: What type of soil is best for growing bell peppers indoors?
A: The ideal soil for indoor bell peppers is a well-draining, nutrient-rich potting mix. Avoid using garden soil, as it can be too heavy and compact, leading to poor drainage and root problems. A good potting mix should contain a blend of peat moss, perlite, and vermiculite. Peat moss helps retain moisture, while perlite and vermiculite improve drainage and aeration. You can also add compost or other organic matter to the potting mix to provide additional nutrients. Look for a potting mix specifically formulated for vegetables or tomatoes, as these mixes typically contain the right balance of nutrients for bell peppers. Ensure the pH of the soil is slightly acidic, around 6.0 to 6.8, for optimal nutrient absorption.
Q: How do I pollinate my indoor bell pepper plants?
A: Bell peppers are self-pollinating, meaning they have both male and female parts in the same flower. However, indoor plants often require assistance with pollination because there is no wind or insect activity to help transfer pollen. You can manually pollinate your bell pepper plants by gently shaking the plants or using a small paintbrush to transfer pollen from the stamen (male part) to the pistil (female part) of each flower. Do this every few days, especially when the plants are flowering. You can also use a fan to create a gentle breeze, which can help distribute pollen. Another effective method is to use an electric toothbrush to vibrate the flower stems, which releases pollen.
Q: What are some common pests and diseases that affect indoor bell pepper plants, and how can I prevent them?
A: Common pests that can affect indoor bell pepper plants include aphids, spider mites, whiteflies, and fungus gnats. To prevent pest infestations, regularly inspect your plants for signs of pests, such as small insects, webbing, or sticky residue. Keep your growing area clean and free of debris. You can also use insecticidal soap or neem oil to control pests. For fungus gnats, allow the top inch of soil to dry out between waterings. Common diseases that can affect indoor bell pepper plants include powdery mildew, blossom end rot, and fungal infections. To prevent diseases, ensure good air circulation around your plants, avoid overwatering, and use a well-draining potting mix. Blossom end rot is caused by a calcium deficiency, so you can add calcium to the soil or use a calcium-rich fertilizer. If you notice any signs of disease, remove the affected leaves or plants immediately to prevent the spread of the disease.
Q: How long does it take for bell peppers to mature indoors?
A: The time it takes for bell peppers to mature indoors depends on the variety of bell pepper and the growing conditions. Generally, it takes about 60-80 days from transplanting seedlings to harvesting mature bell peppers. Some smaller varieties may mature faster, while larger varieties may take longer. Ensure your plants receive adequate light, water, and nutrients to promote healthy growth and fruiting. Monitor the color and size of the bell peppers to determine when they are ready to harvest. Bell peppers are typically harvested when they are fully colored and firm to the touch.
Q: Can I grow bell peppers indoors year-round?
A: Yes, you can grow bell peppers indoors year-round, provided you provide the right growing conditions. This includes adequate light, water, nutrients, and temperature. Use grow lights to supplement natural light, especially during the winter months. Maintain a consistent temperature of around 70-80°F during the day and 60-70°F at night. Ensure good air circulation to prevent diseases. With proper care, you can enjoy a continuous harvest of fresh bell peppers throughout the year.
Leave a Comment