
Grow Arugula at Home and unlock a world of peppery freshness right at your fingertips! Imagine stepping outside your door and snipping vibrant, flavorful arugula leaves for your salad, pizza, or even a zesty pesto. No more bland supermarket greens – just the crisp, peppery bite of homegrown arugula, bursting with flavor and nutrients.
Arugula, also known as rocket, has a rich history dating back to Roman times, where it was prized for its culinary and medicinal properties. From ancient emperors to modern foodies, this leafy green has captivated palates for centuries. But why rely on expensive grocery store options when you can easily cultivate your own supply?
In today’s world, where fresh, healthy ingredients are more important than ever, knowing how to grow arugula at home is a game-changer. Not only will you save money, but you’ll also have complete control over the growing process, ensuring your arugula is free from harmful pesticides and packed with flavor. Plus, it’s incredibly rewarding to nurture a plant from seed to table! This DIY guide will provide you with simple, effective tricks and hacks to successfully grow arugula, even if you have limited space or gardening experience. Let’s get started and bring the taste of fresh, homegrown arugula to your kitchen!
Growing Arugula at Home: Your DIY Guide for Crisp Salad
I love arugula! That peppery, nutty flavor is simply irresistible in salads, on pizza, or as a pesto. And the best part? It’s super easy to grow at home, even if you don’t have a huge garden. I’ll show you how it’s done!
What You Need: The Ingredients for Your Arugula Success
Before we start, here’s a list of everything you’ll need. Don’t worry, you probably have most of it at home already!
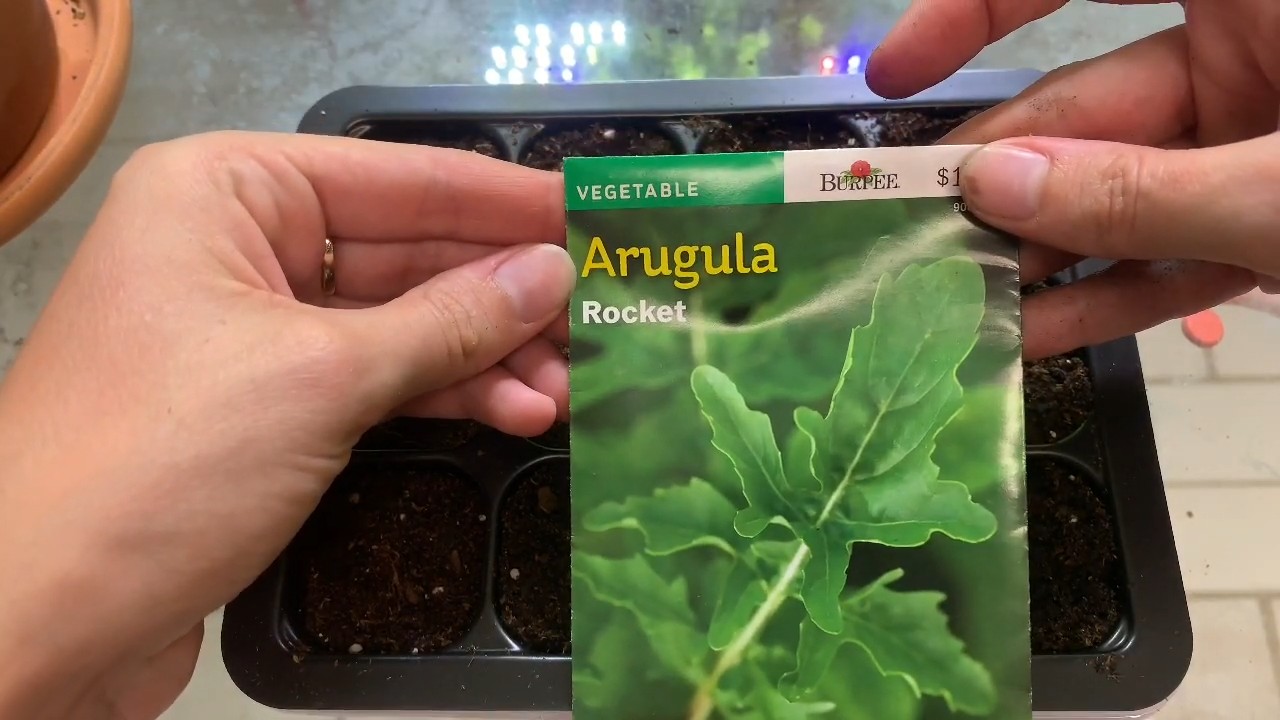
- Arugula seeds: You can find them in any garden center or online. Look for fresh seeds for a better germination rate.
- Planter or garden bed: A pot at least 15 cm (6 inches) in diameter or a section of a garden bed is ideal.
- High-quality potting soil: Well-draining soil is important so the roots don’t rot.
- Watering can or spray bottle: For gentle watering.
- Optional: Liquid fertilizer for leafy greens (I like to use an organic fertilizer).
- Optional: A small shovel or trowel for planting.
The Preparation: The Foundation for a Bountiful Harvest
Before we put the seeds in the ground, we need to prepare everything. It’s very simple, I promise!
- Choose the right location: Arugula loves the sun, but it doesn’t like too much heat. A spot with at least 4-6 hours of sun per day is ideal. If you live in a very hot area, choose a location with some afternoon shade.
- Prepare the planter: If you’re using a pot, make sure it has drainage holes so excess water can run off. Fill the pot with potting soil, but leave about 2-3 cm (1 inch) of space at the top.
- Prepare the garden bed: Loosen the soil in the bed with a rake and remove stones and weeds. Improve the soil quality by working in compost or well-rotted manure.
Sowing the Seeds: The Start to a Peppery Pleasure
Now comes the exciting part: sowing the seeds!
- Sow the seeds: Sprinkle the arugula seeds evenly over the surface of the soil. They are very small, so don’t overdo it. I like to sow them a bit more densely because not all seeds will germinate.
- Cover the seeds: Cover the seeds with a thin layer of soil (about 0.5 cm or 0.2 inches).
- Water gently: Moisten the soil with a watering can or spray bottle. Make sure the soil is damp but not wet.
Care: So Your Arugula Thrives
Care is the key to a bountiful harvest. Arugula is low-maintenance, but there are a few things you should keep in mind.
- Watering: Keep the soil moist, but not wet. Water regularly, especially in dry weather. Avoid waterlogging, as this can lead to root rot. I always check the soil with my finger. If it feels dry, it’s time to water.
- Thinning: When the seedlings are about 2-3 cm (1 inch) tall, thin them out so they are about 5-7 cm (2-3 inches) apart. This gives them enough space to grow. By the way, you can eat the thinned seedlings too!
- Fertilizing (optional): If you like, you can fertilize your arugula every few weeks with a liquid fertilizer for leafy greens. This promotes growth and ensures strong leaves. I like to use an organic fertilizer because it’s gentler on the environment.
- Weed control: Keep the bed or pot free of weeds. Weeds compete with the arugula for nutrients and water.
- Pest protection: Arugula is relatively resistant to pests, but sometimes slugs or flea beetles can become a problem. Slug bait or a net over the bed can help. Flea beetles can often be driven away with a strong jet of water.
The Harvest: The Reward for Your Effort
After about 3-4 weeks, you can harvest your arugula!
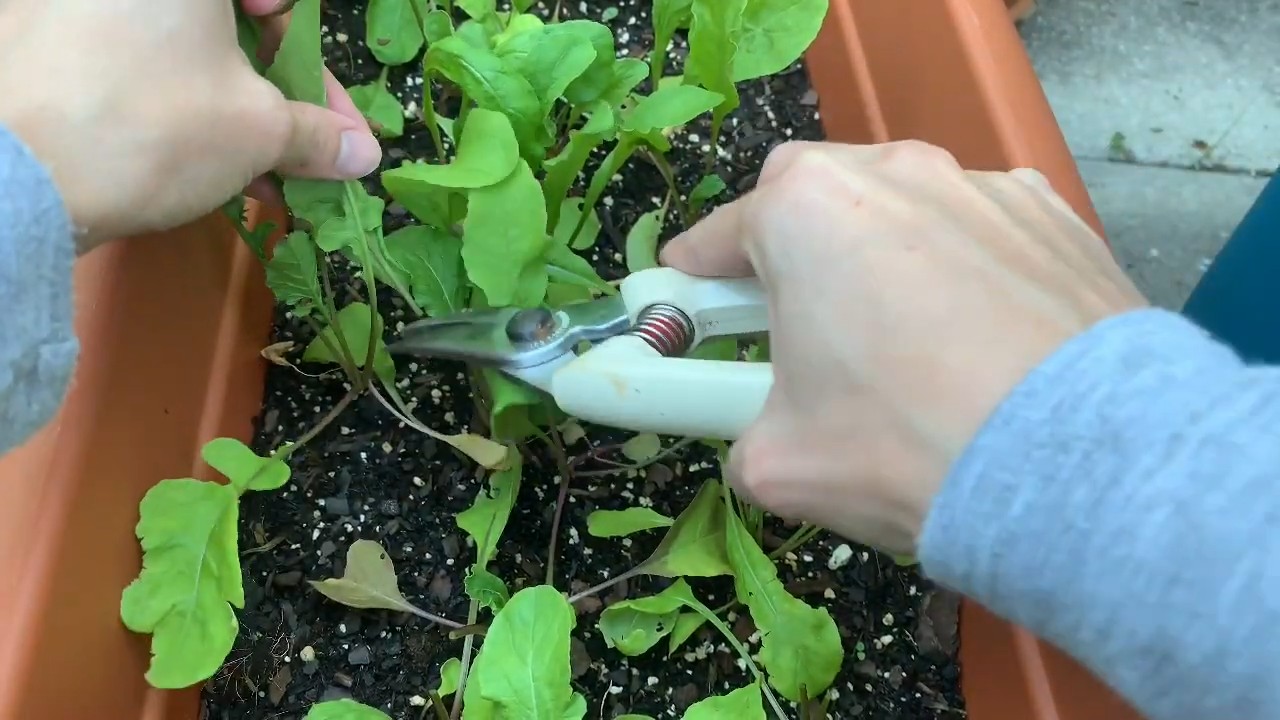
- Harvest the leaves: Cut the outer leaves with scissors or a knife. Leave the inner leaves so the plant can continue to grow.
- Regular harvesting: Harvest the arugula regularly to encourage the growth of new leaves. The more often you harvest, the longer you can enjoy your crop.
- Enjoy your arugula: Wash the leaves thoroughly and enjoy them in salads, on pizza, or as a pesto.
Common Problems and Solutions: Don’t Panic, I’ll Help You!
Even when growing arugula, problems can sometimes arise. But don’t worry, I have the solutions for you!
- Yellow leaves: Yellow leaves can be a sign of overwatering, nutrient deficiency, or pest infestation. Check your watering, fertilize if necessary, and combat pests.
- Slow growth: Slow growth can be due to too little sun, poor soil, or a lack of nutrients. Choose a sunnier location, improve the soil quality, and fertilize regularly.
- Bitter taste: Arugula can taste bitter if it gets too much sun or is too dry. Choose a location with some afternoon shade and water regularly.
- Pests: Slugs and flea beetles can infest arugula. Slug bait or a net over the bed can help. Flea beetles can often be driven away with a strong jet of water.
Arugula in a Pot vs. in a Bed: Which is Better?
Both options have their pros and cons.
- Arugula in a pot: Ideal for small balconies or patios. You can easily move the pot to find the best location. However, the soil in a pot dries out faster than in a garden bed.
- Arugula in a bed: Offers more space for the roots and retains moisture better. However, you are tied to the location.
I personally like to grow my arugula in a pot because I can place it flexibly.
Arugula Varieties: Variety for Your Palate
There are different arugula varieties that differ in taste and appearance. Here are a few examples:
- Wild Arugula: Has a more intense, peppery taste than regular arugula.
- Italian Arugula: Has a milder, nuttier taste.
- Rocket: Is another name for arugula.
Try different varieties to find your favorite!
Arugula in the Kitchen: More Than Just Salad
Arugula is versatile in the kitchen. Here are a few ideas:
- Salad: The classic! Mix arugula with other types of lettuce, tomatoes, cucumbers, and a delicious dressing.
- Pizza: Top your pizza with fresh arugula after baking.
- Pesto: Replace basil with arugula for a peppery pesto.
- Soup: Add fresh arugula to your soup just before serving.
- Sandwich: Top your sandwich with arugula for an extra kick.
Preserving Arugula: How to Enjoy It Longer
Arugula does not stay fresh for very long. Here are a few tips on how you can make it last longer:
In the refrigerator: Wrap the arugula in a damp paper towel and store it in the refrigerator. It will keep for about 2-3 days.
Conclusion
So, there you have it! Growing your own arugula at home is not only surprisingly simple, but it’s also incredibly rewarding. Forget those wilted, pre-packaged greens from the grocery store. Imagine stepping out to your balcony, patio, or even just a sunny windowsill, and harvesting a handful of fresh, peppery arugula whenever you need it. The difference in flavor and texture is truly remarkable. You’ll be amazed at how much more vibrant and flavorful homegrown arugula is compared to anything you can buy.
This isn’t just about saving a few dollars (though that’s a nice bonus!). It’s about connecting with your food, knowing exactly where it comes from, and enjoying the satisfaction of nurturing something from seed to table. Plus, it’s a fantastic way to add a touch of green to your living space, even if you don’t have a traditional garden.
We’ve covered the basics, but don’t be afraid to experiment! Try different varieties of arugula – some are spicier than others. Play around with the container size and soil mix to see what works best for your environment. You can even try succession planting, sowing new seeds every few weeks, to ensure a continuous supply of fresh arugula throughout the growing season. Consider companion planting your arugula with other herbs or vegetables that benefit from its presence, like carrots or radishes.
Growing arugula at home is a gateway to a more sustainable and flavorful lifestyle. It’s a small step that can make a big difference in your culinary experience.
We wholeheartedly encourage you to give this DIY trick a try. It’s easy, affordable, and incredibly satisfying. Once you taste the difference between homegrown and store-bought arugula, you’ll never go back!
Don’t forget to share your experiences with us! We’d love to hear about your successes, your challenges, and any tips or tricks you discover along the way. Post photos of your arugula plants, share your favorite recipes using your homegrown greens, and let us know what you think. Your feedback will help us improve this guide and inspire others to embark on their own arugula-growing adventures. Happy gardening!
Frequently Asked Questions (FAQ)
What are the best conditions for growing arugula at home?
Arugula thrives in cool weather, ideally between 60°F and 70°F (15°C and 21°C). It prefers partial shade, especially during the hottest part of the day, but needs at least 6 hours of sunlight. Well-draining soil is crucial to prevent root rot. If you’re growing arugula indoors, a sunny windowsill or grow lights will provide the necessary light. Consistent moisture is important, but avoid overwatering, which can lead to fungal diseases.
How long does it take for arugula to grow from seed?
One of the great things about arugula is how quickly it grows! You can typically expect to harvest your first leaves within 3 to 4 weeks of planting. The exact time will depend on the variety of arugula, the growing conditions, and the time of year. Warmer temperatures can speed up germination and growth, while cooler temperatures may slow it down slightly.
Can I grow arugula in containers?
Absolutely! Arugula is perfectly suited for container gardening. Choose a container that is at least 6 inches deep and wide to allow the roots to develop properly. Make sure the container has drainage holes to prevent waterlogging. Use a good-quality potting mix that is well-draining and rich in organic matter. Container gardening is an excellent option for those with limited space or who want to grow arugula indoors.
What kind of soil is best for growing arugula?
Arugula prefers well-draining soil that is rich in organic matter. A slightly acidic to neutral pH (around 6.0 to 7.0) is ideal. You can improve the soil by adding compost, aged manure, or other organic amendments. Avoid heavy clay soils, as they can retain too much moisture and lead to root rot. If you’re using a potting mix, choose one that is specifically formulated for vegetables or herbs.
How often should I water my arugula plants?
Arugula needs consistent moisture, but it doesn’t like to be waterlogged. Water your plants whenever the top inch of soil feels dry to the touch. Water deeply, ensuring that the water reaches the roots. Avoid watering the leaves, as this can increase the risk of fungal diseases. During hot weather, you may need to water more frequently.
How do I harvest arugula?
You can start harvesting arugula leaves when they are about 2 to 3 inches long. Simply snip off the outer leaves with scissors or your fingers, leaving the inner leaves to continue growing. This cut-and-come-again method allows you to harvest arugula multiple times from the same plant. Harvest in the morning for the best flavor.
What are some common pests and diseases that affect arugula?
Arugula is generally a hardy plant, but it can be susceptible to certain pests and diseases. Common pests include aphids, flea beetles, and slugs. You can control these pests by handpicking them off the plants, using insecticidal soap, or applying diatomaceous earth. Common diseases include downy mildew and powdery mildew. To prevent these diseases, ensure good air circulation, avoid overwatering, and remove any infected leaves promptly.
Can I grow arugula indoors year-round?
Yes, you can grow arugula indoors year-round, provided you have adequate light. A sunny windowsill that receives at least 6 hours of direct sunlight per day is ideal. If you don’t have enough natural light, you can use grow lights to supplement. Keep the temperature cool and provide consistent moisture. With proper care, you can enjoy fresh arugula from your indoor garden all year long.
How do I prevent arugula from bolting (going to seed)?
Bolting is when a plant prematurely flowers and goes to seed, which can make the leaves bitter. Arugula is more likely to bolt in hot weather. To prevent bolting, plant arugula in partial shade, especially during the hottest part of the day. Keep the soil consistently moist, and harvest the leaves regularly. Succession planting, sowing new seeds every few weeks, can also help ensure a continuous supply of fresh arugula before the plants have a chance to bolt.
What are some creative ways to use homegrown arugula?
The possibilities are endless! Arugula adds a peppery kick to salads, sandwiches, and pizzas. It can also be used in pesto, soups, and stir-fries. Try adding it to scrambled eggs or omelets for a flavorful breakfast. Arugula pairs well with a variety of flavors, including lemon, garlic, Parmesan cheese, and balsamic vinegar. Get creative and experiment with different recipes to discover your favorite ways to enjoy your homegrown arugula.
Leave a Comment