
Easy tomato growing routine – sounds like a dream, right? I know, I know, visions of juicy, sun-ripened tomatoes bursting with flavor dance in your head, but the reality of battling pests, diseases, and unpredictable weather can quickly turn that dream into a gardening nightmare. But what if I told you that achieving that tomato-growing dream is actually within reach, even for the most novice gardener?
For centuries, tomatoes have held a special place in cultures around the world. Originating in South America, they were initially viewed with suspicion in Europe, but eventually, their vibrant color and delicious taste won everyone over. Now, they’re a staple in countless cuisines, from Italian pasta sauces to refreshing summer salads.
That’s why I’m so excited to share these simple yet effective DIY tricks and hacks that will transform your tomato-growing experience. Forget complicated gardening jargon and back-breaking labor. This article is all about making easy tomato growing routine accessible to everyone. We’ll cover everything from choosing the right varieties for your climate to creating a simple watering system that will keep your plants happy and healthy. So, grab your gardening gloves, and let’s get ready to harvest a bumper crop of delicious tomatoes this season! You’ll be amazed at how much easier and more rewarding growing your own tomatoes can be.

DIY: Unlock a Bountiful Tomato Harvest with This Simple Routine
Hey there, fellow gardening enthusiasts! Are you dreaming of juicy, sun-ripened tomatoes bursting with flavor, but feel intimidated by the thought of growing them yourself? Don’t worry, I’m here to share my super easy tomato growing routine that even a complete beginner can master. I promise, with a little bit of love and these simple steps, you’ll be enjoying homegrown tomatoes in no time!
Choosing the Right Tomato Variety
Before we get our hands dirty, let’s talk about tomato varieties. This is crucial because different types thrive in different climates and have varying growth habits.
* Determinate Tomatoes: These are bush-type tomatoes that grow to a certain size and then stop. They produce most of their fruit all at once, making them perfect for canning or making sauce. Examples include Roma and Celebrity.
* Indeterminate Tomatoes: These are vining tomatoes that keep growing and producing fruit throughout the season. They require staking or caging for support. Examples include Beefsteak, Cherry, and Heirloom varieties.
* Consider your climate: If you live in a cooler climate with a shorter growing season, opt for early-maturing varieties. If you have a long, warm growing season, you can experiment with later-maturing varieties.
* Think about your needs: Do you want tomatoes for salads, sandwiches, or sauces? Choose varieties that are best suited for your intended use.
I personally love growing a mix of determinate and indeterminate varieties to have a continuous supply of tomatoes throughout the season.
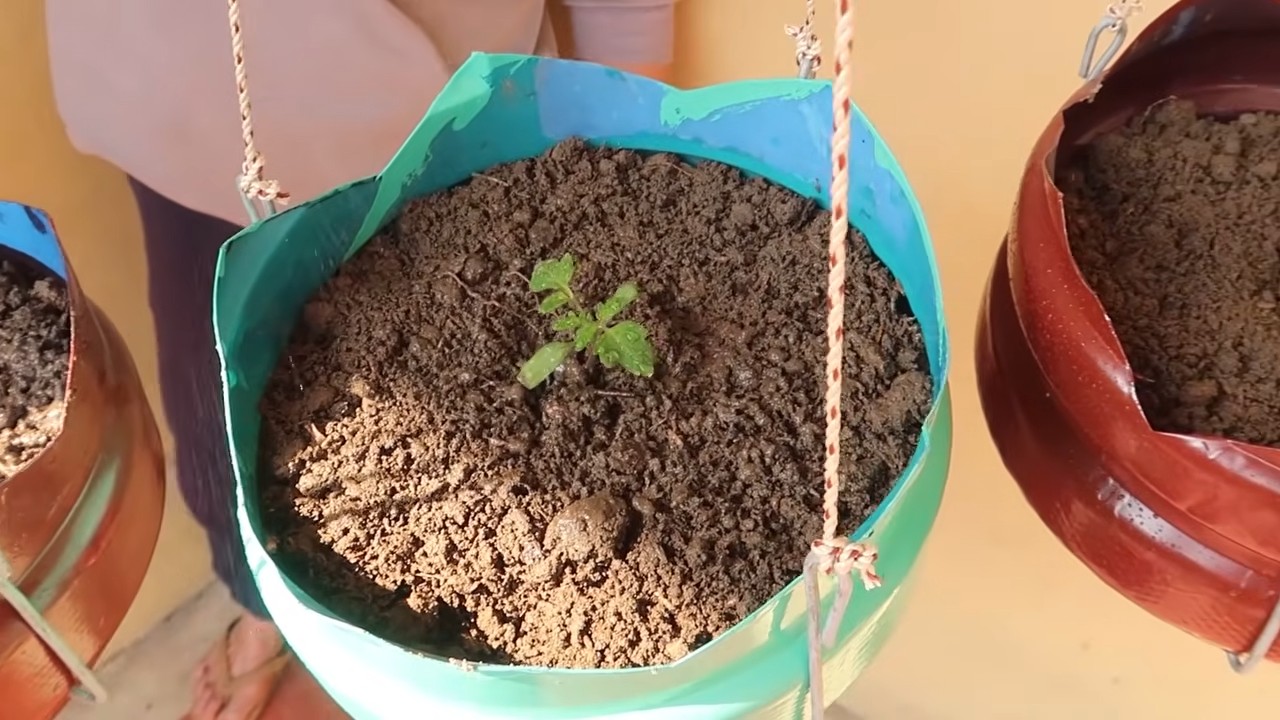
Getting Started: Planting Your Tomato Seedlings
Okay, now for the fun part! We’re going to get those tomato seedlings into the ground (or pots!).
1. Prepare the Soil: Tomatoes love rich, well-draining soil. Amend your garden soil with compost or well-rotted manure to improve its fertility and drainage. If you’re growing in containers, use a high-quality potting mix specifically formulated for vegetables. I like to add a handful of bone meal to the planting hole to provide phosphorus, which promotes strong root growth.
2. Choose the Right Location: Tomatoes need at least 6-8 hours of sunlight per day. Choose a sunny spot in your garden or on your patio. Make sure the location is also protected from strong winds.
3. Dig the Planting Hole: Dig a hole that is deep enough to bury the bottom third of the tomato seedling’s stem. This encourages the plant to develop more roots along the buried stem, resulting in a stronger and healthier plant.
4. Plant the Seedling: Gently remove the tomato seedling from its container. Loosen the roots slightly before planting. Place the seedling in the hole and backfill with soil. Gently pat the soil around the base of the plant.
5. Water Thoroughly: Water the newly planted seedling thoroughly to help settle the soil and encourage root growth.
Supporting Your Tomato Plants: Staking or Caging
As your tomato plants grow, they’ll need support to prevent them from sprawling on the ground. This is especially important for indeterminate varieties.
* Staking: Drive a sturdy stake into the ground near the tomato plant, a few inches away from the stem. As the plant grows, tie the stem to the stake using soft twine or plant ties. Be careful not to tie the stem too tightly, as this can restrict growth.
* Caging: Place a tomato cage around the plant when it’s still small. The cage will provide support as the plant grows. Make sure the cage is tall enough to accommodate the mature size of the tomato variety you’re growing. I find that using extra tall cages is best, especially for vigorous indeterminate varieties.
I personally prefer caging my tomato plants because it’s less work than staking and provides more comprehensive support.
Watering and Feeding Your Tomato Plants
Consistent watering and feeding are essential for healthy tomato growth and abundant fruit production.
1. Watering: Water your tomato plants deeply and regularly, especially during hot, dry weather. Aim to water at the base of the plant to avoid wetting the foliage, which can lead to fungal diseases. I usually water deeply every 2-3 days, depending on the weather.
2. Fertilizing: Feed your tomato plants with a balanced fertilizer every 2-3 weeks. Look for a fertilizer that is specifically formulated for tomatoes or vegetables. Follow the instructions on the fertilizer package. I like to use a liquid fertilizer that I can apply directly to the soil.
3. Mulching: Apply a layer of mulch around the base of your tomato plants to help retain moisture, suppress weeds, and regulate soil temperature. I use straw or shredded leaves as mulch.
Pruning Your Tomato Plants (For Indeterminate Varieties)
Pruning indeterminate tomato plants can help improve air circulation, promote fruit production, and prevent diseases.
* Remove Suckers: Suckers are small shoots that grow in the “V” between the main stem and the branches. Remove these suckers regularly to encourage the plant to focus its energy on producing fruit. I usually pinch off the suckers when they are small, about 2-3 inches long.
* Remove Yellowing Leaves: Remove any yellowing or diseased leaves from the bottom of the plant to improve air circulation and prevent the spread of disease.
I find that pruning my indeterminate tomato plants makes a huge difference in their overall health and productivity.
Dealing with Pests and Diseases
Even with the best care, tomato plants can sometimes be affected by pests and diseases. Here are some common problems and how to deal with them:
* Aphids: These small, sap-sucking insects can weaken tomato plants. Spray them with a strong stream of water or use insecticidal soap.
* Tomato Hornworms: These large, green caterpillars can quickly defoliate tomato plants. Handpick them off the plants or use Bacillus thuringiensis (Bt), a natural insecticide.
* Blossom End Rot: This condition causes the bottom of the tomato to rot. It’s usually caused by calcium deficiency or inconsistent watering. Ensure consistent watering and amend the soil with calcium if necessary. I add crushed eggshells to my soil to provide extra calcium.
* Early Blight: This fungal disease causes dark spots on the leaves. Remove infected leaves and spray the plant with a fungicide.
I always try to use organic methods to control pests and diseases whenever possible.
Harvesting Your Tomatoes
The moment you’ve been waiting for! Harvesting your delicious, homegrown tomatoes.
1. Check for Ripeness: Tomatoes are ripe when they are fully colored and slightly soft to the touch. The color will depend on the variety you’re growing.
2. Gently Twist: Gently twist the tomato off the vine. If it doesn’t come off easily, it’s probably not quite ripe yet.
3. Enjoy! Enjoy your fresh, homegrown tomatoes in salads, sandwiches, sauces, or just eat them straight off the vine!
I love the feeling of harvesting my own tomatoes. It’s so rewarding to see the fruits (literally!) of my labor.
Troubleshooting Common Tomato Growing Problems
Sometimes, even with the best intentions, things can go wrong. Here are a few common problems and how to address them:
* No Flowers: If your tomato plants aren’t producing flowers, it could be due to a lack of sunlight, too much nitrogen fertilizer, or extreme temperatures. Make sure your plants are getting enough sunlight, use a balanced fertilizer, and protect them from extreme heat or cold.
* Flowers Dropping: Tomato flowers can drop off the plant if the temperature is too hot or too cold, or if the plant is not getting enough water. Ensure consistent watering and protect the plants from extreme temperatures.
* Cracked Tomatoes: Cracked tomatoes are usually caused by inconsistent watering. Water your plants regularly and deeply to prevent cracking.
Remember, gardening is a learning process. Don’t be discouraged if you encounter problems along the way. Just keep learning and experimenting, and you’ll eventually become a tomato-growing pro!
Extending Your Tomato Season
Want to enjoy fresh tomatoes for even longer? Here are a few tips for extending your tomato season:
* Start Seeds Indoors Early: Start your tomato seeds indoors 6-8 weeks before the last expected frost. This will give you a head start on the growing season.
* Use Row Covers: Row covers can protect your tomato plants from frost and extend the growing season in the fall.
* Choose Late-Maturing Varieties: Plant some late-maturing varieties that will continue to produce fruit later in the season.
* Greenhouse Growing: If you have a greenhouse, you can grow tomatoes year-round.
I hope this guide has inspired you to grow your own tomatoes. It’s a rewarding and delicious experience! Happy gardening!
Conclusion
So, there you have it! This simple, yet incredibly effective, DIY trick for nurturing your tomato plants is more than just a gardening hack; it’s a pathway to a bountiful harvest of juicy, flavorful tomatoes. We’ve walked you through the process, highlighting how easy it is to implement and the significant impact it can have on your plants’ health and productivity.
Why is this a must-try? Because it addresses some of the most common challenges faced by tomato growers: inconsistent watering, nutrient deficiencies, and the dreaded blossom end rot. By providing a slow-release, targeted feeding system directly to the roots, you’re ensuring your plants receive a steady supply of the nutrients they need to thrive. This method minimizes water waste, reduces the risk of fungal diseases caused by overhead watering, and promotes strong root development, leading to healthier, more resilient plants.
But the beauty of this DIY trick lies not only in its simplicity but also in its adaptability. Feel free to experiment with variations to suit your specific needs and preferences. For example, if you’re growing organic tomatoes, use organic fertilizer or compost tea in your bottles. You can also adjust the size of the holes in the bottle caps to control the flow rate, depending on the size of your plants and the climate you live in. Consider adding a layer of mulch around the base of your plants to further conserve moisture and suppress weeds.
Don’t be afraid to get creative! Perhaps you’ll discover a new and improved version of this DIY trick that works even better for you. The possibilities are endless.
We wholeheartedly encourage you to give this easy tomato growing routine a try. It’s a small investment of time and effort that can yield significant rewards in the form of a delicious and abundant tomato harvest. Imagine the satisfaction of biting into a sun-ripened tomato, knowing that you nurtured it from seedling to fruit using your own ingenuity.
And once you’ve experienced the benefits of this DIY trick, we’d love to hear about your results! Share your experiences, tips, and variations in the comments section below. Let’s create a community of tomato enthusiasts who are passionate about growing their own food and sharing their knowledge with others. Your insights could inspire and help fellow gardeners achieve their tomato-growing dreams.
Ready to transform your tomato garden? Grab your empty plastic bottles, gather your supplies, and get ready to witness the magic of this simple yet powerful DIY trick. Happy gardening!
Frequently Asked Questions (FAQ)
What type of plastic bottles are best to use for this DIY trick?
Ideally, you should use sturdy plastic bottles that can withstand the elements and won’t easily degrade in the sun. Recycled soda or water bottles work well, but avoid using thin, flimsy bottles that might collapse or crack. Dark-colored bottles are preferable as they help to prevent algae growth inside the bottle. Make sure to thoroughly clean the bottles before using them to remove any residue that could harm your plants.
How often should I refill the bottles with water and fertilizer?
The frequency of refilling depends on several factors, including the size of the bottle, the size of your tomato plants, the climate, and the type of soil you’re using. As a general guideline, check the bottles every 2-3 days and refill them when they are about half empty. During hot, dry weather, you may need to refill them more frequently. Observe your plants closely and adjust the watering schedule accordingly. If the soil around the base of the plants is consistently dry, you may need to increase the frequency of refilling or use larger bottles.
Can I use this DIY trick for other types of plants besides tomatoes?
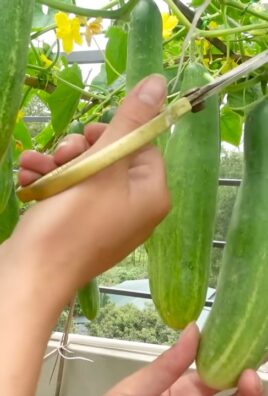
Yes, this DIY trick can be adapted for other plants that benefit from consistent watering and targeted fertilization. Vegetables like peppers, cucumbers, and eggplants can also thrive with this method. However, you may need to adjust the size of the bottles and the concentration of fertilizer depending on the specific needs of the plant. For example, plants with shallow root systems may not require as much water or fertilizer as tomatoes. Experiment and observe your plants to determine the optimal watering and feeding schedule.
What type of fertilizer should I use in the bottles?
The best type of fertilizer to use depends on your personal preferences and the specific needs of your tomato plants. You can use a commercially available tomato fertilizer, either liquid or granular, following the instructions on the label. Alternatively, you can use organic fertilizers like compost tea, fish emulsion, or seaweed extract. These organic options provide a slow-release source of nutrients and also help to improve the soil health. Avoid using fertilizers that are high in nitrogen, as this can promote excessive foliage growth at the expense of fruit production. Look for a fertilizer that is balanced in nitrogen, phosphorus, and potassium, with a slightly higher phosphorus content to encourage flowering and fruiting.
What if I see algae growing inside the bottles?
Algae growth inside the bottles is a common occurrence, especially if you’re using clear plastic bottles. While algae itself is not directly harmful to your plants, it can clog the holes in the bottle caps and reduce the flow of water and nutrients. To prevent algae growth, use dark-colored bottles or wrap the bottles in opaque material. You can also add a small amount of hydrogen peroxide to the water in the bottles, which will help to kill the algae. If algae growth becomes excessive, remove the bottles, clean them thoroughly with soap and water, and replace them.
How do I prevent the holes in the bottle caps from getting clogged?
Clogging of the holes in the bottle caps can be a problem, especially if you’re using granular fertilizer or if the water is hard. To prevent clogging, use a fine-mesh strainer to filter the water and fertilizer before adding it to the bottles. You can also use a small drill bit or needle to clean the holes periodically. If you’re using granular fertilizer, make sure it is fully dissolved in the water before adding it to the bottles. Consider using a liquid fertilizer instead, as it is less likely to cause clogging.
Can I use this DIY trick in containers or raised beds?
Yes, this DIY trick works equally well in containers, raised beds, or in-ground gardens. The only adjustment you may need to make is the size of the bottles, depending on the size of the container or raised bed. For smaller containers, you may want to use smaller bottles. Ensure that the soil in the container or raised bed is well-draining and rich in organic matter.
What if I live in a very rainy climate? Will this DIY trick still be effective?
In very rainy climates, you may need to adjust the frequency of refilling the bottles to avoid overwatering your plants. Monitor the soil moisture levels closely and only refill the bottles when the soil is dry to the touch. You can also consider using larger bottles to provide a buffer against excessive rainfall. Make sure your soil is well-draining to prevent waterlogging. In extremely wet conditions, you may need to temporarily remove the bottles to allow the soil to dry out.
How long will this DIY trick last? Do I need to replace the bottles periodically?
The lifespan of the bottles depends on the quality of the plastic and the environmental conditions. Sturdy plastic bottles can last for several growing seasons. However, they may eventually become brittle or cracked due to exposure to sunlight and weather. Check the bottles periodically for signs of wear and tear and replace them as needed. You can also recycle the old bottles and use them for other gardening purposes.
Is this DIY trick environmentally friendly?
Yes, this DIY trick is a great way to recycle plastic bottles and reduce water waste. By using recycled materials and providing targeted watering and fertilization, you’re minimizing your environmental impact. You can further enhance the environmental friendliness of this method by using organic fertilizers and practicing sustainable gardening techniques. This easy tomato growing routine is a win-win for both your garden and the planet.

Leave a Comment