
DIY Strawberry Tower: Your Ticket to a Bountiful Berry Harvest!
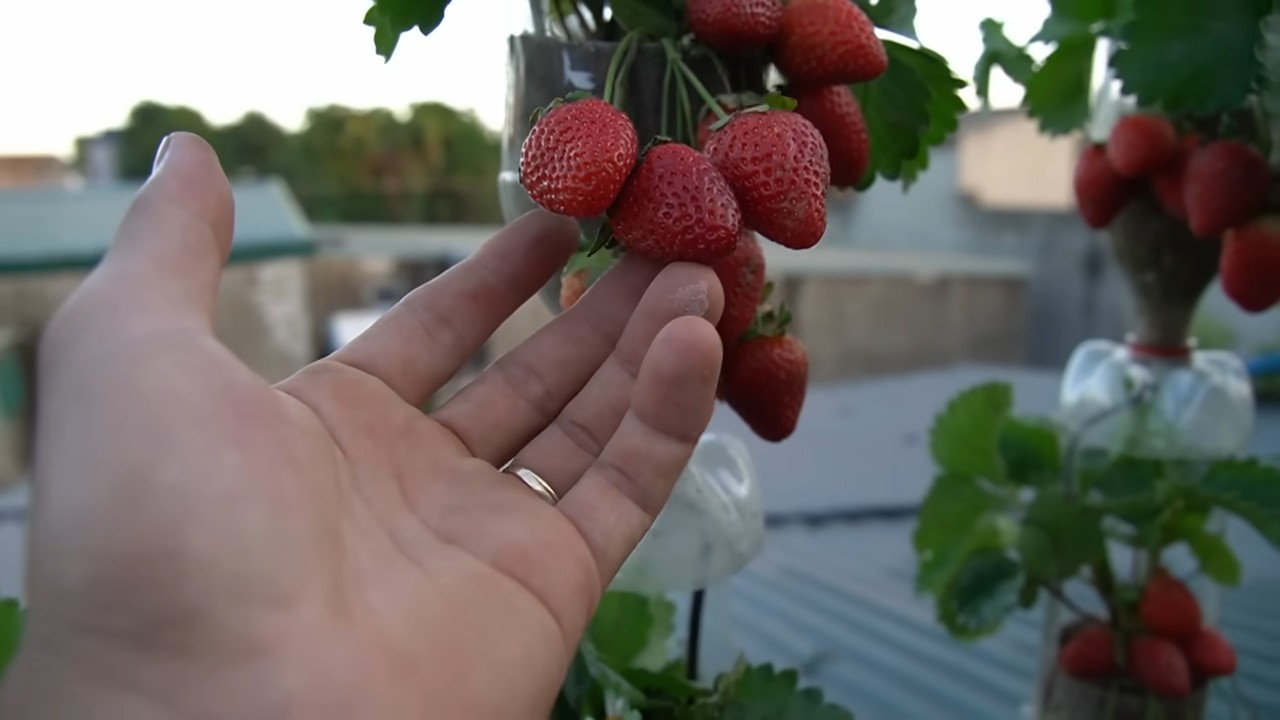
Ever dream of plucking juicy, sun-ripened strawberries right from your own backyard? I know I have! But maybe you’re short on space, or perhaps you just want a visually stunning addition to your garden. That’s where the magic of a DIY strawberry tower comes in. Forget sprawling strawberry patches that take over your precious garden real estate. We’re talking vertical gardening at its finest!
The concept of vertical gardening, while seemingly modern, actually has roots stretching back centuries. Think of the Hanging Gardens of Babylon, one of the Seven Wonders of the Ancient World! While we might not be building anything quite so grand, the principle is the same: maximizing space and creating a beautiful, thriving ecosystem. For centuries, cultures around the globe have found innovative ways to grow upwards, and now it’s our turn to bring that ingenuity to our own homes.
Why do you need this DIY strawberry tower in your life? Well, besides the obvious benefit of fresh, delicious strawberries, it’s a fantastic solution for urban gardeners, apartment dwellers with balconies, or anyone looking to add a touch of whimsy to their outdoor space. Plus, it keeps those precious berries off the ground, protecting them from pests and rot. I’m excited to show you how to build your own strawberry tower, so let’s get started and transform your gardening dreams into a delicious reality!
Erdbeer-Turm selber bauen: Eine Schritt-für-Schritt Anleitung
Hey Gartenfreunde! Habt ihr auch so Lust auf frische, saftige Erdbeeren direkt aus dem eigenen Garten? Aber wenig Platz? Kein Problem! Ich zeige euch, wie ihr einen fantastischen Erdbeer-Turm selber bauen könnt. Das ist nicht nur platzsparend, sondern auch ein echter Hingucker! Und das Beste: Es ist einfacher, als ihr denkt!
Was ihr für euren Erdbeer-Turm braucht:
* Ein großes Pflanzgefäß: Am besten einen Terrakotta-Topf oder einen stabilen Plastikeimer mit einem Durchmesser von mindestens 30 cm. Je größer, desto mehr Erdbeeren passen rein!
* Ein stabiles Rohr: Ein PVC-Rohr (ca. 10-15 cm Durchmesser) oder ein Bambusstab. Dieses Rohr dient als Bewässerungssystem und Stütze.
* Bohrmaschine mit Lochsäge oder Bohraufsatz: Für die Löcher im Rohr.
* Gartenvlies oder Jute: Um das Rohr zu umwickeln und zu verhindern, dass Erde in die Löcher gelangt.
* Pflanzerde: Am besten eine spezielle Erdbeererde, die ist nährstoffreich und sorgt für eine gute Drainage.
* Erdbeerpflanzen: Sucht euch robuste Sorten aus, die für den Anbau im Topf geeignet sind. Hängeerdbeeren sehen besonders toll aus!
* Kies oder Blähton: Für die Drainage am Boden des Pflanzgefäßes.
* Schere oder Messer: Zum Zuschneiden des Vlieses.
* Handschuhe: Zum Schutz eurer Hände.
* Gießkanne oder Schlauch: Zum Bewässern.
* Optional: Dekorative Steine oder Mulch, um die Oberfläche zu verschönern.
Schritt-für-Schritt Anleitung: So baut ihr euren Erdbeer-Turm
1. Vorbereitung des Pflanzgefäßes
1. Drainage legen: Beginnt damit, eine Schicht Kies oder Blähton auf den Boden des Pflanzgefäßes zu geben. Das sorgt für eine gute Drainage und verhindert Staunässe, die Erdbeeren gar nicht mögen. Eine Schicht von etwa 5-10 cm ist ideal.
2. Erde einfüllen: Füllt nun das Pflanzgefäß mit etwas Erde. Achtet darauf, dass die Erde locker und luftig ist. Drückt sie nicht zu fest an.
2. Vorbereitung des Bewässerungsrohrs
1. Löcher bohren: Nehmt euer PVC-Rohr oder den Bambusstab und bohrt mit der Lochsäge oder dem Bohraufsatz Löcher hinein. Die Löcher sollten einen Durchmesser von etwa 1-2 cm haben und in regelmäßigen Abständen (ca. 10-15 cm) angeordnet sein. Achtet darauf, dass die Löcher nicht zu groß sind, damit die Erde nicht herausfällt.
2. Rohr umwickeln: Schneidet das Gartenvlies oder die Jute in Streifen, die breit genug sind, um das Rohr einmal zu umwickeln. Befestigt die Streifen mit etwas Klebeband oder Garn am Rohr. Das Vlies verhindert, dass Erde in die Löcher gelangt und das Bewässerungssystem verstopft.
3. Aufbau des Erdbeer-Turms
1. Rohr platzieren: Steckt das vorbereitete Rohr mittig in das Pflanzgefäß. Achtet darauf, dass es stabil steht und nicht wackelt.
2. Erde auffüllen: Füllt nun das Pflanzgefäß weiter mit Erde auf, bis etwa 10 cm unter den Rand. Drückt die Erde leicht an.
3. Pflanzlöcher vorbereiten: Schneidet mit einem Messer oder einer Schere kleine Löcher in das Gartenvlies, das das Rohr umwickelt. Diese Löcher dienen als Pflanzlöcher für eure Erdbeerpflanzen. Die Löcher sollten groß genug sein, damit die Wurzelballen der Pflanzen hineinpassen.
4. Erdbeeren pflanzen: Nehmt die Erdbeerpflanzen aus ihren Töpfen und lockert die Wurzelballen etwas auf. Setzt die Pflanzen vorsichtig in die vorbereiteten Pflanzlöcher. Achtet darauf, dass die Wurzeln gut mit Erde bedeckt sind.
5. Oben bepflanzen: Pflanzt auch oben auf dem Pflanzgefäß Erdbeeren. Hier könnt ihr entweder die gleichen Sorten wie an den Seiten verwenden oder andere, die vielleicht etwas höher wachsen.
6. Erde auffüllen: Füllt die restliche Erde auf, bis alle Wurzeln gut bedeckt sind. Drückt die Erde leicht an.
4. Bewässerung und Pflege
1. Bewässern: Gießt euren Erdbeer-Turm gründlich. Am besten gießt ihr direkt in das Rohr, damit das Wasser gleichmäßig verteilt wird. Achtet darauf, dass die Erde immer leicht feucht ist, aber nicht zu nass.
2. Düngen: Erdbeeren sind hungrig! Düngt euren Erdbeer-Turm regelmäßig mit einem speziellen Erdbeerdünger. Beachtet dabei die Anweisungen auf der Verpackung.
3. Sonniger Standort: Erdbeeren lieben die Sonne! Stellt euren Erdbeer-Turm an einen sonnigen Standort, damit die Pflanzen gut wachsen und viele Früchte tragen.
4. Schutz vor Schädlingen: Achtet auf Schädlinge wie Schnecken oder Blattläuse. Bei Bedarf könnt ihr natürliche Schädlingsbekämpfungsmittel einsetzen.
5. Ernte: Und dann heißt es warten und genießen! Sobald die Erdbeeren rot und reif sind, könnt ihr sie ernten. Lasst sie euch schmecken!
Zusätzliche Tipps für euren Erdbeer-Turm
* Sortenwahl: Wählt Erdbeersorten, die für den Anbau im Topf geeignet sind. Hängeerdbeeren sehen besonders dekorativ aus und tragen viele Früchte.
* Regelmäßiges Gießen: Erdbeeren brauchen regelmäßig Wasser, besonders an heißen Tagen. Kontrolliert die Erde regelmäßig und gießt bei Bedarf.
* Schutz vor Regen: Bei starkem Regen kann die Erde im Turm schnell zu nass werden. Stellt den Turm dann am besten unter ein Dach oder eine Überdachung.
* Überwinterung: Erdbeeren sind mehrjährig. Um sie gut über den Winter zu bringen, solltet ihr den Turm an einen geschützten Ort stellen und die Pflanzen mit Reisig oder Vlies abdecken.
* Dekoration: Verschönert euren Erdbeer-Turm mit dekorativen Steinen, Mulch oder kleinen Figuren. So wird er zum echten Hingucker in eurem Garten oder auf eurem Balkon.
* Erde erneuern: Nach ein paar Jahren solltet ihr die Erde im Turm erneuern, da sie dann ausgelaugt ist.
Warum ein Erdbeer-Turm eine tolle Idee ist:
* Platzsparend: Ideal für kleine Gärten oder Balkone.
* Dekorativ: Ein echter Hingucker!
* Ernte auf Augenhöhe: Bequemes Ernten ohne Bücken.
* Weniger Schädlinge: Durch die erhöhte Position sind die Erdbeeren weniger anfällig für Schnecken und andere Schädlinge.
* Gute Belüftung: Die Pflanzen werden gut belüftet, was das Risiko von Pilzkrankheiten reduziert.
Ich hoffe, diese Anleitung hilft euch dabei, euren eigenen Erdbeer-Turm zu bauen. Es ist wirklich ein tolles Projekt, das nicht nur Spaß macht, sondern euch auch mit leckeren Erdbeeren belohnt. Viel Erfolg und guten Appetit!
Conclusion
So, there you have it! Building your own DIY strawberry tower isn’t just a fun weekend project; it’s a gateway to a season brimming with fresh, juicy strawberries right at your fingertips. Forget those expensive, often underwhelming berries from the grocery store. Imagine stepping outside your door and plucking sun-ripened sweetness straight from your own vertical garden. The satisfaction alone is worth the effort, but the abundance of delicious strawberries you’ll harvest makes this DIY project a true winner.
This method of gardening is especially beneficial for those with limited space. Whether you have a small balcony, a tiny patio, or simply want to maximize your garden’s yield, a strawberry tower offers an efficient and aesthetically pleasing solution. It’s also a fantastic way to deter pests and keep your strawberries clean and off the ground, reducing the risk of rot and disease.
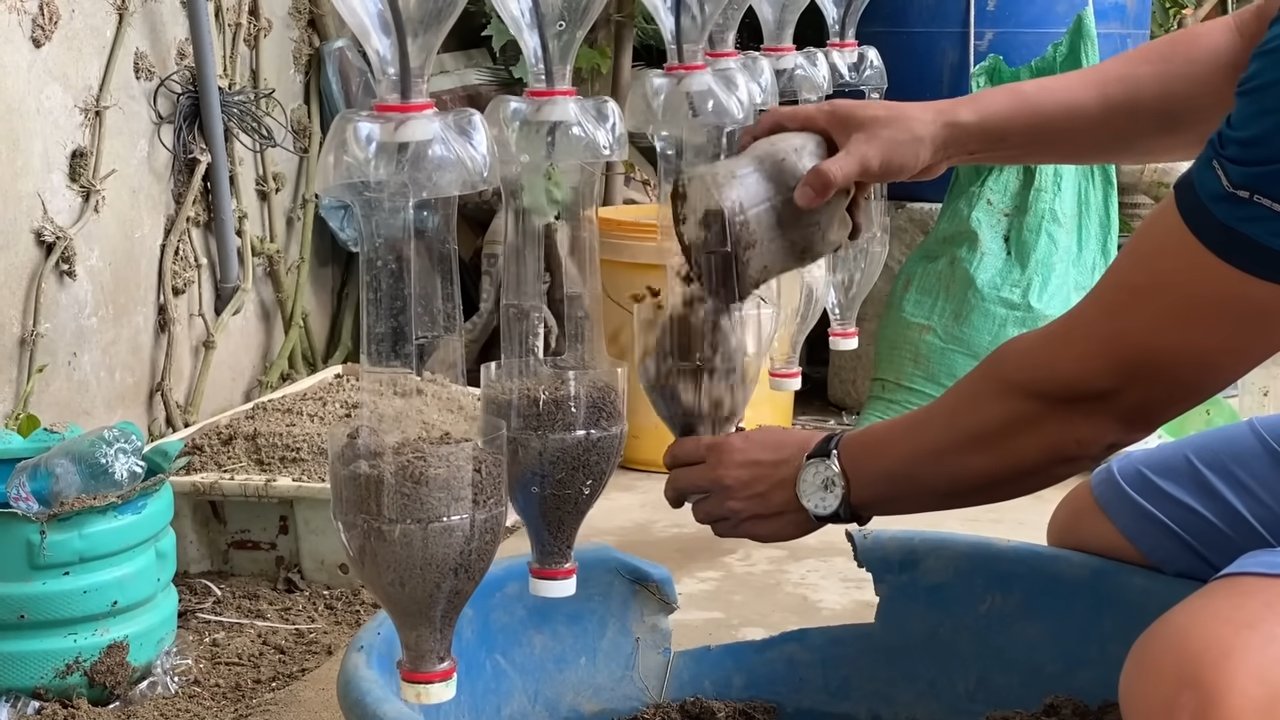
But the beauty of this DIY project lies in its adaptability. Feel free to experiment with different materials. While we’ve focused on using a plastic container or PVC pipe, you could also repurpose old tires, wooden pallets, or even create a tower from stacked terracotta pots. The possibilities are endless!
Consider these variations to personalize your strawberry tower:
* Herb and Strawberry Combo: Interplant your strawberries with complementary herbs like basil, thyme, or mint. These herbs can act as natural pest repellents and add a delightful aroma to your garden.
* Vertical Succulent Garden: If strawberries aren’t your thing, adapt the same technique to create a stunning vertical succulent garden. Succulents thrive in well-draining soil and require minimal watering, making them a low-maintenance option.
* Tiered Vegetable Garden: Use a larger container and create a tiered system for growing various vegetables like lettuce, spinach, and herbs. This is a great way to maximize your yield in a small space.
* Lighting: If you live in an area with limited sunlight, consider adding grow lights to your strawberry tower. This will ensure that your plants receive the necessary light for optimal growth.
* Automatic Watering System: For those who travel frequently or simply want to simplify their gardening routine, consider installing an automatic watering system. This will ensure that your plants receive consistent moisture, even when you’re not around.
Don’t be afraid to get creative and tailor your strawberry tower to your specific needs and preferences. The most important thing is to have fun and enjoy the process of creating your own vertical garden.
We’re confident that you’ll love the results of this DIY strawberry tower project. The taste of homegrown strawberries is simply unmatched, and the visual appeal of a thriving vertical garden is undeniable. So, gather your materials, follow our instructions, and get ready to enjoy a bountiful harvest of delicious strawberries.
We’d love to hear about your experience! Share your photos and stories with us in the comments below. Let us know what materials you used, what challenges you faced, and what tips you have for other aspiring strawberry tower builders. Your feedback will help us improve our instructions and inspire others to embark on this rewarding DIY project. Happy gardening!
Frequently Asked Questions (FAQ)
Q: What kind of soil should I use for my DIY strawberry tower?
A: The best soil for your strawberry tower is a well-draining potting mix that’s rich in organic matter. A mix of equal parts potting soil, compost, and perlite or vermiculite is ideal. This combination provides the necessary nutrients for healthy strawberry growth while ensuring good drainage to prevent root rot. Avoid using garden soil, as it can be too heavy and compact, hindering drainage and potentially suffocating the roots. You can also amend your potting mix with a slow-release fertilizer to provide a steady supply of nutrients throughout the growing season.
Q: How often should I water my strawberry tower?
A: Watering frequency depends on several factors, including the weather, the type of container you’re using, and the size of your strawberry plants. As a general rule, water your strawberry tower when the top inch of soil feels dry to the touch. During hot, dry weather, you may need to water daily, while during cooler, wetter periods, you can water less frequently. Be sure to water thoroughly, allowing the water to drain out of the bottom of the container. Avoid overwatering, as this can lead to root rot. A good way to check if your plants need water is to stick your finger into the soil. If the soil feels dry an inch or two below the surface, it’s time to water.
Q: What type of strawberries are best for a strawberry tower?
A: Day-neutral and everbearing strawberry varieties are generally the best choices for a strawberry tower. Day-neutral varieties produce fruit throughout the growing season, regardless of day length, while everbearing varieties produce two or three crops per year. These varieties tend to be more compact and produce smaller runners, making them well-suited for container gardening. Some popular day-neutral and everbearing strawberry varieties include Albion, Seascape, and Tristar. June-bearing varieties, which produce a single large crop in the spring, can also be grown in a strawberry tower, but they may require more space and pruning.
Q: How much sunlight do strawberries need in a strawberry tower?
A: Strawberries need at least 6-8 hours of direct sunlight per day to thrive. Choose a location for your strawberry tower that receives plenty of sunlight throughout the day. If you live in a hot climate, you may need to provide some afternoon shade to protect the plants from scorching. If you don’t have a sunny spot, you can supplement with grow lights.
Q: How do I fertilize my strawberry tower?
A: Fertilize your strawberry tower every 2-4 weeks with a balanced liquid fertilizer or a slow-release granular fertilizer. Follow the instructions on the fertilizer package carefully. Avoid over-fertilizing, as this can burn the roots of your plants. You can also amend your soil with compost or other organic matter to provide a steady supply of nutrients. Look for a fertilizer that is specifically formulated for strawberries or other fruiting plants.
Q: How do I protect my strawberry tower from pests and diseases?
A: To protect your strawberry tower from pests and diseases, start by using healthy, disease-free plants. Inspect your plants regularly for signs of pests or diseases, such as aphids, spider mites, or powdery mildew. If you find any pests or diseases, treat them promptly with an appropriate insecticide or fungicide. You can also use organic pest control methods, such as insecticidal soap or neem oil. Good air circulation can also help prevent fungal diseases. Consider companion planting with herbs like basil or marigolds, which can help repel pests.
Q: How do I overwinter my strawberry tower?
A: In colder climates, you’ll need to protect your strawberry tower from freezing temperatures. You can move the tower to a sheltered location, such as a garage or shed, or you can wrap it in burlap or blankets. Water the plants sparingly during the winter months, and avoid fertilizing them. In the spring, gradually acclimate the plants to outdoor conditions before moving them back to their permanent location. You can also prune away any dead or damaged foliage in the spring.
Q: Can I grow other plants in my strawberry tower besides strawberries?
A: Yes, you can grow other plants in your strawberry tower, but it’s important to choose plants that have similar growing requirements to strawberries. Good companion plants for strawberries include herbs like basil, thyme, and mint, as well as flowers like marigolds and nasturtiums. Avoid planting aggressive or invasive plants that could compete with the strawberries for resources. Consider the size and growth habit of the plants you choose, and make sure they have enough space to grow without overcrowding the strawberries.
Q: How long will my strawberry tower last?
A: The lifespan of your strawberry tower depends on the materials you use and how well you maintain it. A well-constructed strawberry tower made from durable materials can last for several years. However, you may need to replace the soil and plants every year or two to maintain optimal growth. Regularly inspect your strawberry tower for signs of damage or wear and tear, and make repairs as needed. With proper care and maintenance, your DIY strawberry tower can provide you with years of fresh, delicious strawberries.


Leave a Comment