
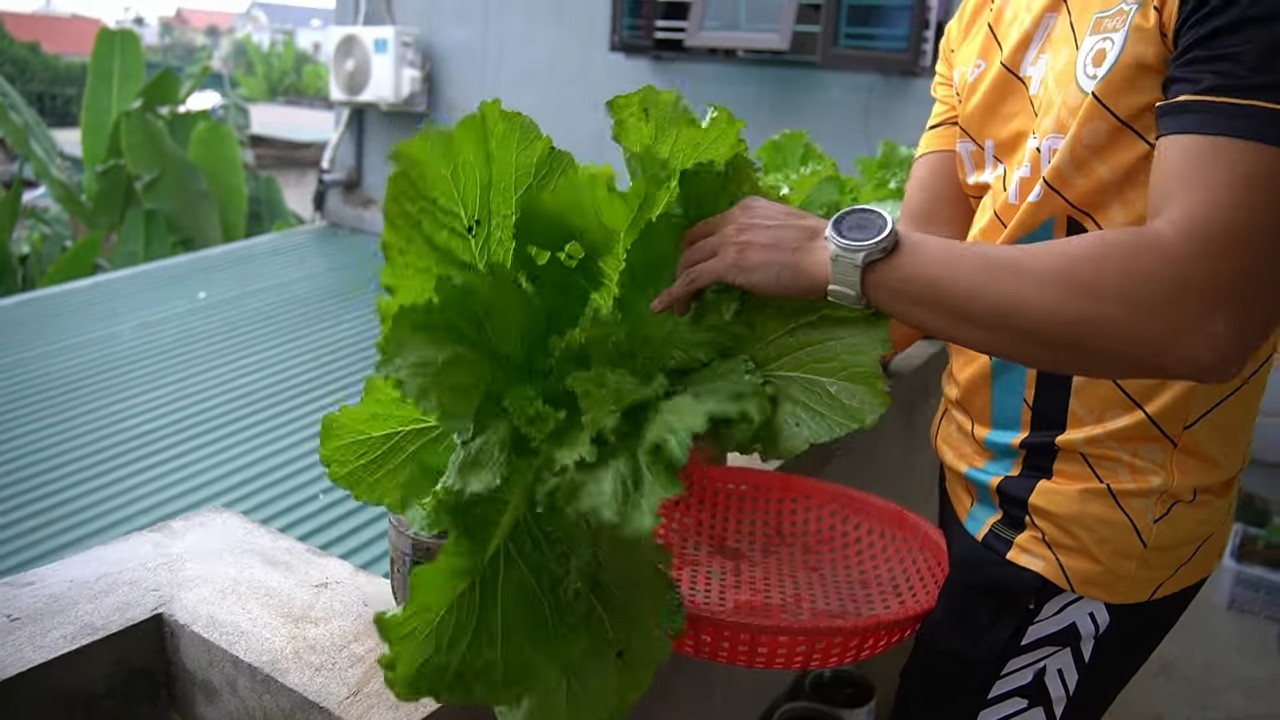
DIY self-watering mustard greens – sounds like a mouthful, right? But trust me, it’s the secret weapon you need to unlock a bountiful harvest, even if you’re a self-proclaimed plant-killing novice! I know, because I used to be one. I’d dream of fresh, peppery mustard greens gracing my salads, but my attempts always ended in wilted disappointment.
Mustard greens have a rich history, deeply rooted in various cultures. From ancient medicinal uses to being a staple in Southern cuisine, these leafy greens have nourished generations. But let’s be honest, sometimes life gets in the way, and remembering to water our precious plants becomes a chore. That’s where this DIY trick comes in!
Imagine this: you’re going on vacation, or maybe you’re just super busy with work. The thought of your beloved mustard greens drying out and dying is enough to send shivers down your spine. That’s why I’m so excited to share this simple, yet effective, DIY self-watering mustard greens system. It’s a game-changer for busy gardeners, forgetful plant parents, and anyone who wants to enjoy fresh, homegrown greens without the daily watering commitment. Get ready to say goodbye to wilted leaves and hello to a thriving mustard green patch!
DIY Selbstbewässernder Senfgrün-Garten: Dein einfacher Weg zu frischem Grün!
Hey Gartenfreunde! Habt ihr auch manchmal das Problem, dass ihr vergesst, eure Kräuter oder Salate zu gießen? Oder seid ihr oft unterwegs und wollt trotzdem frische Senfgrün-Blätter ernten können? Dann habe ich hier die perfekte Lösung für euch: einen selbstbewässernden Senfgrün-Garten, den ihr ganz einfach selber bauen könnt! Das ist nicht nur super praktisch, sondern auch noch nachhaltig und schont euren Geldbeutel. Los geht’s!
Was du brauchst:
* Zwei Plastikflaschen (am besten 2-Liter-Flaschen)
* Ein Stück Baumwollstoff (z.B. ein altes T-Shirt)
* Erde (am besten Anzuchterde)
* Senfgrün-Samen
* Ein Messer oder eine Schere
* Ein Bohrer oder ein Nagel (optional)
* Wasser
Schritt-für-Schritt-Anleitung:
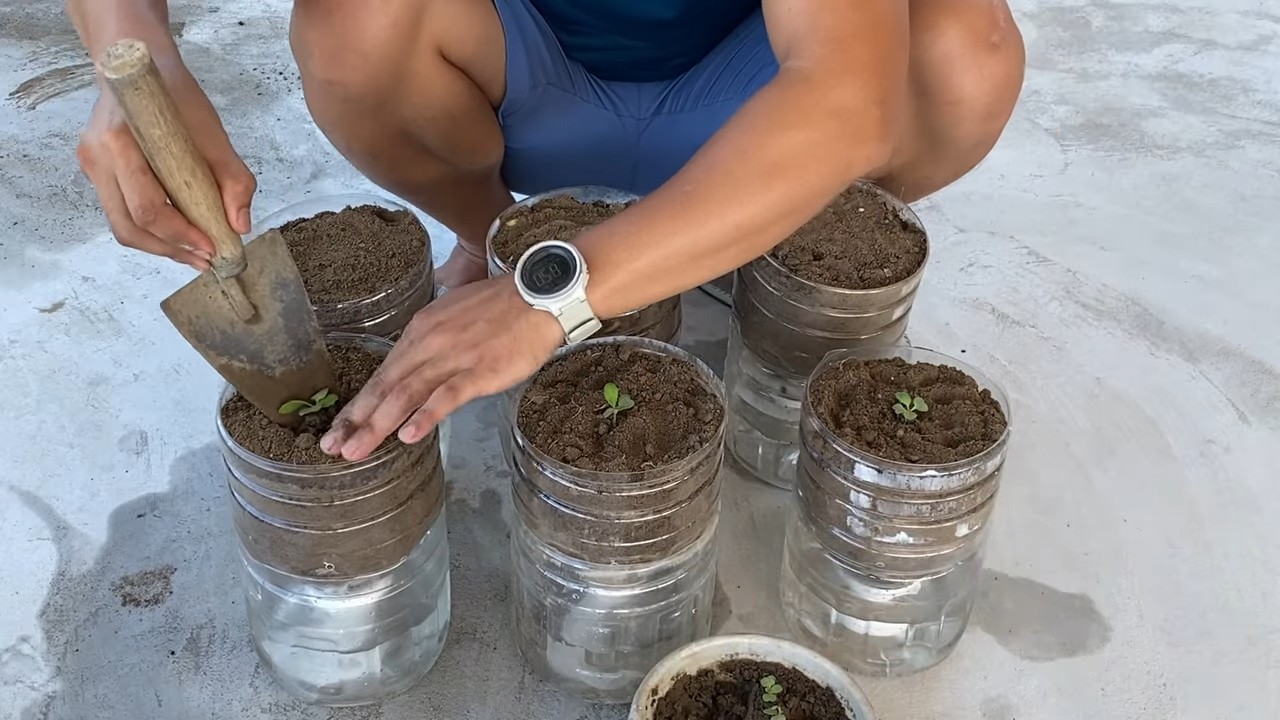
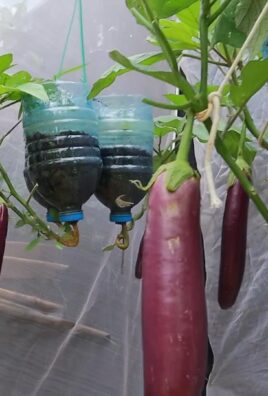
1. Flaschen vorbereiten: Zuerst nehmen wir uns die beiden Plastikflaschen vor. Bei einer Flasche schneiden wir den oberen Teil (den Flaschenhals) ab. Achtet darauf, dass der Schnitt sauber ist, damit ihr euch später nicht verletzt. Die andere Flasche bleibt erstmal ganz.
2. Bewässerungssystem bauen: Jetzt kommt der Clou! Wir brauchen den Baumwollstoff. Schneidet daraus einen Streifen, der lang genug ist, um vom Boden der abgeschnittenen Flasche bis in den Boden der ganzen Flasche zu reichen. Dieser Stoffstreifen wird unser Docht, der das Wasser nach oben transportiert.
3. Docht einsetzen: Fädelt den Baumwollstreifen durch die Öffnung des Flaschenhalses, den wir abgeschnitten haben. Lasst ein gutes Stück des Stoffes heraushängen, damit es später im Wasser steht.
4. Flaschen zusammenfügen: Dreht den abgeschnittenen Flaschenhals um und steckt ihn in die ganze Flasche. Der Baumwollstreifen sollte nun bis zum Boden der unteren Flasche reichen.
5. Wasserreservoir füllen: Füllt die untere Flasche mit Wasser. Achtet darauf, dass der Baumwollstreifen gut im Wasser liegt. Das ist wichtig, damit die Erde später ausreichend bewässert wird.
6. Erde einfüllen: Jetzt füllen wir die abgeschnittene Flasche mit Erde. Am besten verwendet ihr Anzuchterde, da diese besonders nährstoffreich ist und den Senfgrün-Samen einen guten Start ermöglicht. Lasst oben noch etwas Platz, damit ihr die Samen später gut verteilen könnt.
7. Samen aussäen: Verteilt die Senfgrün-Samen gleichmäßig auf der Erde. Drückt sie leicht an, aber bedeckt sie nicht zu dick mit Erde. Senfgrün ist ein Lichtkeimer, das heißt, die Samen brauchen Licht zum Keimen.
8. Angießen: Gießt die Erde vorsichtig an. Achtet darauf, dass ihr die Samen nicht wegschwemmt. Am besten verwendet ihr eine Sprühflasche oder eine Gießkanne mit einem feinen Brausekopf.
9. Standort wählen: Stellt euren selbstbewässernden Senfgrün-Garten an einen hellen Ort, aber nicht in die pralle Sonne. Ein Fensterbrett oder ein Balkon mit etwas Schatten sind ideal.
10. Geduld haben: Jetzt heißt es warten! Senfgrün keimt in der Regel innerhalb weniger Tage. Haltet die Erde feucht, aber nicht nass. Das Wasserreservoir in der unteren Flasche sollte immer gefüllt sein.
Zusätzliche Tipps und Tricks:
* Belüftung verbessern: Wenn ihr merkt, dass die Erde zu feucht ist oder sich Schimmel bildet, könnt ihr mit einem Bohrer oder einem Nagel kleine Löcher in die abgeschnittene Flasche bohren. Das verbessert die Belüftung und verhindert Staunässe.
* Düngen: Senfgrün ist zwar nicht sehr anspruchsvoll, aber etwas Dünger kann nicht schaden. Verwendet am besten einen organischen Flüssigdünger und gebt ihn dem Gießwasser hinzu.
* Erntezeit: Senfgrün ist relativ schnellwüchsig. Ihr könnt die Blätter schon nach wenigen Wochen ernten. Schneidet die Blätter einfach mit einer Schere ab. Die Pflanze wird weiterwachsen und neue Blätter bilden.
* Verschiedene Sorten: Es gibt verschiedene Senfgrün-Sorten mit unterschiedlichen Geschmacksrichtungen. Probiert doch mal verschiedene Sorten aus und findet euren Favoriten!
* Alternative Materialien: Anstelle von Plastikflaschen könnt ihr auch andere Behälter verwenden, z.B. alte Joghurtbecher oder Konservendosen. Achtet aber darauf, dass die Behälter sauber und lebensmittelecht sind.
Warum dieser DIY-Garten so toll ist:
* Selbstbewässerung: Ihr müsst euch keine Sorgen mehr machen, dass ihr das Gießen vergesst. Der Baumwollstreifen sorgt dafür, dass die Erde immer ausreichend feucht ist.
* Nachhaltigkeit: Ihr recycelt Plastikflaschen und tragt so zur Müllvermeidung bei.
* Platzsparend: Der selbstbewässernde Senfgrün-Garten ist ideal für kleine Wohnungen oder Balkone.
* Frische Kräuter: Ihr habt immer frische Senfgrün-Blätter zur Hand, um eure Gerichte zu verfeinern.
* Günstig: Die Materialien für diesen DIY-Garten sind sehr günstig oder sogar kostenlos.
Häufige Probleme und Lösungen:
* Samen keimen nicht: Überprüft, ob die Samen noch haltbar sind. Senfgrün-Samen verlieren mit der Zeit ihre Keimfähigkeit. Achtet auch darauf, dass die Erde feucht genug ist und die Samen ausreichend Licht bekommen.
* Schimmelbildung: Schimmelbildung deutet auf zu hohe Luftfeuchtigkeit hin. Sorgt für eine bessere Belüftung, indem ihr Löcher in die Flasche bohrt oder den Garten an einen luftigeren Ort stellt.
* Pflanzen wachsen langsam: Zu wenig Licht oder Nährstoffe können das Wachstum beeinträchtigen. Stellt den Garten an einen helleren Ort und düngt die Pflanzen regelmäßig.
* Blätter werden gelb: Gelbe Blätter können auf Wassermangel oder Nährstoffmangel hindeuten. Überprüft, ob das Wasserreservoir gefüllt ist und düngt die Pflanzen gegebenenfalls.
Senfgrün ernten und verwenden:
Senfgrün ist super vielseitig! Du kannst es roh in Salaten verwenden, als Topping für Suppen und Sandwiches oder kurz in der Pfanne anbraten. Der leicht scharfe Geschmack macht es zu einer tollen Ergänzung für viele Gerichte.
* Salate: Senfgrün verleiht Salaten eine würzige Note. Kombiniert es mit anderen Blattsalaten, Tomaten, Gurken und einem leckeren Dressing.
* Suppen: Gebt kurz vor dem Servieren ein paar Senfgrün-Blätter in eure Suppe. Das sorgt für einen frischen Geschmack und eine schöne Optik.
* Sandwiches: Belegt eure Sandwiches mit Senfgrün anstelle von Salat. Das schmeckt super lecker und ist mal was anderes.
* Pfannengerichte: Bratet Senfgrün kurz in der Pfanne an. Es passt gut zu Fleisch, Fisch oder Gemüse.
Ich hoffe, diese Anleitung hilft euch dabei, euren eigenen selbstbewässernden Senfgrün-Garten zu bauen. Viel Spaß beim Gärtnern und guten Appetit! Lasst mich wissen, wie es bei euch geklappt hat! Ich freue mich über eure Kommentare und Fotos!
Conclusion
So, there you have it! Creating your own DIY self-watering system for your mustard greens isn’t just a clever gardening hack; it’s a game-changer for anyone who wants fresh, vibrant greens without the constant worry of underwatering or overwatering. This simple yet effective method allows you to cultivate a thriving patch of mustard greens, even with a busy schedule or a less-than-green thumb.
Why is this DIY trick a must-try? Because it offers a multitude of benefits. First and foremost, it simplifies the watering process, ensuring your mustard greens receive a consistent and adequate supply of moisture. This is especially crucial during hot summer months or periods of drought when these leafy greens are most susceptible to drying out. Secondly, it promotes healthier plant growth. By providing a steady stream of water directly to the roots, you encourage stronger root development and more robust foliage. This translates to tastier, more nutritious mustard greens for your salads, stir-fries, and other culinary creations. Thirdly, it’s incredibly cost-effective. Instead of investing in expensive self-watering planters or irrigation systems, you can repurpose readily available materials like plastic bottles or buckets to create your own sustainable watering solution.
But the beauty of this DIY project lies in its versatility. Feel free to experiment with different variations to suit your specific needs and preferences. For instance, if you’re growing your mustard greens in containers, you can adapt the self-watering system to fit the size and shape of the pot. You could also try using different types of wicking materials, such as cotton rope or strips of old t-shirts, to see which works best for your soil and climate. Consider adding a layer of mulch around the base of your plants to further conserve moisture and suppress weeds.
Another exciting variation involves incorporating nutrient solutions into the water reservoir. By adding a diluted liquid fertilizer to the water, you can provide your mustard greens with a continuous supply of essential nutrients, resulting in even more vigorous growth and enhanced flavor. Just be sure to follow the instructions on the fertilizer label carefully to avoid over-fertilizing, which can damage your plants.
Don’t be afraid to get creative and personalize your DIY self-watering system. You can decorate the water reservoir with paint, stickers, or other embellishments to make it a visually appealing addition to your garden. You can also experiment with different types of containers to find the perfect balance between functionality and aesthetics.
We wholeheartedly encourage you to give this DIY self-watering trick a try. It’s a rewarding and fulfilling experience that will not only simplify your gardening routine but also connect you more deeply with the natural world. Imagine the satisfaction of harvesting your own fresh, homegrown mustard greens, knowing that you played an active role in nurturing their growth.
And once you’ve successfully implemented your DIY self-watering system, we’d love to hear about your experience! Share your photos, tips, and insights in the comments section below. Let’s create a community of passionate gardeners who are dedicated to growing their own food sustainably and efficiently. Your feedback will not only inspire others to try this DIY trick but also help us refine and improve the method for future generations of gardeners. So, grab your tools, gather your materials, and get ready to embark on a journey of self-sufficiency and delicious, homegrown mustard greens! Remember, the key to successful gardening is experimentation, observation, and a willingness to learn from your mistakes. Happy gardening!
Frequently Asked Questions (FAQ)
What type of container is best for the water reservoir?
The best type of container for your water reservoir depends on the size of your mustard green patch and your aesthetic preferences. Plastic bottles, buckets, and even repurposed containers like old milk jugs can all work well. The key is to choose a container that is large enough to hold a sufficient amount of water to keep your mustard greens hydrated for several days, especially during hot weather. Also, ensure the container is made of food-grade plastic if you plan to add nutrient solutions to the water. Darker colored containers can also help prevent algae growth.
What kind of soil is best for using this self-watering method?
A well-draining potting mix is ideal for use with a DIY self-watering system. This type of soil allows water to wick up effectively while also providing adequate aeration for the roots. Avoid using heavy clay soils, as they can become waterlogged and inhibit root growth. You can also amend your potting mix with perlite or vermiculite to improve drainage and aeration. A good mix would be something like a 60% potting mix, 20% perlite, and 20% compost.
How often do I need to refill the water reservoir?
The frequency with which you need to refill the water reservoir will depend on several factors, including the size of your container, the weather conditions, and the size of your mustard green plants. In general, you should check the water level in the reservoir every few days and refill it when it gets low. During hot, dry weather, you may need to refill it more frequently. A good rule of thumb is to check the soil moisture near the surface of the soil. If it feels dry to the touch, it’s time to refill the reservoir.
Can I use this self-watering system for other plants besides mustard greens?
Yes, absolutely! This DIY self-watering system can be adapted for use with a wide variety of plants, including other leafy greens like lettuce and spinach, as well as herbs like basil and mint. The key is to adjust the size of the water reservoir and the type of wicking material to suit the specific needs of the plant. Plants that prefer drier conditions may require a smaller reservoir or a less absorbent wicking material.
What type of wicking material is best?
Cotton rope, strips of old t-shirts, and even felt can all be used as wicking materials. The best choice will depend on the size of your container and the type of soil you’re using. Cotton rope is a good all-around option, as it’s readily available and relatively inexpensive. Strips of old t-shirts are a great way to repurpose old clothing and can be particularly effective for larger containers. Felt is a good option for smaller containers, as it’s easy to cut and shape. Experiment with different materials to see which works best for your setup.
How do I prevent algae growth in the water reservoir?
Algae growth can be a common problem in self-watering systems, especially if the reservoir is exposed to sunlight. To prevent algae growth, try using a dark-colored container for the reservoir. You can also add a small amount of hydrogen peroxide to the water to kill algae. Another option is to cover the top of the reservoir with a lid or a piece of cloth to block out sunlight. Regularly cleaning the reservoir can also help prevent algae buildup.
What if my mustard greens are still wilting even with the self-watering system?
If your mustard greens are wilting even with the self-watering system, there could be a few reasons. First, make sure the wicking material is properly saturated and making good contact with both the soil and the water reservoir. Secondly, check the soil moisture to ensure that the water is actually wicking up effectively. If the soil is dry, the wicking material may be clogged or not absorbent enough. Thirdly, consider the possibility of other factors, such as pests, diseases, or nutrient deficiencies. Inspect your plants carefully for any signs of these problems and take appropriate action. Finally, ensure your plants are getting adequate sunlight.
Can I use tap water in my self-watering system?
While tap water is generally safe to use, it’s best to let it sit out for 24 hours before using it in your self-watering system. This allows chlorine and other chemicals to evaporate, which can be harmful to plants. If your tap water is particularly hard or contains high levels of minerals, you may want to consider using filtered water or rainwater instead.
How do I know if I’m overwatering my mustard greens with this system?
Overwatering can be just as detrimental to mustard greens as underwatering. Signs of overwatering include yellowing leaves, stunted growth, and root rot. If you suspect that you’re overwatering, reduce the amount of water in the reservoir or switch to a less absorbent wicking material. You can also improve drainage by adding more perlite or vermiculite to the soil. Allow the soil to dry out slightly between waterings.
Is this system suitable for growing mustard greens indoors?
Yes, this DIY self-watering system is perfectly suitable for growing mustard greens indoors. In fact, it can be even more beneficial indoors, as it helps to maintain consistent moisture levels in a controlled environment. Just be sure to provide your mustard greens with adequate light, either from a sunny window or a grow light.
Leave a Comment