
DIY Natural Peroxide Cleaner: Are you tired of harsh chemicals lurking in your cleaning supplies? Do you dream of a sparkling clean home without the worry of harmful fumes or residues? I know I do! That’s why I’m so excited to share this incredible DIY trick with you – creating your own natural peroxide cleaner!
Hydrogen peroxide, the star of our show, isn’t just a modern marvel. Its use as a disinfectant actually dates back to the late 19th century! While its widespread adoption in household cleaning is more recent, the principle of using oxidizing agents to sanitize has been around for ages. Think of ancient cultures using sunlight to purify water – it’s all about harnessing natural power for a cleaner, healthier environment.
But why should *you* bother making your own DIY Natural Peroxide Cleaner? Well, for starters, it’s incredibly cost-effective. Store-bought cleaners can be expensive, and often contain unnecessary additives. Plus, you have complete control over the ingredients, ensuring a truly natural and eco-friendly solution. In a world increasingly concerned about sustainability and the impact of chemicals on our health, this simple DIY project empowers you to take charge of your cleaning routine. Get ready to ditch the harsh chemicals and embrace the power of peroxide!
DIY Natural Peroxide Cleaner: A Sparkling Home, the Eco-Friendly Way!
Hey there, fellow DIY enthusiasts! I’m so excited to share one of my favorite cleaning hacks with you: making your own natural peroxide cleaner. Not only is it super effective at tackling grime and stains, but it’s also a much gentler alternative to harsh chemicals, making it safer for your family, pets, and the environment. Plus, it’s incredibly budget-friendly! Let’s dive in and get our homes sparkling, naturally!
Why Peroxide? The Magic Behind the Fizz
Hydrogen peroxide (H2O2) is a fantastic cleaning agent because it’s a natural disinfectant, deodorizer, and bleaching agent. It breaks down into water and oxygen, leaving no harmful residues behind. It’s perfect for sanitizing surfaces, removing stains, and even brightening laundry. I use it all the time!
Gathering Your Supplies: The Arsenal of Clean
Before we get started, let’s make sure we have everything we need. Here’s your shopping list:
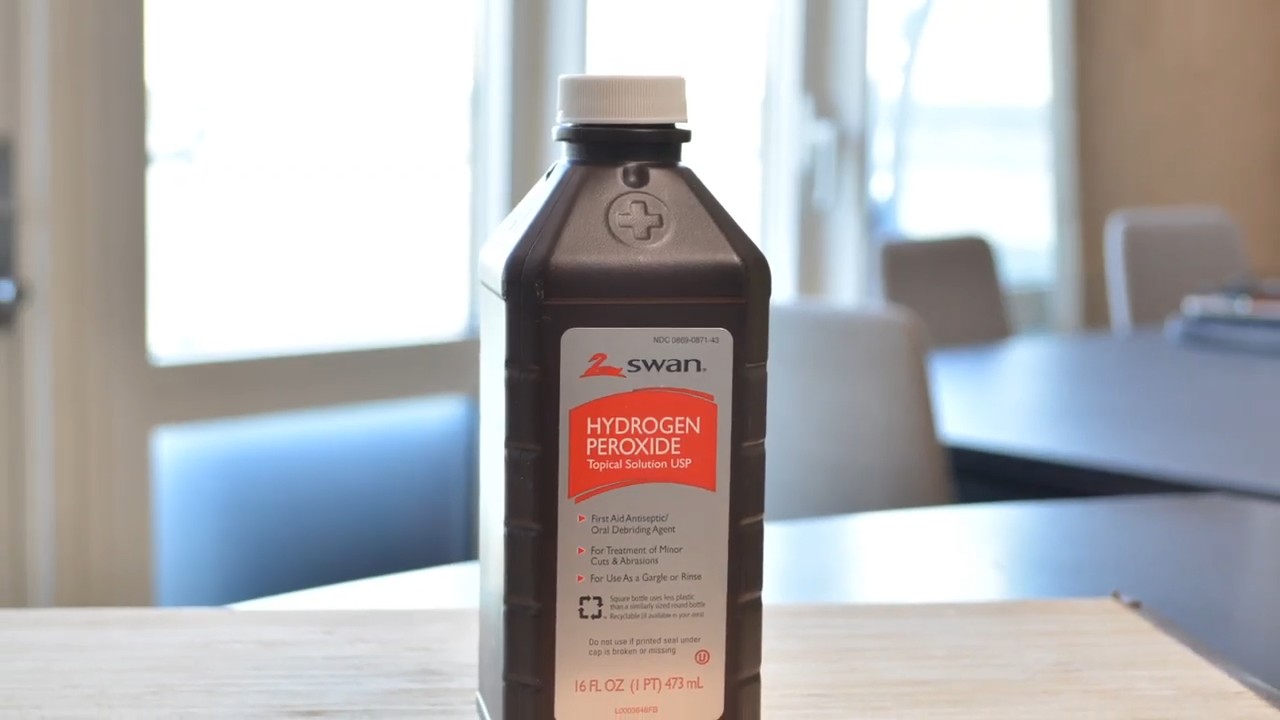
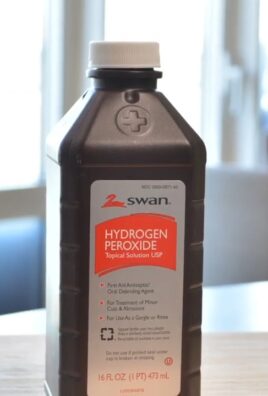
* Hydrogen Peroxide (3%): This is the standard concentration you’ll find at most drugstores. Don’t go for anything stronger unless you know what you’re doing!
* Distilled Water: Using distilled water helps prevent mineral buildup in your spray bottle and ensures a cleaner solution.
* Essential Oils (Optional): These add a lovely scent and can boost the cleaning power. My favorites are lemon, tea tree, lavender, and eucalyptus.
* Spray Bottle: A dark-colored spray bottle is ideal because it protects the hydrogen peroxide from light, which can degrade its effectiveness. If you only have a clear one, store it in a dark place.
* Measuring Cups and Spoons: For accurate mixing.
* Funnel (Optional): Makes pouring liquids into the spray bottle much easier.
* Gloves (Optional): If you have sensitive skin, gloves are always a good idea.
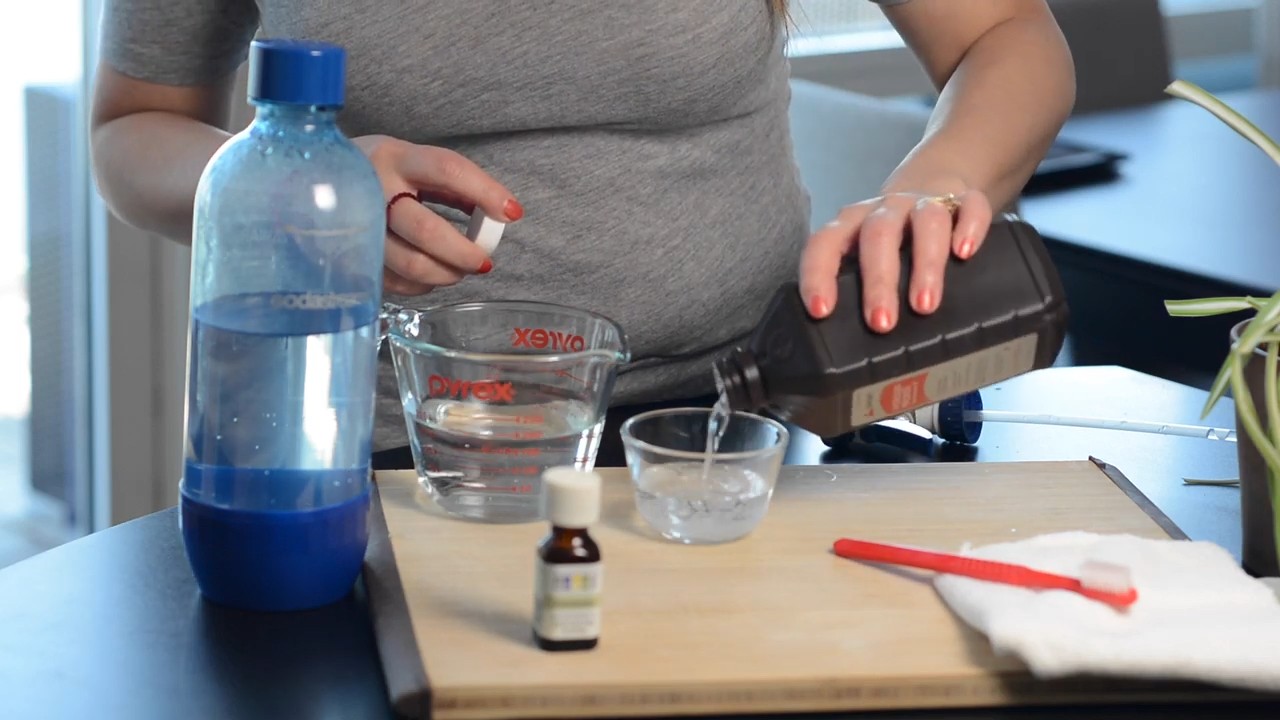
Mixing Your Natural Peroxide Cleaner: The Recipe for Success
Okay, now for the fun part! Here’s how to whip up your own batch of natural peroxide cleaner:
1. Prepare Your Spray Bottle: Make sure your spray bottle is clean and dry. This will prevent any unwanted contamination.
2. Combine Water and Peroxide: In your measuring cup, combine equal parts distilled water and 3% hydrogen peroxide. I usually start with 1 cup of each, but you can adjust the amount depending on the size of your spray bottle. For example, if you have a 16-ounce spray bottle, use 8 ounces of distilled water and 8 ounces of hydrogen peroxide.
3. Add Essential Oils (Optional): If you’re using essential oils, add 10-20 drops to the mixture. Start with a smaller amount and add more if you prefer a stronger scent. Remember, a little goes a long way! I personally love a combination of 10 drops of lemon and 5 drops of tea tree oil for a fresh, clean scent with added antibacterial properties.
4. Mix Well: Gently stir the mixture with a spoon to ensure the ingredients are thoroughly combined. Avoid shaking vigorously, as this can create bubbles.
5. Pour into Spray Bottle: Using a funnel (if you have one), carefully pour the mixture into your spray bottle.
6. Label Your Bottle: This is super important! Clearly label your bottle as “Peroxide Cleaner” to avoid any confusion. You might also want to include the date you made it.
Using Your Natural Peroxide Cleaner: Where the Magic Happens
Now that you have your homemade cleaner, let’s put it to work! Here are some of my favorite ways to use it:
* Kitchen Surfaces: Spray on countertops, sinks, and cutting boards to disinfect and remove stains. Let it sit for a few minutes before wiping clean.
* Bathroom Surfaces: Use it on toilets, showers, and tiles to kill germs and remove mildew.
* Mirrors and Glass: Dilute the cleaner with a bit more water (about 1 part cleaner to 2 parts water) for streak-free shine.
* Laundry Stain Remover: Spray directly onto stains before washing. Test on an inconspicuous area first to ensure colorfastness.
* Toothbrushes and Sponges: Soak them in the cleaner for a few minutes to disinfect.
* Cutting Boards: After washing your cutting board, spray it with the peroxide cleaner to kill bacteria.
* Fruits and Vegetables: Add a small amount of peroxide to a bowl of water and soak your fruits and vegetables for a few minutes to remove pesticides and bacteria. Rinse thoroughly before eating.
* Toilet Bowl Cleaner: Pour about 1/2 cup of peroxide into the toilet bowl, let it sit for 30 minutes, then scrub and flush.
Safety First: Important Precautions
While hydrogen peroxide is generally safe, it’s important to take a few precautions:
* Always Dilute: Never use concentrated hydrogen peroxide (anything above 3%) for cleaning unless you’re a professional.
* Avoid Contact with Eyes: If you get peroxide in your eyes, rinse immediately with plenty of water.
* Test on Inconspicuous Areas: Before using the cleaner on any surface, test it on a small, hidden area to make sure it doesn’t cause discoloration or damage.
* Don’t Mix with Vinegar or Bleach: Mixing peroxide with vinegar can create peracetic acid, which is a toxic irritant. Mixing it with bleach can create chlorine gas, which is extremely dangerous.
* Store in a Dark Place: Light can degrade the effectiveness of hydrogen peroxide, so store your cleaner in a dark place or use a dark-colored spray bottle.
* Keep Out of Reach of Children and Pets: As with any cleaning product, keep your peroxide cleaner out of reach of children and pets.
Troubleshooting: Addressing Common Concerns
Sometimes, things don’t go exactly as planned. Here are a few common issues you might encounter and how to fix them:
* Cleaner Smells Too Strong: If the scent of your essential oils is too overpowering, simply add more distilled water to dilute the mixture.
* Cleaner Leaves Streaks: If your cleaner is leaving streaks on glass or mirrors, try diluting it with more water or using a microfiber cloth to wipe the surface.
* Cleaner Doesn’t Seem to Be Working: Make sure you’re using fresh hydrogen peroxide. Peroxide can lose its effectiveness over time, especially if it’s exposed to light. Also, make sure you’re letting the cleaner sit on the surface for a few minutes before wiping it clean.
* Discoloration on Surfaces: If you notice any discoloration on a surface after using the cleaner, stop using it immediately and rinse the area with water. This is rare, but it can happen on certain materials.
Boosting Cleaning Power: Advanced Techniques
Want to take your natural peroxide cleaning to the next level? Here are a few advanced techniques I’ve found helpful:
* Peroxide and Baking Soda Paste: For tough stains, mix hydrogen peroxide with baking soda to create a paste. Apply the paste to the stain, let it sit for a few minutes, then scrub and rinse. This works great on grout, oven stains, and even stubborn laundry stains.
* Peroxide and Lemon Juice: For extra brightening power, add a tablespoon of lemon juice to your peroxide cleaner. Lemon juice is a natural bleaching agent and can help remove stains and brighten surfaces.
* Peroxide and Vinegar (Used Separately): While you should never mix peroxide and vinegar in the same container, you can use them sequentially. For example, you can spray a surface with vinegar, let it sit for a few minutes, then spray it with peroxide. This creates a powerful cleaning action. Just make sure to rinse the surface thoroughly after each application.
Beyond Cleaning: Unexpected Uses for Peroxide
Hydrogen peroxide isn’t just for cleaning! Here are a few other surprising ways you can use it around your home:
* Mouthwash: Dilute hydrogen peroxide with water (1 part peroxide to 2 parts water) and use it as a mouthwash to kill bacteria and freshen breath. Don’t swallow it!
* Earwax Removal: Put a few drops of hydrogen peroxide in your ear to soften earwax. Let it sit for a few minutes, then drain your ear.
* Wound Care: Use hydrogen peroxide to clean minor cuts and scrapes. It helps kill bacteria and prevent infection.
* Plant Care: Add a small amount of hydrogen peroxide to your plant’s water to help aerate the soil and prevent root rot.
* Teeth Whitening: Mix hydrogen peroxide with baking soda to create a paste and use it to brush your teeth. This can help whiten your teeth naturally. Be careful not to overuse it, as it can damage your enamel.
Final Thoughts: Embrace the Natural Clean!
I hope you’ve enjoyed this guide to making your own natural peroxide cleaner! It’s a simple, effective
Conclusion
So, there you have it! Crafting your own DIY Natural Peroxide Cleaner is not just a cost-effective alternative to store-bought options; it’s a powerful step towards a healthier home and a more sustainable lifestyle. We’ve walked you through the simple process, highlighting the versatility and effectiveness of hydrogen peroxide as a cleaning agent. From tackling stubborn stains to disinfecting surfaces, this homemade solution offers a safe and reliable way to keep your living space sparkling.
But why is this DIY trick a must-try? Beyond the obvious benefits of saving money and reducing your exposure to harsh chemicals, this cleaner empowers you to take control of what you bring into your home. You know exactly what’s in it – just hydrogen peroxide and water (and perhaps a touch of essential oil for a pleasant scent!). This transparency is invaluable, especially for those with sensitivities or allergies.
Furthermore, the versatility of this cleaner is truly remarkable. While we’ve focused on general cleaning, the possibilities are endless. Consider these variations and suggestions to tailor the cleaner to your specific needs:
* For a stronger disinfectant: Increase the concentration of hydrogen peroxide to 6% (always test on an inconspicuous area first).
* For a citrus boost: Add a few drops of lemon, orange, or grapefruit essential oil for a refreshing scent and added cleaning power. Citrus oils are known for their degreasing properties.
* For laundry stain removal: Pre-treat stains with a concentrated solution of the cleaner before washing.
* For mold and mildew removal: Spray the affected area with the cleaner, let it sit for 10-15 minutes, and then scrub with a brush.
* For whitening grout: Apply the cleaner to grout lines, let it sit for a few minutes, and then scrub with a grout brush.
* For cleaning cutting boards: Spray the cutting board with the cleaner after each use to kill bacteria.
Remember to always store your DIY Natural Peroxide Cleaner in a dark, opaque bottle to prevent the hydrogen peroxide from degrading due to light exposure. Label the bottle clearly to avoid any confusion. And, as with any cleaning product, always test the cleaner on an inconspicuous area before applying it to a larger surface.
We are confident that once you experience the effectiveness and simplicity of this DIY cleaner, you’ll never go back to store-bought alternatives. It’s a game-changer for your cleaning routine and a positive step towards a healthier, more sustainable home.
So, what are you waiting for? Gather your ingredients, mix up a batch of this amazing DIY Natural Peroxide Cleaner, and experience the difference for yourself! We encourage you to try this simple yet effective solution and share your experiences with us. Let us know what you’ve cleaned, what variations you’ve tried, and any tips or tricks you’ve discovered along the way. Your feedback is invaluable and helps us all learn and grow together in our journey towards a cleaner, healthier world. Share your stories in the comments below – we can’t wait to hear from you!
FAQ
What concentration of hydrogen peroxide should I use for my DIY cleaner?
The most common concentration of hydrogen peroxide available in stores is 3%. This is generally safe and effective for most cleaning tasks. However, for tougher stains or disinfecting purposes, you can use a 6% solution. Be cautious when using higher concentrations, as they can be more irritating to the skin and may damage certain surfaces. Always test on an inconspicuous area first. Never use concentrations higher than 6% for general household cleaning without proper safety precautions.
Is hydrogen peroxide safe to use on all surfaces?
While hydrogen peroxide is generally safe, it’s always best to test it on an inconspicuous area before applying it to a larger surface. Avoid using it on delicate fabrics, polished wood, or surfaces that are prone to discoloration. It can sometimes lighten or bleach certain materials. Always err on the side of caution and test first.
How should I store my DIY Natural Peroxide Cleaner?
Hydrogen peroxide degrades when exposed to light, so it’s crucial to store your DIY cleaner in a dark, opaque bottle. A spray bottle made of dark plastic is ideal. Keep the bottle in a cool, dark place away from direct sunlight. Properly stored, your cleaner should remain effective for several months.
Can I add essential oils to my DIY Natural Peroxide Cleaner?
Yes, adding essential oils is a great way to enhance the cleaning power and scent of your DIY cleaner. Lemon, tea tree, eucalyptus, and lavender essential oils are all excellent choices. They have antibacterial and antifungal properties that can boost the effectiveness of the cleaner. Add a few drops of your favorite essential oil to the mixture and shake well before each use.
Can I use this cleaner on my skin or as a mouthwash?
No, this DIY cleaner is intended for household cleaning purposes only. Do not use it on your skin or as a mouthwash. Hydrogen peroxide can be irritating to the skin and can damage the delicate tissues in your mouth. There are specific hydrogen peroxide solutions formulated for oral care; consult with a dentist or doctor before using any hydrogen peroxide product internally.
How long does the DIY Natural Peroxide Cleaner last?
When stored properly in a dark, opaque bottle away from light and heat, your DIY Natural Peroxide Cleaner should remain effective for approximately 1-3 months. Over time, the hydrogen peroxide will gradually break down into water and oxygen, reducing its cleaning power. If you notice that the cleaner is no longer as effective, it’s time to make a fresh batch.
Can I mix hydrogen peroxide with other cleaning products?
Never mix hydrogen peroxide with vinegar or bleach. Mixing hydrogen peroxide with vinegar can create peracetic acid, which is a toxic and potentially dangerous chemical. Mixing hydrogen peroxide with bleach can create chlorine gas, which is also extremely toxic and can be fatal. Always use hydrogen peroxide alone or with water and essential oils.
Is this DIY cleaner safe for pets and children?
While hydrogen peroxide is generally considered safe when used properly, it’s important to keep it out of reach of children and pets. If ingested, it can cause stomach upset and irritation. Store the cleaner in a secure location where children and pets cannot access it. If your pet or child accidentally ingests the cleaner, contact a poison control center or seek medical attention immediately.
Can I use this cleaner to clean my toilet?
Yes, the DIY Natural Peroxide Cleaner is effective for cleaning toilets. Simply spray the cleaner inside the bowl and around the rim, let it sit for a few minutes, and then scrub with a toilet brush. The hydrogen peroxide will help to disinfect the toilet and remove stains.
What are the benefits of using a DIY Natural Peroxide Cleaner compared to commercial cleaners?
There are several benefits to using a DIY Natural Peroxide Cleaner:
* Cost-effective: Hydrogen peroxide is relatively inexpensive compared to many commercial cleaners.
* Environmentally friendly: It’s a biodegradable and non-toxic alternative to harsh chemicals.
* Safer for your health: It reduces your exposure to potentially harmful chemicals found in commercial cleaners.
* Versatile: It can be used for a wide range of cleaning tasks.
* Transparency: You know exactly what’s in it, giving you peace of mind.
Can I use this cleaner to remove blood stains?
Yes, hydrogen peroxide is an excellent stain remover for blood. Apply the cleaner directly to the blood stain, let it sit for a few minutes, and then blot with a clean cloth. Repeat as needed until the stain is removed. Always test on an inconspicuous area first, especially on delicate fabrics.
What safety precautions should I take when using hydrogen peroxide?
While hydrogen peroxide is generally safe, it’s important to take a few precautions:
* Wear gloves to protect your skin from irritation.
* Avoid contact with your eyes. If contact occurs, rinse thoroughly with water.
* Do not ingest.
* Test on an inconspicuous area before applying to a larger surface.
* Store in a dark, opaque bottle away from light and heat.
* Never mix with vinegar or bleach.


Leave a Comment