
DIY Lettuce Vertical Garden: Imagine stepping outside your door and harvesting fresh, crisp lettuce for your salad, sandwich, or even a quick snack. No more trips to the grocery store for wilted greens! That’s the magic of a DIY lettuce vertical garden, and I’m here to show you how incredibly easy it is to create your own.
Vertical gardening, in general, isn’t a new concept. Think of the Hanging Gardens of Babylon, one of the Seven Wonders of the Ancient World! While we might not be building anything quite so grand, the principle remains the same: maximizing space and bringing greenery into our lives. For centuries, people have found creative ways to grow plants upwards, especially in urban environments or areas with limited land.
But why a DIY lettuce vertical garden specifically? Well, lettuce is a fast-growing, shallow-rooted plant that thrives in containers. This makes it perfect for vertical setups. Plus, let’s be honest, who doesn’t love fresh lettuce? More importantly, in today’s world, where space is a premium and healthy eating is a priority, this DIY project offers a fantastic solution. It’s a cost-effective way to grow your own food, reduce your carbon footprint, and add a touch of beauty to your balcony, patio, or even a sunny indoor wall. So, let’s dive in and get our hands dirty! I’ll guide you through each step, ensuring you have a thriving vertical lettuce garden in no time.
DIY Vertikaler Salatgarten: Frischer Salat direkt von der Wand!
Hey Leute! Habt ihr auch so wenig Platz im Garten oder Balkon, aber trotzdem Lust auf frischen Salat? Dann habe ich genau das Richtige für euch: einen vertikalen Salatgarten! Das ist nicht nur super platzsparend, sondern sieht auch noch richtig cool aus. Ich zeige euch, wie ihr das ganz einfach selber bauen könnt. Los geht’s!
Was ihr braucht:
* Holzpalette: Am besten eine, die unbehandelt ist und keine scharfen Kanten hat. Achtet darauf, dass sie stabil ist!
* Gartenvlies: Das brauchen wir, um die Fächer der Palette auszukleiden.
* Tacker: Zum Befestigen des Gartenvlieses.
* Schere oder Cutter: Zum Zuschneiden des Vlieses.
* Erde: Am besten Bio-Gemüseerde.
* Salatpflanzen: Verschiedene Sorten für eine bunte Mischung!
* Handschuhe: Damit eure Hände sauber bleiben.
* Optional: Schleifpapier: Falls die Palette rau ist.
* Optional: Holzschutzlasur: Um die Palette wetterfest zu machen.
* Optional: Messwerkzeug (Zollstock oder Bandmaß): Für genaues Zuschneiden des Vlieses.
Vorbereitung ist alles!
Bevor wir loslegen, sollten wir die Palette vorbereiten. Das ist wichtig, damit unser Salat später gut wächst und die Palette lange hält.
1. Palette reinigen: Zuerst müsst ihr die Palette gründlich reinigen. Entfernt Staub, Schmutz und eventuelle lose Holzsplitter. Eine Bürste und etwas Wasser reichen meistens aus. Lasst die Palette danach gut trocknen.
2. Palette abschleifen (optional): Wenn die Palette sehr rau ist, könnt ihr sie mit Schleifpapier glätten. Das verhindert, dass ihr euch später an Splittern verletzt. Achtet besonders auf die Kanten.
3. Palette lasieren (optional): Um die Palette vor Witterungseinflüssen zu schützen, könnt ihr sie mit einer Holzschutzlasur behandeln. Das verlängert die Lebensdauer eures vertikalen Gartens. Lasst die Lasur gut trocknen, bevor ihr weitermacht. Achtet darauf, eine Lasur zu verwenden, die für den Außenbereich geeignet ist und keine schädlichen Stoffe enthält.
Die Fächer auskleiden: So bleibt die Erde drin!
Jetzt kommt der wichtigste Teil: das Auskleiden der Fächer mit Gartenvlies. Das verhindert, dass die Erde herausfällt und sorgt dafür, dass die Feuchtigkeit im Boden bleibt.
1. Vlies zuschneiden: Messt die einzelnen Fächer der Palette aus. Schneidet das Gartenvlies so zu, dass es etwas größer ist als die Fächer. So habt ihr genug Material zum Befestigen.
2. Vlies befestigen: Legt das zugeschnittene Vlies in ein Fach und tackert es an den Innenseiten der Palette fest. Achtet darauf, dass das Vlies gut anliegt und keine Löcher entstehen. Die Ecken könnt ihr falten und ebenfalls festtackern.
3. Wiederholen: Wiederholt die Schritte 1 und 2 für alle Fächer der Palette. Kontrolliert noch einmal, ob alle Fächer gut ausgekleidet sind und keine Erde herausfallen kann.
Salat einpflanzen: Jetzt wird’s grün!
Endlich können wir unseren Salat einpflanzen! Das ist der spaßigste Teil, finde ich.
1. Erde einfüllen: Füllt die Fächer mit Erde. Lasst oben noch etwas Platz, damit die Erde beim Gießen nicht überschwappt.
2. Salatpflanzen vorbereiten: Nehmt die Salatpflanzen aus ihren Töpfen und lockert die Wurzeln etwas auf.
3. Salat einpflanzen: Pflanzt die Salatpflanzen in die Erde. Achtet darauf, dass sie genügend Platz haben und nicht zu dicht beieinander stehen.
4. Angießen: Gießt die Salatpflanzen vorsichtig an.
Pflege: Damit der Salat prächtig gedeiht!
Damit euer Salat auch gut wächst, braucht er natürlich die richtige Pflege.
1. Gießen: Gießt den Salat regelmäßig, besonders an heißen Tagen. Achtet darauf, dass die Erde immer leicht feucht ist, aber nicht zu nass.
2. Düngen (optional): Wenn ihr möchtet, könnt ihr den Salat ab und zu mit etwas Bio-Gemüsedünger düngen. Das sorgt für eine reiche Ernte.
3. Schädlinge kontrollieren: Achtet auf Schädlinge wie Schnecken oder Blattläuse. Bei Bedarf könnt ihr natürliche Schädlingsbekämpfungsmittel einsetzen.
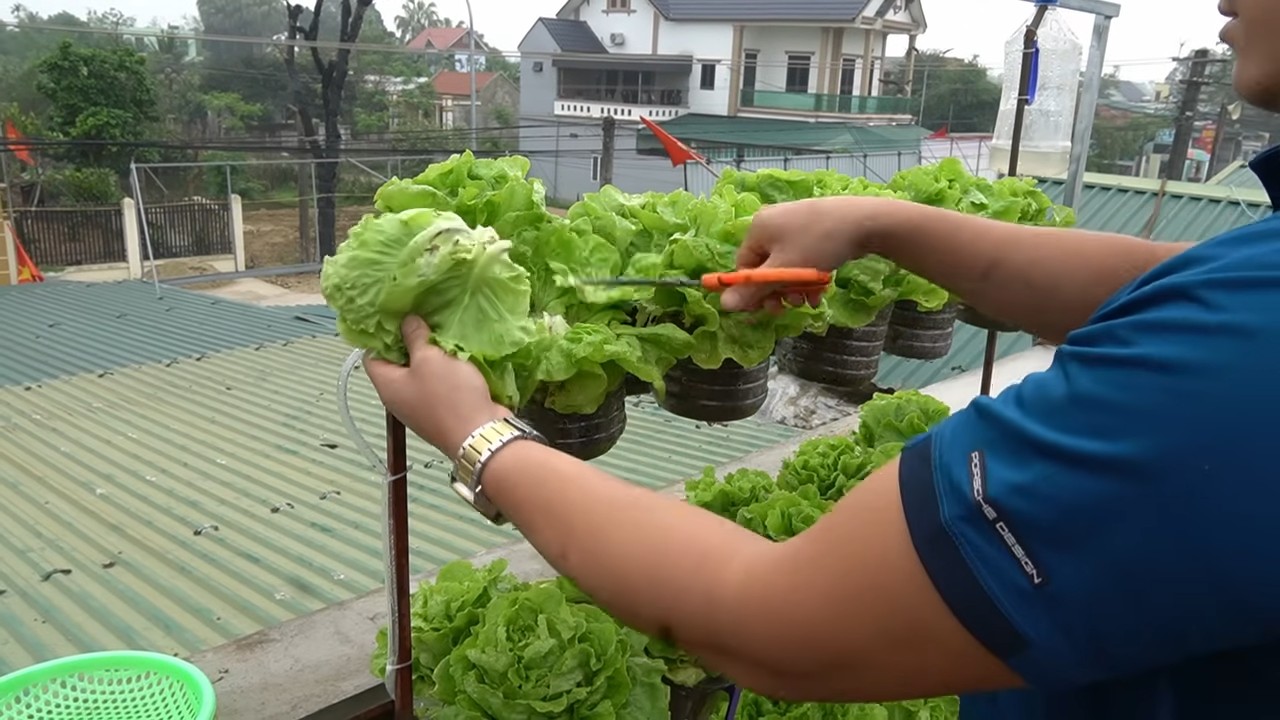
4. Ernten: Erntet den Salat, sobald er groß genug ist. Schneidet die Blätter einfach mit einem Messer ab. So wächst der Salat immer wieder nach.
Die richtige Platzierung: Wo fühlt sich der Salat wohl?
Der Standort ist entscheidend für das Wachstum eures Salats.
1. Sonniger Standort: Salat braucht viel Licht, aber keine pralle Mittagssonne. Ein halbschattiger Standort ist ideal.
2. Windgeschützt: Stellt die Palette an einen windgeschützten Ort, damit die Pflanzen nicht austrocknen.
3. Stabile Befestigung: Achtet darauf, dass die Palette sicher steht oder an einer Wand befestigt ist, damit sie nicht umkippen kann.
Weitere Tipps und Tricks:
* Verschiedene Salatsorten: Probiert verschiedene Salatsorten aus, wie Kopfsalat, Feldsalat, Pflücksalat oder Rucola. So habt ihr eine bunte Mischung und könnt immer wieder neue Geschmacksrichtungen entdecken.
* Kräuter: Ihr könnt auch Kräuter wie Petersilie, Schnittlauch oder Basilikum in euren vertikalen Garten pflanzen. Das passt super zu Salat und sieht toll aus.
* Blumen: Um euren vertikalen Garten noch bunter zu gestalten, könnt ihr auch ein paar essbare Blumen wie Ringelblumen oder Kapuzinerkresse pflanzen.
* Regelmäßiges Umtopfen: Wenn die Salatpflanzen zu groß werden, könnt ihr sie in größere Töpfe umtopfen.
* Boden verbessern: Mischt der Erde etwas Kompost bei, um sie mit Nährstoffen anzureichern.
* Schneckenabwehr: Um Schnecken fernzuhalten, könnt ihr Schneckenkorn oder Kaffeesatz um die Pflanzen streuen.
* Vertikale Bewässerung: Es gibt spezielle Bewässerungssysteme für vertikale Gärten, die euch das Gießen erleichtern.
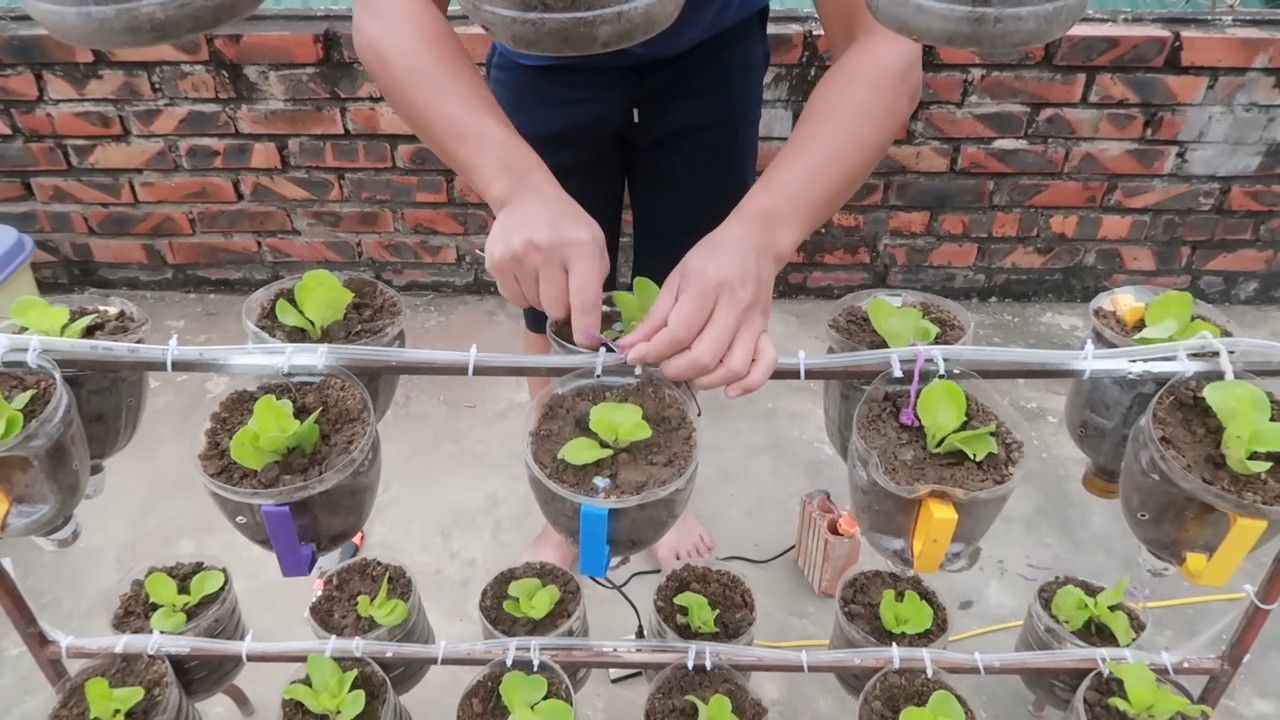
* Upcycling: Anstatt einer Palette könnt ihr auch andere Gegenstände wie alte Rohre, Plastikflaschen oder Stofftaschen für euren vertikalen Garten verwenden. Seid kreativ!
* Beschriftung: Beschriftet die einzelnen Fächer, damit ihr wisst, welche Salatsorte wo wächst.
* Fotos machen: Macht regelmäßig Fotos von eurem vertikalen Garten, um die Entwicklung zu dokumentieren.
Häufige Fehler vermeiden:
* Falsche Erde: Verwendet keine Blumenerde, sondern spezielle Gemüseerde.
* Zu viel Gießen: Vermeidet Staunässe, da dies zu Wurzelfäule führen kann.
* Zu wenig Licht: Stellt den Salat nicht an einen zu dunklen Ort.
* Schädlinge ignorieren: Kontrolliert die Pflanzen regelmäßig auf Schädlinge und handelt rechtzeitig.
* Ernte vergessen: Erntet den Salat regelmäßig, damit er nicht zu groß wird und bitter schmeckt.
Ich hoffe, diese Anleitung hilft euch dabei, euren eigenen vertikalen Salatgarten zu bauen. Es ist wirklich ein tolles Projekt und es macht Spaß, den Salat wachsen zu sehen und ihn dann frisch zu ernten. Viel Erfolg und guten Appetit!
Conclusion
So, there you have it! Creating your own DIY lettuce vertical garden isn’t just a fun project; it’s a game-changer for anyone looking to enjoy fresh, homegrown lettuce, regardless of space constraints. We’ve walked you through the simple steps, highlighting the benefits and offering tips to ensure your success. But why is this DIY trick a must-try?
Firstly, think about the sheer convenience. Imagine stepping outside your door and harvesting crisp, vibrant lettuce leaves whenever you need them. No more last-minute trips to the grocery store or settling for wilted, pre-packaged greens. The freshness and flavor of homegrown lettuce are simply unmatched.
Secondly, consider the space-saving aspect. Whether you have a sprawling backyard or a tiny balcony, a vertical garden allows you to maximize your growing potential. It’s an ingenious solution for urban dwellers and anyone with limited gardening space. You can grow a surprising amount of lettuce in a relatively small area.
Thirdly, it’s incredibly cost-effective. Once you’ve set up your vertical garden, the ongoing costs are minimal. You’ll save money on groceries and reduce your reliance on commercially grown lettuce, which often comes with a hefty price tag and environmental concerns.
But the benefits don’t stop there. Gardening is a therapeutic activity that can reduce stress and improve your overall well-being. Nurturing your lettuce plants and watching them thrive is a rewarding experience that connects you with nature. Plus, a vertical garden adds a touch of greenery and beauty to your outdoor space.
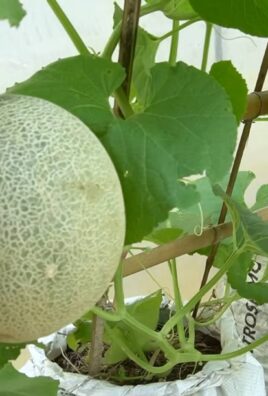
Now, let’s talk about variations. Feel free to get creative with your DIY lettuce vertical garden. You can use different types of containers, such as repurposed plastic bottles, hanging baskets, or even old pallets. Experiment with different lettuce varieties to find your favorites. Consider adding other herbs and vegetables to your vertical garden, such as spinach, kale, or strawberries. The possibilities are endless!
For a more aesthetically pleasing garden, consider painting your containers or adding decorative elements. You can also incorporate a simple irrigation system to make watering easier. If you live in a colder climate, you can move your vertical garden indoors during the winter months to extend your growing season.
We’ve provided a solid foundation for you to build upon. Remember to choose a sunny location, use well-draining soil, and water your lettuce plants regularly. With a little care and attention, you’ll be enjoying fresh, homegrown lettuce in no time.
We wholeheartedly encourage you to try this DIY lettuce vertical garden project. It’s a fun, rewarding, and sustainable way to grow your own food. Don’t be afraid to experiment and personalize your garden to suit your needs and preferences.
And most importantly, we want to hear about your experience! Share your photos, tips, and stories with us. Let us know what worked well for you, what challenges you faced, and what you learned along the way. Together, we can create a community of passionate gardeners who are committed to growing their own food and living a more sustainable lifestyle. So, get your hands dirty, embrace the challenge, and enjoy the delicious rewards of your own DIY lettuce vertical garden!
Frequently Asked Questions (FAQ)
What type of lettuce grows best in a vertical garden?
Loose-leaf lettuce varieties, such as Romaine, Butterhead, and Oakleaf, are generally the best choices for vertical gardens. They tend to be more compact and easier to harvest than head lettuce varieties. They also mature relatively quickly, allowing for multiple harvests throughout the growing season. Consider the amount of sunlight your vertical garden receives when selecting your lettuce varieties. Some varieties are more tolerant of shade than others.
How often should I water my lettuce vertical garden?
The frequency of watering depends on several factors, including the weather, the type of soil you’re using, and the type of containers you’re using. As a general rule, you should water your lettuce plants when the top inch of soil feels dry to the touch. During hot, dry weather, you may need to water them daily. In cooler, wetter weather, you may only need to water them every few days. Be careful not to overwater your lettuce plants, as this can lead to root rot. Ensure your containers have adequate drainage to prevent water from pooling at the bottom.
What kind of soil should I use for my lettuce vertical garden?
Use a well-draining potting mix that is specifically formulated for containers. Avoid using garden soil, as it can be too heavy and compact for container gardening. A good potting mix will retain moisture while still allowing for adequate drainage. You can also amend your potting mix with compost or other organic matter to improve its fertility and drainage.
How much sunlight does my lettuce vertical garden need?
Lettuce needs at least six hours of sunlight per day to thrive. However, it can also tolerate partial shade, especially during the hottest part of the day. If you live in a hot climate, consider placing your vertical garden in a location that receives morning sun and afternoon shade. If you live in a cooler climate, you can place your vertical garden in a location that receives full sun.
How do I harvest lettuce from my vertical garden?
You can harvest lettuce from your vertical garden by simply cutting off the outer leaves as needed. This is known as “cut-and-come-again” harvesting. The inner leaves will continue to grow, allowing you to harvest multiple times from the same plant. Avoid harvesting more than one-third of the leaves at a time, as this can stress the plant.
How do I fertilize my lettuce vertical garden?
Lettuce plants need regular fertilization to stay healthy and productive. You can use a liquid fertilizer or a slow-release fertilizer. Follow the instructions on the fertilizer label carefully. Avoid over-fertilizing your lettuce plants, as this can burn the roots. You can also amend your soil with compost or other organic matter to provide a slow-release source of nutrients.
How do I protect my lettuce vertical garden from pests and diseases?
There are several things you can do to protect your lettuce vertical garden from pests and diseases. First, choose disease-resistant lettuce varieties. Second, keep your garden clean and free of debris. Third, water your lettuce plants from the bottom to avoid wetting the leaves, which can promote fungal diseases. Fourth, inspect your plants regularly for pests and diseases. If you find any pests, you can remove them by hand or use an insecticidal soap. If you find any diseases, you can treat them with a fungicide.
Can I grow lettuce in a vertical garden indoors?
Yes, you can grow lettuce in a vertical garden indoors, but you’ll need to provide adequate light. A sunny windowsill may be sufficient, but you may need to supplement with grow lights. Choose compact lettuce varieties that are well-suited for indoor growing. Be sure to monitor the moisture levels in your soil and water accordingly.
What are some creative container ideas for a DIY lettuce vertical garden?
Beyond the standard plastic pots, consider repurposing items like old gutters, stacked tires, plastic bottles cut in half and hung upside down, or even fabric grow bags attached to a frame. Pallets are also a popular choice, but ensure they are heat-treated and not chemically treated before using them for growing food. Get creative and think about what materials you have readily available that could be transformed into a unique vertical garden structure.
How do I prevent my vertical garden from becoming too heavy?
Weight is a crucial consideration, especially if you’re hanging your vertical garden. Choose lightweight containers and potting mix. Avoid overwatering, as water adds significant weight. Consider reinforcing the structure you’re using to support the garden to ensure it can handle the weight of the plants, soil, and water. Distribute the weight evenly across the structure to prevent it from tipping or collapsing.


Leave a Comment