
Container tomato growing is more than just a trend; it’s a gateway to fresh, flavorful tomatoes right outside your door, no matter how limited your space might be! Imagine biting into a juicy, sun-ripened tomato you nurtured from a tiny seedling – the taste is simply unmatched. For centuries, humans have cultivated tomatoes, tracing their origins back to the Andes Mountains of South America. From humble beginnings, they’ve become a global culinary staple, and now, you can easily grow them yourself, even without a traditional garden.
But let’s be honest, getting started with container tomato growing can feel a little daunting. Where do you begin? What kind of container do you need? How do you avoid common pitfalls like blossom end rot or pests? That’s where this DIY guide comes in! I’m going to share my tried-and-true tricks and hacks for successful container tomato growing, ensuring you’ll be harvesting a bountiful crop in no time. Whether you’re a seasoned gardener or a complete beginner, these tips will empower you to create your own thriving tomato oasis, one container at a time. Get ready to roll up your sleeves and transform your balcony, patio, or even a sunny windowsill into a tomato-lover’s paradise!
Tomatenanbau im Container: Dein DIY-Guide für eine reiche Ernte
Hallo liebe Gartenfreunde! Ich liebe es, frische Tomaten direkt vom Strauch zu naschen. Aber was, wenn man keinen Garten hat? Kein Problem! Tomatenanbau im Container ist die perfekte Lösung für Balkone, Terrassen oder kleine Gärten. Ich zeige dir, wie du mit einfachen Mitteln und ein bisschen Geduld deine eigenen köstlichen Tomaten ernten kannst.
Die richtige Tomatensorte wählen
Bevor wir loslegen, ist die Wahl der richtigen Tomatensorte entscheidend. Nicht alle Tomaten sind für den Anbau im Container geeignet. Hier sind ein paar Tipps:
* **Buschtomaten (Determinate):** Diese Sorten wachsen kompakt und buschig, ideal für kleinere Container. Sie hören nach einer bestimmten Zeit auf zu wachsen und tragen ihre Früchte relativ gleichzeitig. Beispiele sind Roma, Tiny Tim oder Patio.
* **Stabtomaten (Indeterminate):** Diese Sorten wachsen kontinuierlich weiter und benötigen eine Stütze (z.B. einen Stab oder ein Spalier). Sie tragen über einen längeren Zeitraum Früchte. Wenn du genügend Platz hast, sind sie eine gute Wahl. Beispiele sind Cherrytomaten, Cocktailtomaten oder Fleischtomaten.
* **Zwergtomaten:** Diese Sorten sind besonders klein und eignen sich hervorragend für sehr kleine Container oder sogar Hängetöpfe.
Mein Tipp: Informiere dich vor dem Kauf genau über die Eigenschaften der jeweiligen Sorte, um die beste Wahl für deine Bedürfnisse zu treffen.
Die Vorbereitung: Was du brauchst
Damit deine Tomaten sich im Container wohlfühlen, brauchst du die richtige Ausrüstung. Hier ist eine Liste der wichtigsten Dinge:
* **Container:** Wähle einen ausreichend großen Container. Für Buschtomaten reichen in der Regel 10-20 Liter Volumen, für Stabtomaten sollten es mindestens 20-30 Liter sein. Achte darauf, dass der Container Drainagelöcher hat, damit überschüssiges Wasser ablaufen kann.
* **Tomatenerde:** Verwende spezielle Tomatenerde oder eine hochwertige Blumenerde. Diese ist nährstoffreich und sorgt für ein gesundes Wachstum.
* **Dünger:** Tomaten sind Starkzehrer und benötigen regelmäßige Düngung. Verwende einen organischen Tomatendünger oder einen Flüssigdünger.
* **Stütze:** Für Stabtomaten benötigst du einen Stab, ein Spalier oder eine andere Stütze, an der du die Pflanze befestigen kannst.
* **Gießkanne oder Schlauch:** Zum regelmäßigen Gießen deiner Tomaten.
* **Pflanzschaufel:** Zum Umtopfen der Tomatenpflanzen.
* **Handschuhe:** Zum Schutz deiner Hände.
* **Optional: Mulch:** Mulch (z.B. Stroh oder Holzhackschnitzel) hilft, die Feuchtigkeit im Boden zu halten und Unkraut zu unterdrücken.
Schritt-für-Schritt-Anleitung: Tomaten im Container pflanzen
Jetzt geht’s ans Eingemachte! Folge diesen Schritten, um deine Tomaten erfolgreich im Container anzupflanzen:
1. **Container vorbereiten:** Reinige den Container gründlich und stelle sicher, dass die Drainagelöcher frei sind. Lege eventuell eine Schicht Tonscherben oder Blähton auf den Boden des Containers, um die Drainage zu verbessern.
2. **Erde einfüllen:** Fülle den Container mit Tomatenerde, lasse aber etwa 5-10 cm Platz bis zum Rand.
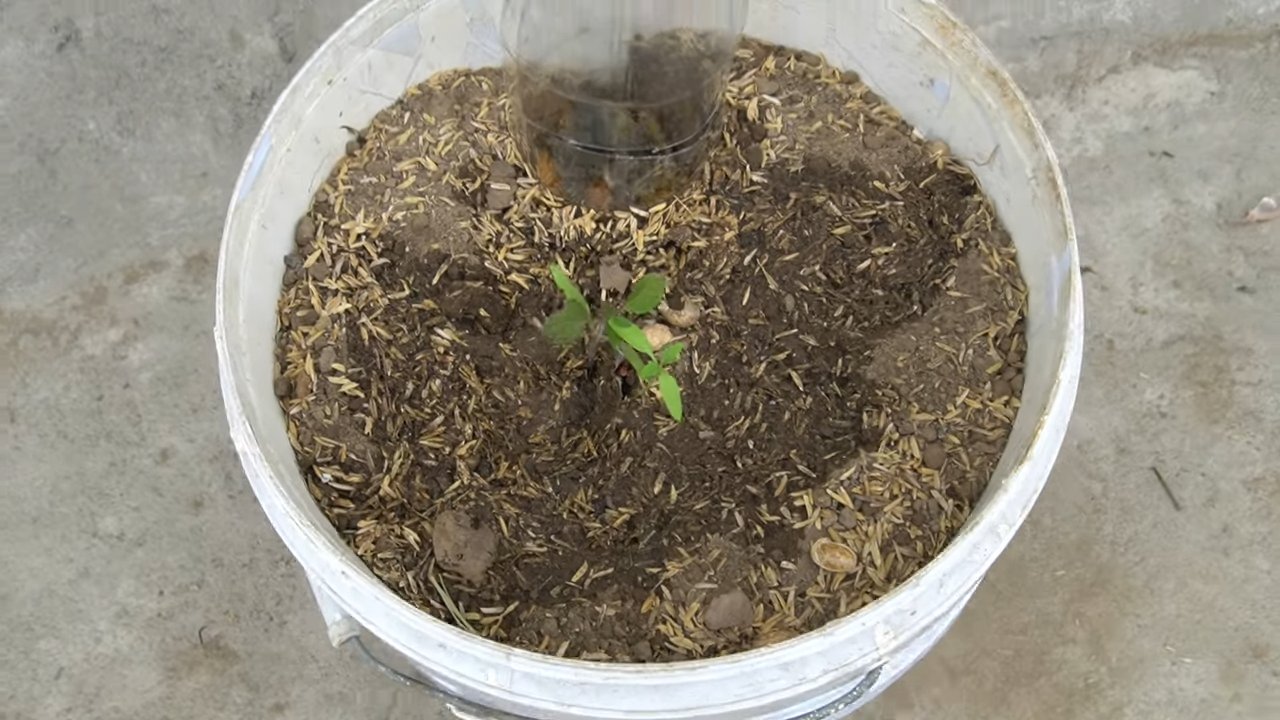
3. **Pflanze vorbereiten:** Nimm die Tomatenpflanze vorsichtig aus dem Anzuchttopf. Lockere die Wurzeln etwas auf, damit sie sich besser im neuen Container ausbreiten können.
4. **Pflanze einsetzen:** Setze die Tomatenpflanze mittig in den Container. Die oberste Wurzel sollte etwa 2-3 cm unter der Erdoberfläche liegen. Bei Stabtomaten kannst du die Pflanze etwas tiefer setzen, da sie an den Stängelstellen zusätzliche Wurzeln bilden können.
5. **Erde auffüllen:** Fülle den Container mit Erde auf und drücke sie leicht an.
6. **Angießen:** Gieße die Tomatenpflanze gründlich an, bis das Wasser aus den Drainagelöchern läuft.
7. **Stütze anbringen (bei Stabtomaten):** Stecke den Stab oder das Spalier in den Container, möglichst nah an der Pflanze, ohne die Wurzeln zu beschädigen.
8. **Mulchen (optional):** Verteile eine Schicht Mulch um die Tomatenpflanze, um die Feuchtigkeit im Boden zu halten und Unkraut zu unterdrücken.
Die Pflege: So bleiben deine Tomaten gesund und ertragreich
Die richtige Pflege ist entscheidend für eine reiche Tomatenernte. Hier sind ein paar wichtige Tipps:
* **Gießen:** Gieße deine Tomaten regelmäßig, besonders an heißen Tagen. Die Erde sollte immer leicht feucht sein, aber nicht nass. Vermeide es, die Blätter zu gießen, da dies Pilzkrankheiten fördern kann. Gieße am besten morgens oder abends, wenn die Sonne nicht scheint.
* **Düngen:** Dünge deine Tomaten regelmäßig, etwa alle 1-2 Wochen, mit einem organischen Tomatendünger oder einem Flüssigdünger. Beachte die Anweisungen auf der Verpackung.
* **Ausgeizen (bei Stabtomaten):** Entferne regelmäßig die Seitentriebe (Geiztriebe), die sich in den Blattachseln bilden. Dies fördert das Wachstum der Haupttriebe und sorgt für eine bessere Belüftung der Pflanze.
* **Stützen (bei Stabtomaten):** Binde die Tomatenpflanze regelmäßig an den Stab oder das Spalier, damit sie nicht umknickt.
* **Schutz vor Schädlingen und Krankheiten:** Kontrolliere deine Tomaten regelmäßig auf Schädlinge und Krankheiten. Bei Bedarf kannst du biologische Schädlingsbekämpfungsmittel oder Fungizide einsetzen.
* **Sonnenschein:** Tomaten lieben die Sonne! Stelle deine Container an einen sonnigen Standort, an dem sie mindestens 6-8 Stunden Sonne pro Tag bekommen.
* **Belüftung:** Sorge für eine gute Belüftung der Pflanzen, um Pilzkrankheiten vorzubeugen. Stelle die Container nicht zu dicht nebeneinander.
Häufige Probleme und Lösungen
Auch beim Tomatenanbau im Container können Probleme auftreten. Hier sind ein paar häufige Probleme und wie du sie lösen kannst:
* **Gelbe Blätter:** Gelbe Blätter können verschiedene Ursachen haben, z.B. Nährstoffmangel, Wassermangel oder Pilzkrankheiten. Überprüfe die Erde auf Feuchtigkeit und dünge die Pflanze bei Bedarf. Entferne befallene Blätter.
* **Blütenendfäule:** Blütenendfäule ist ein Calciummangel, der sich durch braune, ledrige Flecken am Blütenende der Tomaten äußert. Sorge für eine gleichmäßige Wasserversorgung und dünge die Pflanze mit einem calciumhaltigen Dünger.
* **Schädlinge:** Blattläuse, Weiße Fliege oder Spinnmilben können deine Tomaten befallen. Spritze die Pflanzen mit einem biologischen Schädlingsbekämpfungsmittel ab.
* **Pilzkrankheiten:** Braunfäule oder Krautfäule sind häufige Pilzkrankheiten, die sich durch braune Flecken auf den Blättern und Früchten äußern. Entferne befallene Blätter und Früchte und spritze die Pflanzen mit einem Fungizid. Sorge für eine gute Belüftung der Pflanzen.
Die Ernte: Der Lohn deiner Mühe
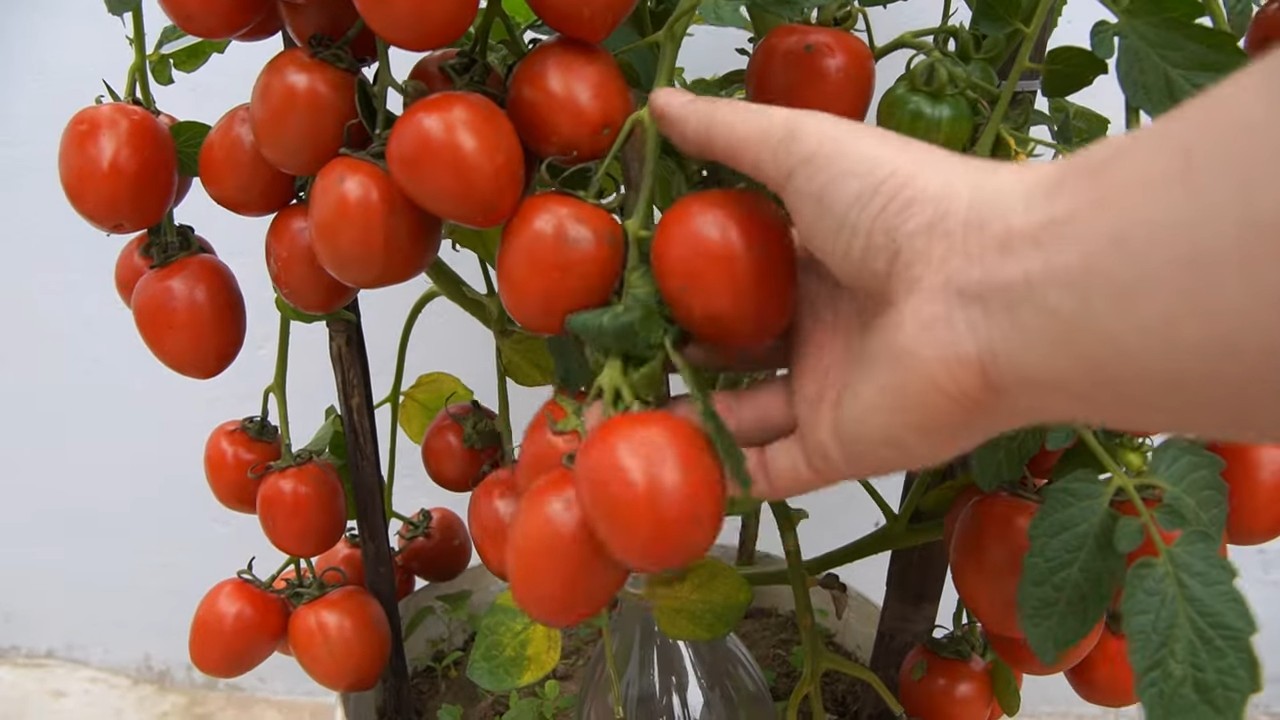
Nach all der Arbeit und Pflege ist es endlich soweit: Die Tomaten sind reif! Die Erntezeit hängt von der Sorte und den Witterungsbedingungen ab. Reife Tomaten sind leuchtend rot (oder gelb, orange, je nach Sorte) und lassen sich leicht vom Stiel lösen.
Mein Tipp: Ernte die Tomaten am besten an einem trockenen Tag, wenn sie vollsonnig sind. So schmecken sie am besten!
Ich hoffe, dieser Guide hat dir geholfen, deine eigenen Tomaten im Container anzubauen. Mit ein bisschen Geduld und Pflege wirst du bald eine reiche Ernte genießen können. Viel Spaß beim Gärtnern!
Conclusion
So, there you have it! Transforming your gardening game with this simple yet incredibly effective DIY trick for container tomato growing is not just a possibility, it’s practically a guarantee for a bountiful harvest. We’ve walked you through the steps, highlighted the benefits, and hopefully, inspired you to ditch the expensive, pre-made solutions and embrace the satisfaction of creating something amazing with your own two hands.
Why is this a must-try? Because it’s more than just saving money. It’s about understanding your plants’ needs and providing them with the optimal environment to thrive. It’s about reducing waste by repurposing materials you likely already have. And most importantly, it’s about experiencing the joy of nurturing life from seed to table, knowing you played an active role in every step of the process.
Think of the possibilities! You’re not limited to just one type of tomato. Experiment with different varieties – cherry tomatoes cascading over the edges of your containers, beefsteak tomatoes promising juicy slices for summer sandwiches, or even Roma tomatoes perfect for homemade sauces. You can also adapt this method to other vining vegetables like cucumbers or even certain types of squash, adjusting the support structure as needed. Consider adding companion plants like basil or marigolds to your containers to deter pests and attract beneficial insects, creating a mini-ecosystem right on your patio.
Don’t be afraid to get creative with your container choices too. While we’ve focused on using readily available plastic containers, you could also repurpose old buckets, wooden crates lined with landscape fabric, or even large grow bags. The key is to ensure adequate drainage and sufficient space for the roots to develop.
We understand that gardening can sometimes feel intimidating, but this DIY trick is designed to be accessible to everyone, regardless of their experience level. It’s a forgiving method that allows you to learn as you go, adapting your approach based on what works best for your specific environment and tomato varieties.
This DIY container tomato growing method is a game-changer for anyone looking to maximize their yield and minimize their expenses. It’s a sustainable, cost-effective, and incredibly rewarding way to enjoy fresh, homegrown tomatoes all season long.
So, what are you waiting for? Gather your supplies, get your hands dirty, and prepare to be amazed by the results. We’re confident that you’ll be thrilled with the abundance of delicious tomatoes you’ll be harvesting in no time.
But don’t just take our word for it! We encourage you to try this DIY trick for container tomato growing and share your experience with us. Post pictures of your thriving tomato plants, share your tips and tricks, and let us know what worked best for you. Together, we can create a community of passionate gardeners who are committed to growing their own food in a sustainable and rewarding way. Happy gardening!
Frequently Asked Questions (FAQ)
What type of container is best for growing tomatoes?
The ideal container for growing tomatoes should be large enough to accommodate the plant’s root system and provide adequate drainage. A minimum of 10 gallons is recommended for determinate (bush) varieties, while 20 gallons or more is preferable for indeterminate (vining) varieties. Plastic containers are a popular and affordable option, but you can also use grow bags, repurposed buckets, or even wooden crates lined with landscape fabric. Ensure the container has drainage holes to prevent waterlogging, which can lead to root rot. The material of the container isn’t as important as its size and drainage capabilities. Dark-colored containers can heat up quickly in direct sunlight, so consider using lighter colors or providing shade during the hottest part of the day.
How often should I water my container tomatoes?
Watering frequency depends on several factors, including the size of the container, the weather conditions, and the type of tomato plant. Generally, container tomatoes need to be watered more frequently than tomatoes grown in the ground because the soil in containers dries out faster. Check the soil moisture level daily by sticking your finger about an inch or two into the soil. If the soil feels dry to the touch, it’s time to water. Water deeply until water drains out of the drainage holes, ensuring the entire root ball is moistened. Avoid overhead watering, as this can promote fungal diseases. Instead, water at the base of the plant. During hot, dry weather, you may need to water your container tomatoes twice a day.
What kind of soil should I use for container tomato growing?
The best soil for container tomato growing is a well-draining potting mix that is rich in organic matter. Avoid using garden soil, as it can become compacted in containers and restrict root growth. A good potting mix will retain moisture while still allowing for adequate drainage. You can also amend your potting mix with compost, aged manure, or other organic materials to improve its fertility and water-holding capacity. Consider adding perlite or vermiculite to further improve drainage. A slightly acidic soil pH of around 6.0 to 6.8 is ideal for tomatoes.
How much sunlight do container tomatoes need?
Tomatoes are sun-loving plants and require at least 6-8 hours of direct sunlight per day to thrive. Choose a location for your container tomatoes that receives plenty of sunlight throughout the day. If you live in a particularly hot climate, you may need to provide some afternoon shade to prevent the plants from overheating. If you don’t have a sunny location, you can supplement with grow lights. Rotate your containers regularly to ensure all sides of the plant receive adequate sunlight.
Do I need to fertilize my container tomatoes?
Yes, container tomatoes benefit from regular fertilization. Because the nutrients in the potting mix are limited, you’ll need to provide supplemental nutrients to support healthy growth and fruit production. Start fertilizing your tomatoes a few weeks after transplanting them into their containers. Use a balanced fertilizer that is specifically formulated for tomatoes, following the instructions on the label. You can also use organic fertilizers such as compost tea or fish emulsion. Fertilize every 2-3 weeks throughout the growing season. Avoid over-fertilizing, as this can lead to excessive foliage growth and reduced fruit production.
How do I support my tomato plants in containers?
Indeterminate tomato varieties, which continue to grow and produce fruit throughout the season, require support to prevent them from sprawling and breaking under the weight of the fruit. You can use stakes, cages, or trellises to support your tomato plants. Insert the support structure into the container when you transplant the seedlings to avoid damaging the roots later. Tie the tomato stems to the support structure as they grow, using soft twine or plant ties. Cages are a popular option because they provide all-around support and allow the plant to grow naturally. Stakes are a more economical option, but they require more frequent tying.
How do I prevent pests and diseases in my container tomatoes?
Preventing pests and diseases is crucial for successful container tomato growing. Start by choosing disease-resistant tomato varieties. Inspect your plants regularly for signs of pests or diseases. Common tomato pests include aphids, whiteflies, and tomato hornworms. You can control these pests with insecticidal soap, neem oil, or by handpicking them off the plants. Common tomato diseases include early blight, late blight, and blossom end rot. Prevent these diseases by providing good air circulation, avoiding overhead watering, and using a fungicide if necessary. Mulching around the base of the plants can also help to prevent soilborne diseases. Ensure proper drainage to avoid root rot.
What is blossom end rot and how do I prevent it?
Blossom end rot is a common problem in tomatoes that is caused by a calcium deficiency. It appears as a dark, leathery spot on the bottom of the fruit. To prevent blossom end rot, ensure your soil has adequate calcium levels. You can add lime or bone meal to the soil before planting. Also, maintain consistent watering to prevent fluctuations in soil moisture, which can interfere with calcium uptake. Avoid over-fertilizing with nitrogen, as this can also contribute to blossom end rot.
Can I grow tomatoes in containers indoors?
Yes, you can grow tomatoes in containers indoors, but it requires providing them with adequate light and warmth. You’ll need to use grow lights to supplement natural sunlight, providing at least 14-16 hours of light per day. Choose a warm location with temperatures between 70-80°F during the day and 60-70°F at night. Pollinate the flowers manually by gently shaking the plants or using a small brush to transfer pollen from one flower to another. Choose compact or dwarf tomato varieties that are well-suited for indoor growing.
How do I know when my tomatoes are ripe?
The color of the tomato will change from green to its mature color, which depends on the variety (red, yellow, orange, etc.). The tomato should also feel slightly soft to the touch but not mushy. Gently twist the tomato from the vine. If it comes off easily, it’s ripe. The aroma of a ripe tomato is also a good indicator.
Leave a Comment