
Container potatoes indoors? Absolutely! Forget needing acres of farmland; you can grow your own delicious spuds right in your home, even if you only have a sunny windowsill. Imagine the satisfaction of harvesting fresh, homegrown potatoes just steps from your kitchen – it’s easier than you think!
Growing potatoes in containers isn’t a newfangled idea. In fact, resourceful gardeners have been adapting potato cultivation to limited spaces for centuries. Think of rooftop gardens in bustling cities or small cottage gardens where every inch counts. This method allows anyone, regardless of their living situation, to experience the joy of growing their own food.
But why should you try growing container potatoes indoors? Well, for starters, it’s a fantastic way to have access to fresh, organic produce year-round, regardless of the weather outside. Plus, it’s a fun and rewarding project that connects you with nature and teaches you about the growing process. Let’s be honest, store-bought potatoes just don’t compare to the flavor of freshly dug, homegrown ones. And with rising food costs, growing your own can even save you money! So, let’s dive into some simple DIY tricks and hacks that will have you harvesting a bountiful crop of potatoes from your very own indoor garden. I’m excited to share my tips and tricks with you!
Growing Potatoes Indoors: A Spud-tacular DIY Guide!
Hey there, fellow plant enthusiasts! Ever dreamt of harvesting your own potatoes without a garden? Well, dream no more! I’m going to walk you through a super fun and rewarding DIY project: growing potatoes indoors in containers. It’s easier than you think, and the satisfaction of digging up your own homegrown spuds is simply unbeatable. Let’s get started!
What You’ll Need: The Potato Power Starter Pack
Before we dive in, let’s gather our supplies. This is crucial for a smooth and successful potato-growing adventure.
* Seed Potatoes: These aren’t your regular grocery store potatoes. Seed potatoes are specifically grown for planting and are certified disease-free. You can find them at your local garden center or online. Choose varieties that mature quickly and are suitable for container growing, like Yukon Gold, Red Pontiac, or fingerling potatoes. I personally love Yukon Gold for their buttery flavor!
* Large Containers: We’re talking big! Think at least 10-gallon containers, but bigger is better. Potatoes need room to grow, both above and below the soil. Plastic buckets, large pots, or even repurposed trash cans (with drainage holes, of course!) will work.
* Well-Draining Potting Mix: This is key. Regular garden soil is too heavy and compacts easily, which potatoes hate. Opt for a high-quality potting mix that’s light, airy, and drains well. You can also amend it with perlite or vermiculite for extra drainage.
* Grow Lights (Optional but Recommended): If you don’t have a sunny spot that gets at least 6-8 hours of direct sunlight per day, grow lights are a must. They’ll provide the necessary light for healthy potato growth.
* Watering Can or Hose: For keeping your potatoes hydrated.
* Fertilizer: A balanced, slow-release fertilizer or a liquid fertilizer formulated for vegetables.
* Sharp Knife: For cutting the seed potatoes (if needed).
* Gloves: To keep your hands clean.
Preparing Your Seed Potatoes: The Sprout-tacular Start
This step is crucial for getting your potatoes off to a good start. We want to encourage those little eyes to sprout!
1. Chitting (Optional but Recommended): Chitting is the process of encouraging your seed potatoes to sprout before planting. This gives them a head start and can result in an earlier harvest. To chit your potatoes, place them in a cool, bright location (but not direct sunlight) for a few weeks. You’ll see small, green sprouts (eyes) emerging from the potatoes.
2. Cutting (If Necessary): If your seed potatoes are large (bigger than an egg), you can cut them into smaller pieces. Each piece should have at least 1-2 eyes. Let the cut pieces air dry for a day or two to allow the cut surfaces to callous over. This helps prevent rot. I usually cut mine into pieces about the size of a golf ball.
3. Choosing the Right Pieces: When cutting, make sure each piece has a good number of “eyes” or sprouts. These are where the new potato plants will emerge from. Discard any potatoes that show signs of rot or disease.
Planting Your Potatoes: The Underground Adventure Begins
Now for the fun part – planting! This is where we get our hands dirty and set the stage for a bountiful harvest.
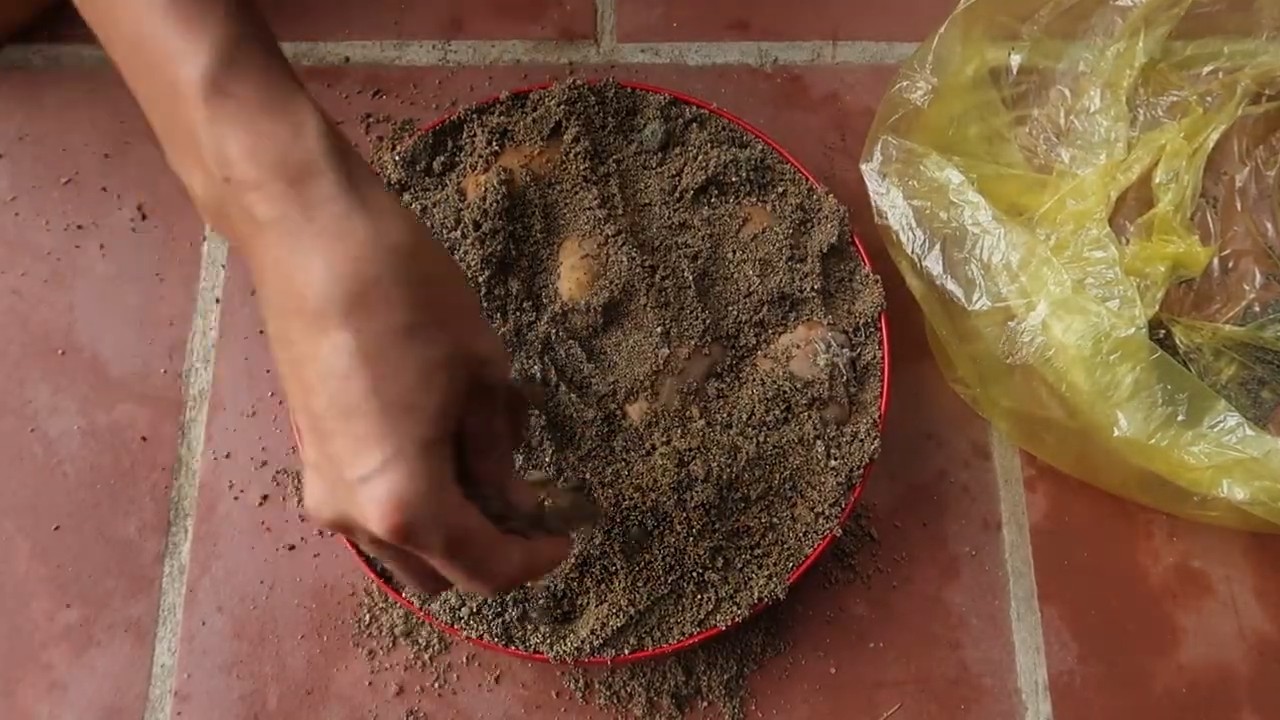
1. Prepare the Container: Fill the container with about 4-6 inches of potting mix.
2. Plant the Seed Potatoes: Place the seed potato pieces (sprouts facing up) on top of the soil, spacing them about 8-10 inches apart. If you’re only planting one seed potato per container, place it in the center.
3. Cover with Soil: Cover the seed potatoes with another 4-6 inches of potting mix.
4. Water Thoroughly: Water the soil until it’s evenly moist but not soggy.
Hilling Your Potatoes: The Mound-Building Magic
Hilling is a crucial technique for maximizing your potato yield. It encourages the plant to produce more potatoes along the stem.
1. Wait for Growth: As the potato plants grow, they’ll start to emerge from the soil. Wait until the stems are about 6-8 inches tall.
2. Add More Soil: Gently add more potting mix to the container, burying the stems up to the bottom set of leaves. Leave the top leaves exposed.
3. Repeat: Continue hilling every few weeks as the plants grow, until the container is almost full. This encourages the plant to produce more potatoes along the buried stem. I usually hill mine every 2-3 weeks.
Caring for Your Potatoes: The Nurturing Phase
Now that your potatoes are planted, it’s time to provide them with the care they need to thrive.
1. Watering: Potatoes need consistent moisture, but they don’t like to be waterlogged. Water deeply when the top inch of soil feels dry to the touch. Avoid overwatering, as this can lead to rot.
2. Fertilizing: Feed your potatoes with a balanced fertilizer every few weeks. You can use a slow-release fertilizer or a liquid fertilizer diluted according to the package instructions. I prefer using a liquid fertilizer because it’s easier to control the dosage.
3. Light: Potatoes need plenty of light to grow. If you’re growing them indoors, provide them with at least 6-8 hours of direct sunlight per day or use grow lights.
4. Temperature: Potatoes prefer cool temperatures, around 60-70°F (15-21°C). Avoid placing them in areas that are too hot or too cold.
5. Pest Control: Keep an eye out for pests like aphids, potato beetles, and flea beetles. If you spot any pests, treat them with an appropriate insecticide or organic pest control method. I usually use insecticidal soap for aphids.
Harvesting Your Potatoes: The Spud-tacular Finale!
The moment we’ve all been waiting for! Harvesting your own homegrown potatoes is incredibly rewarding.
1. Timing: Potatoes are typically ready to harvest about 70-90 days after planting, depending on the variety. You’ll know they’re ready when the plants start to flower and the foliage begins to yellow and die back.
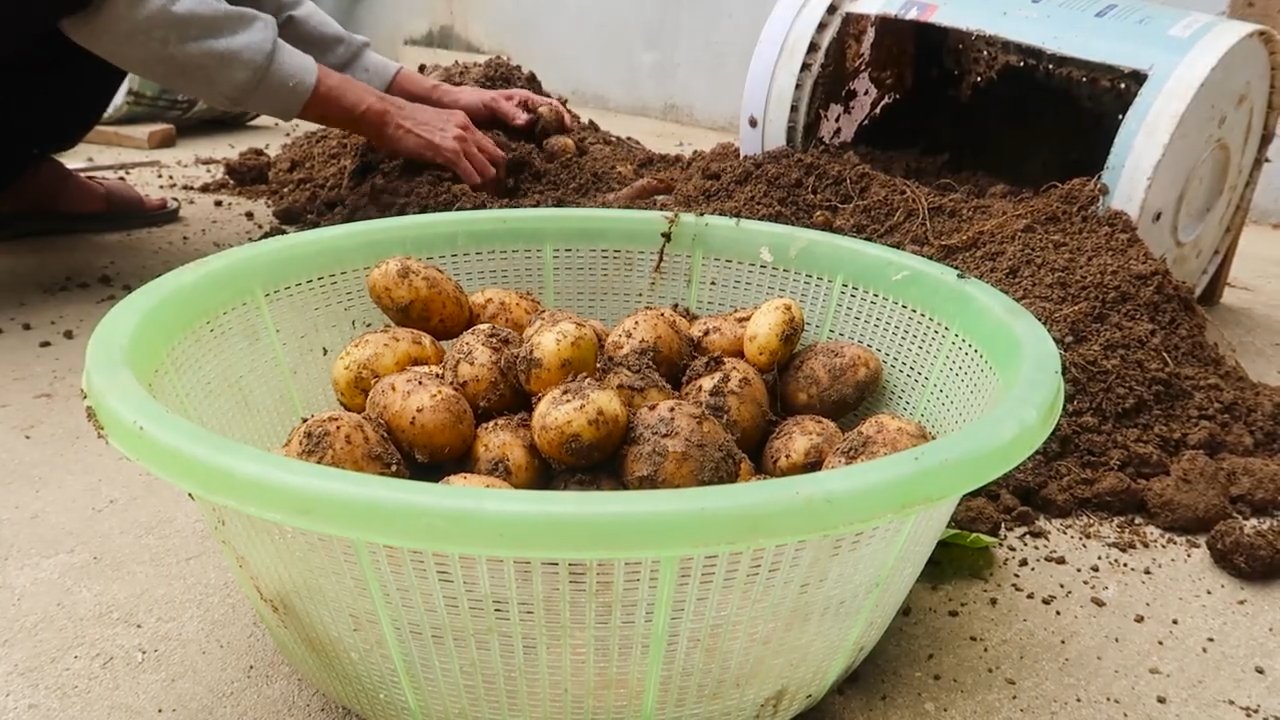
2. Harvesting: Gently dig around the base of the plant with your hands or a small trowel. Be careful not to damage the potatoes.
3. Enjoy! Once you’ve harvested your potatoes, brush off the excess soil and let them cure in a cool, dark place for a few days before storing them.
Troubleshooting: Common Potato Problems and Solutions
Even with the best care, you might encounter some challenges along the way. Here are some common potato problems and how to fix them:
* Leggy Plants: This usually indicates a lack of light. Move your potatoes to a sunnier location or provide them with grow lights.
* Yellowing Leaves: This could be caused by overwatering, underwatering, or nutrient deficiencies. Check the soil moisture and adjust your watering accordingly. Fertilize your potatoes with a balanced fertilizer.
* Rotting Potatoes: This is usually caused by overwatering or poor drainage. Make sure your containers have adequate drainage holes and avoid overwatering.
* Pests: As mentioned earlier, keep an eye out for pests and treat them promptly.
Choosing the Right Potato Variety: A Spud for Every Taste
Selecting the right potato variety is crucial for success, especially when growing in containers. Here are a few of my favorites:
* Yukon Gold: These are my go-to potatoes for indoor growing. They’re early-maturing, have a delicious buttery flavor, and are well-suited for containers.
* Red Pontiac: These red-skinned potatoes are another great option for container growing. They’re known for their smooth texture and slightly sweet flavor.
* Fingerling Potatoes: These long, slender potatoes are a fun and unique option. They come in a variety of colors and have a firm, waxy texture.
Optimizing Your Potato Growing Setup: Tips and Tricks
Here are a few extra tips and tricks to help you maximize your potato harvest:
* Rotate Your Crops: If you’re growing potatoes in the same containers year after year, rotate your crops to prevent soilborne diseases.
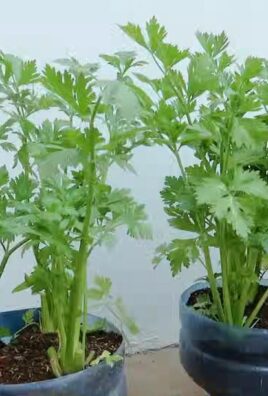
* Use Companion Planting: Plant companion plants like marigolds, basil, or nasturtiums around your potatoes to deter pests.
* Mulch: Mulch around your potato plants with straw or wood chips to help retain moisture and suppress weeds.
* Monitor Soil pH: Potatoes prefer a slightly acidic soil pH (around 6.0-6.5). Test your soil pH and adjust it if necessary.
Enjoying Your Homegrown Potatoes: From Garden to Table
Now that you’
Conclusion
So, there you have it! Growing potatoes indoors in containers isn’t just a quirky gardening experiment; it’s a genuinely rewarding and surprisingly simple way to enjoy fresh, homegrown potatoes, even without a sprawling garden. We’ve walked you through the entire process, from selecting the right seed potatoes and choosing the perfect container to mastering the art of watering and “hilling” to maximize your yield.
But why is this DIY trick a must-try? Beyond the sheer satisfaction of nurturing life from a tiny seed potato to a harvest of delicious spuds, growing potatoes indoors offers several compelling advantages. Firstly, it grants you complete control over the growing environment, shielding your precious plants from unpredictable weather, pests, and diseases that can plague outdoor gardens. This translates to a healthier, more productive crop. Secondly, it extends the growing season, allowing you to enjoy fresh potatoes long before or after the traditional outdoor harvest. Imagine savoring the taste of homegrown new potatoes in the dead of winter – a true culinary delight! Thirdly, it’s an incredibly space-efficient method, perfect for apartment dwellers, urban gardeners, or anyone with limited outdoor space. A few strategically placed containers can yield a surprisingly bountiful harvest.
Don’t be afraid to experiment with variations to personalize your potato-growing experience. Try different potato varieties to discover your favorites. Russets are great for baking, Yukon Golds are perfect for boiling, and fingerling potatoes offer a unique and delicate flavor. You can also experiment with different soil mixes to find what works best for your growing conditions. Some gardeners swear by adding compost or worm castings to enrich the soil and boost potato production. Consider adding companion plants like marigolds or basil to your potato containers to deter pests and attract beneficial insects.
And speaking of boosting production, remember the importance of consistent watering and proper hilling. These two factors are crucial for maximizing your potato yield. Keep the soil consistently moist but not waterlogged, and continue to add soil or compost around the stems as they grow, encouraging the formation of more potatoes along the buried stems.
Finally, remember that growing potatoes indoors is a learning process. Don’t be discouraged if your first attempt isn’t perfect. Every gardener, even the most experienced, faces challenges along the way. The key is to learn from your mistakes, adapt your techniques, and keep experimenting.
We wholeheartedly encourage you to give this DIY trick a try. It’s a fun, educational, and ultimately rewarding experience that will connect you with the natural world and provide you with a delicious and sustainable source of food. Once you’ve harvested your first crop of homegrown potatoes, we’d love to hear about your experience! Share your photos, tips, and stories in the comments below. Let’s build a community of indoor potato growers and inspire others to discover the joy of homegrown goodness. This method of **container potatoes indoors** is a game changer.
Frequently Asked Questions (FAQ)
What are the best potato varieties to grow indoors in containers?
While many potato varieties can be grown indoors, some are better suited for container gardening than others. Look for varieties that are relatively compact and early-maturing. Some excellent choices include:
* **Yukon Gold:** A popular all-purpose potato with a creamy texture and buttery flavor. They are relatively early maturing and produce well in containers.
* **Red Pontiac:** A classic red-skinned potato with a waxy texture, ideal for boiling and salads. They are also relatively early maturing and disease-resistant.
* **Fingerling Potatoes (e.g., Russian Banana, French Fingerling):** These small, elongated potatoes have a unique flavor and texture. They are well-suited for container gardening due to their smaller size.
* **Irish Cobbler:** An early-maturing white potato with a slightly floury texture. They are a good choice for baking and mashing.
* **’Kennebec’:** A versatile potato good for baking, frying, and mashing. It is relatively disease resistant and produces a good yield.
Ultimately, the best variety for you will depend on your personal preferences and growing conditions. Experiment with different varieties to find what works best in your indoor garden.
How much sunlight do indoor container potatoes need?
Potatoes need at least 6-8 hours of direct sunlight per day to thrive. If you don’t have a sunny window, you can supplement with grow lights. Position the grow lights about 6-12 inches above the plants and keep them on for 12-16 hours per day. Rotate the containers regularly to ensure that all sides of the plants receive adequate light. Insufficient light can lead to leggy growth and reduced potato production.
What type of container is best for growing potatoes indoors?
Choose a container that is at least 10-12 inches in diameter and 12-18 inches deep. Fabric grow bags are an excellent option because they allow for good drainage and aeration, preventing root rot. Plastic or terracotta pots can also be used, but make sure they have drainage holes. You can also use a large bucket or even a trash can, as long as it has drainage holes. The size of the container will determine how many seed potatoes you can plant. A larger container will allow for more potatoes to grow.
How often should I water my indoor container potatoes?
Water your potatoes regularly, keeping the soil consistently moist but not waterlogged. Check the soil moisture level by sticking your finger about an inch into the soil. If it feels dry, it’s time to water. Avoid overwatering, as this can lead to root rot. The frequency of watering will depend on the size of the container, the type of soil, and the ambient temperature. In general, you may need to water more frequently during hot, dry weather.
What is “hilling” and why is it important for growing potatoes?
Hilling is the process of adding soil or compost around the stems of the potato plants as they grow. This encourages the formation of more potatoes along the buried stems. As the stems grow taller, gradually add soil or compost until only the top few leaves are visible. Repeat this process every few weeks until the container is nearly full. Hilling is crucial for maximizing your potato yield.
How do I know when my indoor container potatoes are ready to harvest?
Potatoes are typically ready to harvest when the plants begin to flower or when the foliage starts to turn yellow and die back. You can harvest “new potatoes” (small, immature potatoes) a few weeks after flowering. For larger, more mature potatoes, wait until the foliage has completely died back. To harvest, gently dig around the base of the plant and lift the potatoes out of the soil.
What are some common pests and diseases that affect indoor container potatoes?
While indoor container potatoes are generally less susceptible to pests and diseases than outdoor plants, they can still be affected by certain problems. Common pests include aphids, spider mites, and whiteflies. These pests can be controlled with insecticidal soap or neem oil. Common diseases include early blight and late blight. These diseases can be prevented by providing good air circulation and avoiding overwatering. If you notice any signs of pests or diseases, take action immediately to prevent them from spreading.
Can I reuse the soil from my potato containers?
It’s generally not recommended to reuse the soil from your potato containers, as it may contain disease pathogens or pests. However, if you choose to reuse the soil, you should sterilize it first by baking it in the oven at 180°F (82°C) for 30 minutes. You should also amend the soil with fresh compost or other organic matter to replenish nutrients.
How do I store my harvested potatoes?
Store your harvested potatoes in a cool, dark, and dry place. A root cellar is ideal, but a basement or garage will also work. Avoid storing potatoes in the refrigerator, as this can cause them to develop a sweet taste. Potatoes should be stored away from apples and bananas, as these fruits release ethylene gas, which can cause potatoes to sprout. Properly stored potatoes can last for several months.
Leave a Comment