
Clean Wood Cutting Board: Is your trusty wooden cutting board starting to look a little… less than appetizing? Don’t worry, you’re not alone! We’ve all been there. That beautiful, natural surface that once gleamed is now sporting knife marks, stains, and maybe even a lingering odor of garlic from last week’s stir-fry. But before you resign yourself to buying a new one, let me tell you a secret: you can bring it back to life with some simple DIY magic!
Wood cutting boards have been a kitchen staple for centuries, dating back to a time when they were often crafted from a single piece of sturdy hardwood. They represent a connection to simpler times, a time when food preparation was a more hands-on, deliberate process. But unlike our ancestors, we have the benefit of modern knowledge and readily available ingredients to keep these essential tools in tip-top shape.
Why is it so important to clean wood cutting board properly? Well, beyond the obvious aesthetic reasons, a clean cutting board is crucial for food safety. Wood, being a porous material, can harbor bacteria if not properly cared for. This DIY guide will provide you with easy, effective, and natural methods to sanitize, deodorize, and restore your wooden cutting board, ensuring it remains a safe and beautiful part of your kitchen for years to come. I’m excited to share these simple tricks with you, so let’s get started!
DIY Wood Cutting Board Cleaning and Restoration
Hey everyone! I love my wood cutting boards. They’re beautiful, durable, and just feel right in the kitchen. But let’s be honest, they can get pretty gross. Stains, smells, knife marks – it’s all part of the game. But don’t worry, you don’t have to toss them! I’m going to walk you through my tried-and-true method for cleaning and restoring your wood cutting boards, making them look and feel almost new again.
What You’ll Need
Before we dive in, let’s gather our supplies. This is what I usually have on hand:
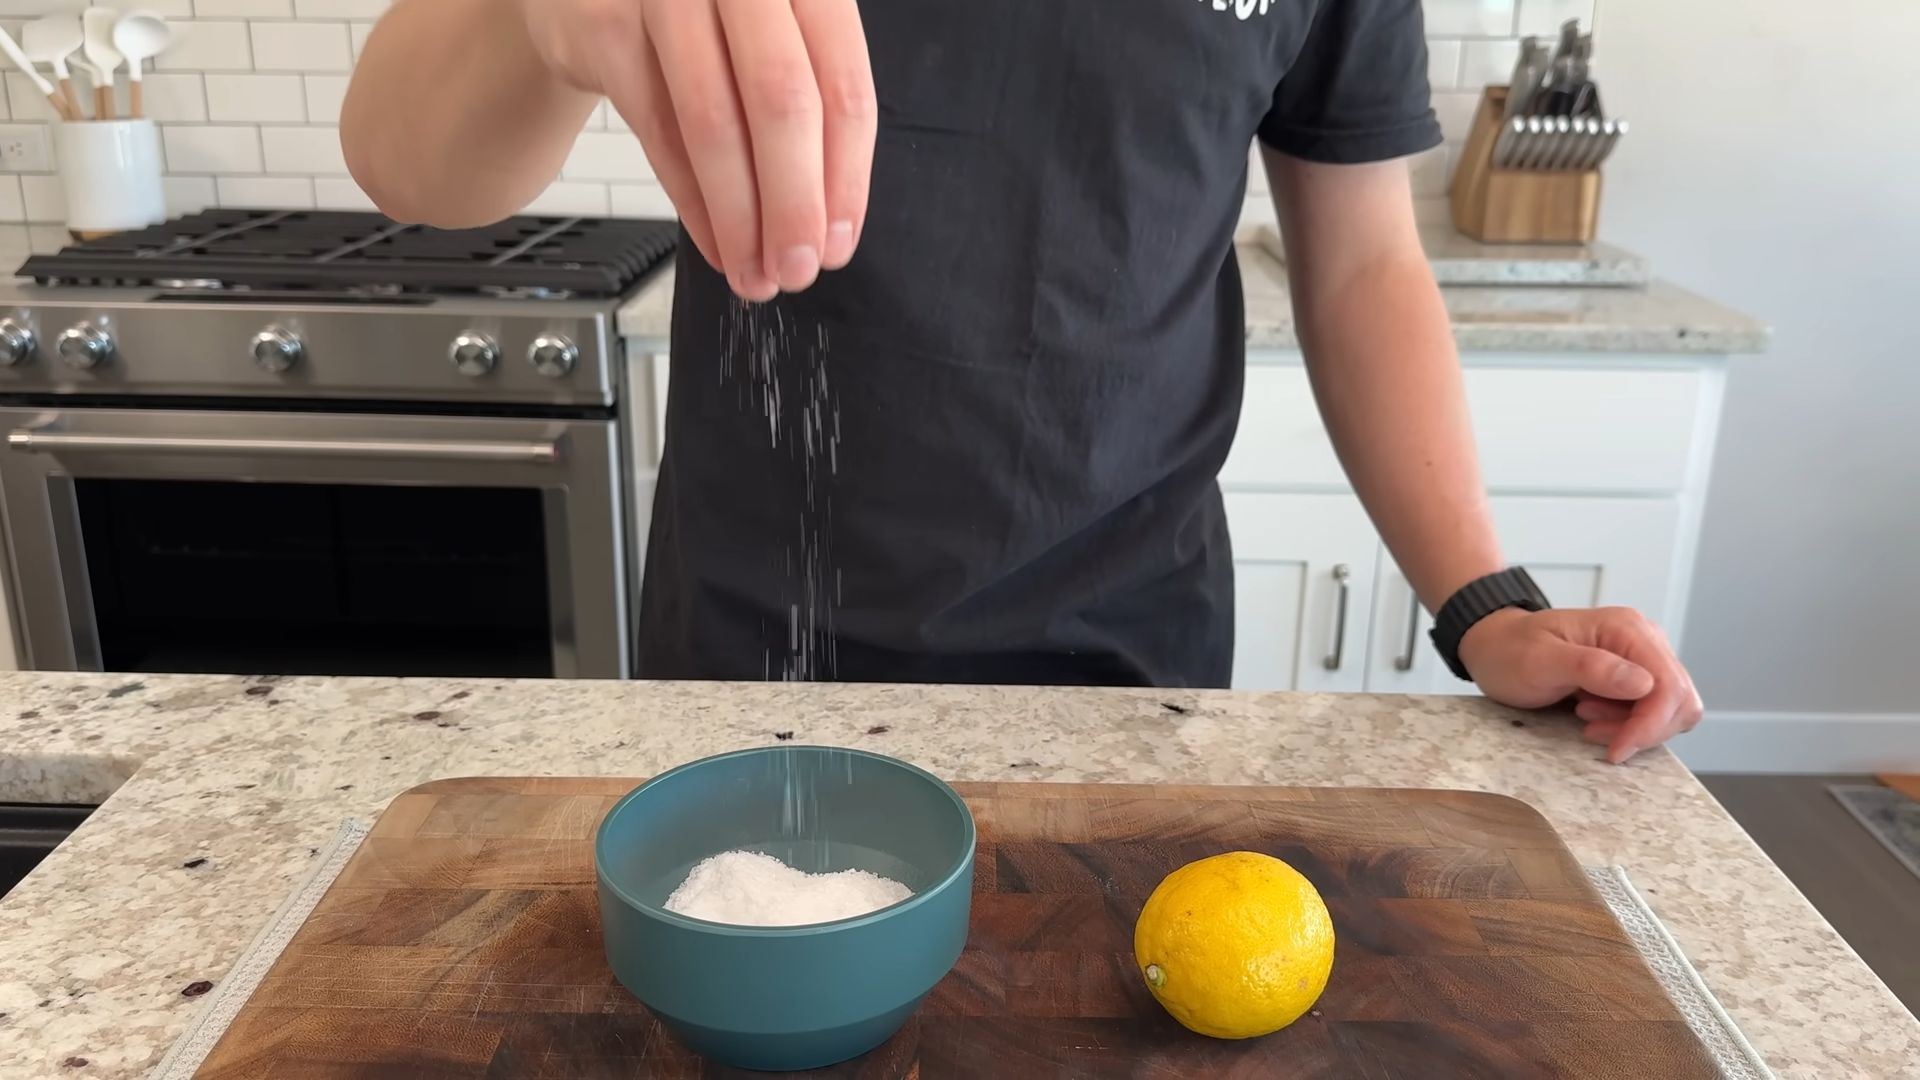
* Coarse Salt: Table salt works in a pinch, but coarse salt is much better for scrubbing.
* Lemons: Fresh lemons are key for their cleaning and deodorizing power.
* White Vinegar: A natural disinfectant and cleaner.
* Baking Soda: Great for absorbing odors and gentle abrasion.
* Food-Grade Mineral Oil: Essential for rehydrating and protecting the wood.
* Beeswax (Optional): To create a cutting board conditioner for extra protection.
* Clean Rags or Paper Towels: For wiping and applying oil.
* Scrub Brush or Sponge: For scrubbing away grime.
* Plastic Scraper (Optional): For removing stubborn stuck-on food.
* Fine-Grit Sandpaper (220-grit or higher): For smoothing out knife marks (optional, but recommended for heavily used boards).
* Mixing Bowl (If making beeswax conditioner): For melting beeswax and oil.
* Double Boiler or Microwave (If making beeswax conditioner): For melting beeswax.
* Heat-Safe Container (If making beeswax conditioner): For storing the conditioner.
Phase 1: The Initial Cleaning
This first step is all about getting rid of the surface grime and any lingering food particles.
1. Scrape Away Debris: Start by using a plastic scraper or the edge of a sturdy spatula to remove any stuck-on food particles. Don’t use a metal scraper, as it can damage the wood.
2. Rinse with Warm Water: Give the cutting board a good rinse under warm water. This will loosen any remaining debris.
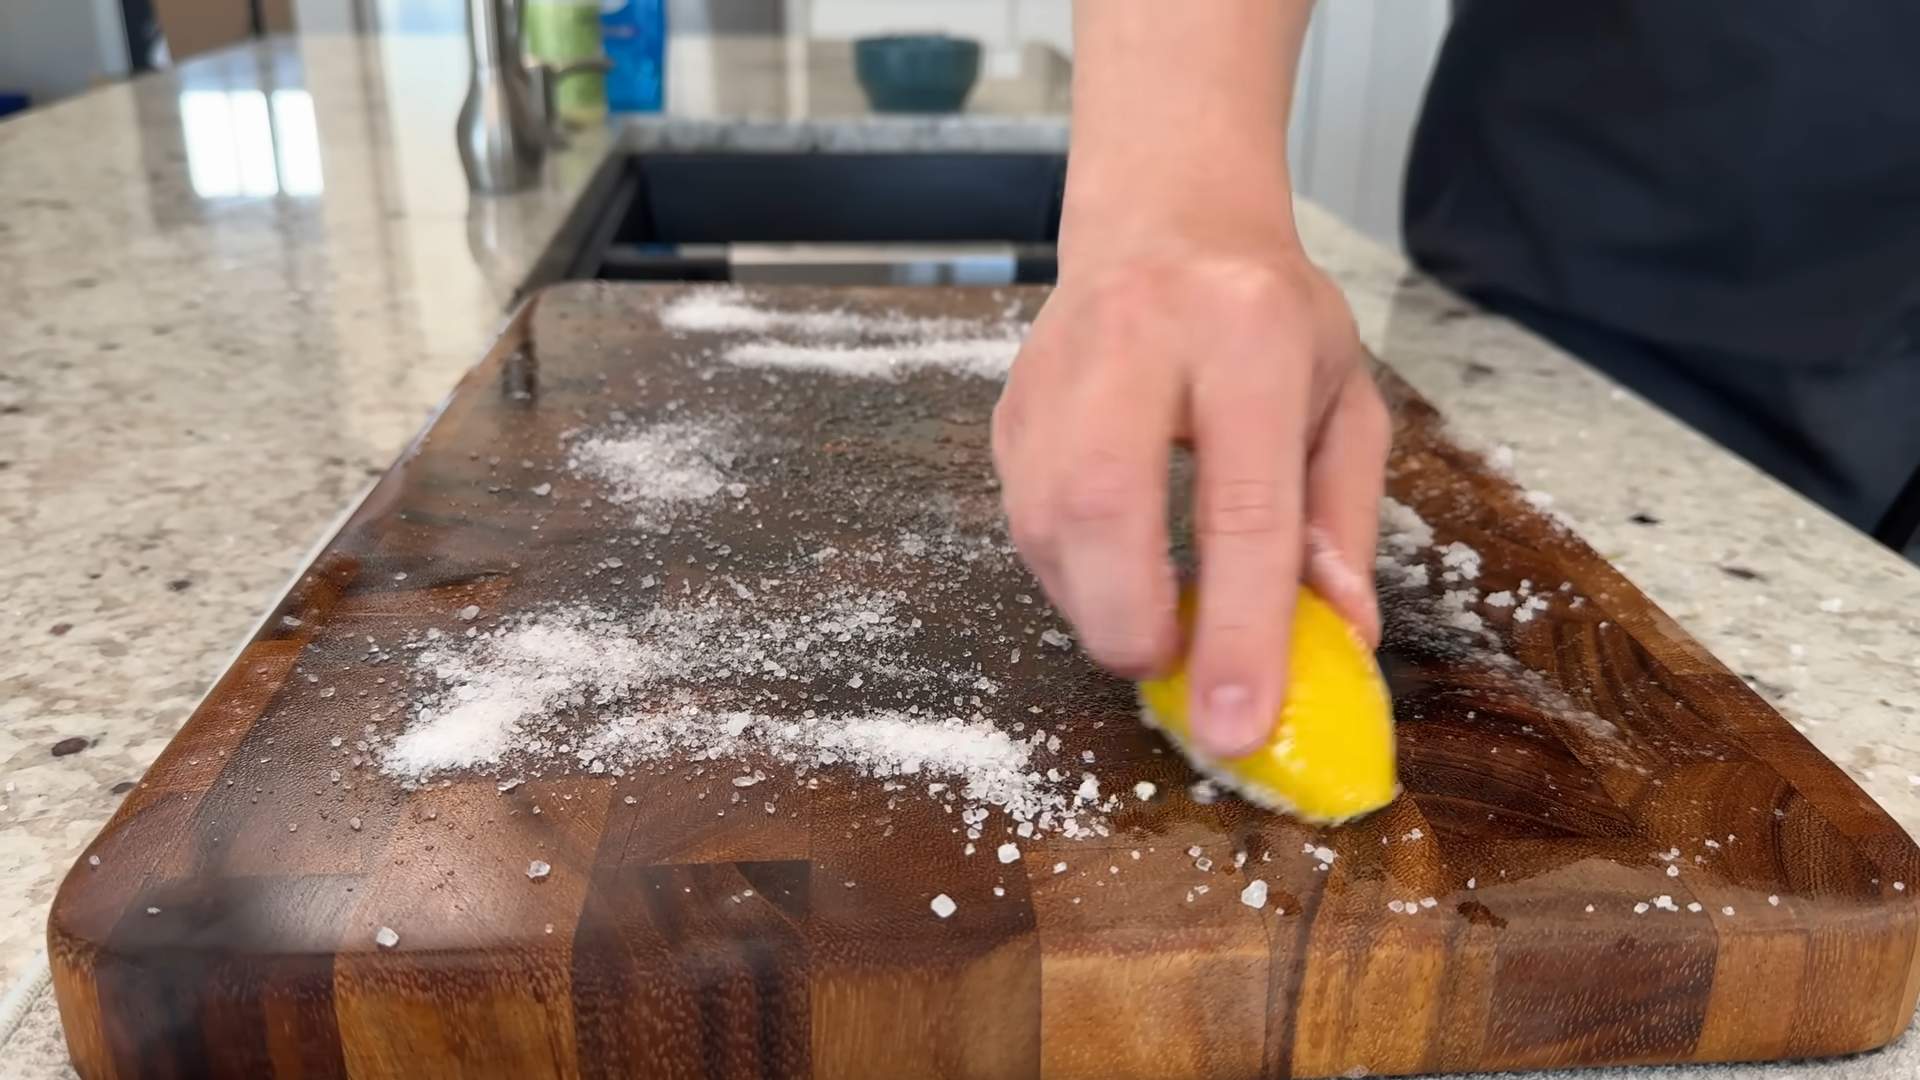
3. Salt and Lemon Scrub: This is where the magic happens! Sprinkle a generous amount of coarse salt all over the cutting board. Then, cut a lemon in half and use the cut side to scrub the salt into the wood. Squeeze the lemon as you scrub to release the juice. The salt acts as a gentle abrasive, while the lemon juice disinfects and deodorizes. I like to really focus on any stained or heavily used areas.
4. Let it Sit: After scrubbing, let the salt and lemon mixture sit on the cutting board for about 5-10 minutes. This allows the lemon juice to work its magic.
5. Rinse Thoroughly: Rinse the cutting board thoroughly with warm water, making sure to remove all traces of salt and lemon.
6. Vinegar Rinse (Optional): For extra disinfecting power, you can give the cutting board a final rinse with a diluted white vinegar solution (1 part vinegar to 1 part water). This will help kill any remaining bacteria.
7. Dry Completely: This is crucial! Use a clean rag or paper towels to dry the cutting board thoroughly. Then, let it air dry completely, preferably standing on its side, before moving on to the next step. This can take several hours, or even overnight. Never store a damp cutting board, as this can lead to mold and mildew growth.
Phase 2: Deodorizing and Stain Removal (If Needed)
If your cutting board still has lingering odors or stubborn stains after the initial cleaning, this phase is for you.
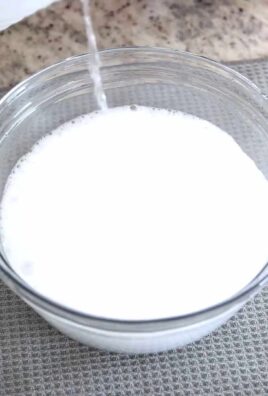
1. Baking Soda Paste: Make a paste of baking soda and water. The consistency should be thick enough to spread easily.
2. Apply the Paste: Spread the baking soda paste over the entire cutting board, focusing on areas with stains or odors.
3. Let it Sit: Let the paste sit on the cutting board for at least 30 minutes, or even longer for stubborn stains. I sometimes leave it overnight.
4. Scrub Gently: After letting the paste sit, scrub the cutting board gently with a scrub brush or sponge.
5. Rinse Thoroughly: Rinse the cutting board thoroughly with warm water, making sure to remove all traces of baking soda.
6. Dry Completely: Again, make sure the cutting board is completely dry before moving on.
Phase 3: Sanding (Optional, but Recommended)
Hey everyone! I love my wood cutting boards. They’re beautiful, durable, and just feel right in the kitchen. But let’s be honest, they can get pretty gross. Stains, smells, knife marks – it’s all part of the game. But don’t worry, you don’t have to toss them! I’m going to walk you through my tried-and-true method for cleaning and restoring your wood cutting boards, making them look and feel almost new again.
What You’ll Need
Before we dive in, let’s gather our supplies. This is what I usually have on hand:
* Coarse Salt: Table salt works in a pinch, but coarse salt is much better for scrubbing.
* Lemons: Fresh lemons are key for their cleaning and deodorizing power.
* White Vinegar: A natural disinfectant and cleaner.
* Baking Soda: Great for absorbing odors and gentle abrasion.
* Food-Grade Mineral Oil: Essential for rehydrating and protecting the wood.
* Beeswax (Optional): To create a cutting board conditioner for extra protection.
* Clean Rags or Paper Towels: For wiping and applying oil.
* Scrub Brush or Sponge: For scrubbing away grime.
* Plastic Scraper (Optional): For removing stubborn stuck-on food.
* Fine-Grit Sandpaper (220-grit or higher): For smoothing out knife marks (optional, but recommended for heavily used boards).
* Mixing Bowl (If making beeswax conditioner): For melting beeswax and oil.
* Double Boiler or Microwave (If making beeswax conditioner): For melting beeswax.
* Heat-Safe Container (If making beeswax conditioner): For storing the conditioner.
Phase 1: The Initial Cleaning
This first step is all about getting rid of the surface grime and any lingering food particles.
1. Scrape Away Debris: Start by using a plastic scraper or the edge of a sturdy spatula to remove any stuck-on food particles. Don’t use a metal scraper, as it can damage the wood.
2. Rinse with Warm Water: Give the cutting board a good rinse under warm water. This will loosen any remaining debris.
3. Salt and Lemon Scrub: This is where the magic happens! Sprinkle a generous amount of coarse salt all over the cutting board. Then, cut a lemon in half and use the cut side to scrub the salt into the wood. Squeeze the lemon as you scrub to release the juice. The salt acts as a gentle abrasive, while the lemon juice disinfects and deodorizes. I like to really focus on any stained or heavily used areas.
4. Let it Sit: After scrubbing, let the salt and lemon mixture sit on the cutting board for about 5-10 minutes. This allows the lemon juice to work its magic.
5. Rinse Thoroughly: Rinse the cutting board thoroughly with warm water, making sure to remove all traces of salt and lemon.
6. Vinegar Rinse (Optional): For extra disinfecting power, you can give the cutting board a final rinse with a diluted white vinegar solution (1 part vinegar to 1 part water). This will help kill any remaining bacteria.
7. Dry Completely: This is crucial! Use a clean rag or paper towels to dry the cutting board thoroughly. Then, let it air dry completely, preferably standing on its side, before moving on to the next step. This can take several hours, or even overnight. Never store a damp cutting board, as this can lead to mold and mildew growth.
Phase 2: Deodorizing and Stain Removal (If Needed)
If your cutting board still has lingering odors or stubborn stains after the initial cleaning, this phase is for you.
1. Baking Soda Paste: Make a paste of baking soda and water. The consistency should be thick enough to spread easily.
2. Apply the Paste: Spread the baking soda paste over the entire cutting board, focusing on areas with stains or odors.
3. Let it Sit: Let the paste sit on the cutting board for at least 30 minutes, or even longer for stubborn stains. I sometimes leave it overnight.
4. Scrub Gently: After letting the paste sit, scrub the cutting board gently with a scrub brush or sponge.
5. Rinse Thoroughly: Rinse the cutting board thoroughly with warm water, making sure to remove all traces of baking soda.
6. Dry Completely: Again, make sure the cutting board is completely dry before moving on.
Phase 3: Sanding (Optional, but Recommended)
If your cutting board has a lot of knife marks or feels rough to the touch, sanding will help smooth it out and restore its surface.
1. Choose Your Sandpaper: Start with a fine-grit sandpaper (220-grit or higher). You can use a coarser grit if the knife marks are very deep, but be careful not to remove too much wood.
2. Sand with the Grain: Sand the cutting board in the direction of the wood grain. Use light, even pressure. Avoid sanding against the grain, as this can create scratches.
3. Inspect and Repeat: After sanding, wipe the cutting board with a clean rag to remove any sanding dust. Inspect the surface and repeat the sanding process if necessary. You can gradually move to finer grits of sandpaper for an even smoother finish.
4. Remove Sanding Dust: Once you’re satisfied with the smoothness of the cutting board, thoroughly remove all sanding dust with a clean, damp rag.
5. Dry Completely: Let the cutting board dry completely before moving on.
Phase 4: Oiling and Conditioning
This is the most important step for protecting your wood cutting board and keeping it in good condition. Oiling the wood prevents it from drying out, cracking, and absorbing odors.
1. Apply Mineral Oil: Pour a generous amount of food-grade mineral oil onto the cutting board.
2. Rub it In: Use a clean rag to rub the oil into the wood, working it in thoroughly. Pay attention to the edges and end grain, as these areas tend to dry out the most.
3. Let it Soak: Let the oil soak into the wood for at least a few hours, or even overnight. The longer it soaks, the better. You’ll notice the wood will start to look less dry and more vibrant.
4. Wipe Off Excess Oil: After the oil has soaked in, wipe off any excess oil with a clean rag. You don’t want the surface to be sticky or greasy.
5. Repeat (If Necessary): Depending on how dry your cutting board is, you may need to repeat the oiling process several times. I usually do at least two coats, especially when I’ve just sanded the board.
Phase 5: Beeswax Conditioner (Optional, but Recommended for Extra Protection)
A beeswax conditioner will add an extra layer of protection to your cutting board, making it more water-resistant and preventing it from drying out.
1. Melt Beeswax and Oil: In a double boiler or microwave, melt equal parts beeswax and mineral oil. I usually use about 1/4 cup of each for a standard-sized cutting board. If using a microwave, heat in short intervals (30 seconds) and stir in between to prevent overheating.
2. Stir Until Combined: Stir the mixture until the beeswax is completely melted and the oil and beeswax are fully combined.
3. Let it Cool Slightly: Let the mixture cool slightly before applying it to the cutting board. It should still be liquid, but not too hot.
4. Apply the Conditioner: Use a clean rag to apply the beeswax conditioner to the cutting board. Rub it in thoroughly, just like you did with the mineral oil.
5. Let it Sit: Let the conditioner sit on the cutting board for at least 30 minutes, or even longer.
6. Buff the Surface: After letting the conditioner sit, use a clean, dry rag to buff the surface of the cutting board. This will remove any excess conditioner and create a smooth, protective finish.
7. Store in a Cool, Dry Place: Store any leftover beeswax conditioner in a heat-safe container in a cool, dry place. It will solidify as it cools.
Maintaining Your Cutting Board
Once you’ve cleaned and restored your wood cutting board, it’s important to maintain it properly to keep it in good condition. Here are a few tips:
* Wash After Each Use: Wash your cutting board with warm, soapy water after each use. Avoid using harsh detergents or putting it in the dishwasher, as this can dry out the wood.
* Dry Thoroughly: Always dry your cutting board thoroughly after washing it.
* Oil Regularly: Oil your cutting board regularly, especially after washing it. How often you need to oil it will depend on
Conclusion
So, there you have it! A simple, effective, and surprisingly satisfying way to keep your wood cutting boards pristine and ready for action. We’ve walked you through the process, highlighting the importance of regular cleaning and maintenance to extend the life of your beloved kitchen workhorse. But why is this DIY method a must-try?
Firstly, it’s incredibly cost-effective. Forget expensive, specialized cleaning products filled with harsh chemicals. This method relies on ingredients you likely already have in your pantry: lemon, salt, and oil. This makes it not only budget-friendly but also environmentally conscious, reducing your reliance on commercially produced cleaners.
Secondly, it’s gentle yet powerful. The combination of coarse salt and acidic lemon provides a natural abrasive action that lifts away stubborn food particles and stains without damaging the wood. The oil then replenishes the moisture lost during cleaning, preventing the board from drying out and cracking. This is crucial for maintaining the integrity and longevity of your wood cutting board.
Thirdly, it’s customizable. Feel free to experiment with different types of salt. Coarse sea salt works wonders for heavy-duty cleaning, while finer table salt is gentler for everyday maintenance. You can also add a few drops of your favorite essential oil, like tea tree or lavender, for an extra boost of antibacterial power and a pleasant scent. Just be sure to use food-safe essential oils!
Looking for variations? Consider adding a touch of baking soda to the salt and lemon mixture for extra stain-fighting power. Baking soda is a mild alkali that helps to neutralize acids and lift away discoloration. Another option is to use white vinegar instead of lemon juice. Vinegar is a powerful disinfectant and deodorizer, making it a great choice for tackling lingering odors.
Ultimately, the key to a clean wood cutting board is consistency. Make this DIY cleaning method a regular part of your kitchen routine, and you’ll be rewarded with a beautiful, hygienic, and long-lasting cutting board that you can rely on for years to come.
We’re confident that you’ll love the results of this simple yet effective DIY cleaning trick. So, grab your lemon, salt, and oil, and give your wood cutting board the TLC it deserves. Don’t just take our word for it – try it out for yourself!
We encourage you to try this method and share your experience with us. Did you find it effective? Did you try any variations? What were your results? Share your photos and stories in the comments below! We can’t wait to hear from you and learn from your experiences. Let’s build a community of clean cutting board enthusiasts!
Frequently Asked Questions (FAQ)
Q: How often should I clean my wood cutting board using this method?
A: The frequency depends on how often you use your cutting board. For daily use, a quick wipe down with soap and water after each use is sufficient. However, we recommend a deep clean using the lemon, salt, and oil method at least once a week, or more often if you’ve been cutting raw meat, poultry, or fish. If you notice any lingering odors or stains, it’s definitely time for a deep clean. Regular cleaning prevents the buildup of bacteria and keeps your cutting board in top condition.
Q: What type of salt is best for cleaning a wood cutting board?
A: Coarse salt, such as sea salt or kosher salt, is generally preferred for its abrasive texture, which helps to scrub away stubborn food particles and stains. However, finer table salt can also be used, especially for more delicate cleaning or for boards that are already relatively clean. Avoid using iodized salt, as the iodine can potentially stain the wood over time. Experiment with different types of salt to see what works best for your cutting board and your cleaning preferences.
Q: Can I use any type of oil to condition my wood cutting board?
A: No, it’s crucial to use food-grade mineral oil or a specialized cutting board oil. These oils are non-toxic, odorless, and tasteless, and they won’t go rancid over time. Avoid using vegetable oils, olive oil, or other cooking oils, as they can become sticky and attract bacteria. Mineral oil penetrates the wood fibers, helping to prevent them from drying out and cracking. Apply a generous amount of oil after cleaning and let it soak in for several hours or overnight before wiping off the excess.
Q: What if my wood cutting board has deep cuts or grooves?
A: Deep cuts and grooves can harbor bacteria and food particles, making them difficult to clean. For these areas, use a stiff-bristled brush or an old toothbrush to scrub the lemon and salt mixture into the grooves. You can also try using a toothpick or skewer to dislodge any stubborn debris. If the cuts are very deep, you may need to sand the board down to create a smoother surface. Always follow up with oiling to protect the wood.
Q: How do I get rid of lingering odors on my wood cutting board?
A: Lingering odors, especially from garlic or onions, can be a common problem. The lemon and salt method is often effective at neutralizing odors. However, if the odor persists, try making a paste of baking soda and water and applying it to the affected area. Let it sit for several hours or overnight before rinsing it off. You can also try soaking the board in a solution of white vinegar and water for a few minutes. Be sure to rinse the board thoroughly and dry it completely after any of these treatments.
Q: Can I put my wood cutting board in the dishwasher?
A: Absolutely not! Dishwashers are extremely harsh on wood cutting boards. The high heat and strong detergents can cause the wood to warp, crack, and dry out. Always hand wash your wood cutting board with warm, soapy water and dry it immediately.
Q: How do I store my wood cutting board properly?
A: Store your wood cutting board in a dry, well-ventilated area. Avoid storing it flat on a countertop, as this can trap moisture and lead to warping. Instead, store it on its side or in a cutting board rack to allow air to circulate around it. Regularly oiling your cutting board will also help to prevent it from drying out and cracking during storage.
Q: My wood cutting board is starting to look dull and worn. Can I restore it?
A: Yes, you can often restore a dull and worn wood cutting board by sanding it down. Use a medium-grit sandpaper to remove any scratches, stains, or imperfections. Then, use a fine-grit sandpaper to smooth the surface. Be sure to sand with the grain of the wood. After sanding, clean the board thoroughly and apply a generous amount of mineral oil. This will help to revitalize the wood and bring back its natural beauty.
Q: Is it safe to cut raw meat on a wood cutting board?
A: Yes, it is safe to cut raw meat on a wood cutting board, as long as you clean and disinfect it properly afterward. Wood has natural antibacterial properties that can help to kill bacteria. However, it’s still important to thoroughly clean the board with hot, soapy water and a disinfectant, such as a diluted bleach solution or white vinegar. Consider using separate cutting boards for raw meat and other foods to prevent cross-contamination.
Q: What are the signs that my wood cutting board needs to be replaced?
A: While a well-maintained wood cutting board can last for many years, there are some signs that it may need to be replaced. These include deep cracks or splits that cannot be repaired, excessive warping, or a persistent odor that cannot be removed. If your cutting board is showing any of these signs, it’s time to invest in a new one.


Leave a Comment