
Celery container gardening harvest – sounds like a dream, right? I know, I know, visions of fresh, crunchy celery sticks dancing in your head! But the reality of growing celery can sometimes feel… well, a little less dreamy. It’s often seen as a tricky vegetable to cultivate, demanding specific conditions and a whole lot of patience. But what if I told you that you could bypass all the fuss and enjoy a bountiful celery harvest, even without a sprawling garden?
For centuries, celery has been valued not only for its crisp texture and refreshing flavor but also for its medicinal properties. Ancient civilizations, from the Egyptians to the Romans, used celery for everything from flavoring food to treating ailments. Now, we’re bringing this ancient vegetable into the modern age with a DIY twist!
Let’s face it, not everyone has the space or the time for a traditional garden. That’s where the magic of container gardening comes in. And when it comes to celery, this method is a game-changer. Imagine being able to snip off fresh celery stalks whenever you need them, right from your patio or balcony. No more wilted, store-bought celery! This DIY guide will equip you with all the insider tips and tricks you need to achieve a successful celery container gardening harvest. We’ll cover everything from choosing the right container and soil to watering techniques and pest control, ensuring you’ll be enjoying homegrown celery in no time. Get ready to unleash your inner gardener and discover the joy of growing your own fresh, delicious celery!
Growing Celery in Containers: From Seed to Stalk!
Hey there, fellow gardening enthusiasts! I’m so excited to share my experience with growing celery in containers. It might seem a bit daunting at first, but trust me, with a little patience and the right approach, you can enjoy fresh, homegrown celery right from your patio or balcony. I’ve learned a lot along the way, and I’m here to guide you through every step, from choosing the right container to harvesting those crisp, delicious stalks.
Choosing the Right Container and Soil
Before we even think about seeds, let’s talk about setting up the perfect home for our celery.
* Container Size: Celery needs room to grow! I recommend a container that’s at least 12 inches deep and 12 inches in diameter. A larger container is even better, as it will hold more moisture and give the roots plenty of space to spread out. You can use a single large container for multiple plants, spacing them about 6-8 inches apart.
* Drainage: This is crucial! Celery loves moisture, but it hates sitting in soggy soil. Make sure your container has plenty of drainage holes. If not, you can drill some yourself.
* Material: Plastic, terracotta, or even fabric pots will work. I personally prefer plastic because they retain moisture better, which is important for celery.
* Soil: Celery thrives in rich, well-draining soil. I like to use a mix of:
* Potting mix (about 60%)
* Compost (about 30%) – This adds nutrients and improves drainage.
* Perlite or vermiculite (about 10%) – This helps with aeration and drainage.
Starting Celery from Seed (or Seedlings!)
Celery can be a bit slow to germinate, so starting indoors is generally recommended, especially if you live in a cooler climate. You can also buy seedlings from a nursery to speed things up.
Starting from Seed:
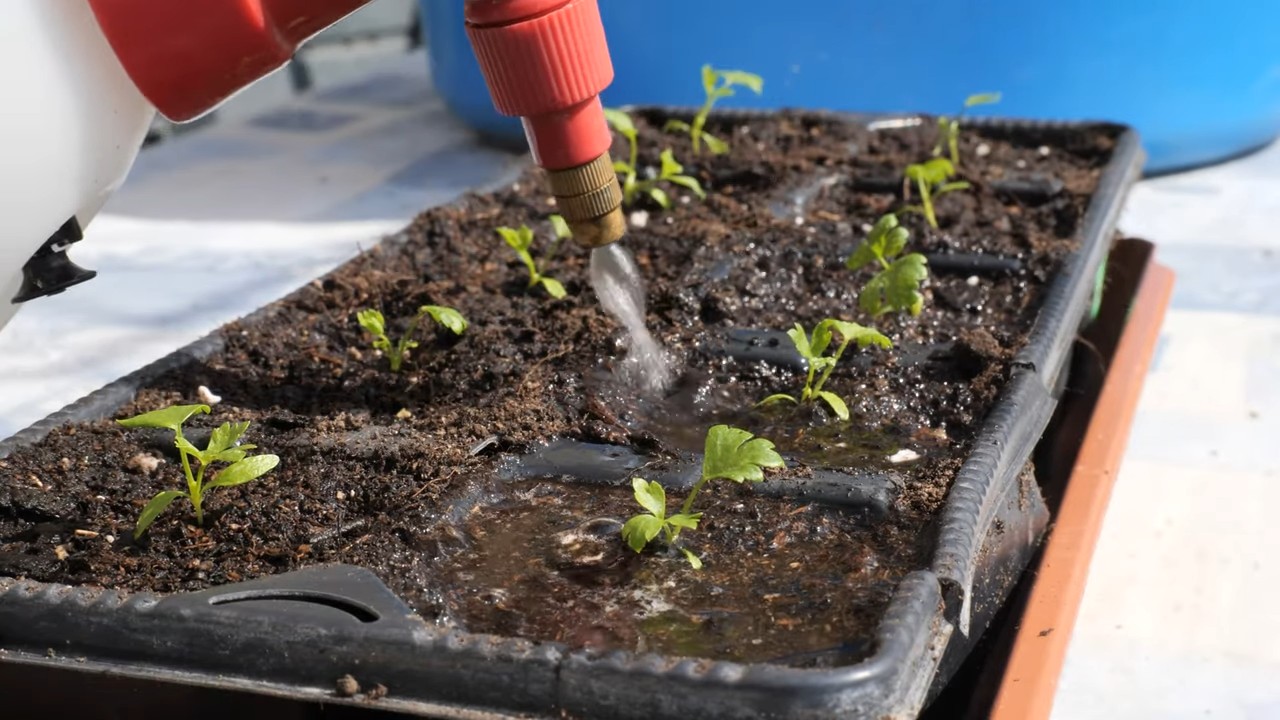
1. Sowing the Seeds: Celery seeds are tiny! I like to use a seed starting tray with individual cells. Fill the cells with your seed starting mix (a lighter version of the soil mix mentioned above). Moisten the soil and gently sprinkle a few seeds into each cell. Don’t bury them too deep – just lightly press them into the soil. They need light to germinate.
2. Providing Light and Warmth: Cover the tray with a clear plastic dome or plastic wrap to create a humid environment. Place the tray in a warm location (around 70-75°F) and under grow lights or near a sunny window.
3. Maintaining Moisture: Keep the soil consistently moist, but not soggy. I use a spray bottle to gently mist the soil whenever it starts to dry out.
4. Germination: Be patient! Celery seeds can take anywhere from 2-3 weeks to germinate. Once the seedlings emerge, remove the plastic cover and continue to provide light and moisture.
5. Thinning: Once the seedlings have a few true leaves, thin them out to one strong seedling per cell.
Transplanting Seedlings (Whether You Grew Them or Bought Them):
1. Hardening Off: Before transplanting your seedlings outdoors, you need to “harden them off.” This means gradually exposing them to outdoor conditions over a period of about a week. Start by placing them outside for an hour or two each day, gradually increasing the time each day. This will help them adjust to the sun, wind, and temperature changes.
2. Transplanting: Once the seedlings are hardened off, it’s time to transplant them into your container. Dig a small hole in the soil, carefully remove the seedling from its cell, and place it in the hole. Gently backfill with soil and water thoroughly. Space the seedlings about 6-8 inches apart.
Caring for Your Celery Plants
Now that your celery plants are in their new home, it’s time to provide them with the care they need to thrive.
* Watering: Celery needs consistent moisture. Water deeply whenever the top inch of soil feels dry to the touch. Avoid letting the soil dry out completely, especially during hot weather. I usually water every day or every other day, depending on the weather.
* Fertilizing: Celery is a heavy feeder, meaning it needs a lot of nutrients. I like to fertilize every 2-3 weeks with a balanced liquid fertilizer. You can also use a slow-release fertilizer at planting time.
* Sunlight: Celery prefers partial shade, especially during the hottest part of the day. If you live in a hot climate, provide some afternoon shade to prevent the leaves from scorching. In cooler climates, celery can tolerate more sun.
* Weeding: Keep the container free of weeds, as they can compete with your celery plants for nutrients and water.
* Blanching (Optional): Blanching is the process of excluding light from the stalks to make them whiter and milder in flavor. This isn’t necessary, but if you prefer blanched celery, you can do it a week or two before harvest. There are a few ways to blanch celery:
* Mounding Soil: Gently mound soil around the base of the stalks, leaving the top leaves exposed.
* Wrapping: Wrap the stalks with newspaper or cardboard, securing it with twine.
* Blanching Sleeves: You can also buy special blanching sleeves designed for this purpose.
Dealing with Pests and Diseases
Celery is generally a pretty hardy plant, but it can be susceptible to a few pests and diseases.
* Pests:
* Aphids: These tiny insects can suck the sap from the leaves, causing them to become distorted and yellow. You can control aphids by spraying them with a strong stream of water or by using insecticidal soap.
* Celery Leaf Tier: These caterpillars feed on the leaves, creating holes and webbing. Handpick them off the plants or use Bacillus thuringiensis (Bt), a biological insecticide.
* Slugs and Snails: These pests can damage the leaves and stalks. You can control them by handpicking them off the plants, using slug bait, or creating barriers around the plants.
* Diseases:
* Early Blight: This fungal disease causes small, brown spots on the leaves. To prevent early blight, avoid overhead watering and provide good air circulation. If you see signs of the disease, remove the affected leaves and spray with a fungicide.
* Late Blight: Similar to early blight, but the spots are larger and more irregular. Control measures are the same as for early blight.
* Pink Rot: This fungal disease causes the stalks to rot and turn pink. To prevent pink rot, avoid overwatering and provide good air circulation. If you see signs of the disease, remove the affected plants.
Harvesting Your Celery
The moment we’ve all been waiting for! Harvesting your homegrown celery is so rewarding.
* When to Harvest: Celery is typically ready to harvest about 80-100 days after planting. The stalks should be at least 6-8 inches long and thick enough to eat.
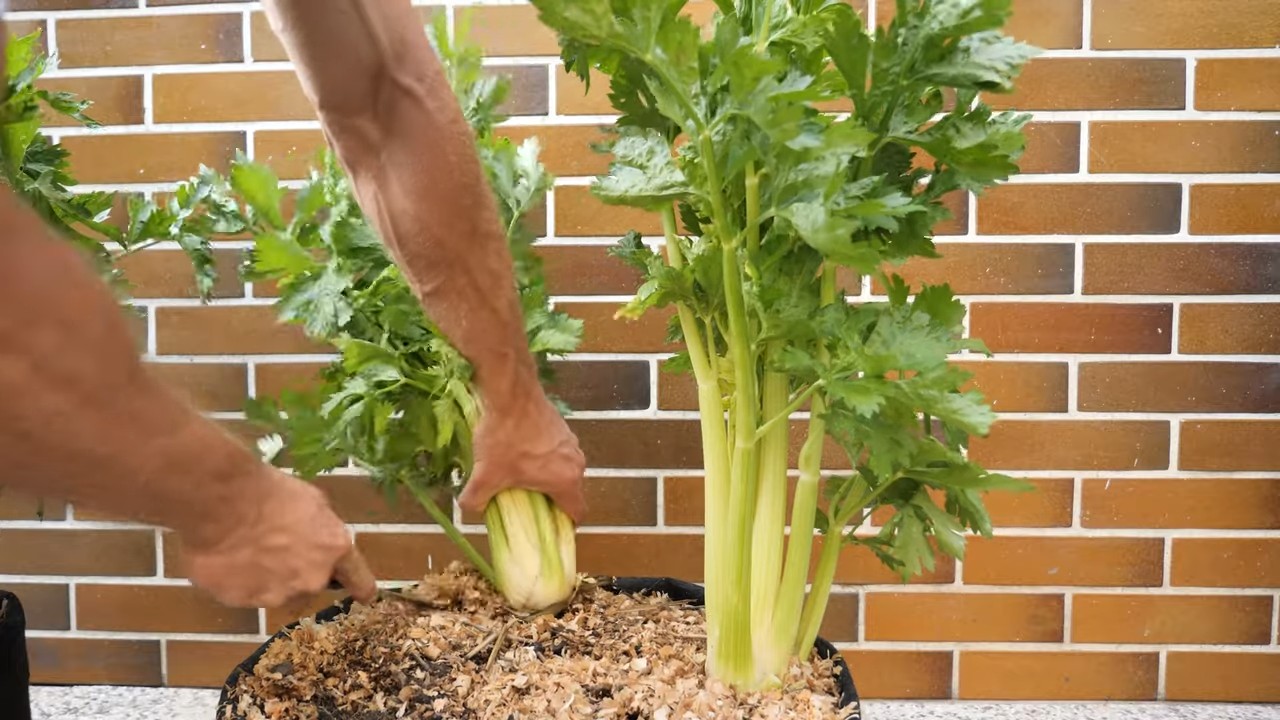
* How to Harvest: You can harvest the entire plant at once, or you can harvest individual stalks as needed. To harvest the entire plant, use a sharp knife to cut the stalks at the base of the plant. To harvest individual stalks, simply snap them off at the base.
* Storing: Celery is best eaten fresh, but you can store it in the refrigerator for up to a week. Wrap the stalks in a damp paper towel and place them in a plastic bag.
Troubleshooting
Even with the best care, you might encounter some challenges along the way. Here are a few common problems and how to fix them:
* Yellowing Leaves: This could be caused by a number of factors, including overwatering, underwatering, nutrient deficiencies, or pests. Check the soil moisture, fertilize if necessary, and inspect the plants for pests.
* Stunted Growth: This could be caused by poor soil, lack of sunlight, or pests. Make sure your plants are getting enough sunlight and nutrients, and check for pests.
* Bitter Taste: This can be caused by hot weather or lack of water. Provide some afternoon shade and make sure the plants are getting enough water.
Enjoying Your Homegrown Celery
Now that you’ve harvested your celery, it’s time to enjoy the fruits (or vegetables!) of your labor. Celery is delicious eaten raw, dipped in hummus or peanut butter. It’s also a great addition to soups, stews, salads, and stir-fries. I love adding it to my morning smoothies for a healthy boost.
Growing celery in containers is a fun and rewarding experience. With a little patience and the right care, you can enjoy fresh, homegrown celery all season long. Happy gardening!
Conclusion
So, there you have it! Growing your own celery in containers isn’t just a quirky gardening experiment; it’s a genuinely rewarding experience that puts fresh, crisp celery right at your fingertips. Forget those limp, sad stalks from the grocery store – imagine the vibrant flavor and satisfying crunch of homegrown celery, ready to elevate your salads, soups, and snacks.
This DIY celery container gardening harvest method is a must-try for several compelling reasons. First and foremost, it offers unparalleled freshness. You control the entire growing process, ensuring your celery is free from unwanted pesticides and herbicides. Secondly, it’s incredibly convenient, especially for those with limited garden space. A few well-placed containers on a balcony, patio, or even a sunny windowsill can yield a surprising amount of celery. Thirdly, it’s a fantastic way to reduce food waste. You harvest only what you need, when you need it, minimizing the risk of celery spoiling in the refrigerator. Finally, and perhaps most importantly, it’s incredibly satisfying to nurture a plant from seed (or even a grocery store stalk!) to a bountiful harvest.
But the fun doesn’t stop there! Feel free to experiment with different celery varieties. ‘Utah Tall’ is a classic choice, known for its robust flavor and sturdy stalks. ‘Golden Self-Blanching’ offers a milder taste and a beautiful golden hue. You can also try growing celery from the base of a store-bought stalk. Simply cut off the bottom two inches, place it in a shallow dish of water, and watch it sprout new growth. Once roots develop, transplant it into a container filled with potting mix.
Consider companion planting to enhance your celery’s growth and deter pests. Marigolds, onions, and garlic are excellent choices. You can also add a layer of mulch to help retain moisture and suppress weeds. And don’t forget to fertilize regularly with a balanced organic fertilizer to ensure your celery receives the nutrients it needs to thrive.
We encourage you to embrace this DIY celery container gardening harvest adventure. It’s a simple, rewarding, and delicious way to connect with nature and enjoy the fruits (or rather, vegetables) of your labor. Don’t be afraid to get your hands dirty and experiment. Every garden is unique, and what works for one person may not work for another. The key is to observe your plants, learn from your mistakes, and most importantly, have fun!
We’d love to hear about your experiences! Share your photos, tips, and tricks in the comments below. Let’s build a community of celery-loving gardeners and inspire others to grow their own fresh, flavorful celery at home. Happy gardening!
Frequently Asked Questions (FAQ)
What kind of container is best for growing celery?
The ideal container for growing celery should be at least 12 inches deep and 12 inches wide. Celery has a relatively shallow root system but needs ample space to develop its stalks. A wider container allows for better air circulation and prevents overcrowding. You can use plastic pots, terracotta pots, or even repurposed containers like buckets or tubs. Just make sure the container has drainage holes to prevent waterlogging. Dark-colored containers can heat up quickly in direct sunlight, so consider using lighter colors or providing shade during the hottest part of the day. Fabric pots are also a good option, as they allow for excellent drainage and aeration.
How often should I water my container celery?
Celery is a water-loving plant, so it’s crucial to keep the soil consistently moist. Water deeply whenever the top inch of soil feels dry to the touch. This may mean watering daily, especially during hot, dry weather. Avoid letting the soil dry out completely, as this can cause the stalks to become tough and bitter. However, be careful not to overwater, as this can lead to root rot. A good rule of thumb is to water slowly and deeply until you see water draining from the bottom of the container. Mulching around the base of the plants can help retain moisture and reduce the need for frequent watering.
What kind of soil should I use for container celery?
Celery thrives in rich, well-draining soil that is high in organic matter. A good potting mix for container celery should consist of equal parts compost, peat moss (or coconut coir), and perlite or vermiculite. Compost provides essential nutrients and improves soil structure. Peat moss or coconut coir helps retain moisture. Perlite or vermiculite improves drainage and aeration. Avoid using garden soil in containers, as it can become compacted and poorly drained. You can also amend your potting mix with a slow-release organic fertilizer to provide a steady supply of nutrients throughout the growing season.
How much sunlight does container celery need?
Celery needs at least six hours of sunlight per day to thrive. Choose a location that receives full sun for most of the day. However, in very hot climates, celery may benefit from some afternoon shade to prevent the stalks from scorching. If you’re growing celery indoors, place it near a sunny window or use grow lights to supplement natural light. Rotate the container regularly to ensure that all sides of the plant receive equal exposure to light.
How do I harvest my container celery?
You can begin harvesting celery when the stalks are at least 6 inches tall. To harvest, simply cut the outer stalks near the base of the plant with a sharp knife. Leave the inner stalks to continue growing. You can harvest celery gradually over several weeks, as needed. Alternatively, you can harvest the entire plant at once by cutting it off at the base. After harvesting, wash the celery stalks thoroughly and store them in the refrigerator in a plastic bag or container.
What are some common pests and diseases that affect container celery?
Celery can be susceptible to several pests and diseases, including aphids, celery leaf tiers, and fungal diseases like early blight and late blight. Regularly inspect your plants for signs of pests or diseases. If you find aphids, you can spray them off with a strong stream of water or use insecticidal soap. Celery leaf tiers can be handpicked or controlled with Bacillus thuringiensis (Bt). To prevent fungal diseases, ensure good air circulation around your plants and avoid overhead watering. If you notice signs of disease, remove the affected leaves and treat the plant with a fungicide.
Can I grow celery from seed in containers?
Yes, you can grow celery from seed in containers, but it requires patience and a bit of extra care. Celery seeds are very small and can be slow to germinate. Start seeds indoors 8-10 weeks before the last expected frost. Sow the seeds thinly on the surface of a seed-starting mix and gently press them into the soil. Keep the soil consistently moist and provide bottom heat to encourage germination. Once the seedlings have developed a few true leaves, transplant them into individual pots. Gradually harden them off before transplanting them into their final containers outdoors.
How can I blanch my celery in containers?
Blanching celery helps to produce milder, sweeter stalks. To blanch celery in containers, you can either mound soil around the base of the stalks or wrap them with newspaper or cardboard. Leave the tops of the stalks exposed to sunlight. Blanching typically takes about two to three weeks. Alternatively, you can choose a self-blanching variety of celery, which naturally produces paler stalks without any intervention.
What are some good companion plants for container celery?
Companion planting can help to improve the growth and health of your celery. Some good companion plants for celery include onions, garlic, marigolds, and nasturtiums. Onions and garlic deter pests like aphids and celery leaf tiers. Marigolds repel nematodes and other soil pests. Nasturtiums attract beneficial insects that prey on aphids. Avoid planting celery near parsley, as they can compete for nutrients.
How do I fertilize my container celery?
Celery is a heavy feeder and requires regular fertilization to thrive. Use a balanced organic fertilizer, such as a 5-5-5 or 10-10-10, every two to three weeks. You can also supplement with liquid seaweed or fish emulsion. Avoid over-fertilizing, as this can lead to leggy growth and bitter stalks. Follow the instructions on the fertilizer label carefully.


Leave a Comment