
Broccoli harvest schedule: It’s the key to unlocking the full potential of your homegrown broccoli and enjoying the freshest, most flavorful florets imaginable! Have you ever dreamt of serving up vibrant, perfectly textured broccoli, bursting with nutrients, straight from your backyard to your dinner plate? I know I have! But let’s face it, timing is everything when it comes to harvesting this cool-season crop.
For centuries, broccoli has been a staple in gardens and kitchens worldwide, prized for its nutritional value and versatility. From its origins in the Mediterranean, where it was cultivated by the Romans, to its modern-day popularity, broccoli has always been a symbol of healthy eating. But even with its long history, many home gardeners struggle to pinpoint the perfect moment for harvest.
That’s where this DIY guide comes in! Knowing the ideal broccoli harvest schedule is crucial because harvesting too early results in small, underdeveloped heads, while waiting too long leads to bolting, bitter flavors, and a loss of that desirable tight bud formation. I’m here to share my tried-and-true tips and tricks to help you master the art of broccoli harvesting. With a little know-how, you’ll be enjoying a bountiful harvest of delicious, homegrown broccoli all season long!
DIY Broccoli Harvest Extender: From Garden to Freezer with Flavor!
Hey fellow gardeners! I’m so excited to share my tried-and-true method for extending your broccoli harvest and enjoying that fresh-from-the-garden taste long after the season ends. We all know the disappointment of a bumper crop ripening all at once, leaving us scrambling to eat it all before it goes bad. This guide will walk you through a few simple steps to not only stagger your harvest but also preserve that delicious broccoli goodness for months to come.
Understanding Broccoli Harvest Timing
Before we dive into the DIY magic, let’s quickly recap broccoli harvest timing. Knowing when to pick your broccoli is crucial for both enjoying it fresh and preparing it for freezing.
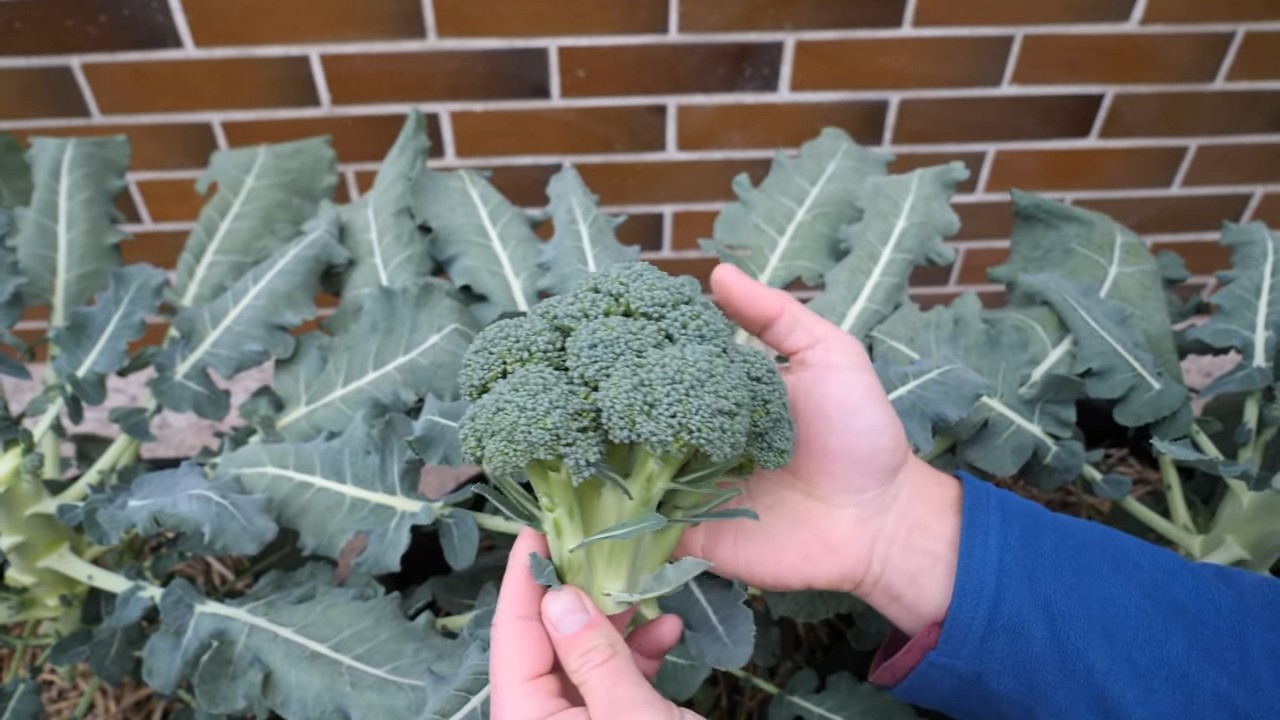
* Head Size: Look for tight, compact heads that are 4-7 inches in diameter, depending on the variety.
* Bud Condition: The individual flower buds should be tightly closed and not starting to open or show yellow. Yellowing indicates the broccoli is bolting (going to seed) and will have a less desirable flavor and texture.
* Harvest Time: Harvest broccoli in the morning when the heads are cool and firm. This helps preserve their quality.
Staggering Your Broccoli Harvest
The key to extending your broccoli enjoyment is to avoid having all your plants mature simultaneously. Here’s how I do it:
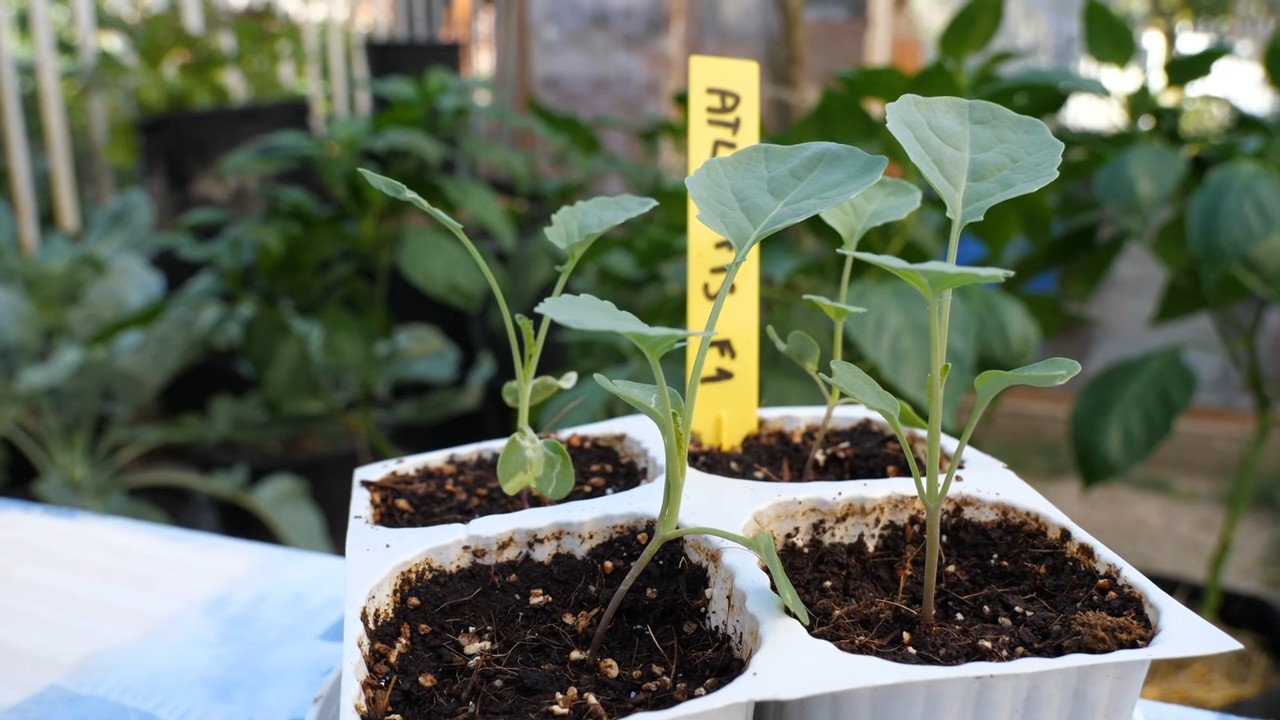
* Succession Planting: This is the most effective method. Plant new broccoli seedlings every 2-3 weeks, starting a few weeks before your last expected frost. This ensures a continuous supply of broccoli throughout the growing season.
* Variety Selection: Choose broccoli varieties with different maturity dates. Some varieties mature in as little as 50 days, while others take 70 days or more. Planting a mix of these will naturally stagger your harvest.
* Strategic Fertilizing: Avoid over-fertilizing with nitrogen, especially later in the season. Excessive nitrogen can promote rapid growth and cause all your plants to mature at the same time.
Freezing Broccoli for Long-Term Storage
Okay, now for the main event: preserving that delicious broccoli by freezing it! This is my go-to method, and it works like a charm every time.
What You’ll Need:
* Freshly harvested broccoli
* Large pot
* Ice water bath (a large bowl filled with ice and water)
* Slotted spoon or strainer
* Clean kitchen towels
* Freezer bags or airtight containers
* Sharp knife
* Cutting board
Step-by-Step Freezing Instructions:
1. Wash the Broccoli: Thoroughly wash the broccoli heads under cold running water. Pay close attention to the florets, removing any dirt, insects, or debris. I sometimes soak the broccoli in a bowl of cold water with a little salt for about 15 minutes to help draw out any hidden critters.
2. Cut the Broccoli into Florets: Using a sharp knife, cut the broccoli heads into florets. Aim for florets that are roughly the same size (about 1-2 inches) to ensure even blanching. You can also peel and chop the broccoli stalks into smaller pieces. Don’t throw those stalks away! They’re just as nutritious and delicious as the florets.
3. Prepare the Blanching Water: Fill a large pot with water and bring it to a rolling boil. Make sure you have enough water to completely submerge the broccoli florets.
4. Prepare the Ice Water Bath: While the water is heating up, prepare your ice water bath. This is crucial for stopping the cooking process and preserving the broccoli’s color and texture.
5. Blanch the Broccoli: Once the water is boiling, carefully add the broccoli florets to the pot. Blanch them for 3 minutes. Blanching is essential for preserving the broccoli’s color, flavor, and texture during freezing. It also helps to destroy enzymes that can cause spoilage.
6. Cool the Broccoli: After 3 minutes, immediately remove the broccoli florets from the boiling water using a slotted spoon or strainer and transfer them to the ice water bath. Let them cool for 3 minutes, or until they are completely cold to the touch.
7. Drain and Dry the Broccoli: Once the broccoli is cooled, drain it thoroughly and spread it out in a single layer on clean kitchen towels. Gently pat the broccoli dry to remove any excess moisture. This is important to prevent ice crystals from forming during freezing, which can affect the texture of the broccoli.
8. Flash Freeze (Optional but Recommended): For the best results, I highly recommend flash freezing the broccoli before packing it into freezer bags. To do this, spread the dried broccoli florets in a single layer on a baking sheet lined with parchment paper. Place the baking sheet in the freezer for 1-2 hours, or until the florets are frozen solid. Flash freezing prevents the florets from clumping together in the freezer bag, making it easier to use them later.
9. Pack the Broccoli: Once the broccoli is frozen (or just drained and dried if you skipped the flash freezing step), pack it into freezer bags or airtight containers. Remove as much air as possible from the bags to prevent freezer burn. I like to use a straw to suck out the excess air before sealing the bag.
10. Label and Date: Don’t forget to label and date each bag or container with the contents and the date you froze it. This will help you keep track of your frozen broccoli and ensure you use it within a reasonable timeframe (ideally within 8-12 months for best quality).
11. Freeze: Place the bags or containers of broccoli in the freezer. Make sure they are lying flat so they freeze evenly.
Tips for Using Frozen Broccoli
* No Need to Thaw: You can cook frozen broccoli directly from the freezer. There’s no need to thaw it first.
* Cooking Methods: Frozen broccoli can be steamed, boiled, roasted, or stir-fried. Adjust the cooking time accordingly, as it may cook slightly faster than fresh broccoli.
* Soups and Stews: Frozen broccoli is perfect for adding to soups, stews, and casseroles.
* Nutritional Value: Frozen broccoli retains most of its nutritional value, making it a healthy and convenient option for adding vegetables to your diet.
Troubleshooting
* Broccoli is Mushy After Freezing: This is usually caused by over-blanching or not cooling the broccoli quickly enough after blanching. Make sure to follow the blanching times carefully and use a proper ice water bath.
* Broccoli Has Freezer Burn: This is caused by exposure to air in the freezer. Make sure to remove as much air as possible from the freezer bags or containers and store the broccoli in a freezer-safe container.
* Broccoli Tastes Bland: This can happen if the broccoli was not fresh when it was frozen or if it was stored in the freezer for too long. Use freshly harvested broccoli and try to use it within 8-12 months for the best flavor.
Beyond the Basics: Broccoli Stem Recipes!
Don’t let those broccoli stems go to waste! They’re packed with nutrients and can be just as delicious as the florets. Here are a few ideas:
* Broccoli Stem Slaw: Shred the broccoli stems using a food processor or grater and toss them with your favorite slaw dressing.
* Broccoli Stem Soup: Add chopped broccoli stems to your favorite vegetable soup recipe.
* Broccoli Stem Stir-Fry: Slice the broccoli stems thinly and add them to your stir-fries.
* Pickled Broccoli Stems: Pickle the broccoli stems for a tangy and crunchy snack.
Final Thoughts
Extending your broccoli harvest and preserving it for later use is a rewarding experience. With a little planning and effort, you can enjoy the taste of fresh, homegrown broccoli all year round. I hope this guide has been helpful! Happy gardening and happy freezing!
Conclusion
So, there you have it! Mastering your broccoli harvest schedule doesn’t have to be a guessing game. By understanding the key indicators of maturity, paying close attention to the weather, and implementing a staggered planting strategy, you can enjoy a continuous supply of fresh, delicious broccoli straight from your garden. This DIY approach not only saves you money but also guarantees the quality and freshness of your produce.
Why is this a must-try? Because store-bought broccoli simply can’t compare to the vibrant flavor and nutritional value of homegrown. Plus, knowing exactly when to harvest your broccoli ensures you’re getting the most out of your efforts. No more tough, yellowing heads or wasted crops! You’ll be amazed at the difference in taste and texture when you harvest at the peak of perfection.
Consider these variations to personalize your broccoli harvest schedule:
* Succession Planting for Extended Harvest: Plant different varieties of broccoli with varying maturity dates. This will naturally extend your harvest window, providing a continuous supply for weeks or even months.
* Fall Harvest in Warmer Climates: In regions with mild winters, you can plant broccoli in late summer for a fall harvest. This avoids the intense heat of summer, which can negatively impact broccoli growth.
* Freezing for Later Use: If you find yourself with a surplus of broccoli, blanch and freeze it for later use in soups, stir-fries, or casseroles. This is a great way to preserve your harvest and enjoy homegrown broccoli year-round.
* Broccoli Raab: Don’t forget about broccoli raab! This leafy green relative of broccoli can be harvested multiple times throughout the growing season, providing a continuous supply of nutritious greens.
Don’t be intimidated by the idea of managing your own broccoli harvest schedule. It’s a rewarding experience that connects you with nature and provides you with fresh, healthy food. We encourage you to give it a try! Start small, experiment with different varieties and planting times, and most importantly, observe your plants closely.
We’re confident that with a little practice, you’ll become a broccoli harvesting pro. And we want to hear about your experiences! Share your tips, tricks, and photos in the comments below. Let’s build a community of broccoli enthusiasts and learn from each other. Happy harvesting!
Frequently Asked Questions (FAQ)
Q: How do I know when my broccoli is ready to harvest?
A: The primary indicator is the size and tightness of the broccoli head. The head should be firm, compact, and a deep green color. The individual florets should be tightly closed. If the florets start to separate or turn yellow, it’s a sign that the broccoli is overripe and should be harvested immediately. Also, check the overall size of the head. Most broccoli varieties are ready to harvest when the head reaches 6-8 inches in diameter, but this can vary depending on the specific variety.
Q: What happens if I leave the broccoli on the plant too long?
A: If you leave broccoli on the plant too long, the florets will start to open up and turn yellow. The head will also become less firm and the flavor will deteriorate. Overripe broccoli can also attract pests and diseases. While it’s still technically edible, it won’t be as palatable or nutritious. It’s best to harvest broccoli when it’s at its peak of ripeness.
Q: Can I harvest broccoli multiple times from the same plant?
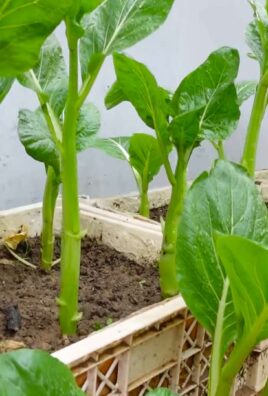
A: Yes, most broccoli varieties will produce side shoots after the main head is harvested. These side shoots will develop into smaller broccoli heads that can be harvested later in the season. To encourage side shoot production, cut the main head off at an angle, leaving a few inches of stem. This will stimulate the plant to produce new growth.
Q: What is the best time of day to harvest broccoli?
A: The best time to harvest broccoli is in the morning, after the dew has dried but before the sun gets too hot. This will help to prevent the broccoli from wilting. Harvesting in the morning also ensures that the broccoli is at its freshest and most flavorful.
Q: How do I store harvested broccoli?
A: To store harvested broccoli, wrap it loosely in a damp paper towel and place it in a plastic bag in the refrigerator. This will help to keep the broccoli fresh and crisp. Broccoli can typically be stored in the refrigerator for up to a week. You can also blanch and freeze broccoli for longer-term storage.
Q: What are some common problems that can affect broccoli harvest?
A: Several problems can affect broccoli harvest, including:
* Bolting: This occurs when the broccoli plant prematurely flowers due to stress, such as heat or drought. Bolting can result in a bitter-tasting head.
* Head Rot: This is a fungal disease that can cause the broccoli head to rot. It’s often caused by excessive moisture.
* Pest Infestations: Pests such as cabbage worms and aphids can damage broccoli plants and reduce yields.
* Nutrient Deficiencies: A lack of essential nutrients can stunt broccoli growth and affect head development.
Q: How can I prevent these problems?
A: To prevent these problems, follow these tips:
* Choose broccoli varieties that are well-suited to your climate.
* Provide adequate water and nutrients to your broccoli plants.
* Protect your broccoli plants from pests and diseases.
* Harvest your broccoli at the peak of ripeness.
* Practice crop rotation to prevent soilborne diseases.
Q: What if my broccoli head is small?
A: A small broccoli head can be caused by several factors, including poor soil, insufficient watering, or pest infestations. Make sure your broccoli plants are getting enough water and nutrients. You can also amend the soil with compost or fertilizer to improve its fertility. If pests are a problem, take steps to control them. Even if the head is small, it’s still edible and nutritious.
Q: Can I eat the broccoli leaves?
A: Yes, broccoli leaves are edible and nutritious. They can be eaten raw in salads or cooked like other leafy greens. Broccoli leaves are a good source of vitamins A and C, as well as fiber.
Q: What are some good companion plants for broccoli?
A: Good companion plants for broccoli include:
* Marigolds: These flowers repel many common broccoli pests.
* Nasturtiums: These flowers also repel pests and attract beneficial insects.
* Onions and Garlic: These plants deter pests and can improve broccoli growth.
* Dill: This herb attracts beneficial insects that prey on broccoli pests.
* Chamomile: This herb can improve broccoli flavor and growth.
Leave a Comment