
Bathroom Cleaning Hacks: Let’s face it, nobody *loves* cleaning the bathroom. It’s a chore we all dread, conjuring images of harsh chemicals and endless scrubbing. But what if I told you there’s a better way? A way to reclaim your weekends and actually enjoy a sparkling clean bathroom without breaking a sweat (or the bank)? This article is your ultimate guide to DIY bathroom cleaning, packed with clever hacks and tricks that will transform your cleaning routine from a dreaded task to a satisfying accomplishment.
Throughout history, maintaining hygiene has been a cornerstone of civilization. From ancient Roman bathhouses to the communal washing spaces of various cultures, cleanliness has always been valued. While our methods have evolved, the underlying principle remains the same: a clean space promotes health and well-being. And let’s be honest, a gleaming bathroom is a sanctuary, a place to relax and refresh.
In today’s busy world, time is precious. Who wants to spend hours scrubbing grout or battling stubborn stains? That’s where these bathroom cleaning hacks come in. I’m going to share my favorite DIY solutions, using everyday ingredients you probably already have in your pantry. These tricks are not only effective but also eco-friendly and budget-conscious. Get ready to say goodbye to harsh chemicals and hello to a sparkling clean bathroom, the easy way!
DIY Bathroom Cleaning Hacks: Sparkling Clean on a Budget!
Okay, let’s face it, cleaning the bathroom is nobody’s favorite chore. But a sparkling clean bathroom can make a huge difference in how you feel about your home. I’m going to share some of my favorite DIY bathroom cleaning hacks that are not only effective but also budget-friendly and use ingredients you probably already have in your pantry! Get ready to say goodbye to grime and hello to a fresh, clean space!
Tackling Soap Scum and Hard Water Stains
Soap scum and hard water stains are the bane of every bathroom cleaner’s existence. They’re stubborn, unsightly, and seem to multiply overnight. But don’t despair! Here’s how to conquer them using simple ingredients:
* The Power of Vinegar: Vinegar is my go-to for tackling hard water stains and soap scum. Its acidity breaks down the mineral deposits and grime, making them easy to wipe away.
* Baking Soda’s Abrasive Magic: Baking soda is a mild abrasive that helps scrub away stubborn stains without scratching surfaces.
* Lemon Juice for Extra Shine: Lemon juice adds a fresh scent and extra cleaning power, thanks to its citric acid.
Step-by-Step Guide to a Sparkling Shower
1. Prepare Your Vinegar Solution: In a spray bottle, mix equal parts white vinegar and warm water. For extra cleaning power, you can add a few drops of your favorite essential oil, like tea tree or eucalyptus, for their antibacterial properties and refreshing scent. I usually go for lavender because it’s so relaxing!
2. Spray and Soak: Generously spray the vinegar solution onto your shower walls, door, and fixtures. Make sure to cover all areas affected by soap scum and hard water stains. Let it soak for at least 15-30 minutes. This allows the vinegar to work its magic and loosen the grime. For really tough stains, you can even let it soak for an hour.
3. Baking Soda Scrub: Make a paste of baking soda and water. The consistency should be like a thick cream. Apply the paste to the areas that need extra scrubbing, like around the showerhead or the bottom of the shower door.
4. Scrub-a-dub-dub: Using a non-scratch scrub brush or sponge, scrub the affected areas. You’ll see the soap scum and hard water stains start to lift away. For tight corners and crevices, an old toothbrush works wonders!
5. Rinse Thoroughly: Rinse everything thoroughly with warm water. Make sure to remove all traces of vinegar and baking soda.
6. Lemon Juice Polish (Optional): For an extra shine, cut a lemon in half and rub it directly onto your shower fixtures. The citric acid in the lemon juice will help remove any remaining water spots and leave a fresh, clean scent. Rinse again with warm water.
7. Dry and Admire: Dry the shower with a clean towel or squeegee to prevent water spots from forming. Step back and admire your sparkling clean shower!
Cleaning the Toilet Like a Pro
The toilet is another area that requires regular cleaning. Here’s how to keep it fresh and sanitary using DIY methods:
* Baking Soda and Vinegar Fizz: This classic combination creates a powerful fizzing action that helps loosen stains and deodorize the toilet bowl.
* Borax for Stubborn Stains: Borax is a natural mineral that acts as a disinfectant and helps remove tough stains.
* Toilet Bowl Cleaner Tablets: Make your own toilet bowl cleaner tablets using simple ingredients to keep your toilet fresh between cleanings.
Step-by-Step Toilet Cleaning Guide
1. Prepare the Bowl: Flush the toilet to wet the bowl.
2. Baking Soda Blast: Sprinkle about one cup of baking soda into the toilet bowl. Make sure to coat the entire surface.
3. Vinegar Volcano: Slowly pour about one cup of white vinegar into the bowl. The mixture will fizz and bubble. This is a good thing! It means the baking soda and vinegar are reacting and loosening the grime.
4. Let it Fizz: Let the mixture fizz for at least 30 minutes. For heavily stained toilets, you can let it sit overnight. I usually do this before I go to bed so it has plenty of time to work.
5. Scrub-a-loo: Use a toilet brush to scrub the entire bowl, paying special attention to any stains or rings.
6. Flush Away: Flush the toilet to rinse away the baking soda, vinegar, and grime.
7. Borax Boost (Optional): If you have stubborn stains that won’t budge, sprinkle about 1/2 cup of borax into the bowl after flushing. Let it sit for a few hours, then scrub and flush again.
8. Clean the Exterior: Wipe down the exterior of the toilet with a damp cloth and a mild cleaning solution. You can use the same vinegar solution you used for the shower. Don’t forget to clean the base of the toilet and the handle!
9. Toilet Bowl Cleaner Tablets (Optional): To keep your toilet fresh between cleanings, drop a DIY toilet bowl cleaner tablet into the bowl after flushing.
DIY Toilet Bowl Cleaner Tablets
These tablets are super easy to make and will keep your toilet smelling fresh and clean!
Ingredients:
* 1 cup baking soda
* 1/4 cup citric acid (you can find this online or at some health food stores)
* 1/4 cup borax
* A few drops of your favorite essential oil (lemon, tea tree, or eucalyptus are great choices)
* Water (in a spray bottle)
* Silicone mold (ice cube trays or small silicone molds work well)
Instructions:
1. Mix Dry Ingredients: In a bowl, combine the baking soda, citric acid, and borax.
2. Add Essential Oil: Add a few drops of your favorite essential oil.
3. Moisten the Mixture: Lightly spray the mixture with water, a little at a time, while mixing with your hands. The mixture should be damp enough to hold its shape when pressed together, but not too wet. Be careful not to add too much water, or the mixture will fizz prematurely.
4. Press into Molds: Press the mixture firmly into the silicone molds.
5. Let it Dry: Let the tablets dry completely for at least 24 hours.
6. Pop Them Out: Once the tablets are dry, pop them out of the molds and store them in an airtight container.
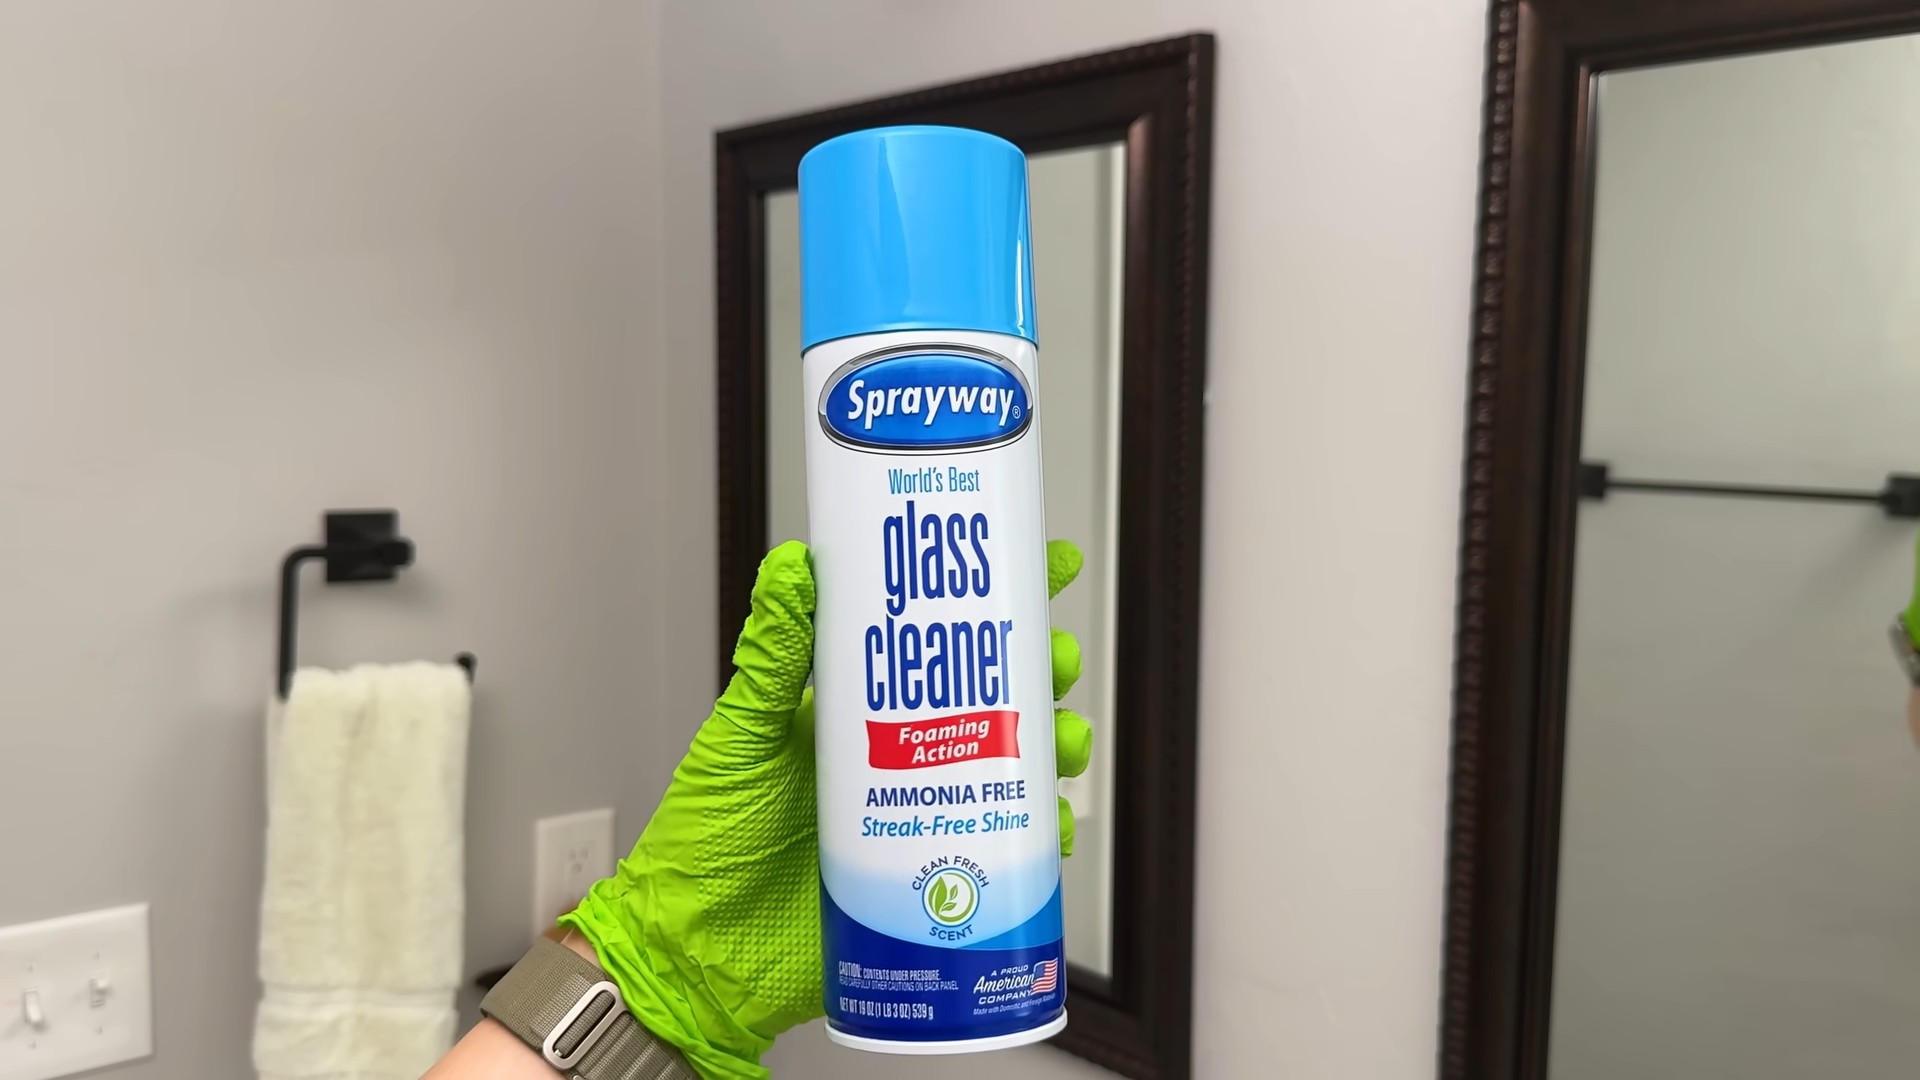
Shining Mirrors and Windows
Streaky mirrors and windows can make your entire bathroom look dingy. Here’s how to achieve a streak-free shine:
* Vinegar and Water Solution: A simple solution of vinegar and water is all you need for sparkling mirrors and windows.
* Microfiber Cloths: Microfiber cloths are essential for streak-free cleaning. They trap dirt and grime without leaving behind lint or streaks.
* Newspaper (Old School Trick): Believe it or not, newspaper can also be used to clean mirrors and windows. The ink helps to remove streaks and leave a sparkling shine.
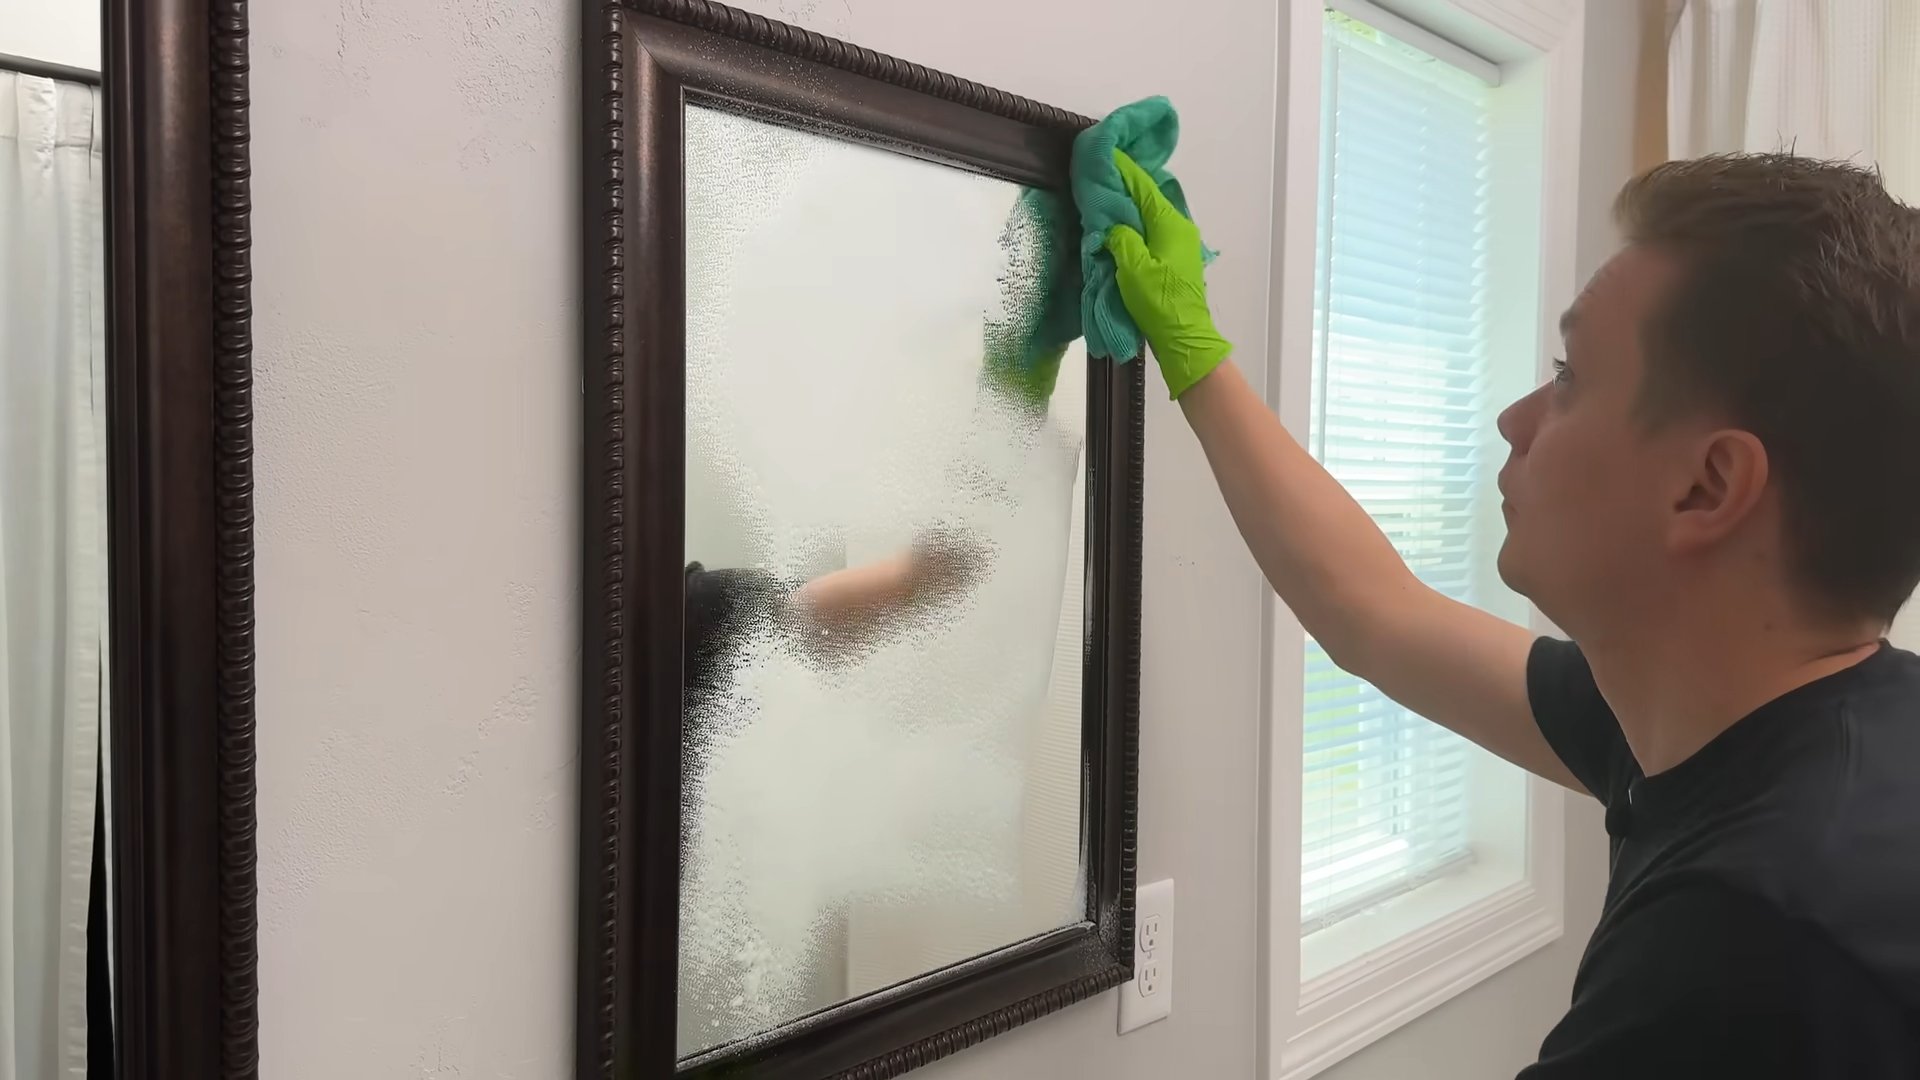
Step-by-Step Mirror and Window Cleaning
1. Prepare Your Solution: In a spray bottle, mix equal parts white vinegar and water.
2. Spray and Wipe: Spray the vinegar solution onto the mirror or window.
3. Wipe with Microfiber Cloth: Immediately wipe the surface with a clean microfiber cloth. Use a circular motion to remove dirt and grime, then buff with a dry section of the cloth to achieve a streak-free shine.
4. Newspaper Alternative: If you’re using newspaper, crumple up a sheet and use it to wipe the surface after spraying with the vinegar solution.
5. Admire Your Reflection: Step back and admire your sparkling clean mirrors and windows!
Cleaning Grout with Ease
Grout can be a breeding ground for mold and mildew, making it look discolored and dirty. Here’s how to clean grout effectively:
* Baking Soda Paste: A paste of baking soda and water is a gentle yet effective way to clean grout.
* Vinegar Spray: Spraying vinegar onto the baking soda paste creates a fizzing action that helps lift dirt and grime.
* Old Toothbrush: An old toothbrush is the perfect tool for scrubbing grout lines.
Step-by-Step Grout Cleaning Guide
1. Prepare the Paste: Make a paste of baking soda and water. The consistency should be like a thick cream.
2. Apply the Paste: Apply the paste to the grout lines.
3. Spray with Vinegar: Spray the baking soda paste with white vinegar. The mixture will fizz.
4. Scrub-a-dub: Using an old toothbrush, scrub the grout lines.
5. Rinse Thoroughly: Rinse the grout with warm water.
6
Conclusion
So, there you have it! These bathroom cleaning hacks aren’t just about achieving a sparkling clean bathroom; they’re about reclaiming your time, saving money, and creating a healthier, more pleasant environment. We’ve explored simple yet incredibly effective methods, from harnessing the power of vinegar and baking soda to repurposing everyday items for cleaning tasks.
Why is this a must-try? Because it’s practical, economical, and yields impressive results. Forget spending a fortune on harsh chemicals that can irritate your skin and pollute your home. These DIY solutions are gentle, effective, and often use ingredients you already have in your pantry. Imagine the satisfaction of knowing you’re cleaning your bathroom with natural, safe ingredients while achieving a level of cleanliness that rivals professional services.
But the beauty of these bathroom cleaning hacks lies in their adaptability. Feel free to experiment with variations to suit your specific needs and preferences. For instance, if you’re not a fan of the vinegar smell, add a few drops of your favorite essential oil, like lemon or lavender, to the cleaning solution. For stubborn stains on grout, create a paste of baking soda and hydrogen peroxide and let it sit for a few minutes before scrubbing. If you have hard water stains, try using lemon juice instead of vinegar for its extra cleaning power.
Don’t be afraid to get creative and personalize these hacks to fit your bathroom’s unique challenges. The key is to find what works best for you and your cleaning routine.
We’ve covered everything from tackling soap scum and mildew to polishing fixtures and deodorizing the air. Each hack is designed to be easy to implement and deliver noticeable improvements. Think about how much time you currently spend scrubbing and cleaning your bathroom. These hacks can significantly reduce that time, allowing you to focus on more enjoyable activities.
The real magic happens when you combine these bathroom cleaning hacks into a comprehensive cleaning routine. Start by decluttering your bathroom to remove unnecessary items. Then, use the vinegar and baking soda solution to clean your shower and tub. Tackle the toilet with a homemade toilet bowl cleaner. Polish your mirrors and fixtures with a microfiber cloth and a simple water and vinegar solution. And finally, deodorize the air with a natural air freshener.
We truly believe that these bathroom cleaning hacks can transform your cleaning experience. They’re not just about cleaning; they’re about creating a healthier, more sustainable, and more enjoyable home environment.
So, what are you waiting for? Give these bathroom cleaning hacks a try and see the difference for yourself. We’re confident that you’ll be amazed by the results. And most importantly, we want to hear about your experience! Share your before-and-after photos, your favorite variations, and any tips or tricks you’ve discovered along the way. Let’s create a community of clean bathroom enthusiasts who are passionate about natural, effective cleaning solutions.
Share your experiences in the comments section below, tag us on social media, and let’s inspire others to embrace these simple yet powerful bathroom cleaning hacks. Your feedback is invaluable, and we can’t wait to hear how these tips have helped you achieve a sparkling clean bathroom.
FAQ
What if I don’t have vinegar or baking soda? Are there any alternatives?
While vinegar and baking soda are staples in many DIY cleaning recipes due to their effectiveness and affordability, there are alternatives you can use. For vinegar, lemon juice is a great substitute, especially for tackling hard water stains and soap scum. It has similar acidic properties and a pleasant scent. For baking soda, you can try using borax, which is a natural mineral with cleaning and deodorizing properties. However, be sure to handle borax with care and avoid direct contact with skin. Another option is washing soda (sodium carbonate), which is a stronger cleaner than baking soda and is effective for removing grease and grime. Remember to always test any new cleaning solution in an inconspicuous area first to ensure it doesn’s damage the surface.
How often should I use these bathroom cleaning hacks?
The frequency of using these bathroom cleaning hacks depends on how often you use your bathroom and how quickly it gets dirty. For general cleaning, a weekly routine is usually sufficient. This includes cleaning the shower, toilet, sink, and floor. However, if you have a busy household or notice that your bathroom gets dirty quickly, you may need to clean it more frequently, perhaps every few days. For specific issues like soap scum buildup or mildew, you can address them as needed. The key is to stay on top of the cleaning to prevent dirt and grime from accumulating, making it easier to maintain a clean bathroom.
Are these cleaning hacks safe for all bathroom surfaces?
While most of these bathroom cleaning hacks are safe for a wide range of surfaces, it’s always a good idea to test them in an inconspicuous area first, especially on delicate or sensitive materials. For example, vinegar can be too acidic for natural stone surfaces like marble or granite, potentially causing etching or discoloration. In such cases, use a pH-neutral cleaner specifically designed for stone. Similarly, abrasive cleaners like baking soda should be used with caution on polished surfaces to avoid scratching. Always read the manufacturer’s instructions for your bathroom fixtures and surfaces to ensure that the cleaning solutions you’re using are compatible.
Can I use these hacks to clean a heavily soiled bathroom?
Yes, these bathroom cleaning hacks can be used to clean a heavily soiled bathroom, but you may need to adjust the approach and use stronger concentrations of the cleaning solutions. For example, for stubborn soap scum or mildew, create a paste of baking soda and hydrogen peroxide and let it sit for a longer period before scrubbing. You may also need to repeat the cleaning process multiple times to achieve the desired results. For heavily soiled toilets, try using a combination of vinegar and baking soda, followed by a thorough scrubbing. Remember to wear gloves and ventilate the bathroom well when cleaning heavily soiled areas.
How can I prevent my bathroom from getting dirty so quickly?
Prevention is key to maintaining a clean bathroom and reducing the need for frequent deep cleaning. Here are some tips to prevent your bathroom from getting dirty so quickly:
* **Ventilate the bathroom:** Always turn on the exhaust fan or open a window after showering to reduce humidity and prevent mildew growth.
* **Wipe down surfaces:** After each shower, wipe down the shower walls and door with a squeegee or microfiber cloth to remove excess water and prevent soap scum buildup.
* **Use a shower spray:** Use a daily shower spray to help prevent soap scum and mildew from forming.
* **Clean spills immediately:** Clean up any spills or messes as soon as they happen to prevent them from staining or becoming difficult to remove later.
* **Declutter regularly:** Keep your bathroom clutter-free to make cleaning easier and prevent dirt from accumulating.
* **Use a bath mat:** Place a bath mat outside the shower or tub to prevent water from spreading onto the floor.
* **Empty the trash can regularly:** Empty the trash can frequently to prevent odors and bacteria from building up.
What essential oils are best to add to these cleaning solutions?
Adding essential oils to your DIY cleaning solutions not only provides a pleasant scent but also offers additional cleaning and antibacterial benefits. Some of the best essential oils to use in bathroom cleaning include:
* **Tea tree oil:** Known for its powerful antibacterial and antifungal properties, tea tree oil is excellent for fighting mildew and mold.
* **Lemon oil:** A natural degreaser and disinfectant, lemon oil helps to remove soap scum and leave a fresh, citrusy scent.
* **Lavender oil:** With its calming scent and antiseptic properties, lavender oil is a great addition to bathroom cleaners.
* **Eucalyptus oil:** Known for its decongestant and antibacterial properties, eucalyptus oil can help to clear stuffy sinuses and disinfect surfaces.
* **Peppermint oil:** Peppermint oil has a refreshing scent and antibacterial properties, making it a great addition to bathroom cleaners.
When using essential oils, add a few drops to your cleaning solution and always test in an inconspicuous area first.
Are these bathroom cleaning hacks eco-friendly?
Yes, these bathroom cleaning hacks are generally considered eco-friendly because they rely on natural ingredients like vinegar, baking soda, and lemon juice, which are biodegradable and less harmful to the environment compared to harsh chemical cleaners. By using these DIY solutions, you can reduce your reliance on products that contain synthetic chemicals, phosphates, and other pollutants that can contaminate water sources and harm aquatic life. Additionally, these hacks often involve repurposing items you already have at home, reducing waste and promoting sustainability. However, it’s important to dispose of any waste generated during the cleaning process responsibly and to choose eco-friendly packaging for any cleaning supplies you purchase.
Leave a Comment