
Balcony pepper gardening harvest – the words alone conjure images of vibrant colors, spicy aromas, and the satisfaction of growing your own food, even in a limited space! Have you ever dreamed of stepping onto your balcony and plucking a perfectly ripe pepper, ready to add a kick to your next meal? Well, dream no more! This isn’t just about gardening; it’s about bringing a little piece of nature, a touch of self-sufficiency, and a whole lot of flavor right to your doorstep.
For centuries, growing food in small spaces has been a necessity and a tradition. From the hanging gardens of Babylon to the window boxes of European cities, people have found ways to cultivate life and sustenance in even the most urban environments. Today, with increasing urbanization and a growing desire for fresh, locally sourced food, balcony gardening is experiencing a major resurgence.
But let’s be honest, getting a bountiful balcony pepper gardening harvest isn’t always a walk in the park. Pests, limited sunlight, and the challenges of container gardening can sometimes feel overwhelming. That’s where these DIY tricks and hacks come in! I’m going to share my tried-and-true secrets for maximizing your pepper yield, protecting your plants, and enjoying a delicious harvest all season long. Get ready to transform your balcony into a pepper paradise!
Balkon-Paprika-Ernte: So maximierst du deine Ausbeute!
Hallo liebe Gartenfreunde! Ich freue mich, euch heute durch den spannenden Prozess der Paprikaernte auf eurem Balkon zu führen. Es gibt nichts Schöneres, als die Früchte der eigenen Arbeit zu ernten, und mit ein paar einfachen Tricks könnt ihr sicherstellen, dass eure Paprika-Ernte reichlich und schmackhaft ausfällt. Lasst uns gemeinsam eintauchen!
Wann ist der richtige Zeitpunkt für die Ernte?
Der Zeitpunkt der Ernte ist entscheidend für den Geschmack und die Qualität eurer Paprika. Hier sind einige Anhaltspunkte, die euch helfen, den perfekten Moment zu erkennen:
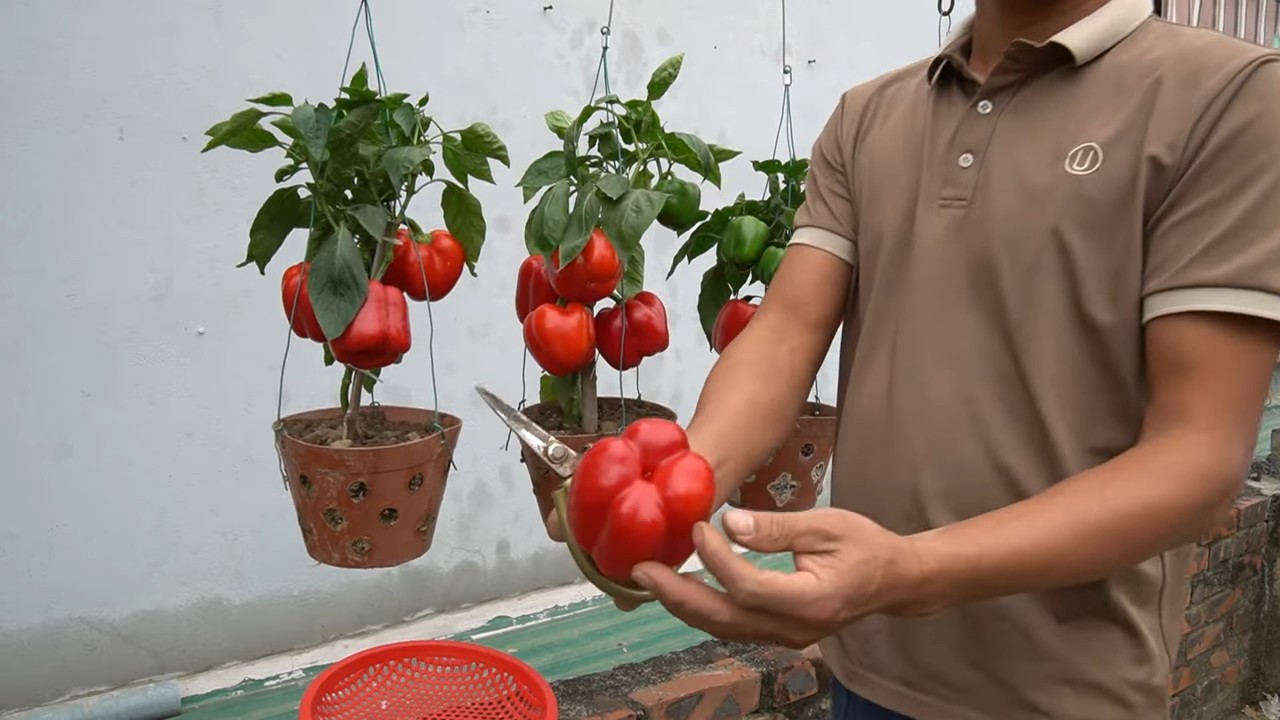
* Farbe: Die Farbe der Paprika ist ein guter Indikator für die Reife. Die meisten Paprikasorten wechseln von Grün zu Rot, Gelb, Orange oder sogar Lila, je nach Sorte. Erntet die Paprika, wenn sie ihre endgültige, sortentypische Farbe erreicht hat.
* Größe: Die Größe der Paprika sollte der Beschreibung auf dem Saatgutpäckchen oder der Pflanzenetikette entsprechen. Wenn die Paprika ihre erwartete Größe erreicht hat, ist sie wahrscheinlich reif.
* Festigkeit: Reife Paprika fühlen sich fest und prall an. Wenn sie sich weich oder schrumpelig anfühlen, sind sie möglicherweise überreif.
* Glanz: Reife Paprika haben oft einen schönen Glanz.
* Stiel: Der Stiel der Paprika sollte leicht eintrocknen und sich leicht von der Pflanze lösen lassen.
Das richtige Werkzeug für die Ernte
Um eure Paprikapflanzen nicht zu beschädigen, solltet ihr das richtige Werkzeug verwenden:
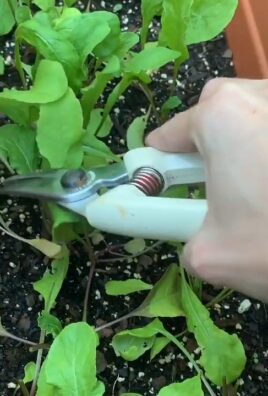
* Scharfe Gartenschere oder Messer: Eine scharfe Schere oder ein Messer ermöglicht einen sauberen Schnitt, ohne die Pflanze zu zerren oder zu quetschen.
* Handschuhe (optional): Wenn ihr empfindliche Haut habt, sind Handschuhe empfehlenswert, da einige Paprikasorten Hautreizungen verursachen können.
* Korb oder Behälter: Ein Korb oder Behälter hilft euch, die geernteten Paprika sicher und ordentlich zu transportieren.
Schritt-für-Schritt-Anleitung zur Paprikaernte
Jetzt geht es ans Eingemachte! Hier ist eine detaillierte Anleitung, wie ihr eure Paprika richtig erntet:
1. Vorbereitung: Nehmt eure Gartenschere oder euer Messer, eure Handschuhe (falls benötigt) und euren Korb oder Behälter zur Hand.
2. Auswahl der reifen Paprika: Sucht die Paprika aus, die die oben genannten Reifezeichen aufweisen. Achtet auf die Farbe, Größe, Festigkeit und den Zustand des Stiels.
3. Schnitttechnik: Schneidet den Stiel der Paprika etwa 2-3 cm oberhalb der Frucht ab. Achtet darauf, einen sauberen Schnitt zu machen, um die Pflanze nicht zu beschädigen. Vermeidet es, an der Paprika zu ziehen, da dies die Pflanze beschädigen und die Ernte der restlichen Früchte beeinträchtigen kann.
4. Sanftes Ablegen: Legt die geerntete Paprika vorsichtig in euren Korb oder Behälter, um Druckstellen zu vermeiden.
5. Regelmäßige Kontrolle: Kontrolliert eure Paprikapflanzen regelmäßig (am besten alle paar Tage), um reife Früchte zu ernten und die Pflanze zur Bildung neuer Früchte anzuregen.
Häufige Fehler vermeiden
Hier sind einige häufige Fehler, die ihr bei der Paprikaernte vermeiden solltet:
* Zu frühe Ernte: Erntet die Paprika nicht zu früh, da sie sonst nicht ihren vollen Geschmack und ihre volle Farbe entwickeln können.
* Zu späte Ernte: Lasst die Paprika nicht zu lange an der Pflanze hängen, da sie sonst weich und schrumpelig werden können.
* Unsachgemäße Schnitttechnik: Vermeidet es, an der Paprika zu ziehen oder den Stiel zu quetschen, da dies die Pflanze beschädigen kann.
* Vernachlässigung der Pflanze: Kontrolliert eure Paprikapflanzen regelmäßig und entfernt beschädigte oder kranke Blätter, um die Gesundheit der Pflanze zu fördern.
Nach der Ernte: Lagerung und Verwendung
Nach der Ernte ist es wichtig, die Paprika richtig zu lagern und zu verwenden, um ihre Frische und ihren Geschmack zu erhalten:
* Lagerung: Lagert die geernteten Paprika im Kühlschrank, am besten in einem Gemüsefach. Sie halten sich dort in der Regel etwa eine Woche.
* Verwendung: Paprika sind vielseitig einsetzbar. Ihr könnt sie roh in Salaten essen, grillen, braten, füllen oder in Suppen und Eintöpfen verwenden.
* Einfrieren: Wenn ihr eine große Ernte habt, könnt ihr die Paprika auch einfrieren. Schneidet sie dazu in Stücke oder Streifen und blanchiert sie kurz in kochendem Wasser, bevor ihr sie einfriert.
Zusätzliche Tipps für eine erfolgreiche Ernte
Hier sind noch einige zusätzliche Tipps, die euch helfen, eure Paprika-Ernte zu maximieren:
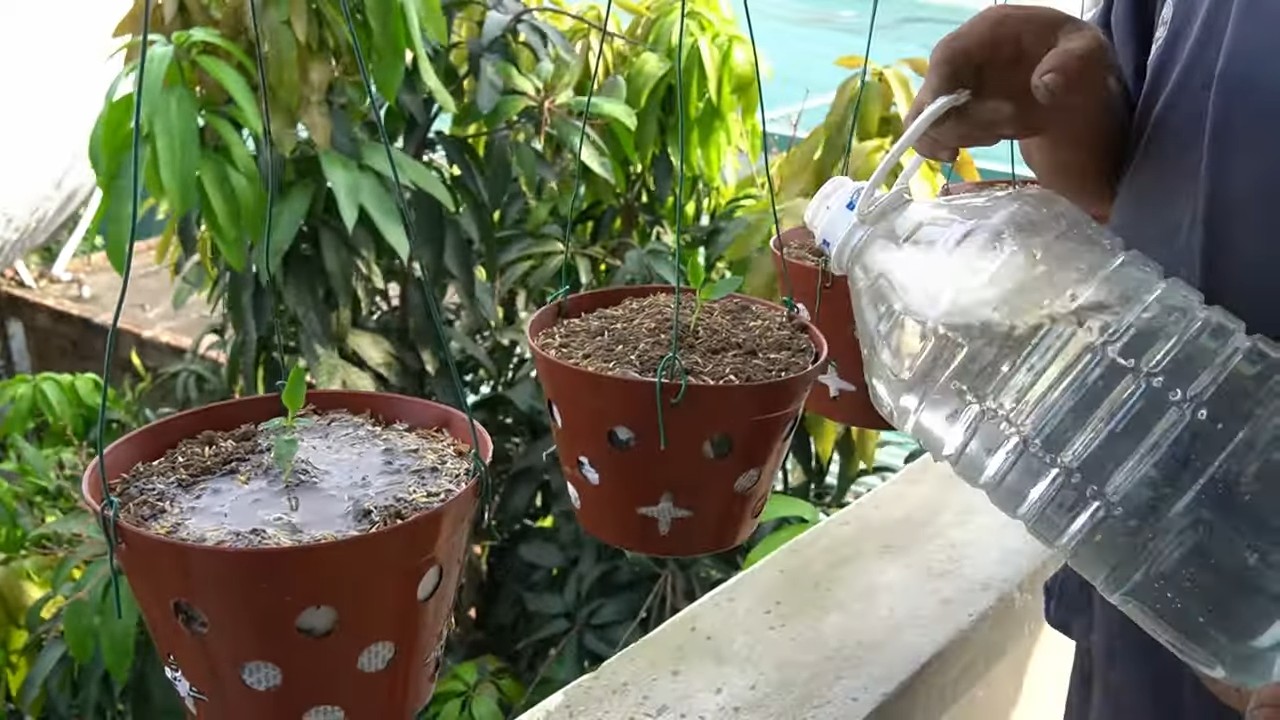
* Regelmäßiges Gießen: Paprika benötigen regelmäßige Bewässerung, besonders während der Fruchtbildung. Achtet darauf, dass der Boden immer leicht feucht ist, aber vermeidet Staunässe.
* Düngung: Düngt eure Paprikapflanzen regelmäßig mit einem geeigneten Dünger, um sie mit den notwendigen Nährstoffen zu versorgen.
* Sonnenlicht: Paprika benötigen viel Sonnenlicht, um gut zu wachsen und Früchte zu bilden. Stellt eure Paprikapflanzen an einen sonnigen Standort auf eurem Balkon.
* Schutz vor Schädlingen: Kontrolliert eure Paprikapflanzen regelmäßig auf Schädlinge und behandelt sie bei Bedarf mit einem geeigneten Mittel.
* Ausgeizen: Entfernt regelmäßig die Seitentriebe (Geiztriebe) der Paprikapflanzen, um die Bildung von Früchten zu fördern.
Sortenvielfalt für deinen Balkon
Es gibt unzählige Paprikasorten, die sich hervorragend für den Anbau auf dem Balkon eignen. Hier sind einige meiner Favoriten:
* ‘Mini Bell’: Diese Sorte produziert kleine, süße Paprika in verschiedenen Farben. Sie ist ideal für den Anbau in Töpfen und Kübeln.
* ‘Snackpaprika’: Diese Sorte liefert kleine, knackige Paprika, die perfekt zum Naschen sind.
* ‘Jalapeño’: Für alle, die es scharf mögen, ist die Jalapeño-Paprika eine gute Wahl. Sie ist relativ einfach anzubauen und liefert eine reiche Ernte.
* ‘Pimiento de Padrón’: Diese spanische Paprikasorte ist bekannt für ihre milden und gelegentlich scharfen Früchte. Sie ist ein echter Hingucker auf dem Balkon.
* ‘Spitzpaprika’: Diese Sorte produziert lange, spitz zulaufende Paprika mit einem süßen Geschmack.
Fazit
Ich hoffe, diese Anleitung hat euch geholfen, eure Paprika-Ernte auf dem Balkon zu optimieren. Mit ein wenig Geduld und Sorgfalt könnt ihr eine reiche und schmackhafte Ernte erzielen. Viel Spaß beim Gärtnern und Genießen! Und denkt daran: Jede Paprika, die ihr erntet, ist ein kleiner Erfolg, der euch für eure Mühe belohnt. Also, ran an die Schere und lasst die Ernte beginnen!
Conclusion
So, there you have it! Transforming your balcony into a thriving pepper paradise and reaping a bountiful harvest is not only achievable, but incredibly rewarding. We’ve explored the ins and outs of balcony pepper gardening, from selecting the right varieties to nurturing your plants for optimal growth. But the real magic lies in the **harvest**. It’s the culmination of your efforts, the moment you get to savor the fruits (or rather, the peppers!) of your labor.
Why is this DIY balcony pepper harvest a must-try? Because it offers a unique connection to your food, a sense of accomplishment, and a flavor experience that store-bought peppers simply can’t match. Imagine the vibrant colors adorning your balcony, the spicy aroma filling the air, and the satisfaction of knowing you grew those peppers yourself. It’s a sensory experience that elevates your cooking and adds a touch of homegrown goodness to every meal.
Beyond the basic techniques we’ve discussed, there’s plenty of room for experimentation and personalization. Consider these variations to further enhance your balcony pepper gardening experience:
* **Succession Planting:** Extend your harvest season by planting new pepper seedlings every few weeks. This ensures a continuous supply of fresh peppers throughout the summer and fall.
* **Companion Planting:** Introduce beneficial herbs and flowers like basil, marigolds, and nasturtiums to your pepper plants. These companions can deter pests, attract pollinators, and even improve the flavor of your peppers.
* **Hot Pepper Infusions:** Once you’ve harvested your peppers, get creative with them! Infuse olive oil with hot peppers for a spicy kick, or dry your peppers and grind them into homemade chili powder.
* **Pepper Jelly:** For a sweet and spicy treat, try making pepper jelly. It’s a delicious accompaniment to cheese and crackers, or as a glaze for grilled meats.
* **Fermented Hot Sauce:** Take your pepper harvest to the next level by fermenting them into a delicious and complex hot sauce. The fermentation process adds depth of flavor and beneficial probiotics.
Don’t be afraid to experiment with different pepper varieties, growing techniques, and preservation methods. The beauty of balcony pepper gardening is that it’s a journey of discovery. Each season brings new challenges and opportunities to learn and grow.
We wholeheartedly encourage you to embark on this exciting adventure. Start small, be patient, and don’t be discouraged by setbacks. With a little care and attention, you’ll be amazed at the abundance your balcony can produce.
And most importantly, we want to hear about your experiences! Share your photos, tips, and stories with us in the comments below. Let’s create a community of balcony pepper gardeners who inspire and support each other. What varieties did you grow? What challenges did you face? What delicious recipes did you create with your harvest? Your insights can help others succeed and make their balcony pepper gardening dreams a reality. So, get your hands dirty, embrace the process, and enjoy the incredible rewards of a homegrown **balcony pepper harvest**!
Frequently Asked Questions (FAQ)
What is the best time to harvest my balcony peppers?
The ideal time to harvest your balcony peppers depends on the variety and your desired level of ripeness. Generally, peppers are ready to harvest when they have reached their mature size and color, as indicated on the seed packet or plant tag. For bell peppers, this usually means a deep, vibrant color (red, yellow, orange, or purple, depending on the variety) and a firm texture. Hot peppers can be harvested at various stages of ripeness, depending on your preference for heat. Green jalapenos, for example, are often harvested before they turn red. As a general rule, the longer a hot pepper stays on the plant, the hotter it will become. Use clean pruning shears or scissors to cut the pepper from the plant, leaving a small piece of stem attached. This helps prevent rot and extends the shelf life of your peppers.
How often should I water my balcony pepper plants?
Watering frequency depends on several factors, including the size of your pots, the type of potting mix you’re using, the weather conditions, and the stage of growth of your plants. As a general rule, water your pepper plants deeply whenever the top inch of soil feels dry to the touch. Avoid overwatering, as this can lead to root rot. During hot, sunny weather, you may need to water your plants daily, or even twice a day. In cooler, cloudy weather, you may only need to water them every few days. Check the soil moisture regularly and adjust your watering schedule accordingly. Consider using self-watering containers or adding mulch to the soil to help retain moisture.
What kind of fertilizer should I use for my balcony pepper plants?
Pepper plants are heavy feeders and require regular fertilization to thrive. Use a balanced fertilizer with an NPK ratio (nitrogen, phosphorus, potassium) of around 5-10-10 or 10-10-10. You can also use a fertilizer specifically formulated for tomatoes or vegetables. Start fertilizing your plants a few weeks after transplanting them into their final pots. Follow the instructions on the fertilizer package for application rates and frequency. Avoid over-fertilizing, as this can burn the roots of your plants. You can also supplement with organic fertilizers like compost tea or fish emulsion.
How do I protect my balcony pepper plants from pests and diseases?
Balcony pepper plants can be susceptible to various pests and diseases, including aphids, spider mites, whiteflies, and fungal diseases like powdery mildew. Regularly inspect your plants for signs of infestation or disease. If you spot any problems, take action immediately. For aphids, spider mites, and whiteflies, you can try spraying your plants with a strong stream of water or using insecticidal soap. For fungal diseases, improve air circulation around your plants and avoid overhead watering. You can also use a fungicide if necessary. Consider using companion planting to deter pests and attract beneficial insects.
Can I grow peppers in small pots on my balcony?
Yes, you can grow peppers in small pots on your balcony, but you’ll need to choose compact or dwarf varieties. These varieties are specifically bred to thrive in containers and don’t require as much space as larger pepper plants. Some good options for small pots include ‘Patio Snacker’, ‘Mini Bell’, and ‘Thai Hot’. Use a well-draining potting mix and make sure your pots have drainage holes. Water and fertilize your plants regularly, as they will dry out and deplete nutrients more quickly in small pots.
My pepper plants are flowering, but not producing any peppers. What could be the problem?
There are several reasons why your pepper plants might be flowering but not producing peppers. One common cause is lack of pollination. Peppers are self-pollinating, but they often need a little help from wind or insects to transfer pollen from the male to the female parts of the flower. You can try hand-pollinating your plants by gently shaking the flowers or using a small paintbrush to transfer pollen. Other potential causes include extreme temperatures (too hot or too cold), insufficient sunlight, over-fertilization with nitrogen, and stress from pests or diseases. Make sure your plants are getting at least 6-8 hours of sunlight per day, and protect them from extreme temperatures.
How do I store my harvested peppers?
The best way to store your harvested peppers depends on how long you want to keep them. For short-term storage (a few days), you can store them in the refrigerator in a plastic bag or container. For longer-term storage, you can dry, freeze, or pickle your peppers. To dry peppers, you can use a dehydrator or hang them in a warm, dry place. To freeze peppers, wash and chop them, then spread them out on a baking sheet and freeze them until solid. Transfer them to a freezer bag or container for long-term storage. Pickling peppers is a great way to preserve them and add a tangy flavor. There are many different pickling recipes available online.
Leave a Comment