
Balcony chili recipe: Imagine plucking fiery red chilies, grown with your own two hands, just steps from your kitchen. Sounds like a dream, right? Well, it doesn’t have to be! This isn’t just about adding a little spice to your meals; it’s about connecting with nature, even in the heart of the city. For centuries, growing your own food, even in small spaces, has been a source of pride and self-sufficiency. From ancient window boxes to modern vertical gardens, the desire to cultivate our own sustenance is deeply ingrained.
But let’s be honest, sometimes the idea of gardening feels overwhelming. That’s where this DIY guide comes in! I’m going to share my favorite, super-easy balcony chili recipe for success, even if you’ve never grown anything before. We’ll break down everything from choosing the right chili varieties to maximizing your yield in a limited space.
Why do you need this? Because store-bought chilies, while convenient, often lack the vibrant flavor and satisfying feeling of something you’ve nurtured yourself. Plus, growing your own is a fantastic way to reduce your carbon footprint and add a touch of green to your urban oasis. So, grab your gardening gloves, and let’s get started on this exciting journey to homegrown heat!
Balkon-Chili: Dein eigenes scharfes Paradies
Hey Chili-Liebhaber! Träumst du auch davon, deine eigenen, superfrischen Chilis direkt auf dem Balkon zu ernten? Ich zeige dir, wie du mit ein paar einfachen Schritten und etwas Geduld deinen Balkon in ein kleines Chili-Paradies verwandelst. Keine Angst, es ist einfacher als du denkst!
Was du brauchst: Die Zutaten für deinen Chili-Erfolg
Bevor wir loslegen, lass uns sicherstellen, dass wir alles beisammen haben. Hier ist eine Liste der Dinge, die du für dein Balkon-Chili-Projekt benötigst:
* Chilisamen: Wähle deine Lieblingssorten! Ob Jalapeño, Habanero oder eine mildere Sorte – die Auswahl ist riesig. Achte auf qualitativ hochwertige Samen von einem vertrauenswürdigen Anbieter.
* Anzuchterde: Diese Erde ist speziell für die Anzucht von Jungpflanzen entwickelt und enthält weniger Nährstoffe, was das Wurzelwachstum fördert.
* Töpfe oder Behälter: Wähle Töpfe mit ausreichend Drainage. Chilis mögen keine Staunässe. Die Größe hängt von der Chilisorte ab, aber ein Topf mit mindestens 10 Litern Volumen ist ideal.
* Pflanzerde: Nach der Anzucht brauchen deine Chilis nährstoffreiche Erde. Eine gute Gemüseerde ist perfekt.
* Dünger: Ein spezieller Chili-Dünger oder ein organischer Gemüsedünger sorgt für eine reiche Ernte.
* Gießkanne oder Schlauch: Zum Bewässern deiner Pflanzen.
* Pflanzstäbe (optional): Für größere Chilisorten, die Unterstützung benötigen.
* Sprühflasche: Für die Befeuchtung der jungen Pflanzen.
* Mini-Gewächshaus oder Klarsichtfolie (optional): Um die Keimung zu beschleunigen.
* Handschuhe: Zum Schutz deiner Hände beim Umgang mit Erde und Dünger.
Phase 1: Die Anzucht – Der Start ins Chili-Abenteuer
Die Anzucht ist der erste und wichtigste Schritt. Hier legen wir den Grundstein für gesunde und kräftige Chili-Pflanzen.
1. Samen vorbereiten: Um die Keimung zu beschleunigen, kannst du die Chilisamen für 12-24 Stunden in lauwarmem Wasser einweichen. Das weicht die Samenschale auf und erleichtert das Keimen.
2. Anzuchttöpfe befüllen: Fülle kleine Anzuchttöpfe oder eine Anzuchtschale mit Anzuchterde. Drücke die Erde leicht an.
3. Samen aussäen: Lege pro Topf 1-2 Samen auf die Erde und bedecke sie mit einer dünnen Schicht Erde (ca. 0,5 cm).
4. Bewässern: Befeuchte die Erde vorsichtig mit einer Sprühflasche. Die Erde sollte feucht, aber nicht nass sein.
5. Für Wärme sorgen: Chilisamen keimen am besten bei einer Temperatur von 22-28°C. Stelle die Anzuchttöpfe an einen warmen Ort, z.B. auf eine Fensterbank über der Heizung oder in ein Mini-Gewächshaus.
6. Feuchtigkeit halten: Um die Luftfeuchtigkeit hoch zu halten, kannst du die Anzuchttöpfe mit Klarsichtfolie oder einem Deckel abdecken. Lüfte die Töpfe täglich kurz, um Schimmelbildung zu vermeiden.
7. Geduld haben: Die Keimung kann je nach Chilisorte und Temperatur 1-3 Wochen dauern. Halte die Erde feucht und warte geduldig.
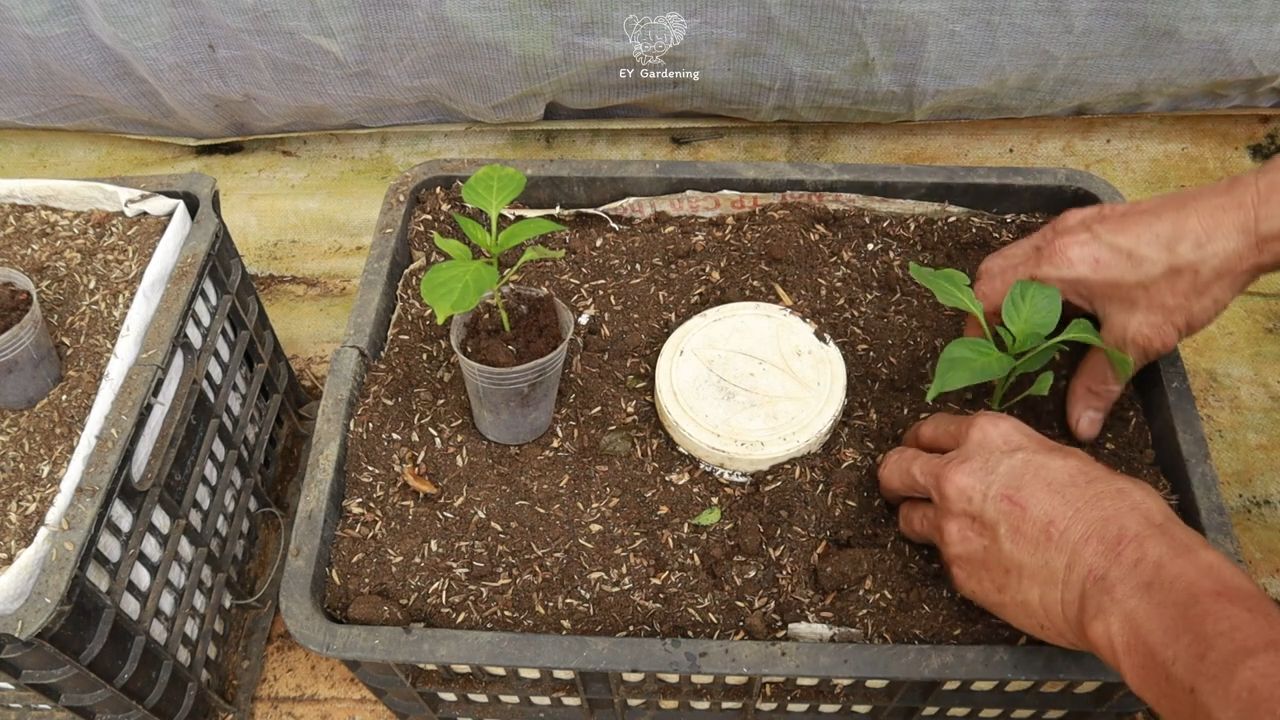
Phase 2: Pikieren – Den kleinen Pflanzen mehr Raum geben
Sobald die ersten Keimblätter (die ersten Blätter, die aus dem Samen kommen) und die ersten richtigen Blätter erscheinen, ist es Zeit zum Pikieren.
1. Vorbereitung: Fülle kleine Töpfe (ca. 8-10 cm Durchmesser) mit Pflanzerde.
2. Pflanzen vorsichtig ausheben: Löse die kleinen Chili-Pflanzen vorsichtig mit einem Pikierstab oder einem Löffel aus der Anzuchterde. Achte darauf, die Wurzeln nicht zu beschädigen.
3. Einpflanzen: Setze jede Chili-Pflanze in einen eigenen Topf. Die Pflanze sollte so tief sitzen, dass die ersten Blätter knapp über der Erde sind.
4. Bewässern: Gieße die Pflanzen vorsichtig an.
5. Heller Standort: Stelle die pikierten Chili-Pflanzen an einen hellen, aber nicht direkt sonnigen Standort.
Phase 3: Die Chili-Pflanzen auf dem Balkon – Das große Finale
Nachdem die Chili-Pflanzen pikiert wurden und kräftig gewachsen sind, können sie auf den Balkon umziehen.
1. Abhärten: Bevor du die Chili-Pflanzen dauerhaft auf den Balkon stellst, solltest du sie langsam an die Außenbedingungen gewöhnen. Stelle sie für ein paar Stunden am Tag nach draußen und verlängere die Zeit jeden Tag.
2. Umtopfen: Wähle größere Töpfe (mindestens 10 Liter Volumen) und fülle sie mit Pflanzerde.
3. Einpflanzen: Setze die Chili-Pflanzen vorsichtig in die neuen Töpfe.
4. Standort wählen: Chilis lieben die Sonne! Wähle einen sonnigen und windgeschützten Standort auf deinem Balkon.
5. Bewässern: Gieße die Chili-Pflanzen regelmäßig, besonders an heißen Tagen. Die Erde sollte immer leicht feucht sein, aber nicht nass.
6. Düngen: Dünge die Chili-Pflanzen regelmäßig mit einem speziellen Chili-Dünger oder einem organischen Gemüsedünger. Befolge die Anweisungen auf der Verpackung.
7. Unterstützung geben: Größere Chilisorten können Unterstützung benötigen. Verwende Pflanzstäbe, um die Pflanzen zu stabilisieren.
8. Schädlinge im Auge behalten: Kontrolliere deine Chili-Pflanzen regelmäßig auf Schädlinge wie Blattläuse oder Spinnmilben. Bei Befall kannst du natürliche Schädlingsbekämpfungsmittel verwenden.
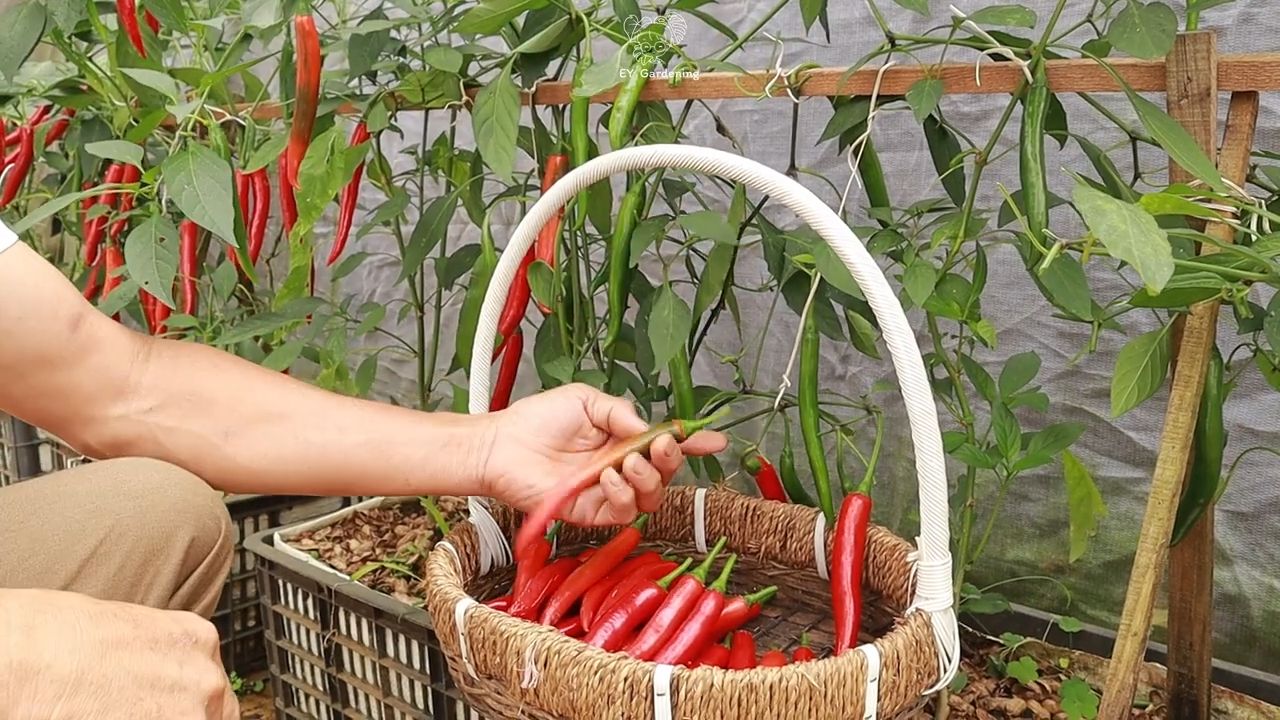
9. Ernten: Je nach Chilisorte und Wetterlage kannst du nach einigen Wochen die ersten Chilis ernten. Die Chilis sind reif, wenn sie ihre endgültige Farbe erreicht haben und sich leicht vom Stiel lösen lassen.
Zusätzliche Tipps für eine reiche Chili-Ernte
* Regelmäßiges Ausgeizen: Entferne regelmäßig die Seitentriebe in den Blattachseln, um die Bildung von Früchten zu fördern.
* Bestäubung unterstützen: Wenn du deine Chilis in einem geschlossenen Raum anbaust, kannst du die Bestäubung unterstützen, indem du die Blüten vorsichtig schüttelst oder mit einem Pinsel bestäubst.
* Überwintern: Wenn du deine Chili-Pflanzen überwintern möchtest, schneide sie im Herbst zurück und stelle sie an einen hellen und kühlen Ort (ca. 10-15°C). Gieße sie nur sparsam. Im Frühjahr kannst du sie dann wieder umtopfen und an einen wärmeren Ort stellen.
* Verschiedene Sorten anbauen: Probiere verschiedene Chilisorten aus, um herauszufinden, welche dir am besten schmecken und welche am besten auf deinem Balkon gedeihen.
* Beobachten und lernen: Beobachte deine Chili-Pflanzen genau und lerne, ihre Bedürfnisse zu verstehen. Je mehr du über sie lernst, desto besser wirst du sie pflegen können.
Ich hoffe, diese Anleitung hilft dir dabei, deinen eigenen kleinen Chili-Garten auf dem Balkon zu erschaffen. Viel Spaß beim Anbauen und Genießen deiner selbstgezogenen Chilis! Und denk dran: Scharf macht glücklich!
Conclusion
So, there you have it! Transforming your balcony into a vibrant chili pepper paradise is not only achievable, but incredibly rewarding. We’ve walked you through the process, from seed to satisfying harvest, and hopefully, instilled the confidence you need to embark on this exciting gardening adventure. This isn’t just about growing chili peppers; it’s about connecting with nature, enjoying fresh, homegrown ingredients, and adding a touch of fiery beauty to your urban space.
Why is this DIY balcony chili project a must-try? Because it offers a unique blend of benefits that store-bought peppers simply can’t match. Imagine the satisfaction of plucking a perfectly ripe chili, knowing you nurtured it from a tiny seed. Think of the incredible flavor explosion that awaits, far surpassing the often bland and mass-produced varieties found in supermarkets. And consider the sheer joy of adding a splash of vibrant color and life to your balcony, creating a mini-oasis of green and red.
But the benefits extend beyond the tangible. Gardening, even on a small scale, is a fantastic stress reliever. It’s a mindful activity that allows you to disconnect from the digital world and reconnect with the natural rhythms of life. Plus, growing your own food is a sustainable and eco-friendly choice, reducing your carbon footprint and promoting a healthier lifestyle.
Ready to take your balcony chili game to the next level? Consider these variations:
* **Experiment with different chili varieties:** From the mild poblano to the scorching habanero, the world of chili peppers is vast and diverse. Try growing a mix of varieties to cater to different spice preferences.
* **Companion planting:** Enhance your chili plants’ growth and deter pests by planting them alongside beneficial herbs like basil, oregano, or marigolds.
* **Vertical gardening:** Maximize your balcony space by using vertical planters or hanging baskets to grow your chili peppers. This is especially useful for smaller balconies.
* **Fermented Chili Paste:** Once you have a good harvest, consider making your own fermented chili paste. This is a great way to preserve your chilies and add a complex, umami flavor to your dishes.
Don’t be afraid to experiment and adapt the techniques to suit your specific balcony conditions and personal preferences. The beauty of DIY is that it’s all about learning and creating something unique.
We wholeheartedly encourage you to give this DIY balcony chili project a try. It’s a fun, rewarding, and delicious way to transform your outdoor space and add a touch of spice to your life. And most importantly, we want to hear about your experiences! Share your photos, tips, and stories with us in the comments below. Let’s create a community of balcony chili enthusiasts and inspire others to embrace the joy of homegrown goodness. We are confident that with a little effort, you can master the art of **balcony chili** cultivation and enjoy a bountiful harvest of flavorful peppers. Happy growing!
Frequently Asked Questions (FAQ)
What kind of soil is best for growing chili peppers in containers?
The best soil for container-grown chili peppers is a well-draining potting mix. Avoid using garden soil, as it can become compacted in containers and hinder drainage. Look for a potting mix that contains ingredients like peat moss, perlite, and vermiculite. These ingredients help to retain moisture while also providing good aeration for the roots. You can also amend your potting mix with compost for added nutrients. A slightly acidic to neutral pH (around 6.0 to 7.0) is ideal for chili peppers.
How much sunlight do chili peppers need on a balcony?
Chili peppers thrive in full sun, meaning they need at least 6-8 hours of direct sunlight per day. If your balcony doesn’t receive that much sunlight, you can supplement with grow lights. Place your chili plants in the sunniest spot on your balcony. If you live in a particularly hot climate, you may need to provide some afternoon shade to prevent the plants from getting scorched. Observe your plants closely and adjust their position as needed to ensure they are getting enough sunlight.
How often should I water my balcony chili plants?
Water your chili plants when the top inch of soil feels dry to the touch. The frequency of watering will depend on factors like the weather, the size of the container, and the type of potting mix you’re using. In hot, dry weather, you may need to water daily. In cooler, wetter weather, you may only need to water every few days. Avoid overwatering, as this can lead to root rot. Ensure that your containers have drainage holes to allow excess water to escape. A good rule of thumb is to water deeply until water drains out of the bottom of the pot.
What kind of fertilizer should I use for my chili peppers?
Chili peppers benefit from regular fertilization, especially during the growing season. Use a balanced fertilizer with an NPK ratio (nitrogen, phosphorus, potassium) of around 10-10-10 or 14-14-14. You can also use a fertilizer specifically formulated for tomatoes or vegetables, as these often contain the nutrients that chili peppers need. Fertilize every 2-3 weeks, following the instructions on the fertilizer package. Avoid over-fertilizing, as this can burn the roots of your plants. You can also supplement with organic fertilizers like compost tea or fish emulsion.
How do I protect my chili plants from pests and diseases on a balcony?
Balcony gardens can be susceptible to pests like aphids, spider mites, and whiteflies. Regularly inspect your plants for signs of infestation. If you spot pests, you can try spraying them with a strong stream of water or using insecticidal soap or neem oil. For diseases like powdery mildew or fungal infections, ensure good air circulation around your plants and avoid overwatering. You can also use a fungicide if necessary. Companion planting with herbs like basil or marigolds can also help to deter pests.
When is the best time to harvest my balcony chili peppers?
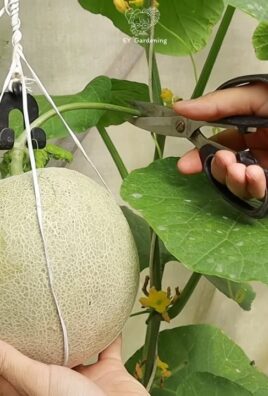
The best time to harvest your chili peppers depends on the variety and your desired level of spiciness. Most chili peppers will change color as they ripen, typically from green to red, yellow, or orange. You can harvest them at any stage of ripeness, but the flavor and spiciness will intensify as they mature. Use a pair of scissors or pruning shears to cut the peppers from the plant, leaving a small stem attached.
Can I grow chili peppers indoors if my balcony doesn’t get enough sunlight?
Yes, you can grow chili peppers indoors if your balcony doesn’t get enough sunlight. However, you will need to provide supplemental lighting using grow lights. Place the grow lights about 6-12 inches above the plants and keep them on for 14-16 hours per day. Ensure that your indoor chili plants have good air circulation and are protected from drafts. You may also need to hand-pollinate the flowers to ensure fruit production.
How do I overwinter my chili pepper plants on a balcony?
In colder climates, chili peppers are often grown as annuals. However, you can overwinter your plants indoors to keep them alive for the following growing season. Before the first frost, prune back your chili plants and transplant them into smaller pots. Bring them indoors and place them in a sunny location. Water sparingly and avoid fertilizing during the winter months. In the spring, gradually acclimate your plants to outdoor conditions before transplanting them back into larger containers on your balcony.
What are some common problems when growing balcony chili peppers and how can I fix them?
Some common problems include:
* **Yellowing leaves:** This can be caused by overwatering, underwatering, nutrient deficiencies, or pests. Adjust your watering schedule, fertilize as needed, and inspect for pests.
* **Blossom drop:** This can be caused by temperature fluctuations, lack of pollination, or nutrient deficiencies. Ensure consistent temperatures, hand-pollinate if necessary, and fertilize with a balanced fertilizer.
* **Stunted growth:** This can be caused by poor soil, lack of sunlight, or pests. Use a well-draining potting mix, provide adequate sunlight, and inspect for pests.
* **Fruit rot:** This can be caused by overwatering or fungal diseases. Ensure good drainage, avoid overwatering, and use a fungicide if necessary.
Can I save seeds from my balcony chili peppers to grow next year?
Yes, you can save seeds from your balcony chili peppers to grow next year. Allow the peppers to fully ripen on the plant before harvesting them for seeds. Cut open the peppers and remove the seeds. Spread the seeds out on a paper towel to dry for several days. Once the seeds are completely dry, store them in an airtight container in a cool, dark place. Label the container with the variety of chili pepper and the date of harvest.
Leave a Comment