
Balcony Bitter Melon Growing might sound intimidating, but trust me, even with limited space, you can cultivate this unique and nutritious vegetable right outside your door! Have you ever dreamed of snipping fresh, homegrown produce for your meals, even if you live in an apartment? Well, bitter melon, with its distinctive bumpy skin and slightly bitter taste, is surprisingly well-suited for balcony life.
Bitter melon, also known as bitter gourd, has a rich history, deeply rooted in Asian cultures where it’s been used for centuries, not just as a food source, but also for its medicinal properties. From traditional Chinese medicine to Indian Ayurvedic practices, this remarkable vegetable has been revered for its health benefits. Now, you can bring a piece of that history to your own home!
But why bother with balcony bitter melon growing? Let’s face it, fresh produce from the grocery store can be expensive and sometimes lacks the vibrant flavor of homegrown vegetables. Plus, there’s something incredibly satisfying about nurturing a plant from seed to harvest. This DIY guide will provide you with simple, step-by-step instructions and clever hacks to maximize your yield, even in a small space. Imagine the joy of sharing your homegrown bitter melon with friends and family, knowing you cultivated it yourself! So, let’s get started and transform your balcony into a thriving mini-garden!

Balkon-Bittermelone: Dein DIY-Leitfaden für eine erfolgreiche Ernte
Ich liebe es, frisches Gemüse direkt vom Balkon zu ernten! Und Bittermelone, mit ihrem einzigartigen Geschmack und gesundheitlichen Vorteilen, ist eine tolle Ergänzung für jeden kleinen Stadtgarten. Keine Angst, es ist einfacher als du denkst! Hier zeige ich dir, wie du Bittermelone erfolgreich auf deinem Balkon anbauen kannst.
Was du brauchst:
* Bittermelonensamen (am besten eine Sorte, die für den Anbau in Containern geeignet ist)
* Anzuchttöpfe oder Eierkartons
* Anzuchterde
* Großer Pflanzkübel (mindestens 30 Liter Volumen)
* Hochwertige Blumenerde
* Kompost oder organischer Dünger
* Rankhilfe (Bambusstäbe, Spalier, Drahtseil)
* Gießkanne oder Schlauch mit Brausekopf
* Gartenschere
* Handschuhe (optional)
Die Vorbereitung: Der Schlüssel zum Erfolg
Bevor wir loslegen, ist eine gute Vorbereitung das A und O. Bittermelonen sind etwas anspruchsvoll, aber mit den richtigen Vorkehrungen wirst du reichlich ernten können.
1. Samen vorziehen: Der frühe Vogel fängt den Wurm
Bittermelonen haben eine relativ lange Wachstumsperiode, daher ist es ratsam, die Samen vorzuziehen. Das gibt ihnen einen Vorsprung, bevor sie ins Freie kommen.
1. Fülle deine Anzuchttöpfe oder Eierkartons mit Anzuchterde.
2. Lege in jeden Topf oder jede Zelle 1-2 Bittermelonensamen.
3. Bedecke die Samen leicht mit Erde (ca. 1 cm).
4. Befeuchte die Erde vorsichtig mit einer Sprühflasche. Sie sollte feucht, aber nicht nass sein.
5. Stelle die Anzuchttöpfe an einen warmen, hellen Ort. Eine Fensterbank oder ein Mini-Gewächshaus sind ideal.
6. Halte die Erde feucht, aber vermeide Staunässe.
7. Nach etwa 1-2 Wochen sollten die Samen keimen.
2. Der richtige Standort: Sonne, Sonne, Sonne!
Bittermelonen lieben die Sonne! Wähle einen Standort auf deinem Balkon, der mindestens 6-8 Stunden direkte Sonneneinstrahlung pro Tag erhält. Ein nach Süden ausgerichteter Balkon ist ideal. Achte auch darauf, dass der Standort windgeschützt ist, da starke Winde die zarten Triebe beschädigen können.
3. Der perfekte Pflanzkübel: Großzügig sein lohnt sich
Bittermelonen sind Kletterpflanzen und brauchen viel Platz für ihre Wurzeln. Ein großer Pflanzkübel mit mindestens 30 Litern Volumen ist daher unerlässlich.
1. Wähle einen Pflanzkübel mit guter Drainage. Löcher im Boden sind wichtig, damit überschüssiges Wasser ablaufen kann.
2. Fülle den Kübel mit einer Mischung aus hochwertiger Blumenerde und Kompost oder organischem Dünger. Das sorgt für eine gute Nährstoffversorgung.
4. Die Rankhilfe: Klettern erlaubt!
Bittermelonen sind Kletterpflanzen und brauchen eine Rankhilfe, um sich daran festzuhalten und in die Höhe zu wachsen. Es gibt verschiedene Möglichkeiten:
* **Bambusstäbe:** Stecke mehrere Bambusstäbe in den Pflanzkübel und verbinde sie oben miteinander.
* **Spalier:** Ein Spalier, das an der Wand befestigt wird, bietet eine stabile und dekorative Rankhilfe.
* **Drahtseil:** Spannt ein Drahtseil zwischen zwei Punkten auf dem Balkon.
Das Einpflanzen: Ab ins Beet!
Sobald die Bittermelonen-Sämlinge kräftig genug sind (ca. 10-15 cm hoch), können sie in den Pflanzkübel umgepflanzt werden.
1. Wähle einen bewölkten Tag oder den späten Nachmittag, um die Sämlinge umzupflanzen. Das reduziert den Stress für die Pflanzen.
2. Grabe ein Loch in die Erde im Pflanzkübel, das groß genug ist, um den Wurzelballen des Sämlings aufzunehmen.
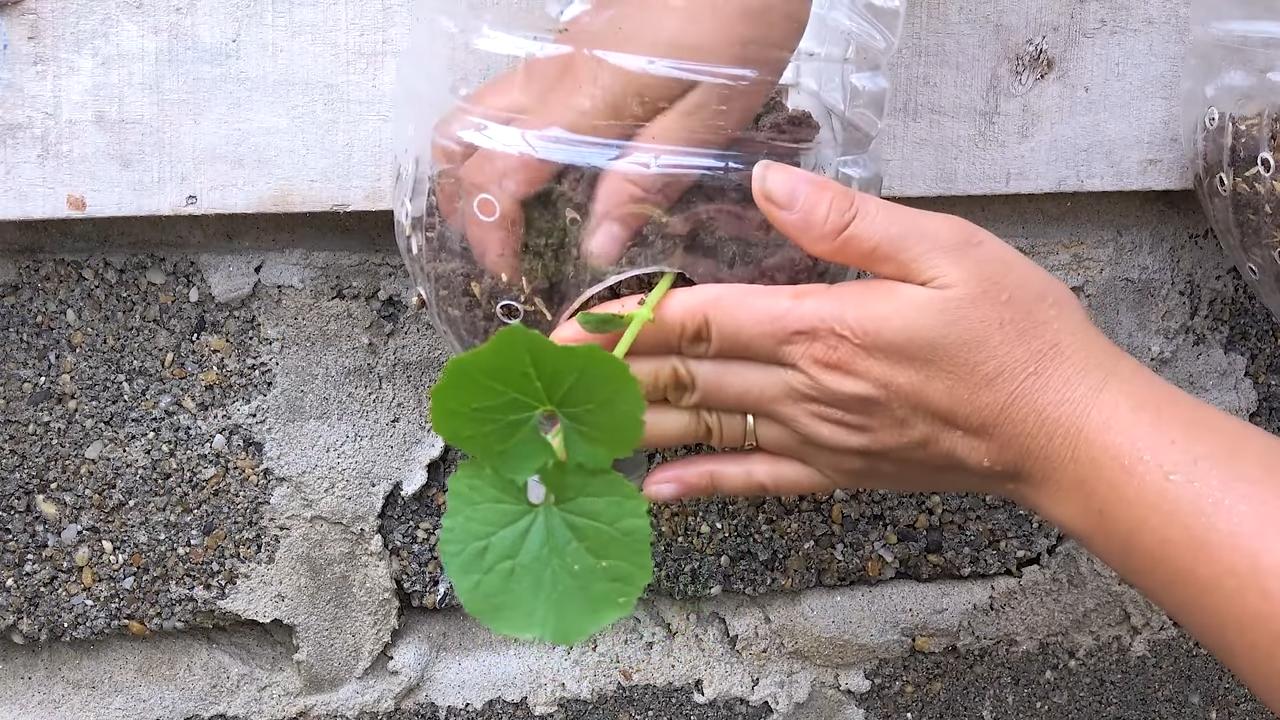
3. Nimm den Sämling vorsichtig aus dem Anzuchttopf und setze ihn in das Loch.
4. Fülle das Loch mit Erde auf und drücke sie leicht an.
5. Gieße den Sämling gründlich.
6. Wiederhole den Vorgang für die restlichen Sämlinge. Achte darauf, genügend Abstand zwischen den Pflanzen zu lassen (ca. 30-40 cm).
Die Pflege: Liebe und Aufmerksamkeit
Bittermelonen brauchen regelmäßige Pflege, um gesund zu wachsen und reichlich Früchte zu tragen.
1. Gießen: Nicht zu viel, nicht zu wenig
Bittermelonen brauchen regelmäßige Bewässerung, besonders während der heißen Sommermonate. Die Erde sollte immer leicht feucht sein, aber vermeide Staunässe. Gieße am besten morgens oder abends, um Verdunstung zu vermeiden.
2. Düngen: Nährstoffe für Wachstum und Ernte
Bittermelonen sind Starkzehrer und brauchen regelmäßige Düngung. Verwende einen organischen Dünger oder Kompost, um die Pflanzen mit den notwendigen Nährstoffen zu versorgen. Dünge alle 2-3 Wochen während der Wachstumsperiode.
3. Rankhilfe: Hilfestellung beim Klettern
Leite die Triebe der Bittermelone regelmäßig an der Rankhilfe entlang. Das fördert das Wachstum und sorgt für eine gute Belüftung der Pflanze.
4. Ausgeizen: Mehr Ertrag durch gezieltes Beschneiden
Das Ausgeizen ist optional, kann aber den Ertrag erhöhen. Entferne Seitentriebe, die aus den Blattachseln wachsen. Das lenkt die Energie der Pflanze in die Entwicklung der Haupttriebe und Früchte.
5. Schädlinge und Krankheiten: Vorbeugen ist besser als heilen
Bittermelonen können anfällig für Schädlinge wie Blattläuse und Spinnmilben sein. Kontrolliere die Pflanzen regelmäßig und bekämpfe Schädlinge frühzeitig mit natürlichen Mitteln wie Neemöl oder Schmierseife. Achte auch auf Anzeichen von Krankheiten wie Mehltau. Eine gute Belüftung und regelmäßige Bewässerung können helfen, Krankheiten vorzubeugen.
Die Ernte: Der Lohn der Mühe
Nach etwa 2-3 Monaten kannst du die ersten Bittermelonen ernten.
1. Ernte die Bittermelonen, wenn sie noch jung und grün sind. Sie sollten fest und prall sein.
2. Schneide die Bittermelonen mit einer Gartenschere vom Stiel ab.
3. Je öfter du erntest, desto mehr Früchte werden nachwachsen.
Zusätzliche Tipps für eine reiche Ernte:
* **Bestäubung:** Bittermelonen sind einhäusig, das heißt, sie haben männliche und weibliche Blüten auf derselben Pflanze. Manchmal kann es jedoch zu Problemen mit der Bestäubung kommen, besonders wenn es wenig Insekten gibt. In diesem Fall kannst du die Blüten von Hand bestäuben. Übertrage einfach mit einem Pinsel Pollen von einer männlichen Blüte auf eine weibliche Blüte. Weibliche Blüten erkennst du an dem kleinen Fruchtansatz direkt unter der Blüte.
* **Mulchen:** Eine Mulchschicht aus Stroh oder Grasschnitt um die Pflanzen herum hilft, die Feuchtigkeit im Boden zu halten und Unkraut zu unterdrücken.
* **Regelmäßige Kontrolle:** Kontrolliere deine Bittermelonen regelmäßig auf Schädlinge, Krankheiten und Anzeichen von Nährstoffmangel. Je früher du Probleme erkennst, desto einfacher ist es, sie zu beheben.
* **Sorte wählen:** Es gibt verschiedene Bittermelonen-Sorten. Informiere dich, welche Sorten sich besonders gut für den Anbau in Containern eignen.
Mit etwas Geduld und Pflege wirst du bald deine eigenen, frischen Bittermelonen vom Balkon ernten können. Viel Spaß beim Gärtnern!
Conclusion
So, there you have it! Transforming your balcony into a thriving bitter melon garden is not only achievable, but also incredibly rewarding. We’ve walked you through the process, highlighting the key steps to ensure your success, from selecting the right variety to providing optimal support and care. But why is this DIY project a must-try?
Firstly, growing your own bitter melon offers unparalleled freshness. Imagine harvesting vibrant, slightly bumpy gourds just steps from your kitchen, knowing exactly where they came from and how they were grown. This level of control allows you to avoid pesticides and herbicides, ensuring a healthier and more flavorful addition to your meals. Store-bought bitter melon simply can’t compare to the taste and nutritional value of homegrown produce.
Secondly, this project is a fantastic way to connect with nature, even in a limited urban space. Tending to your bitter melon plants provides a therapeutic escape from the hustle and bustle of city life. Watching the vines climb, the flowers bloom, and the fruits develop is a truly satisfying experience. It’s a chance to learn about plant life cycles, develop your gardening skills, and appreciate the beauty of nature in your own backyard.
Thirdly, growing bitter melon on your balcony is a sustainable and eco-friendly choice. By producing your own food, you reduce your reliance on commercially grown produce, which often involves long-distance transportation and resource-intensive farming practices. You’re also contributing to a greener environment by adding more plant life to your urban landscape.
But the benefits don’t stop there! Consider these variations to personalize your balcony bitter melon garden:
* Vertical Gardening Expansion: Experiment with different trellising systems to maximize space. Instead of a simple trellis, try a vertical garden wall or a series of hanging planters. This not only increases your yield but also adds a visually stunning element to your balcony.
* Companion Planting: Introduce companion plants like basil, marigolds, or nasturtiums to deter pests and attract beneficial insects. These plants can also enhance the flavor of your bitter melon and add diversity to your balcony garden.
* Seed Saving: Once your bitter melon plants produce fruit, consider saving the seeds for future planting. This is a great way to become more self-sufficient and preserve your favorite varieties.
* Grafting: For the more adventurous gardeners, explore grafting techniques to combine the desirable traits of different bitter melon varieties or to improve disease resistance.
Ultimately, growing balcony bitter melon is an adventure in self-sufficiency and a testament to the power of small-space gardening. It’s a chance to cultivate your own food, connect with nature, and create a beautiful and productive outdoor space.
So, what are you waiting for? Grab your seeds, prepare your pots, and get ready to embark on this exciting journey. We’re confident that you’ll be amazed by the results. And don’t forget to share your experiences with us! We’d love to hear about your successes, challenges, and creative variations. Post photos of your balcony bitter melon garden on social media using #BalconyBitterMelon and tag us so we can celebrate your green thumb! Let’s inspire others to transform their balconies into thriving edible oases. Happy gardening!
Frequently Asked Questions (FAQ)
1. What is the best variety of bitter melon to grow on a balcony?
The best bitter melon varieties for balcony growing are typically those that are compact and have shorter vines. Some popular choices include:
* Dwarf Bitter Melon: As the name suggests, these varieties are smaller and more manageable for container gardening.
* Taiwanese Bitter Melon: Known for their mild flavor and relatively compact growth habit.
* Chinese Bitter Melon: While some Chinese varieties can be quite large, there are smaller cultivars available that are suitable for balconies.
When selecting a variety, consider your local climate and the amount of sunlight your balcony receives. Read seed descriptions carefully to ensure that the variety you choose is well-suited for container gardening.
2. How much sunlight does bitter melon need?
Bitter melon thrives in full sun, requiring at least 6-8 hours of direct sunlight per day. If your balcony doesn’t receive enough sunlight, you may need to supplement with grow lights. Position your plants in the sunniest spot on your balcony and monitor their growth. If the vines are leggy and the leaves are pale, it’s a sign that they need more light.
3. What type of soil is best for growing bitter melon in containers?
Use a well-draining potting mix that is rich in organic matter. A good mix would include equal parts of:
* Potting soil: Provides a base for the mix.
* Compost: Adds nutrients and improves drainage.
* Perlite or vermiculite: Enhances drainage and aeration.
Avoid using garden soil, as it can become compacted in containers and hinder root growth. Ensure that your containers have drainage holes to prevent waterlogging.
4. How often should I water my bitter melon plants?
Water your bitter melon plants regularly, especially during hot and dry weather. Check the soil moisture level daily and water when the top inch feels dry to the touch. Avoid overwatering, as this can lead to root rot. Water deeply, ensuring that the water reaches the bottom of the container.
5. How do I fertilize my bitter melon plants?
Fertilize your bitter melon plants every 2-3 weeks with a balanced liquid fertilizer. Look for a fertilizer with an NPK ratio of 10-10-10 or similar. You can also use organic fertilizers like compost tea or fish emulsion. Follow the instructions on the fertilizer packaging carefully to avoid over-fertilizing.
6. How do I support the vines of my bitter melon plants?
Bitter melon vines need a strong support system to climb. You can use a trellis, a fence, or even a sturdy tomato cage. Train the vines to climb the support structure by gently tying them with twine or plant ties. As the vines grow, continue to provide support to prevent them from breaking or falling over.
7. How do I deal with pests and diseases on my bitter melon plants?
Monitor your plants regularly for signs of pests and diseases. Common pests that affect bitter melon include aphids, spider mites, and whiteflies. You can control these pests with insecticidal soap or neem oil. Diseases like powdery mildew and fungal leaf spots can also affect bitter melon. Prevent these diseases by providing good air circulation and avoiding overhead watering. If you notice signs of disease, treat your plants with a fungicide.
8. When can I harvest my bitter melon?
Bitter melon is typically ready to harvest 2-3 months after planting. The fruits should be firm and have a slightly bumpy texture. The color of the fruit will vary depending on the variety, but it should be a vibrant green or white. Harvest the fruits when they are still young and tender, as they can become bitter as they mature. Use a sharp knife or scissors to cut the fruits from the vine, leaving a small stem attached.
9. How do I reduce the bitterness of bitter melon?
Bitter melon is known for its bitter taste, but there are several ways to reduce the bitterness:
* Soaking: Soak the sliced bitter melon in salted water for 30 minutes before cooking.
* Blanching: Blanch the sliced bitter melon in boiling water for a few minutes before cooking.
* Removing the seeds and pith: The seeds and pith are the most bitter parts of the fruit, so remove them before cooking.
* Pairing with strong flavors: Cook bitter melon with strong flavors like garlic, ginger, and chili peppers to mask the bitterness.
10. Can I grow bitter melon in a small container?
While bitter melon prefers larger containers, you can still grow it in a smaller container (at least 5 gallons) if you choose a compact variety and provide adequate support, watering, and fertilization. Be prepared to water more frequently and monitor the plant closely for signs of stress.


Leave a Comment