
Growing Figs in Bottles might sound like something out of a whimsical fairytale, but trust me, it’s a surprisingly practical and rewarding DIY project! Have you ever dreamed of plucking ripe, juicy figs straight from your own miniature orchard, even if you’re short on space or live in a less-than-ideal climate? Well, this is your chance to turn that dream into a delicious reality.
The practice of container gardening, in general, has roots stretching back centuries, with evidence suggesting ancient civilizations like the Egyptians and Romans utilized pots and vessels to cultivate plants. While not specifically bottles, the ingenuity of adapting to limited resources and controlling growing conditions is a timeless human trait. Figs, with their rich history and cultural significance as symbols of prosperity and abundance, have been cherished for millennia.
Let’s be honest, traditional fig trees can be demanding – they need ample space, specific soil conditions, and protection from harsh weather. But what if you could bypass those challenges and enjoy the sweet taste of homegrown figs regardless? That’s where growing figs in bottles comes in! This clever DIY hack allows you to control the environment, protect your precious fig tree from frost, and even create a stunning conversation piece for your patio or balcony. I’m excited to share this simple yet effective method that will have you harvesting your own figs in no time!
Growing Figs in Bottles: A Fun and Unique DIY Project
Hey there, fellow plant enthusiasts! Ever thought about growing figs in a bottle? It’s a quirky, space-saving, and surprisingly effective way to cultivate these delicious fruits. I’ve been experimenting with this method for a while now, and I’m excited to share my experience and guide you through the process. Get ready to turn those empty bottles into mini fig orchards!
Why Grow Figs in Bottles?
Before we dive into the how-to, let’s talk about why you might want to try this.
* Space Saving: Perfect for small apartments, balconies, or anyone with limited garden space.
* Unique Aesthetic: Adds a touch of whimsy and visual interest to your indoor or outdoor space.
* Controlled Environment: Easier to manage temperature, humidity, and pests compared to traditional gardening.
* Fun Experiment: A great way to learn more about plant propagation and growth.
* Conversation Starter: Guaranteed to impress your friends and family!
What You’ll Need
Here’s a list of the materials you’ll need to get started. Don’t worry, most of these are easily accessible.
* Glass Bottles: Choose bottles with wide mouths for easier planting. Wine bottles, large juice bottles, or even repurposed pickle jars work well. Make sure they are thoroughly cleaned and sanitized.
* Fig Cuttings: Obtain healthy fig cuttings from a mature fig tree. Look for cuttings that are about 6-8 inches long and have several leaf nodes.
* Rooting Hormone (Optional): This can help speed up the rooting process, but it’s not essential.
* Potting Mix: Use a well-draining potting mix specifically formulated for containers. A mix of peat moss, perlite, and vermiculite works well.
* Water: Clean, filtered water is best.
* Spray Bottle: For misting the cuttings and maintaining humidity.
* Sharp Knife or Pruning Shears: For taking cuttings and trimming leaves.
* Gloves: To protect your hands.
* Small Pebbles or Gravel: For drainage at the bottom of the bottle.
* Optional: Clear Plastic Wrap or a Plastic Bag: To create a mini-greenhouse effect.
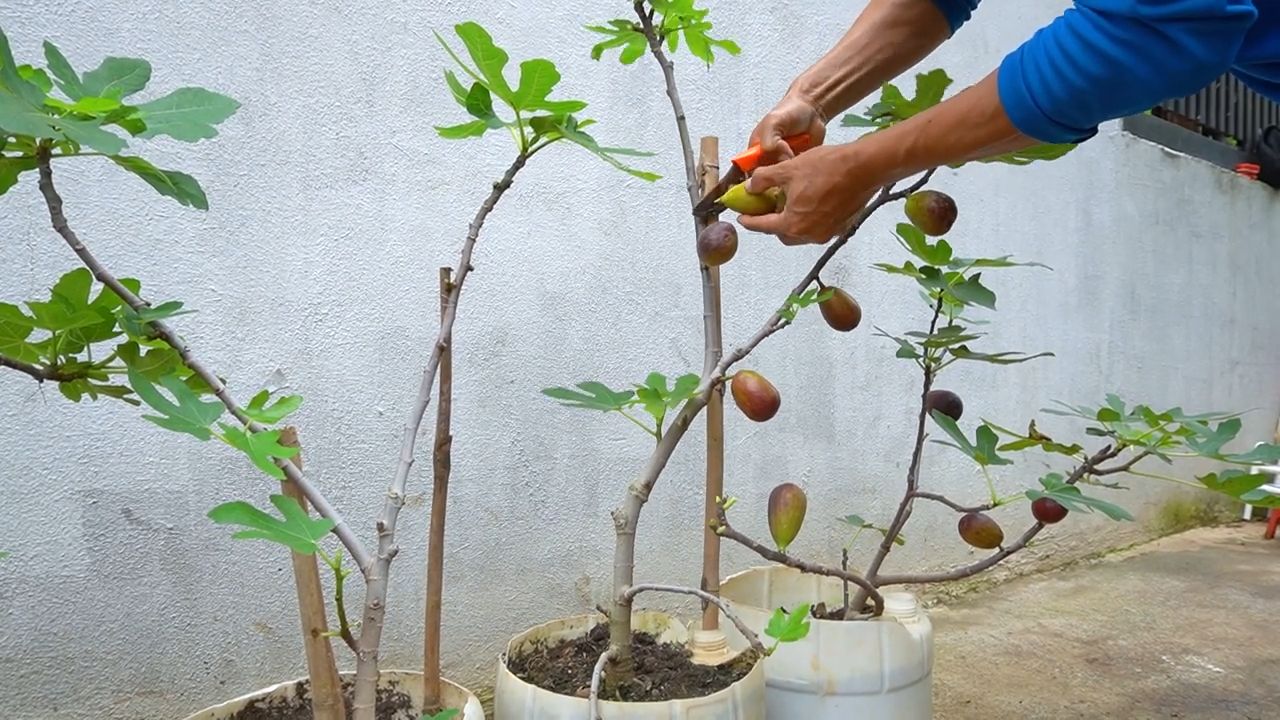
Taking Fig Cuttings
This is a crucial step, so pay close attention! The success of your bottle fig garden depends on the quality of your cuttings.
1. Choose a Healthy Branch: Select a healthy, mature branch from a fig tree. Look for branches that are about pencil-thick and have several leaf nodes (the points where leaves emerge).
2. Timing is Key: The best time to take cuttings is in late winter or early spring, before the tree starts actively growing.
3. Make the Cut: Using a sharp, clean knife or pruning shears, make a clean cut at a 45-degree angle just below a leaf node. This angle helps the cutting absorb water more efficiently.
4. Trim the Leaves: Remove the lower leaves from the cutting, leaving only a few leaves at the top. This reduces water loss and encourages root development.
5. Prepare the Cuttings: If you’re using rooting hormone, dip the cut end of the cutting into the hormone powder or liquid. Follow the instructions on the rooting hormone package.
Preparing the Bottles
Now, let’s get those bottles ready for their new inhabitants!
1. Clean and Sanitize: Thoroughly wash the bottles with soap and water. Then, sanitize them with a diluted bleach solution (1 part bleach to 9 parts water). Rinse well and allow them to dry completely. This helps prevent fungal diseases.
2. Add Drainage: Place a layer of small pebbles or gravel at the bottom of the bottle. This will improve drainage and prevent the roots from sitting in water. About an inch or two is sufficient.
3. Fill with Potting Mix: Carefully fill the bottle with potting mix, leaving about an inch or two of space at the top. Gently tap the bottle to settle the soil and remove any air pockets.
4. Moisten the Soil: Lightly moisten the potting mix with water. It should be damp but not soggy.
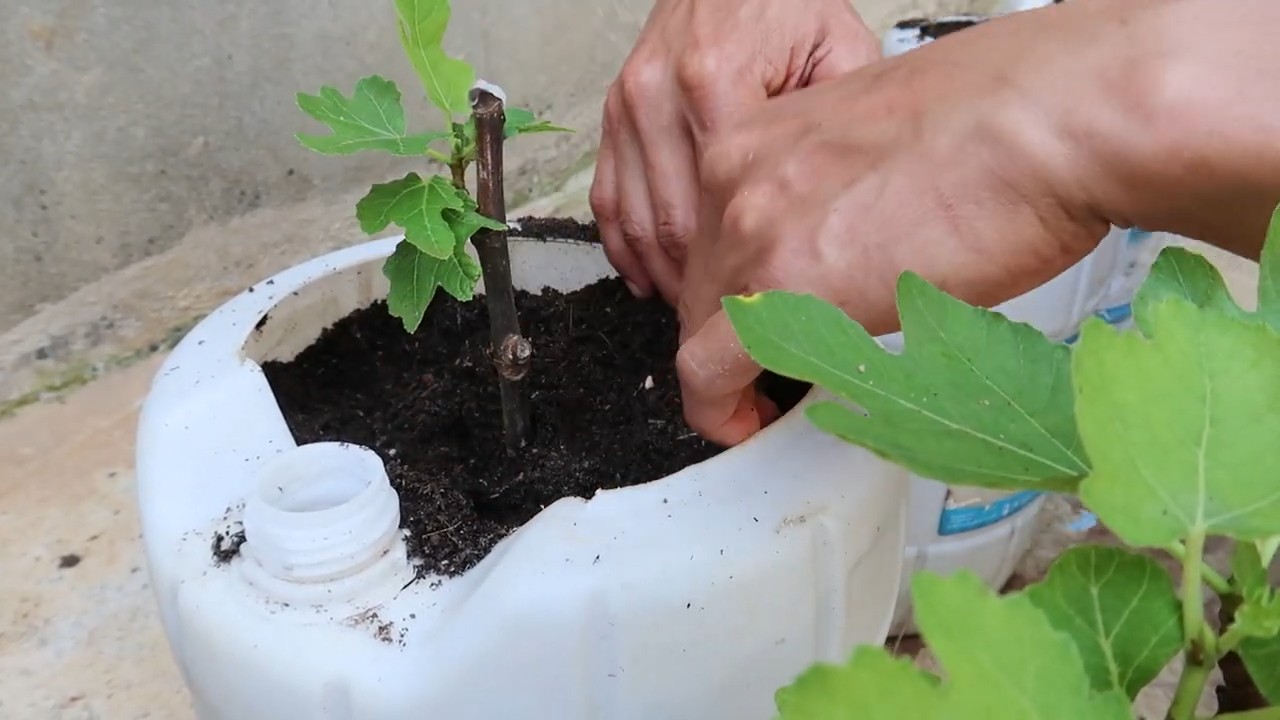
Planting the Fig Cuttings
Time to get those cuttings into their new homes!
1. Make a Hole: Use your finger or a small tool to create a hole in the potting mix, deep enough to accommodate the cut end of the fig cutting.
2. Insert the Cutting: Gently insert the cutting into the hole, making sure that the cut end is buried in the soil.
3. Firm the Soil: Gently firm the soil around the cutting to secure it in place.
4. Water Lightly: Water the cutting lightly to help settle the soil.
5. Create a Humid Environment (Optional): To create a mini-greenhouse effect, cover the bottle with clear plastic wrap or a plastic bag. This will help maintain humidity and encourage rooting. Make sure to poke a few holes in the plastic to allow for air circulation.
Caring for Your Bottle Figs
Now comes the waiting game! Here’s how to care for your bottle figs while they’re rooting.
1. Location: Place the bottles in a warm, bright location, but avoid direct sunlight, which can scorch the cuttings. A windowsill with indirect light is ideal.
2. Humidity: Maintain high humidity around the cuttings. If you’re not using plastic wrap, mist the cuttings regularly with water.
3. Watering: Keep the potting mix consistently moist, but not soggy. Water when the top inch of soil feels dry to the touch.
4. Ventilation: If you’re using plastic wrap, remove it for a few hours each day to allow for air circulation and prevent fungal diseases.
5. Patience: Rooting can take several weeks, so be patient. You’ll know the cuttings have rooted when you see new growth emerging from the top.
Transplanting (If Necessary)
Once your fig cuttings have rooted and started to grow, you may need to transplant them into larger containers. This is especially important if the bottles are too small to accommodate the growing roots.
1. Choose a Larger Container: Select a container that is at least twice the size of the bottle. Make sure it has drainage holes.
2. Prepare the Container: Fill the container with well-draining potting mix.
3. Carefully Remove the Fig Plant: Gently remove the fig plant from the bottle. Be careful not to damage the roots. You may need to break the bottle if the roots are tightly bound.
4. Plant the Fig Plant: Plant the fig plant in the larger container, making sure that the top of the root ball is level with the soil surface.
5. Water Thoroughly: Water the plant thoroughly to help settle the soil.
6. Provide Support (Optional): If the plant is tall and top-heavy, you may need to provide support with a stake or trellis.
Ongoing Care
Once your fig plants are established, here’s how to keep them thriving.
1. Light: Figs need plenty of sunlight to produce fruit. Place your plants in a location that receives at least 6-8 hours of direct sunlight per day.
2. Watering: Water regularly, especially during hot, dry weather. Allow the soil to dry out slightly between waterings.
3. Fertilizing: Fertilize your fig plants regularly with a balanced fertilizer. Follow the instructions on the fertilizer package.
4. Pruning: Prune your fig plants in late winter or early spring to remove dead or damaged branches and to shape the plant.
5. Pest and Disease Control: Monitor your fig plants for pests and diseases. Treat any problems promptly with appropriate insecticides or fungicides.
6. Overwintering: If you live in a cold climate, you’ll need to protect your fig plants from frost. You can either bring them indoors or wrap them in burlap.
Troubleshooting
Here are some common problems you might encounter and how to solve them.
* Cuttings Not Rooting: Make sure the cuttings are healthy, the potting mix is moist, and the humidity is high. Try using rooting hormone.
* Yellowing Leaves: This could be a sign of overwatering, underwatering, or nutrient deficiency. Adjust your watering schedule and fertilize regularly.
* Pests: Common fig pests include aphids, spider mites, and scale. Treat infestations with insecticidal soap or neem oil.
* Fungal Diseases: Fungal diseases can be prevented by providing good air circulation and avoiding overwatering. Treat infections with a fungicide.
Harvesting Your Figs
The moment you’ve been waiting for!
1. Ripeness: Figs are ripe when they are soft to the touch and the skin is slightly wrinkled. The color
Conclusion
So, there you have it! Growing figs in bottles is not just a quirky gardening experiment; it’s a game-changer for fig enthusiasts, especially those with limited space or challenging climates. This method offers a multitude of benefits, from enhanced control over the growing environment to protection against pests and diseases. It’s a surprisingly simple yet incredibly effective way to cultivate delicious, juicy figs right in your own backyard, balcony, or even indoors.
Think about it: no more battling unpredictable weather patterns that can ruin your entire fig harvest. No more worrying about invasive pests feasting on your precious fruit before you get a chance to enjoy them. With bottle fig cultivation, you’re essentially creating a microclimate perfectly tailored to your fig tree’s needs.
But the best part? The possibilities are endless! You can experiment with different fig varieties to see which ones thrive best in your bottle setup. Try using different types of soil mixes to optimize drainage and nutrient availability. Consider adding a slow-release fertilizer to provide your fig tree with a steady supply of essential nutrients. You can even get creative with the bottles themselves, painting them or decorating them to add a touch of personal flair to your garden.
This DIY trick is a must-try for anyone who loves figs and is looking for a fun, rewarding, and space-saving gardening project. It’s a fantastic way to connect with nature, learn about plant care, and enjoy the satisfaction of harvesting your own homegrown fruit.
Don’t be intimidated by the idea of growing figs in bottles. It’s easier than you might think, and the results are well worth the effort. Start small, experiment, and don’t be afraid to make mistakes. That’s all part of the learning process.
We encourage you to give this method a try and discover the joy of growing your own figs in bottles. Once you’ve experienced the satisfaction of harvesting your own delicious, homegrown figs, you’ll never look at gardening the same way again.
And most importantly, we want to hear about your experiences! Share your tips, tricks, and photos with us in the comments below. Let’s create a community of bottle fig growers and learn from each other. Together, we can unlock the full potential of this innovative gardening technique and enjoy a bountiful harvest of figs year after year. So go ahead, grab a bottle, plant a fig tree, and get ready to experience the magic of growing figs in bottles!
Frequently Asked Questions (FAQ)
What type of fig tree is best for growing in bottles?
The best fig varieties for bottle growing are those that are naturally smaller and more compact. Some excellent choices include ‘Brown Turkey,’ ‘Celeste,’ ‘Little Miss Figgy,’ and ‘Black Mission.’ These varieties tend to be more manageable in a confined space and produce fruit relatively quickly. However, don’t be afraid to experiment with other varieties as well! Just be sure to prune them regularly to maintain a manageable size. Consider dwarf varieties specifically bred for container growing for optimal results.
What size bottle should I use?
The ideal bottle size depends on the size of the fig tree you’re planting. For young fig trees or cuttings, a 1-gallon bottle is a good starting point. As the tree grows, you may need to transplant it into a larger bottle, such as a 3-gallon or even a 5-gallon container. The key is to provide enough space for the roots to develop without the tree becoming root-bound. Make sure the bottle is sturdy enough to support the weight of the tree and the soil.
What type of soil should I use?
A well-draining potting mix is essential for growing figs in bottles. A good mix would consist of equal parts potting soil, perlite, and compost. The potting soil provides nutrients, the perlite improves drainage, and the compost adds organic matter. Avoid using garden soil, as it can be too heavy and compact, leading to drainage problems. You can also add a small amount of slow-release fertilizer to the soil mix to provide your fig tree with a steady supply of nutrients.
How often should I water my fig tree in a bottle?
Watering frequency depends on several factors, including the size of the bottle, the type of soil, the climate, and the age of the tree. As a general rule, water your fig tree when the top inch of soil feels dry to the touch. Avoid overwatering, as this can lead to root rot. During the growing season (spring and summer), you may need to water more frequently than during the dormant season (fall and winter). Ensure the bottle has drainage holes to prevent water from accumulating at the bottom.
How much sunlight does my fig tree need?
Fig trees thrive in full sun, meaning they need at least 6-8 hours of direct sunlight per day. If you’re growing your fig tree indoors, place it near a sunny window or supplement with artificial grow lights. Insufficient sunlight can lead to stunted growth and reduced fruit production. Rotate the bottle regularly to ensure that all sides of the tree receive adequate sunlight.
How do I fertilize my fig tree in a bottle?
Fig trees benefit from regular fertilization, especially during the growing season. Use a balanced fertilizer with an NPK ratio of 10-10-10 or 20-20-20. Follow the instructions on the fertilizer label for application rates. You can also use organic fertilizers, such as compost tea or fish emulsion. Avoid over-fertilizing, as this can damage the roots. A slow-release fertilizer incorporated into the soil mix at planting can provide a steady supply of nutrients over several months.
How do I prune my fig tree in a bottle?
Pruning is essential for maintaining the shape and size of your fig tree in a bottle. Prune in late winter or early spring, before new growth begins. Remove any dead, damaged, or crossing branches. You can also prune to shape the tree and encourage branching. Be careful not to remove too much growth at once, as this can stress the tree. Regular pruning will help to keep your fig tree healthy and productive.
How do I protect my fig tree from pests and diseases?
Growing figs in bottles can actually help to reduce the risk of pests and diseases, as it provides a more controlled environment. However, it’s still important to monitor your tree regularly for any signs of problems. Common pests that can affect fig trees include aphids, spider mites, and scale. Treat infestations with insecticidal soap or neem oil. Diseases such as fig rust and leaf spot can also occur. Improve air circulation and avoid overwatering to prevent these diseases. If necessary, use a fungicide to control the spread of disease.
Can I grow figs in bottles indoors?
Yes, you can absolutely grow figs in bottles indoors! Just be sure to provide your tree with plenty of sunlight or artificial grow lights. Also, maintain adequate humidity levels, especially during the winter months when indoor air can be dry. You may need to mist the leaves regularly or use a humidifier. Indoor fig trees may not produce as much fruit as those grown outdoors, but they can still be a beautiful and rewarding addition to your home.
How long does it take for a fig tree to produce fruit in a bottle?
The time it takes for a fig tree to produce fruit depends on several factors, including the variety of fig, the age of the tree, and the growing conditions. Some fig varieties can produce fruit within a year or two of planting, while others may take longer. Providing your tree with plenty of sunlight, water, and fertilizer will help to speed up the fruiting process. Be patient, and you’ll eventually be rewarded with delicious, homegrown figs!


Leave a Comment