
Grow Winged Beans Easily and unlock a world of culinary possibilities right in your backyard! Have you ever dreamt of harvesting a unique, nutritious, and visually stunning crop that adds both beauty and flavor to your garden? Well, dream no more! This DIY guide is your passport to cultivating these fascinating legumes with ease.
Winged beans, also known as Goa beans, have a rich history, particularly in Southeast Asia and Papua New Guinea, where they’ve been a staple food source for centuries. They’re not just a pretty face; every part of the plant is edible, from the pods and beans to the leaves, flowers, and even the roots! Imagine the satisfaction of serving a meal where almost every ingredient comes straight from your own garden.
But why should you bother with this particular DIY project? In today’s world, where access to fresh, diverse produce can be limited, growing your own food is becoming increasingly important. Plus, winged beans are packed with protein, vitamins, and minerals, making them a nutritional powerhouse. I’m here to show you that you don’t need a sprawling farm to grow winged beans easily. With a few simple tricks and readily available materials, you can enjoy a bountiful harvest, impress your friends, and nourish your body, all while connecting with nature in a meaningful way. Let’s get started!
Grow Winged Beans Like a Pro: A DIY Guide
Hey there, fellow gardening enthusiasts! I’m so excited to share my tried-and-true method for growing winged beans. These fascinating legumes are not only beautiful with their vibrant purple flowers, but they’re also incredibly nutritious and versatile in the kitchen. Trust me, once you taste a freshly picked winged bean, you’ll be hooked! This guide will walk you through every step, from seed to harvest, ensuring you have a bountiful crop of these amazing beans.
Understanding Winged Beans
Before we dive into the nitty-gritty, let’s talk a little about what makes winged beans so special. *Psophocarpus tetragonolobus*, as they’re scientifically known, are tropical legumes that are native to Southeast Asia. They’re called “winged” beans because of the four frilly “wings” that run along the length of the pod. Every part of the plant is edible – the pods, leaves, flowers, seeds, and even the tubers! They’re packed with protein, vitamins, and minerals, making them a fantastic addition to any diet.
Why grow winged beans?
* Nutritious: High in protein, vitamins, and minerals.
* Versatile: Every part of the plant is edible.
* Beautiful: Attractive purple flowers add beauty to your garden.
* Nitrogen-fixing: Improves soil health.
* Relatively pest-resistant: Less prone to common garden pests.
Phase 1: Getting Started – Seed Germination and Preparation
Okay, let’s get our hands dirty! The first step is to get those seeds germinating. Winged bean seeds have a hard outer coating, so we need to give them a little help to sprout.
1. Scarification: This is a fancy word for gently scratching the seed coat. You can do this by using a nail file, sandpaper, or even carefully nicking the seed with a knife. Be careful not to damage the inside of the seed! The goal is just to weaken the outer layer so water can penetrate. I usually use a nail file and gently rub the seed against it a few times.
2. Soaking: After scarification, soak the seeds in warm water for 12-24 hours. This helps to further soften the seed coat and encourages germination. I like to use a small bowl and change the water once or twice during the soaking period.
3. Choosing Your Planting Method: You have two main options here: direct sowing or starting seeds indoors. Direct sowing means planting the seeds directly into the garden soil. Starting seeds indoors gives you a head start, especially if you have a shorter growing season. I prefer starting them indoors because I can control the environment better and protect them from early-season pests.
* Direct Sowing: If you choose to direct sow, wait until the soil has warmed up to at least 65°F (18°C). Plant the seeds about 1 inch deep and 4-6 inches apart. Keep the soil consistently moist.
* Starting Seeds Indoors: This is my preferred method. Fill small pots or seed trays with a good quality seed-starting mix. Plant one seed per pot, about 1 inch deep. Water gently and keep the soil moist but not soggy. Place the pots in a warm location, ideally with a temperature of 70-80°F (21-27°C). A heat mat can be helpful if your home is cooler.
4. Germination Time: Be patient! Winged bean seeds can take anywhere from 7 to 21 days to germinate. Keep the soil consistently moist and warm, and you should see sprouts emerging soon. Once the seedlings have developed a few sets of true leaves (the leaves that look like miniature versions of the adult plant’s leaves), they’re ready to be transplanted.
Phase 2: Preparing the Garden Bed
While your seeds are germinating, it’s time to get the garden bed ready. Winged beans are vigorous climbers, so they need a sturdy support system.
1. Choosing the Right Location: Winged beans need plenty of sunlight – at least 6-8 hours per day. Choose a location in your garden that gets full sun. Also, make sure the soil is well-draining. Winged beans don’t like to sit in soggy soil.
2. Soil Preparation: Winged beans prefer slightly acidic to neutral soil with a pH of 6.0 to 7.0. Amend the soil with plenty of organic matter, such as compost or well-rotted manure. This will improve drainage, fertility, and water retention. I like to dig in a generous amount of compost a few weeks before planting.
3. Building a Support System: This is crucial! Winged beans can grow up to 10-15 feet tall, so they need a strong trellis, fence, or other support structure. You can use bamboo poles, cattle panels, or even a sturdy fence. Make sure the support is tall enough to accommodate the plant’s growth. I’ve had success with a simple A-frame trellis made from bamboo poles.
* Trellis Options:
* A-frame trellis: Easy to build and provides good support.
* Cattle panel: Sturdy and long-lasting.
* Fence: If you have an existing fence, you can train the beans to climb it.
* Teepee: A fun and decorative option.
4. Spacing: If you’re planting multiple winged bean plants, space them about 12-18 inches apart along the trellis. This will give them enough room to grow and prevent overcrowding.
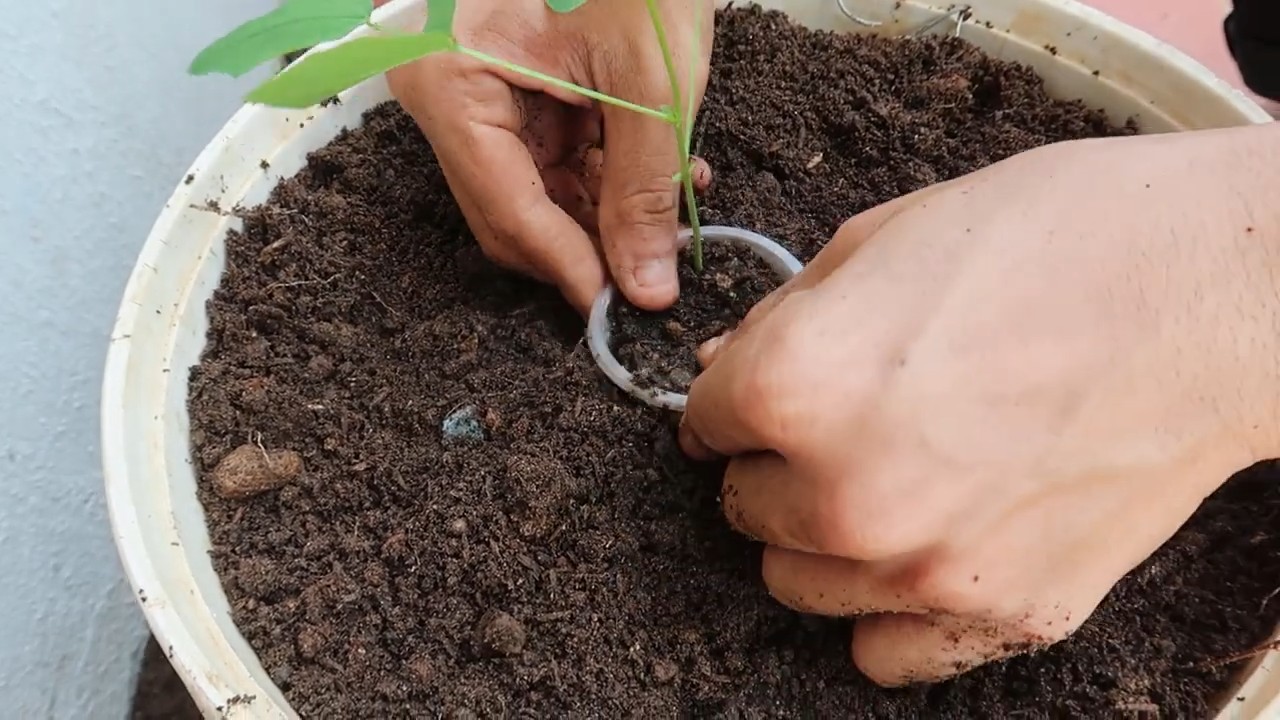
Phase 3: Transplanting and Ongoing Care
Now comes the exciting part – transplanting your seedlings into the garden!
1. Hardening Off: Before transplanting, you need to “harden off” the seedlings. This means gradually acclimating them to outdoor conditions. Start by placing the seedlings outdoors in a sheltered location for a few hours each day, gradually increasing the amount of time they spend outside over the course of a week. This will help them adjust to the sun, wind, and temperature changes.
2. Transplanting: Once the seedlings are hardened off, it’s time to transplant them into the garden. Choose a cloudy day or transplant in the late afternoon to minimize stress on the plants. Dig a hole that’s slightly larger than the root ball of the seedling. Gently remove the seedling from its pot and place it in the hole. Backfill with soil and water thoroughly.
3. Watering: Winged beans need consistent moisture, especially during hot weather. Water deeply and regularly, especially when the plants are flowering and producing pods. Avoid overhead watering, as this can promote fungal diseases. Drip irrigation or soaker hoses are ideal.
4. Fertilizing: Winged beans are nitrogen-fixing plants, meaning they can convert atmospheric nitrogen into a form that plants can use. However, they still benefit from occasional fertilization. Use a balanced organic fertilizer, such as compost tea or fish emulsion, every few weeks. Avoid over-fertilizing, as this can lead to excessive foliage growth at the expense of pod production.
5. Weeding: Keep the garden bed free of weeds, as they can compete with the winged beans for nutrients and water. Mulching around the plants with straw or wood chips can help to suppress weeds and retain moisture.
6. Pest and Disease Control: Winged beans are relatively pest-resistant, but they can occasionally be affected by aphids, spider mites, or bean beetles. Inspect the plants regularly and take action if you see any signs of pests or diseases. You can use insecticidal soap or neem oil to control pests. For fungal diseases, ensure good air circulation and avoid overhead watering.
7. Training the Vines: As the winged bean vines grow, you’ll need to train them to climb the trellis. Gently guide the vines up the support structure and tie them loosely with twine or plant ties if needed.
Phase 4: Harvesting and Enjoying Your Winged Beans
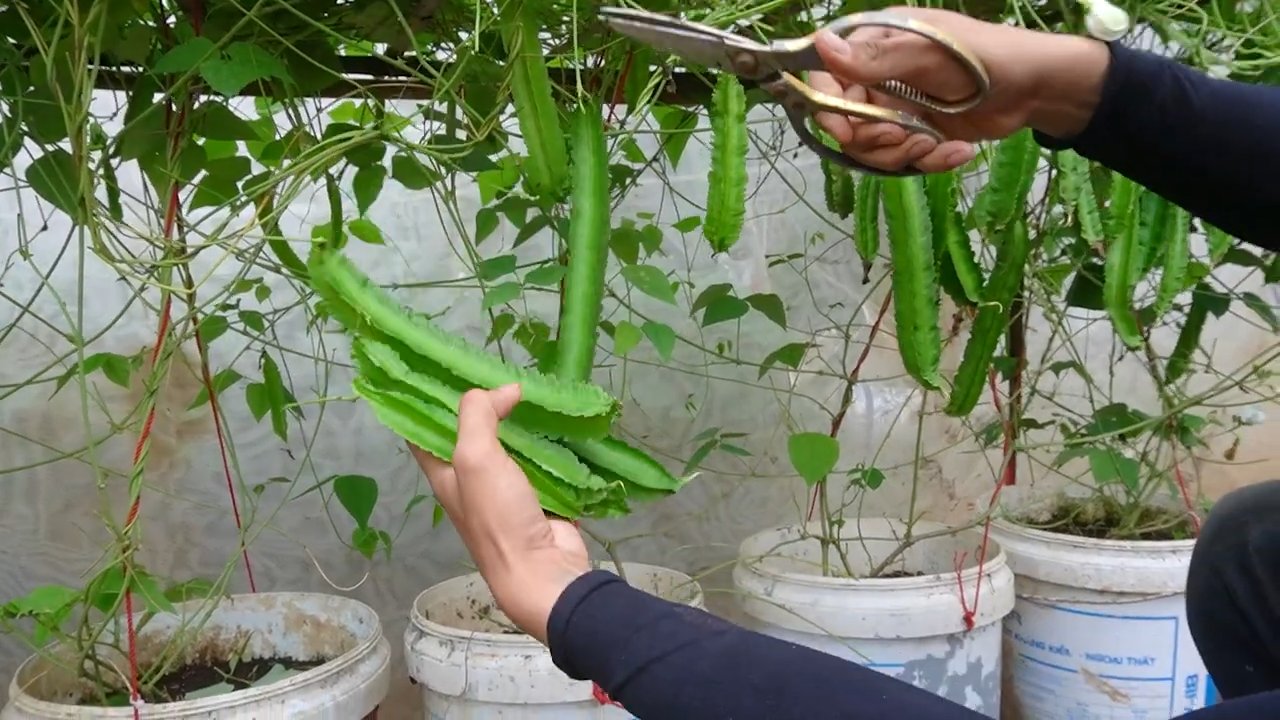
The moment you’ve been waiting for – harvesting your delicious winged beans!
1. Harvesting Pods: Winged bean pods are typically ready to harvest about 2-3 months after planting. Harvest the pods when they are young and tender, about 6-8 inches long. The pods should be firm and snap easily when bent. Regular harvesting encourages the plant to produce more pods.
2. Harvesting Leaves and Flowers: The leaves and flowers of winged beans are also edible. Harvest the leaves when they are young and tender. The flowers can be used in salads or as a garnish.
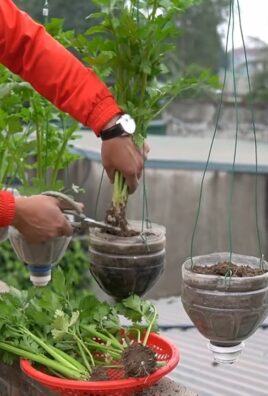
3. Harvesting Seeds: If you want to save seeds for next year, allow some of the pods to mature and dry on the vine. Once the pods are completely dry, shell the seeds and store them in a cool, dry place.
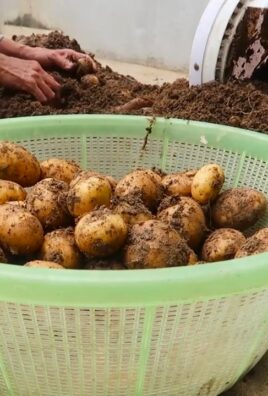
4. Harvesting Tubers: The tubers of winged beans can be harvested after the plant has died back in the fall. They can be eaten raw or
Conclusion
So, there you have it! Growing winged beans doesn’t have to be a daunting task. By embracing this simple DIY trick, you’re not just cultivating a unique and nutritious vegetable; you’re unlocking a world of gardening possibilities. The beauty of this method lies in its accessibility and adaptability. Whether you’re a seasoned gardener or a complete beginner, this approach to growing winged beans offers a higher success rate and a more rewarding experience.
Why is this DIY trick a must-try? Because it addresses the most common challenges faced when cultivating winged beans: germination rates and early vine support. By pre-sprouting the seeds and providing a sturdy trellis system from the get-go, you’re giving your winged beans the best possible start in life. This translates to healthier plants, earlier harvests, and a more abundant yield. Plus, it’s incredibly satisfying to witness the fruits (or rather, the beans!) of your labor.
But don’t stop there! Feel free to experiment with different variations to personalize your winged bean growing journey. Try using different types of trellises – bamboo poles, repurposed fencing, or even a living trellis made of sunflowers. You can also explore companion planting to enhance the growth and flavor of your winged beans. Marigolds, for example, can help deter pests, while basil can improve the overall health of the plants. Consider adding a layer of mulch around the base of your plants to retain moisture and suppress weeds.
And speaking of flavor, don’t limit yourself to just eating the beans! The entire winged bean plant is edible – the leaves, flowers, and even the tubers. Each part offers a unique culinary experience. The young leaves can be used in salads or stir-fries, the flowers can be added to soups or omelets, and the tubers can be boiled, roasted, or fried like potatoes.
Ultimately, the key to successful winged bean cultivation is observation and adaptation. Pay attention to your plants, monitor their growth, and adjust your approach as needed. Don’t be afraid to experiment and learn from your mistakes. Gardening is a journey, not a destination.
We wholeheartedly encourage you to try this DIY trick for growing winged beans. It’s a simple, effective, and rewarding way to cultivate this amazing vegetable. Once you’ve given it a go, we’d love to hear about your experience! Share your tips, tricks, and photos in the comments below. Let’s create a community of winged bean enthusiasts and learn from each other. Together, we can unlock the full potential of this incredible plant and enjoy the delicious and nutritious bounty it has to offer. So, get your hands dirty, embrace the challenge, and discover the joy of growing your own winged beans! Remember, successful **winged bean** cultivation is within your reach.
Frequently Asked Questions (FAQ)
What are winged beans, and why should I grow them?
Winged beans (Psophocarpus tetragonolobus), also known as goa beans or asparagus peas, are a legume native to Southeast Asia. They are incredibly nutritious, packed with protein, vitamins, and minerals. Unlike many other beans, almost the entire plant is edible, including the pods, leaves, flowers, and tubers. They are also relatively easy to grow, especially with the DIY trick outlined above, and can add a unique and delicious element to your garden and your diet. Their ability to fix nitrogen in the soil also makes them a beneficial addition to any garden ecosystem.
How long does it take for winged beans to grow?
Winged beans typically take around 120-180 days from planting to harvest. However, this can vary depending on the climate, soil conditions, and the specific variety. Pre-sprouting the seeds, as suggested in the DIY trick, can significantly shorten the time to harvest. You can expect to start harvesting the young pods about 2-3 months after transplanting the seedlings. The tubers take longer to mature, usually around 6-8 months.
What kind of trellis should I use for winged beans?
Winged beans are vigorous climbers and require a sturdy trellis to support their growth. The trellis should be at least 6-8 feet tall and strong enough to withstand the weight of the mature plants. Options include bamboo poles, wooden trellises, metal fencing, or even a living trellis made of sunflowers or corn stalks. The key is to provide a structure that the vines can easily grip and climb. Make sure the trellis is securely anchored to the ground to prevent it from toppling over in strong winds.
What are the best growing conditions for winged beans?
Winged beans thrive in warm, humid climates with plenty of sunshine. They prefer well-drained soil that is rich in organic matter. The ideal soil pH is between 6.0 and 7.5. They are sensitive to frost and should be planted after the last frost date in your area. Regular watering is essential, especially during dry periods. However, avoid overwatering, as this can lead to root rot.
How often should I water winged beans?
Water winged beans deeply and regularly, especially during hot, dry weather. Aim to keep the soil consistently moist but not waterlogged. A good rule of thumb is to water when the top inch of soil feels dry to the touch. Mulching around the base of the plants can help retain moisture and reduce the need for frequent watering.
What are some common pests and diseases that affect winged beans?
Winged beans are generally resistant to pests and diseases, but they can be susceptible to aphids, spider mites, and bean beetles. These pests can be controlled with insecticidal soap or neem oil. Fungal diseases, such as powdery mildew and root rot, can also occur, especially in humid conditions. To prevent these diseases, ensure good air circulation around the plants and avoid overwatering.
Can I grow winged beans in containers?
Yes, you can grow winged beans in containers, but you will need a large container (at least 15-20 gallons) to accommodate their extensive root system. Choose a container with good drainage and fill it with a well-draining potting mix. Provide a sturdy trellis for the vines to climb on. Container-grown winged beans may require more frequent watering and fertilization than those grown in the ground.
How do I harvest winged beans?
Harvest the young pods when they are about 6-8 inches long and still tender. The pods should be bright green and free from blemishes. Use a sharp knife or scissors to cut the pods from the vine. The leaves and flowers can be harvested at any time. The tubers can be harvested after the plant has died back in the fall.
How do I store winged beans?
Fresh winged bean pods can be stored in the refrigerator for up to a week. They can also be blanched and frozen for longer storage. The dried beans can be stored in an airtight container in a cool, dry place for up to a year.
Are there any companion plants that are beneficial for winged beans?
Yes, several companion plants can benefit winged beans. Marigolds can help deter pests, while basil can improve the overall health of the plants. Other beneficial companion plants include rosemary, thyme, and oregano. Avoid planting winged beans near onions or garlic, as these can inhibit their growth.
What are some ways to cook with winged beans?
Winged beans can be cooked in a variety of ways. The young pods can be eaten raw in salads or stir-fried, steamed, boiled, or roasted. The leaves can be used in salads or stir-fries. The flowers can be added to soups or omelets. The tubers can be boiled, roasted, or fried like potatoes. Winged beans have a slightly nutty flavor and a crisp texture.
Where can I find winged bean seeds?
Winged bean seeds can be found at some nurseries and garden centers, as well as online seed retailers. Look for reputable seed companies that specialize in heirloom or unusual vegetables. Make sure to choose a variety that is well-suited to your climate.
Leave a Comment