
Potato container gardening: ever dreamt of harvesting a mountain of potatoes from your own backyard, even if you only have a tiny balcony or patio? I know I have! Forget sprawling fields and back-breaking labor; with the right techniques, you can grow a surprisingly abundant potato crop in containers, right at your doorstep.
Growing potatoes has a rich history, dating back thousands of years to the Andes Mountains in South America. These humble tubers sustained entire civilizations, and now, you can tap into that agricultural heritage in a modern, space-saving way. But why should you bother with potato container gardening? Well, for starters, it’s incredibly rewarding to nurture a plant from seed (or in this case, a seed potato!) to harvest. Plus, homegrown potatoes taste infinitely better than anything you’ll find in the supermarket – trust me on this one!
This DIY guide is packed with simple, effective tricks and hacks that will transform you into a potato-growing pro, no matter your experience level. We’ll cover everything from choosing the right container and soil to watering techniques and pest control. So, ditch the grocery store spuds and get ready to experience the joy of harvesting your own delicious, homegrown potatoes with potato container gardening!
Grow Your Own Spuds: A Beginner’s Guide to Potato Container Gardening
Hey there, fellow gardening enthusiasts! Ever dreamt of harvesting your own homegrown potatoes, fresh from the earth (or, in this case, a container)? Well, dream no more! Potato container gardening is a fantastic way to grow these versatile veggies, even if you’re short on space. I’m going to walk you through everything you need to know to get started, from choosing the right container to harvesting your bountiful crop. Let’s get digging!
What You’ll Need: The Potato Gardener’s Toolkit
Before we dive into the nitty-gritty, let’s gather our supplies. Here’s a checklist of everything you’ll need to become a potato-growing pro:
* A Large Container: This is crucial! Aim for a container that’s at least 20 inches in diameter and 24 inches deep. The bigger, the better, as it gives the potatoes plenty of room to grow. Think large buckets, trash cans (with drainage holes!), or even fabric grow bags.
* Seed Potatoes: These aren’t your regular supermarket potatoes! Seed potatoes are specifically grown for planting and are certified disease-free. You can find them at your local garden center or online. Choose a variety that suits your taste – Russets, Yukon Golds, Reds, or even fingerling potatoes.
* Well-Draining Potting Mix: Avoid using garden soil directly in your container, as it can become compacted and hinder drainage. Opt for a high-quality potting mix that’s light and airy.
* Fertilizer: Potatoes are heavy feeders, so a slow-release fertilizer or a liquid fertilizer specifically formulated for vegetables will give them the nutrients they need to thrive.
* Watering Can or Hose: Essential for keeping your potato plants hydrated.
* Optional:
* Chitting Tray or Egg Carton: For sprouting your seed potatoes before planting.
* Gardening Gloves: To keep your hands clean.
* Trowel or Small Shovel: For planting and adding soil.
Step-by-Step: Planting Your Potato Paradise
Okay, now for the fun part! Let’s get those potatoes in the ground (or, rather, in the container).
1. Chitting Your Seed Potatoes (Optional but Recommended): Chitting, or sprouting, your seed potatoes before planting gives them a head start. A few weeks before planting, place your seed potatoes in a cool, bright location (but not in direct sunlight). You can use a chitting tray or simply stand them upright in an egg carton. You’ll notice small “eyes” or sprouts emerging from the potatoes. These are what will eventually become the potato plants.
* Why Chit? Chitting encourages faster growth and earlier harvests. It also allows you to identify any weak or diseased seed potatoes before planting.
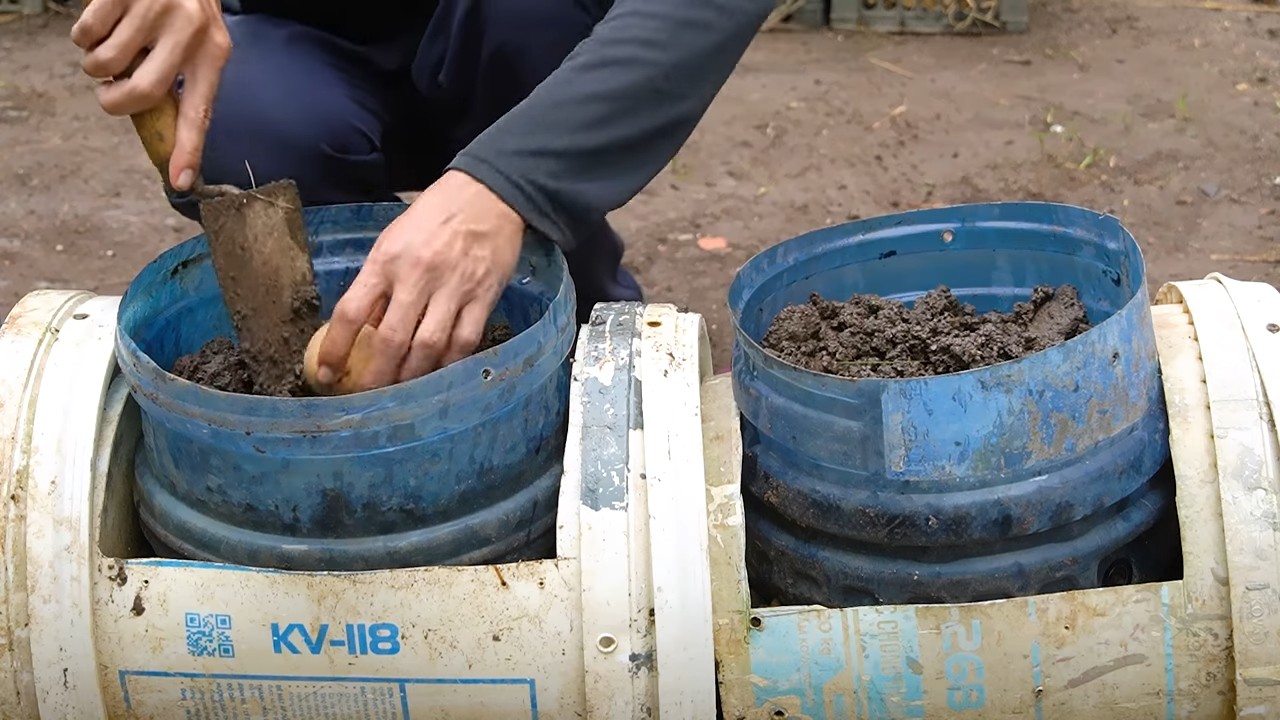
2. Preparing the Container: Make sure your container has adequate drainage holes. If you’re using a trash can, drill several holes in the bottom. Add a layer of gravel or small stones to the bottom of the container to further improve drainage.
3. Adding the Initial Soil Layer: Fill the container with about 4-6 inches of potting mix. This will be the base for your seed potatoes.
4. Planting the Seed Potatoes: If your seed potatoes are large, you can cut them into smaller pieces, ensuring that each piece has at least one or two “eyes” or sprouts. Let the cut pieces dry for a day or two before planting to prevent rotting. Place the seed potato pieces, sprout-side up, on top of the soil layer, spacing them about 8-12 inches apart.
5. Covering the Seed Potatoes: Cover the seed potatoes with another 4-6 inches of potting mix. Gently water the soil until it’s moist but not soggy.
6. Location, Location, Location: Place your container in a sunny location. Potatoes need at least 6-8 hours of sunlight per day to thrive.
7. Watering Regularly: Keep the soil consistently moist, but avoid overwatering. Water when the top inch of soil feels dry to the touch.
The “Hilling” Process: Encouraging More Potatoes
This is where the magic happens! “Hilling” is the process of adding more soil to the container as the potato plants grow. This encourages the plants to produce more potatoes along the stems.
1. Waiting for Growth: As the potato plants grow, you’ll notice stems emerging from the soil. Wait until the stems are about 6-8 inches tall.
2. Adding More Soil: Add another 4-6 inches of potting mix to the container, covering the stems, leaving only the top few leaves exposed.
3. Repeating the Process: Continue this process of adding soil every few weeks as the plants grow, until you reach the top of the container. This encourages the plants to produce more potatoes along the buried stems.
4. Fertilizing: Feed your potato plants regularly with a slow-release fertilizer or a liquid fertilizer. Follow the instructions on the fertilizer packaging.
Caring for Your Potato Plants: Keeping Them Happy and Healthy
Now that your potatoes are planted and growing, it’s important to provide them with the care they need to flourish.
1. Watering: As mentioned earlier, keep the soil consistently moist, but avoid overwatering. Check the soil moisture regularly and water when the top inch feels dry.
2. Fertilizing: Continue to fertilize your potato plants regularly throughout the growing season.
3. Pest Control: Keep an eye out for pests such as aphids, potato beetles, and flea beetles. If you notice any pests, you can try hand-picking them off the plants or using an organic insecticide.
4. Sunlight: Ensure your potato plants are getting at least 6-8 hours of sunlight per day. If they’re not getting enough sunlight, they may become leggy and produce fewer potatoes.
5. Support: As the potato plants grow taller, they may need some support to prevent them from falling over. You can use stakes or a tomato cage to provide support.
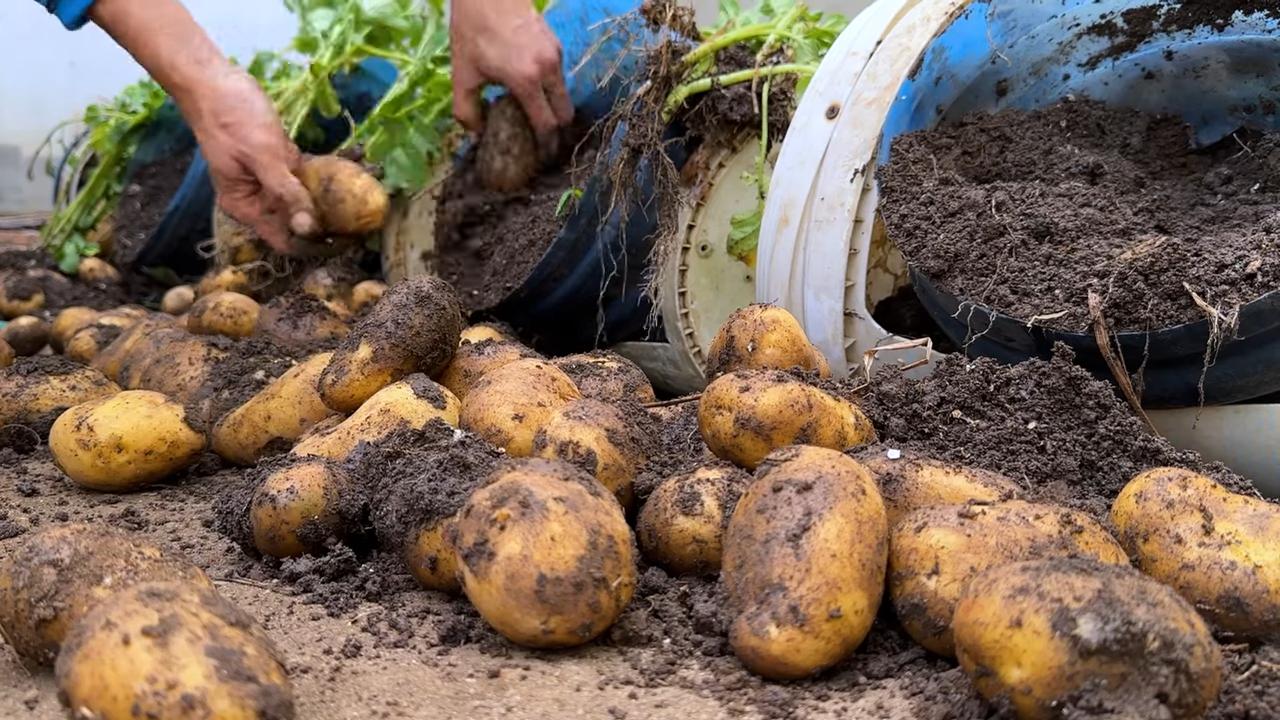
Harvest Time: Reaping the Rewards of Your Labor
After all your hard work, it’s finally time to harvest your homegrown potatoes!
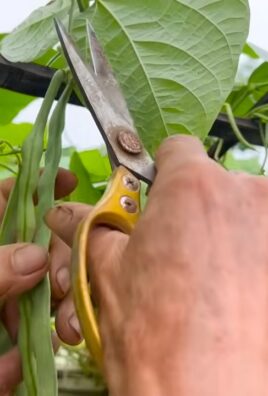
1. Knowing When to Harvest: The timing of your harvest will depend on the variety of potatoes you’re growing. Generally, you can start harvesting “new potatoes” (small, tender potatoes) about 2-3 weeks after the plants have finished flowering. For larger, mature potatoes, wait until the foliage starts to die back and turn yellow or brown.
2. Harvesting New Potatoes: To harvest new potatoes, carefully dig around the base of the plant and gently remove a few potatoes. Be careful not to damage the remaining potatoes.
3. Harvesting Mature Potatoes: To harvest mature potatoes, wait until the foliage has completely died back. Then, carefully tip the container over and gently remove the potatoes from the soil.
4. Curing Your Potatoes: After harvesting, cure your potatoes by spreading them out in a cool, dark, and well-ventilated place for about a week. This will help them to develop a thicker skin and prevent them from rotting.
5. Storing Your Potatoes: Store your cured potatoes in a cool, dark, and dry place. They should last for several months.
Troubleshooting: Addressing Common Potato Problems
Even with the best care, you may encounter some problems while growing potatoes. Here are a few common issues and how to address them:
* Potato Blight: This fungal disease can cause brown spots on the leaves and stems of potato plants. To prevent potato blight, choose disease-resistant varieties and ensure good air circulation around the plants. If you notice signs of blight, remove the affected foliage immediately.
* Scab: This bacterial disease causes rough, scabby patches on the surface of potatoes. To prevent scab, avoid planting potatoes in alkaline soil and ensure good drainage.
* Pests: As mentioned earlier, potatoes can be susceptible to various pests. Monitor your plants regularly and take action to control pests as needed.
* Lack of Potatoes: If your potato plants are not producing many potatoes, it could be due to a lack of sunlight, nutrients, or water. Make sure your plants are getting enough of all three.
Choosing the Right Potato Variety: A Matter of Taste
The beauty of growing your own potatoes is the ability to choose varieties that you can’t always find in the store. Here are a few popular choices:
* Russet Burbank: The classic baking potato, known for its fluffy texture.
* Yukon Gold: A versatile potato with a buttery flavor and smooth texture. Great for mashing, roasting, or boiling.
* Red Pontiac: A red-skinned potato with a waxy texture, perfect for potato salad or boiling.
* Fingerling Potatoes: These small, elongated potatoes have a unique flavor and texture. They’re delicious roasted or
Conclusion
So, there you have it! Transforming a simple container into a thriving potato patch is not only incredibly rewarding but also surprisingly easy. We’ve walked you through the steps, highlighting the simplicity and cost-effectiveness of this DIY project. Forget lugging heavy bags of potatoes from the store; imagine stepping outside your door and harvesting your own fresh, flavorful spuds.
This isn’t just about growing potatoes; it’s about connecting with your food, understanding the process from seed to table, and enjoying the unparalleled taste of homegrown produce. It’s about sustainability, reducing your carbon footprint, and creating a little patch of green in your own space, no matter how small.
The beauty of potato container gardening lies in its adaptability. Feel free to experiment with different potato varieties. Russets, Yukon Golds, fingerlings – the choice is yours! Each variety offers a unique flavor and texture, allowing you to tailor your harvest to your culinary preferences. You can also play around with the container size and material. While we’ve suggested a specific size, you can adjust it based on your available space and the number of potatoes you want to grow. Just remember to ensure adequate drainage.
Consider adding companion plants to your container garden. Marigolds can help deter pests, while herbs like basil and thyme can enhance the flavor of your potatoes and attract beneficial insects. This adds another layer of complexity and enjoyment to the process.
Don’t be intimidated if you’ve never gardened before. Potato container gardening is a fantastic entry point for beginners. It’s a low-risk, high-reward project that will teach you valuable gardening skills and provide you with a delicious harvest. Even seasoned gardeners will appreciate the convenience and control that container gardening offers.
We strongly encourage you to give this DIY trick a try. It’s a fun, educational, and ultimately delicious experience. The satisfaction of digging up your own potatoes, knowing that you nurtured them from start to finish, is truly unmatched.
Once you’ve harvested your bounty, we’d love to hear about your experience! Share your photos, tips, and tricks in the comments section below. Let us know what potato varieties you tried, what challenges you faced, and what you learned along the way. Your feedback will help other readers embark on their own potato container gardening adventures. Let’s build a community of container gardeners and share the joy of growing our own food!
Remember, gardening is a journey, not a destination. There will be successes and setbacks, but the most important thing is to learn and grow along the way. So, grab a container, some seed potatoes, and get ready to experience the magic of potato container gardening! Happy growing!
Frequently Asked Questions (FAQ)
What kind of container is best for potato container gardening?
The ideal container for growing potatoes should be large enough to accommodate the growing root system and allow for the “hilling” process, where you add more soil as the potato plants grow. A container that is at least 2 feet in diameter and 2 feet deep is generally recommended. You can use plastic containers, wooden barrels, grow bags, or even repurposed trash cans, as long as they have drainage holes. Ensure the material is food-safe if you’re using a recycled container. Avoid dark-colored containers in hot climates, as they can absorb too much heat and damage the roots.
What type of soil should I use for potato container gardening?
Potatoes need well-draining, loose soil that is rich in organic matter. A good potting mix specifically designed for vegetables is ideal. You can also create your own mix by combining equal parts of compost, peat moss (or coconut coir), and perlite or vermiculite. Avoid using garden soil, as it can be too heavy and compacted, hindering root growth and drainage. The pH of the soil should be slightly acidic, around 6.0 to 6.5.
How often should I water my potato container garden?
Watering frequency depends on the weather, the size of your container, and the type of soil you’re using. Generally, you should water your potato plants deeply whenever the top inch of soil feels dry to the touch. Avoid overwatering, as this can lead to root rot. During hot, dry weather, you may need to water daily. Use a watering can or hose with a gentle spray to avoid damaging the plants. Check the drainage holes to ensure that excess water is draining properly.
How much sunlight do potato plants need?
Potato plants need at least 6-8 hours of direct sunlight per day to thrive. Choose a location for your container garden that receives plenty of sunlight. If you live in a very hot climate, some afternoon shade can be beneficial to prevent the plants from overheating. If you don’t have enough sunlight, you can supplement with grow lights.
How do I “hill” my potato plants in a container?
Hilling is the process of adding more soil around the stems of the potato plants as they grow. This encourages the plants to produce more potatoes along the buried stems. When the plants are about 6 inches tall, add a few inches of soil to the container, covering the lower part of the stems. Repeat this process every few weeks as the plants grow, until the container is almost full. Be careful not to bury the leaves.
When and how do I harvest my potatoes?
The time to harvest your potatoes depends on the variety and when you planted them. Generally, you can start harvesting “new potatoes” (small, immature potatoes) about 2-3 weeks after the plants flower. To harvest new potatoes, carefully dig around the edges of the container and remove a few potatoes, leaving the rest of the plant to continue growing. For mature potatoes, wait until the foliage starts to die back and turn yellow or brown. This usually takes about 80-100 days. Stop watering the plants a week or two before harvesting to allow the skins to harden. To harvest, gently tip the container over and remove the potatoes from the soil.
What are some common pests and diseases that affect potato plants, and how can I prevent them?
Common pests that can affect potato plants include aphids, potato beetles, and flea beetles. Diseases include early blight, late blight, and potato scab. To prevent pests and diseases, start with healthy seed potatoes, use well-draining soil, and provide adequate sunlight and air circulation. Inspect your plants regularly for signs of pests or diseases. You can use organic pest control methods, such as insecticidal soap or neem oil, to control pests. To prevent diseases, avoid overhead watering and remove any infected leaves or plants immediately. Crop rotation can also help prevent soilborne diseases.
Can I grow potatoes in containers indoors?
While it’s possible to grow potatoes indoors, it can be challenging to provide them with the necessary sunlight and space. You’ll need a very bright location or supplemental grow lights. Also, indoor potato plants may be more susceptible to pests and diseases. If you choose to grow potatoes indoors, make sure to provide them with adequate ventilation and monitor them closely for any problems.
What are some variations I can try with potato container gardening?
There are many ways to customize your potato container garden. You can try growing different potato varieties, such as fingerling potatoes, red potatoes, or purple potatoes. You can also experiment with different container sizes and materials. Consider adding companion plants, such as marigolds, basil, or thyme, to your container garden. You can also try growing potatoes in a vertical garden or using a self-watering container.
How do I store my harvested potatoes?
Store your harvested potatoes in a cool, dark, and dry place, such as a basement or root cellar. The ideal temperature is between 40-50°F (4-10°C). Avoid storing potatoes in the refrigerator, as this can cause them to develop a sweet taste. Store potatoes away from apples and bananas, as these fruits release ethylene gas, which can cause potatoes to sprout. Properly stored potatoes can last for several months.
Leave a Comment