
Tomato growth tips are the secret weapon every home gardener needs to unlock a bountiful harvest of juicy, sun-ripened tomatoes! Have you ever dreamed of strolling into your backyard and plucking the perfect tomato, bursting with flavor, straight from the vine? I know I have! But let’s be honest, sometimes those dreams turn into a frustrating reality of stunted plants, blossom end rot, and a disappointing yield.
Growing tomatoes has been a cherished tradition for centuries, with roots tracing back to South America. These vibrant fruits have become a staple in cuisines worldwide, symbolizing summer’s abundance and the joy of homegrown goodness. But the journey from seed to table can be tricky, and that’s where these DIY tricks come in.
That’s why I’m so excited to share these simple yet effective tomato growth tips that will transform your gardening game. Whether you’re a seasoned gardener or just starting out, these hacks will help you overcome common challenges and cultivate thriving tomato plants. Imagine the satisfaction of serving up delicious, homegrown tomatoes in your salads, sauces, and sandwiches – all thanks to a few clever DIY techniques. Let’s get started and turn your tomato dreams into a delicious reality!

Unlock Tomato Bounty: My Foolproof DIY Growing Secrets
Hey there, fellow gardening enthusiasts! I’m so excited to share my tried-and-true DIY hacks for growing the juiciest, most flavorful tomatoes you’ve ever tasted. Forget those bland, store-bought imposters – we’re talking homegrown goodness bursting with sunshine and flavor. I’ve spent years experimenting, tweaking, and perfecting my methods, and I’m confident that these tips will help you achieve a tomato harvest you can be proud of. Let’s dive in!
Choosing the Right Tomato Variety
Before we even get our hands dirty, it’s crucial to pick the right tomato variety for your climate and growing space. This is a game-changer!
* Consider your climate: Are you in a hot, humid region or a cooler, shorter-season area? Some varieties thrive in heat, while others are more cold-tolerant.
* Think about space: Do you have a sprawling garden or just a balcony? Determinate varieties are bushier and more compact, perfect for containers, while indeterminate varieties are vining and require staking or caging.
* Flavor preferences: Do you prefer sweet cherry tomatoes, tangy heirlooms, or meaty slicers? There’s a tomato for every palate!
I personally love growing ‘Early Girl’ for its early harvest and reliable production, ‘Roma’ for making sauces, and ‘Brandywine’ for its incredible flavor. Don’t be afraid to experiment and find your favorites!
Preparing the Soil: The Foundation for Success
Tomatoes are heavy feeders, so rich, well-drained soil is essential. This is where we lay the groundwork for a thriving tomato patch.
* Soil Testing: Before you do anything, test your soil’s pH. Tomatoes prefer a slightly acidic pH of 6.0 to 6.8. You can buy a soil testing kit at most garden centers.
* Amend with Compost: This is my secret weapon! Compost adds nutrients, improves drainage, and helps retain moisture. I mix in a generous amount of compost into my garden beds before planting.
* Add Organic Matter: Consider adding other organic matter like aged manure, leaf mold, or peat moss to further enrich the soil.
* Ensure Good Drainage: Tomatoes hate soggy feet! Make sure your soil drains well to prevent root rot. If you have heavy clay soil, consider adding perlite or sand to improve drainage.
Starting Seeds Indoors (Optional but Recommended)
Starting your tomato seeds indoors gives you a head start on the growing season, especially if you live in a cooler climate. I find this gives me a significant advantage.
1. Gather Your Supplies: You’ll need seed starting trays or small pots, seed starting mix, tomato seeds, a spray bottle, and a grow light (optional but highly recommended).
2. Sow the Seeds: Fill the trays or pots with seed starting mix and moisten it gently with the spray bottle. Sow the tomato seeds about ¼ inch deep.
3. Provide Warmth and Light: Place the trays in a warm location (around 70-75°F) and provide plenty of light. A grow light is ideal, but a sunny windowsill can also work.
4. Keep the Soil Moist: Water the seedlings regularly, keeping the soil moist but not soggy.
5. Harden Off the Seedlings: Before transplanting the seedlings outdoors, you’ll need to harden them off. This means gradually exposing them to outdoor conditions over a period of a week or two. Start by placing them outside for an hour or two each day, gradually increasing the amount of time they spend outdoors.
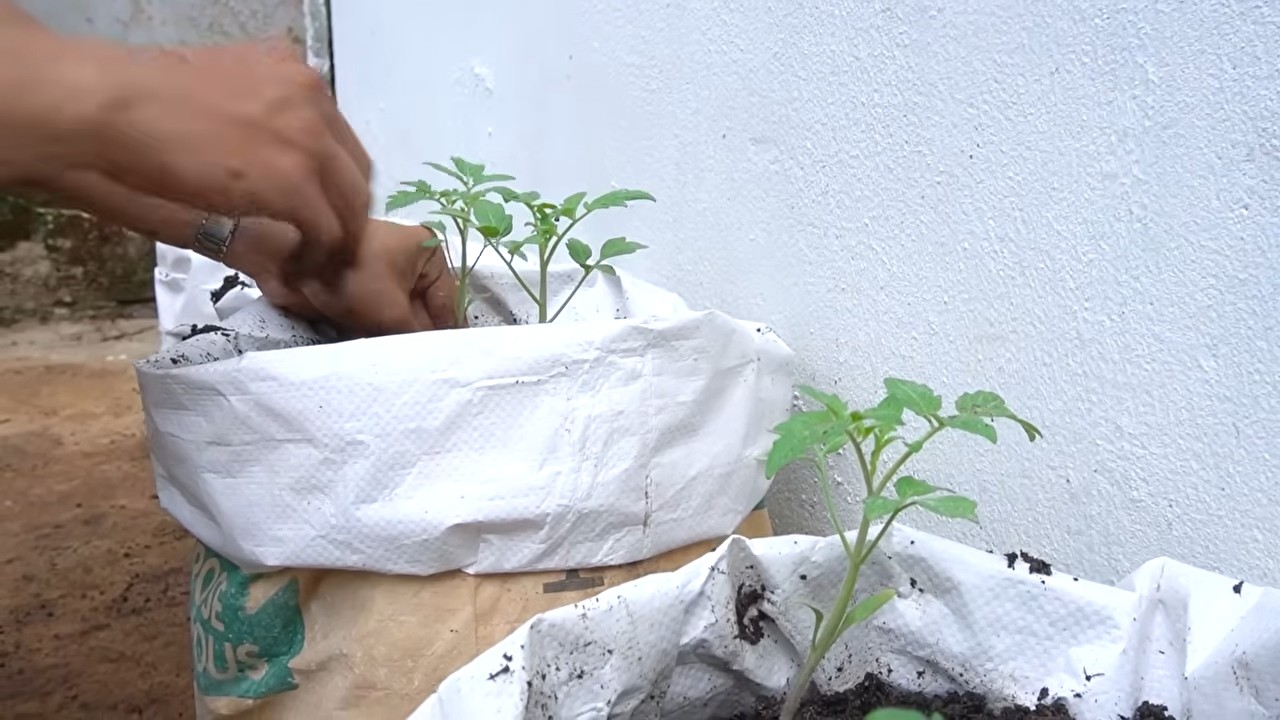
Transplanting Your Tomato Seedlings
Once your seedlings are hardened off and the danger of frost has passed, it’s time to transplant them into the garden. This is a crucial step, so pay close attention!
1. Choose a Sunny Location: Tomatoes need at least 6-8 hours of sunlight per day.
2. Dig a Hole: Dig a hole that is slightly larger than the root ball of the seedling.
3. Add a Handful of Bone Meal: Bone meal provides phosphorus, which promotes strong root growth. I always add a handful to the planting hole.
4. Plant Deep: This is one of my biggest secrets! Plant the tomato seedling deep, burying the stem up to the first set of leaves. This encourages the plant to develop more roots along the buried stem, resulting in a stronger, healthier plant.
5. Water Thoroughly: Water the newly transplanted seedling thoroughly.
6. Mulch Around the Plant: Mulch helps retain moisture, suppress weeds, and regulate soil temperature. I use straw or shredded leaves.
Supporting Your Tomato Plants: Staking, Caging, or Trellising
Supporting your tomato plants is essential, especially for indeterminate varieties. This prevents the fruit from touching the ground, reducing the risk of disease and pests.
* Staking: Drive a sturdy stake into the ground near the plant and tie the main stem to the stake with soft twine or plant ties.
* Caging: Place a tomato cage around the plant when it is young. As the plant grows, it will fill out the cage, providing support.
* Trellising: Train the tomato plant to grow along a trellis. This is a great option for smaller gardens.
I personally prefer caging because it provides excellent support and allows the plant to grow naturally.
Watering and Fertilizing: Keeping Your Tomatoes Happy
Consistent watering and regular fertilization are crucial for healthy tomato plants and abundant fruit production.
* Water Deeply and Regularly: Water deeply and regularly, especially during hot, dry weather. Aim for about 1-2 inches of water per week.
* Avoid Overhead Watering: Overhead watering can promote fungal diseases. Water at the base of the plant instead.
* Fertilize Regularly: Use a balanced fertilizer specifically formulated for tomatoes. Follow the instructions on the fertilizer package. I like to use a liquid fertilizer every two weeks.
* Side-Dress with Compost: Side-dressing with compost throughout the growing season provides a slow-release source of nutrients.
Pruning Your Tomato Plants: Maximizing Fruit Production
Pruning your tomato plants can improve air circulation, reduce disease, and encourage fruit production.
* Remove Suckers: Suckers are small shoots that grow in the crotch between the main stem and the branches. Remove these suckers regularly to encourage the plant to focus its energy on fruit production.
* Remove Yellowing Leaves: Remove any yellowing or diseased leaves to improve air circulation and prevent the spread of disease.
* Top the Plant (Optional): If you live in a short-season area, you can top the plant in late summer to encourage the remaining fruit to ripen.
Dealing with Pests and Diseases: Protecting Your Harvest
Unfortunately, tomatoes are susceptible to a variety of pests and diseases. But don’t worry, I’ve got you covered!
* Common Pests: Aphids, tomato hornworms, whiteflies, and spider mites are common tomato pests.
* Common Diseases: Early blight, late blight, septoria leaf spot, and blossom end rot are common tomato diseases.
* Prevention is Key: The best way to deal with pests and diseases is to prevent them in the first place. Choose disease-resistant varieties, provide good air circulation, and avoid overhead watering.
* Organic Pest Control: If you do encounter pests, try using organic pest control methods like insecticidal soap, neem oil, or Bacillus thuringiensis (Bt).
* Organic Disease Control: For diseases, try using organic fungicides like copper fungicide or sulfur.
* Blossom End Rot Prevention: Blossom end rot is caused by a calcium deficiency. To prevent it, ensure consistent watering and add calcium to the soil by mixing in crushed eggshells or bone meal.
Harvesting Your Tomatoes: The Sweet Reward
Harvesting your own homegrown tomatoes is one of the most rewarding experiences in gardening.
* Harvest When Ripe: Tomatoes are ripe when they are fully colored and slightly soft to the touch.
* Gently Twist or Cut: Gently twist the tomato from the vine or cut it off with pruning shears.
* Store Properly: Store ripe tomatoes at room temperature. Refrigerating them can affect their flavor and texture.
DIY Tomato Cage Upgrade: The Texas Tomato Cage Hack
Okay, this is one of my favorite DIY hacks! Store-bought tomato cages are often flimsy and inadequate for supporting large tomato plants. That’s where the Texas Tomato Cage comes in. It’s a super sturdy, DIY cage that will last for years.
Materials You’ll Need:
* Concrete Reinforcement Mesh (also known as remesh) – usually sold in large sheets at home improvement stores.
* Bolt cutters or a metal cutting tool.
* Gloves (essential for handling the mesh).
* Measuring tape.
* Optional: Zip ties or metal clips for extra reinforcement.
Steps to Build Your Texas Tomato Cage:
1. Measure
Conclusion
So, there you have it! Transforming your tomato-growing game with this simple, yet incredibly effective DIY trick. We’ve walked through the steps, highlighted the benefits, and hopefully, inspired you to ditch the expensive store-bought solutions and embrace a more natural, sustainable approach. This isn’t just about saving money; it’s about understanding the needs of your plants and providing them with exactly what they crave for robust growth and abundant yields.
Why is this DIY trick a must-try? Because it works! It’s a potent, readily available source of calcium, which is crucial for preventing blossom-end rot, a common and frustrating problem for tomato growers. It also improves the overall health and vigor of your plants, leading to stronger stems, more vibrant foliage, and, most importantly, bigger, juicier, and more flavorful tomatoes. Think about biting into a perfectly ripe tomato, bursting with sweetness and tang – that’s the reward waiting for you.
But the beauty of this DIY method lies in its adaptability. Feel free to experiment with variations to suit your specific needs and preferences. For instance, if you’re looking to boost the potassium levels in your soil, consider adding banana peels to your compost or directly into the planting hole. You can also incorporate other organic materials like coffee grounds or eggshells for a nutrient-rich boost. The possibilities are endless!
Consider this: you can also use this method to improve the soil for other plants that love calcium, like peppers and eggplants. It’s a versatile solution that can benefit your entire garden.
We understand that trying something new can be a little daunting, but trust us, this DIY trick is incredibly easy and rewarding. The minimal effort required yields significant results, making it a worthwhile investment of your time and energy.
Now, it’s your turn! We wholeheartedly encourage you to give this DIY trick a try in your own garden. Observe the difference it makes in your tomato plants’ health and productivity. We’re confident that you’ll be amazed by the results.
And most importantly, we want to hear about your experience! Share your successes, your challenges, and any variations you’ve tried in the comments below. Let’s create a community of tomato-growing enthusiasts, sharing knowledge and supporting each other on our gardening journeys. Your insights could be invaluable to other readers, helping them achieve their own tomato-growing dreams. Let’s unlock the secrets to bountiful harvests together, one DIY trick at a time. Remember, successful **tomato growth** is within your reach!
Frequently Asked Questions (FAQ)
1. What exactly is blossom-end rot, and how does this DIY trick prevent it?
Blossom-end rot is a condition that affects tomatoes (and other fruits like peppers and zucchini) where the blossom end of the fruit develops a dark, leathery, sunken spot. This is primarily caused by a calcium deficiency in the developing fruit. While calcium might be present in the soil, the plant may not be able to absorb it effectively due to inconsistent watering, high nitrogen levels, or other environmental factors. This DIY trick provides a readily available and easily absorbable source of calcium directly to the plant, helping to prevent blossom-end rot by ensuring the fruit has the calcium it needs to develop properly. The calcium strengthens the cell walls of the tomato, making them less susceptible to breakdown and rot.
2. How often should I apply this DIY calcium boost to my tomato plants?
The frequency of application depends on the needs of your plants and the condition of your soil. As a general guideline, you can apply it every 2-3 weeks, especially during the period when the tomatoes are actively developing. If you notice signs of blossom-end rot, increase the frequency to once a week until the problem is resolved. It’s always best to observe your plants closely and adjust the application schedule accordingly. Over-application is unlikely to cause harm, but it’s more efficient to apply only as needed. Also, ensure consistent watering practices to aid in calcium uptake.
3. Can I use this DIY trick for other plants besides tomatoes?
Yes! This DIY calcium boost is beneficial for other plants that are prone to calcium deficiencies, such as peppers, eggplants, and even some leafy greens like spinach and kale. These plants also require calcium for strong cell wall development and overall health. The application method is the same: simply apply the solution around the base of the plant or use it as a foliar spray. Remember to adjust the frequency of application based on the specific needs of each plant.
4. What if I don’t have access to the specific ingredients mentioned in the recipe? Are there any alternatives?
While the specific ingredients recommended are ideal, you can certainly explore alternatives. For example, if you don’t have access to a particular type of shell, you can use another type of shell, or even bone meal as a source of calcium. The key is to ensure that the alternative source is organic and readily available for the plant to absorb. Research the calcium content of different organic materials and adjust the quantity accordingly.
5. Is this DIY trick safe for organic gardening?
Absolutely! This DIY trick utilizes natural and organic materials, making it perfectly safe for organic gardening practices. It avoids the use of synthetic fertilizers and chemicals, promoting a healthy and sustainable growing environment. In fact, using organic methods like this can improve the overall health of your soil and attract beneficial microorganisms that further enhance plant growth.
6. How long does it take to see results after applying this DIY trick?
The time it takes to see results can vary depending on the severity of the calcium deficiency and the overall health of your plants. In some cases, you may notice an improvement within a week or two, with new growth appearing healthier and more vibrant. However, for plants with severe blossom-end rot, it may take longer to see a significant difference. Be patient and consistent with your applications, and remember that healthy soil and consistent watering are also crucial for optimal results.
7. Can I use this DIY trick in conjunction with other fertilizers or soil amendments?
Yes, you can absolutely use this DIY trick in conjunction with other fertilizers or soil amendments. However, it’s important to be mindful of the overall nutrient balance in your soil. Avoid over-fertilizing, as this can actually hinder calcium uptake. If you’re using other fertilizers, choose those that are balanced and specifically formulated for tomatoes. It’s always a good idea to conduct a soil test to determine the specific nutrient needs of your plants and adjust your fertilization strategy accordingly.
8. What are some other tips for preventing blossom-end rot besides this DIY trick?
While this DIY trick is effective, it’s just one piece of the puzzle. Other important factors for preventing blossom-end rot include:
* **Consistent Watering:** Inconsistent watering is a major contributor to calcium deficiencies. Water deeply and regularly, especially during hot and dry periods.
* **Proper Soil Drainage:** Ensure that your soil drains well to prevent waterlogging, which can also hinder calcium uptake.
* **Avoid Over-Fertilizing with Nitrogen:** High nitrogen levels can interfere with calcium absorption. Use a balanced fertilizer or one that is specifically formulated for tomatoes.
* **Maintain a Proper Soil pH:** Calcium is most readily available to plants when the soil pH is between 6.0 and 6.8.
* **Mulch Around Plants:** Mulching helps to retain moisture in the soil and regulate soil temperature, which can also improve calcium uptake.
9. Can I use this DIY trick for container-grown tomatoes?
Yes, this DIY trick is perfectly suitable for container-grown tomatoes. In fact, container-grown tomatoes are often more susceptible to calcium deficiencies due to the limited soil volume. Simply apply the solution around the base of the plant in the container, following the same frequency guidelines as for garden-grown tomatoes. Ensure that your containers have adequate drainage to prevent waterlogging.
10. How should I store any leftover solution from this DIY trick?
Store any leftover solution in a sealed container in a cool, dark place. It should remain effective for several weeks. Before using it again, give it a good shake to ensure that the ingredients are well mixed. If you notice any signs of spoilage, such as a foul odor, discard the solution and make a fresh batch.


Leave a Comment