
Grow Chayote Squash Backyard: Ever dreamt of harvesting your own vibrant, pear-shaped chayote squash right from your backyard? Imagine the satisfaction of serving a dish made with ingredients you nurtured from seed to table! This isn’t just a pipe dream; it’s an achievable reality with a few simple DIY tricks and hacks. For centuries, chayote squash, also known as mirliton, has been a staple in Mesoamerican cuisine, revered for its versatility and nutritional benefits. From soups and salads to stir-fries and even desserts, this humble squash can do it all.
But why should you bother learning how to grow chayote squash backyard? Well, beyond the delicious culinary possibilities, growing your own food is incredibly rewarding. It connects you to nature, reduces your carbon footprint, and ensures you have access to fresh, healthy produce free from harmful chemicals. Plus, chayote squash is surprisingly easy to grow, even for beginner gardeners! In this article, I’ll share my favorite DIY tricks and hacks to help you cultivate a thriving chayote squash patch in your own backyard, no matter the size of your space. Get ready to roll up your sleeves and embark on a rewarding gardening adventure!
Chayote Anbauen: Dein Garten-Guide für die Exotische Kürbisfrucht
Hey Gartenfreunde! Habt ihr schon mal von Chayote gehört? Diese birnenförmige Kürbisfrucht ist nicht nur super lecker, sondern auch unglaublich einfach anzubauen, selbst wenn ihr keinen grünen Daumen habt. Ich zeige euch, wie ihr Chayote in eurem eigenen Garten zum Wachsen bringt – versprochen, es macht Spaß!
Was ist Chayote überhaupt?
Bevor wir loslegen, kurz zur Info: Chayote (Sechium edule), auch bekannt als Stachelbeere, Christophine oder Gemüsebirne, ist eine Kletterpflanze aus der Familie der Kürbisgewächse. Ursprünglich stammt sie aus Mittelamerika, aber sie fühlt sich auch in unseren Breitengraden wohl, solange sie genügend Sonne und Wärme bekommt. Das Tolle an Chayote ist, dass fast die ganze Pflanze essbar ist: die Frucht, die Blätter, die Wurzeln und sogar die Samen! Die Frucht schmeckt mild und leicht süßlich, ähnlich wie Zucchini oder Gurke.
Warum Chayote im eigenen Garten anbauen?
* Einfacher Anbau: Chayote ist relativ anspruchslos und wächst schnell.
* Vielseitig verwendbar: Ob roh im Salat, gekocht, gebraten, gefüllt oder eingelegt – Chayote ist ein echter Allrounder in der Küche.
* Gesund: Chayote ist reich an Vitaminen, Mineralstoffen und Ballaststoffen.
* Dekorativ: Die Kletterpflanze mit ihren großen Blättern ist ein echter Hingucker im Garten.
* Nachhaltig: Eigenanbau schont die Umwelt und spart Geld.
Die Vorbereitung: Was du brauchst
Bevor wir mit dem Pflanzen loslegen, brauchen wir ein paar Dinge:
* Chayote-Frucht: Das ist das Wichtigste! Am besten besorgst du dir eine reife Chayote-Frucht im Supermarkt oder auf dem Markt. Achte darauf, dass sie keine Beschädigungen hat und bereits zu keimen beginnt. Du erkennst das an kleinen Trieben, die aus der Frucht herauswachsen.
* Pflanzgefäß (optional): Für die Voranzucht im Haus. Ein Topf mit einem Durchmesser von ca. 20 cm reicht aus.
* Gute Erde: Am besten verwendest du eine Mischung aus Gartenerde und Kompost.
* Rankhilfe: Chayote ist eine Kletterpflanze und braucht unbedingt eine Rankhilfe, an der sie sich festhalten kann. Das kann ein Zaun, ein Spalier, eine Pergola oder ein stabiles Gerüst sein.
* Gießkanne: Zum regelmäßigen Gießen.
* Geduld: Chayote braucht etwas Zeit, um zu wachsen und Früchte zu tragen.
Schritt-für-Schritt-Anleitung: Chayote anbauen
Hier kommt die detaillierte Anleitung, wie du Chayote erfolgreich in deinem Garten anbaust:
Phase 1: Die Voranzucht (optional, aber empfehlenswert)
Die Voranzucht im Haus ist zwar nicht unbedingt notwendig, aber sie gibt der Chayote einen Vorsprung und erhöht die Wahrscheinlichkeit, dass sie im Garten gut anwächst.
1. Die Chayote vorbereiten: Wenn deine Chayote-Frucht noch nicht keimt, kannst du den Keimprozess beschleunigen, indem du sie für ein paar Tage in ein feuchtes Tuch wickelst und an einen warmen Ort legst.
2. Die Chayote einpflanzen: Fülle das Pflanzgefäß mit Erde. Lege die Chayote-Frucht horizontal auf die Erde, sodass der Trieb nach oben zeigt. Bedecke die Frucht nur leicht mit Erde, sodass der Trieb noch sichtbar ist.
3. Gießen: Gieße die Erde vorsichtig an, sodass sie feucht, aber nicht nass ist.
4. Standort: Stelle das Pflanzgefäß an einen hellen und warmen Ort, z.B. auf eine Fensterbank.
5. Pflege: Halte die Erde feucht, aber vermeide Staunässe. Nach ein paar Wochen sollte die Chayote kräftig austreiben.
Phase 2: Das Auspflanzen in den Garten
Sobald die Chayote kräftig genug ist und die Temperaturen im Garten steigen (nach den Eisheiligen Mitte Mai), kannst du sie ins Freie pflanzen.
1. Den Standort vorbereiten: Wähle einen sonnigen und warmen Standort für deine Chayote. Der Boden sollte locker, humusreich und gut durchlässig sein.
2. Die Rankhilfe installieren: Stelle sicher, dass die Rankhilfe stabil und ausreichend groß ist, da die Chayote-Pflanze sehr groß und schwer werden kann.
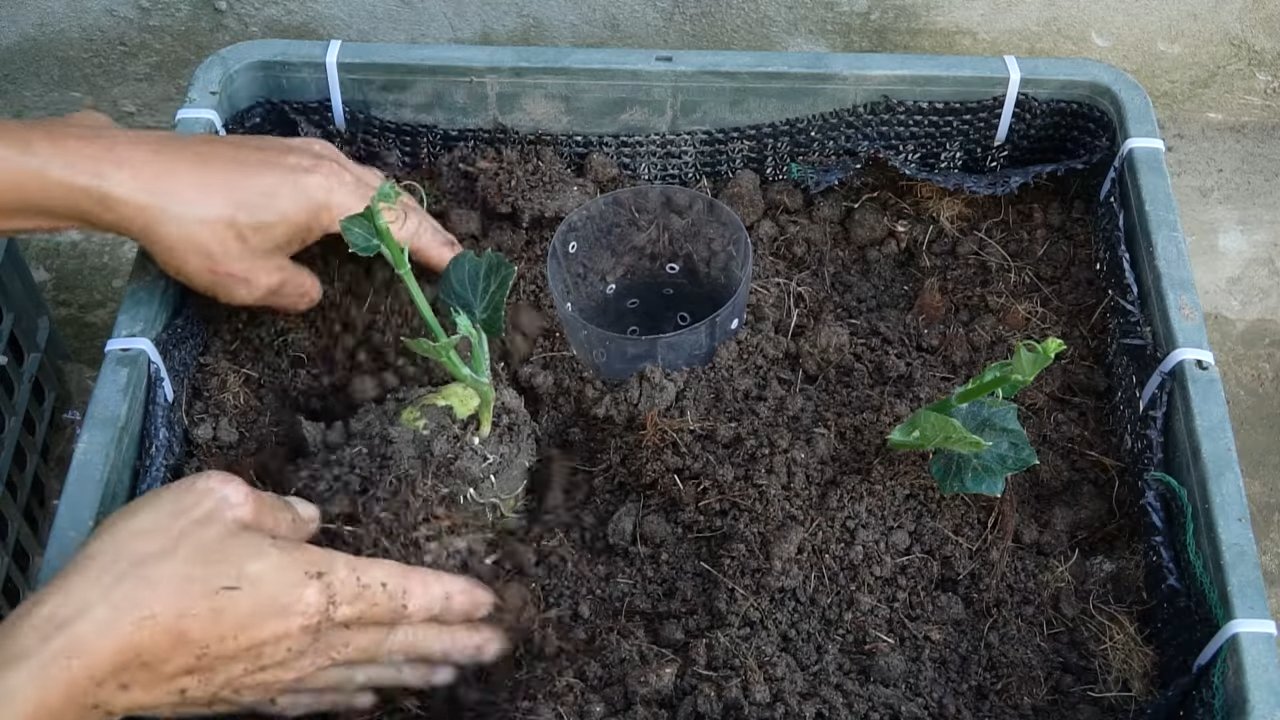
3. Das Pflanzloch ausheben: Hebe ein Pflanzloch aus, das etwas größer ist als der Wurzelballen der Chayote.
4. Die Chayote einpflanzen: Setze die Chayote vorsichtig in das Pflanzloch und fülle es mit Erde auf. Drücke die Erde leicht an.
5. Gießen: Gieße die Chayote gründlich an.
6. Anbinden: Binde die ersten Triebe der Chayote an die Rankhilfe, damit sie sich daran festhalten kann.
Phase 3: Die Pflege der Chayote
Chayote ist relativ pflegeleicht, aber ein paar Dinge solltest du beachten:
1. Gießen: Gieße die Chayote regelmäßig, besonders in trockenen Perioden. Der Boden sollte immer leicht feucht sein.
2. Düngen: Dünge die Chayote während der Wachstumsperiode regelmäßig mit einem organischen Dünger, z.B. Kompost oder Hornspäne.
3. Schneiden: Du kannst die Chayote bei Bedarf zurückschneiden, um ihr Wachstum zu kontrollieren und die Fruchtbildung zu fördern. Entferne dazu einfach überflüssige Triebe.
4. Schutz vor Schädlingen: Chayote ist relativ resistent gegen Schädlinge, aber gelegentlich können Blattläuse oder Schnecken auftreten. Bekämpfe diese bei Bedarf mit natürlichen Mitteln.
5. Überwinterung: Chayote ist nicht winterhart. In kälteren Regionen solltest du die Pflanze im Herbst zurückschneiden und die Wurzeln mit einer dicken Schicht Mulch schützen. Alternativ kannst du die Pflanze auch in einem Topf überwintern und sie im Frühjahr wieder ins Freie pflanzen.
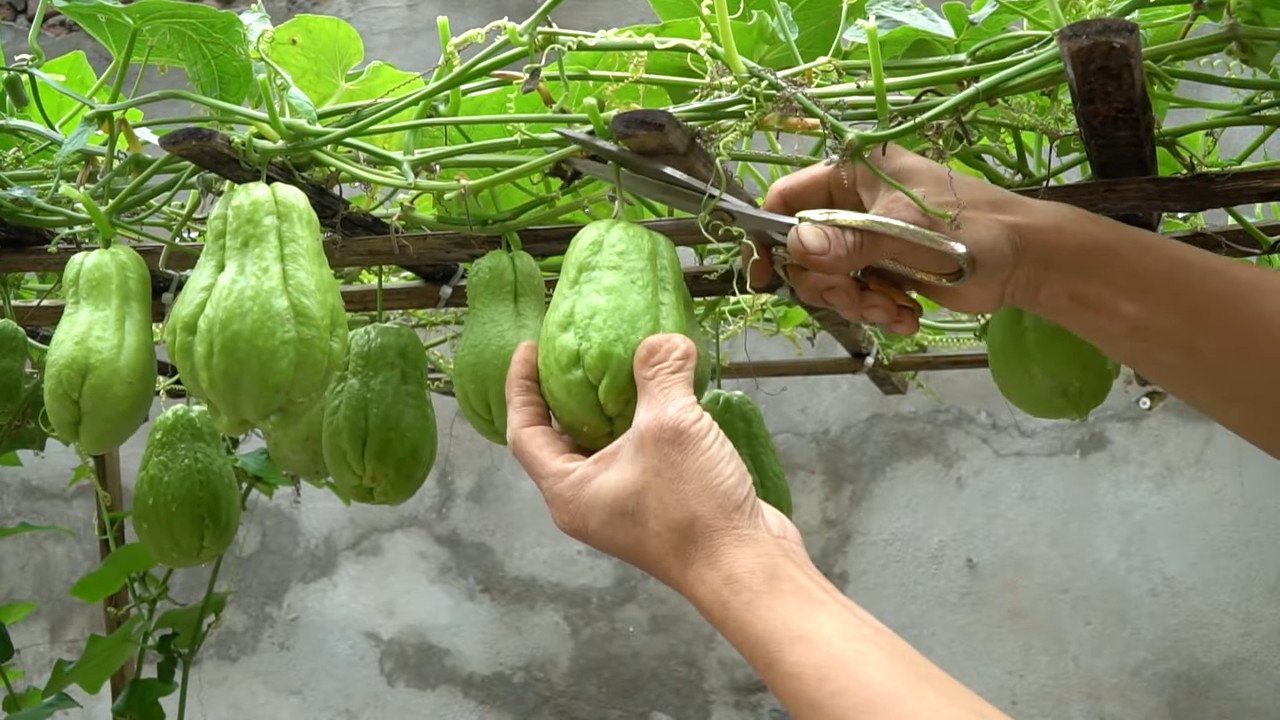
Die Ernte: Wann ist es soweit?
Die Chayote-Früchte sind erntereif, wenn sie eine hellgrüne Farbe haben und sich leicht vom Stiel lösen lassen. Die Erntezeit ist in der Regel im Spätsommer oder Herbst. Du kannst die Früchte nach und nach ernten, sobald sie reif sind.
Tipps und Tricks für den erfolgreichen Chayote-Anbau
* Wähle die richtige Sorte: Es gibt verschiedene Chayote-Sorten, die sich in Größe, Form und Geschmack unterscheiden. Informiere dich vor dem Kauf, welche Sorte für deine Region am besten geeignet ist.
* Sorge für ausreichend Platz: Chayote ist eine stark wachsende Pflanze und braucht viel Platz. Plane genügend Raum für die Rankhilfe ein.
* Achte auf eine gute Drainage: Staunässe kann zu Wurzelfäule führen. Sorge für eine gute Drainage im Boden.
* Schütze die Früchte vor Sonnenbrand: In heißen Regionen können die Früchte Sonnenbrand bekommen. Schütze sie bei Bedarf mit einem Schattiernetz.
* Verwende die ganze Pflanze: Wie bereits erwähnt, ist fast die ganze Chayote-Pflanze essbar. Probiere verschiedene Rezepte aus und entdecke die Vielfalt der Chayote.
Leckere Rezeptideen mit Chayote
* Chayote-Salat: Rohe Chayote in dünne Scheiben schneiden und mit anderen Gemüsesorten, Kräutern und einem leichten Dressing vermischen.
* Gefüllte Chayote: Chayote halbieren, aushöhlen und mit einer Mischung aus Hackfleisch, Reis, Gemüse und Gewürzen füllen. Im Ofen backen.
* Chayote-Suppe: Chayote in Würfel schneiden und mit anderen Gemüsesorten in Brühe kochen. Mit Kräutern und Gewürzen abschmecken.
*
Conclusion
So, there you have it! Growing chayote squash in your backyard is not only achievable but also incredibly rewarding. From the satisfaction of nurturing a plant from a simple fruit to the abundance of fresh, versatile produce it provides, this DIY project is a must-try for any home gardener, regardless of experience level. We’ve walked you through the entire process, from selecting the right chayote, preparing your soil, and providing the necessary support, to harvesting your bounty and even offering some culinary inspiration.
But why is this DIY trick truly a game-changer? It’s about more than just saving money at the grocery store. It’s about connecting with nature, understanding the food you eat, and reducing your environmental footprint. Commercially grown produce often travels long distances, contributing to carbon emissions and potentially losing nutrients along the way. By growing your own chayote squash, you’re ensuring a fresh, local, and sustainable food source for yourself and your family.
And the best part? The possibilities are endless! Feel free to experiment with different growing techniques. Try companion planting with nitrogen-fixing legumes to naturally enrich your soil. Explore different trellis designs to maximize your growing space. You can even try growing chayote squash in containers if you have limited garden space.
Consider these variations to tailor your chayote growing experience:
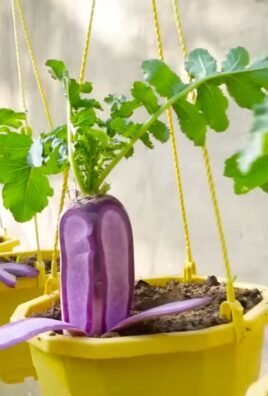
* Vertical Gardening: If you’re short on space, train your chayote vine to grow vertically on a trellis or fence. This maximizes sunlight exposure and keeps the fruit off the ground.
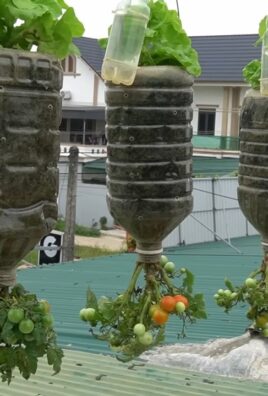
* Container Gardening: Chayote can be grown in large containers (at least 20 gallons). Ensure good drainage and provide adequate support for the vine.
* Grafting: For faster and more reliable fruiting, consider grafting your chayote vine onto a more vigorous rootstock.
* Succession Planting: Plant chayote seeds or fruits at intervals to extend your harvest season.
* Different Varieties: While the green chayote is most common, explore other varieties like the white or spiny chayote for a unique flavor and texture.
Don’t be afraid to get creative and adapt the techniques to suit your specific climate and growing conditions. Remember, gardening is a journey of learning and discovery.
We wholeheartedly encourage you to embark on this exciting adventure of growing chayote squash in your backyard. It’s a project that offers not only delicious and nutritious food but also a sense of accomplishment and connection to the natural world.
Once you’ve harvested your first chayote, we’d love to hear about your experience! Share your tips, successes, and even your challenges in the comments section below. Let’s build a community of chayote growers and learn from each other. Your insights could inspire others to take the plunge and discover the joys of growing their own food. So, grab a chayote, get your hands dirty, and let the growing begin! We are confident that you will find that growing chayote squash is a rewarding experience.
Frequently Asked Questions (FAQ)
What is the best time of year to plant chayote squash?
The ideal time to plant chayote squash is in the spring, after the last frost has passed. Chayote requires a long growing season (at least 150 days) to produce fruit, so starting early is crucial. If you live in a colder climate, you can start the chayote indoors in a pot a few weeks before the last frost and then transplant it outdoors once the weather warms up. In warmer climates, you can plant directly into the ground in the spring.
How much space does a chayote vine need?
Chayote vines are vigorous growers and require a significant amount of space. Each vine can easily spread 15-20 feet or more. Therefore, it’s essential to provide ample room for the vine to grow and climb. A sturdy trellis, fence, or arbor is necessary to support the weight of the vine and the fruit. When planting multiple chayote, space them at least 10-15 feet apart to allow for adequate air circulation and sunlight penetration.
How often should I water my chayote squash plant?
Chayote squash requires consistent moisture, especially during hot and dry periods. Water deeply and regularly, ensuring that the soil remains consistently moist but not waterlogged. Aim to water at the base of the plant to avoid wetting the foliage, which can increase the risk of fungal diseases. Mulching around the base of the plant can help retain moisture and suppress weeds. During periods of heavy rainfall, you may need to reduce watering frequency.
What kind of soil is best for growing chayote squash?
Chayote squash thrives in well-drained, fertile soil that is rich in organic matter. Amend your soil with compost, aged manure, or other organic materials before planting to improve drainage, fertility, and water retention. A slightly acidic to neutral soil pH (6.0-7.0) is ideal. Avoid planting in heavy clay soils, as they can become waterlogged and inhibit root growth. If you have clay soil, consider amending it with sand and organic matter to improve drainage.
How do I know when my chayote squash is ripe?
Chayote squash is typically harvested when it is young and tender, about 4-6 inches in length. The skin should be smooth and light green. Overripe chayote will become tough and fibrous. You can gently press the fruit to check for ripeness. It should feel firm but not hard. The fruit is usually ready for harvest about 3-4 weeks after flowering. Regular harvesting encourages the plant to produce more fruit.
Are there any common pests or diseases that affect chayote squash?
While chayote is relatively pest and disease-resistant, it can be susceptible to certain problems. Common pests include squash bugs, aphids, and spider mites. These can be controlled with insecticidal soap or neem oil. Fungal diseases such as powdery mildew and downy mildew can also affect chayote, especially in humid conditions. Ensure good air circulation around the plants and avoid overhead watering to prevent these diseases. If necessary, use a fungicide to control fungal infections.
Can I grow chayote squash from seed?
While it is possible to grow chayote from seed, it is more common and reliable to grow it from a whole fruit. Chayote seeds have a low germination rate, and the seedlings can be slow to develop. If you want to try growing from seed, select a mature chayote fruit and allow it to sprout before planting.
How do I store chayote squash after harvesting?
Chayote squash can be stored in the refrigerator for several weeks. Wrap the fruit in a plastic bag or store it in a crisper drawer to prevent it from drying out. Chayote can also be frozen for longer storage. Blanch the chayote slices for a few minutes before freezing to preserve their texture and flavor.
Can I eat the entire chayote plant?
Yes, almost all parts of the chayote plant are edible, including the fruit, leaves, shoots, and roots. The fruit is the most commonly consumed part, but the leaves and shoots can be used in salads or stir-fries. The roots can be cooked and eaten like potatoes.
How can I encourage my chayote plant to produce more fruit?
To encourage your chayote plant to produce more fruit, ensure that it receives adequate sunlight, water, and nutrients. Prune the vine regularly to promote air circulation and sunlight penetration. Fertilize the plant with a balanced fertilizer every few weeks during the growing season. Hand-pollinate the flowers if necessary, especially if you notice a lack of fruit set.

Leave a Comment