
Rooftop Guava Tree Harvest: Imagine stepping onto your rooftop, not to escape the city buzz, but to be greeted by the sweet, tropical aroma of ripe guavas hanging heavy on the branches of your very own tree! Sounds like a dream, right? Well, it doesn’t have to be! For centuries, cultivating fruit trees in urban spaces has been a symbol of resilience and resourcefulness. From the hanging gardens of Babylon to modern-day urban farms, people have found ways to connect with nature, even amidst concrete jungles.
But why go through all the effort of growing a guava tree on your roof? Well, besides the obvious benefit of fresh, delicious fruit right at your fingertips, it’s incredibly rewarding! Plus, with rising food costs and concerns about pesticides, knowing exactly where your food comes from is a huge peace of mind. This DIY guide is packed with simple tricks and hacks to ensure a bountiful rooftop guava tree harvest, even if you’re a complete beginner. I’ll walk you through everything from choosing the right variety to protecting your precious tree from pests and diseases. So, get ready to transform your rooftop into a tropical paradise and enjoy the fruits (literally!) of your labor!
DIY: Guaven-Ernte vom Dachgarten – So geht’s!
Hallo ihr Lieben! Ich liebe es, wenn meine Pflanzen Früchte tragen, und dieses Jahr ist meine Guave auf dem Dachgarten einfach explodiert! Ich möchte euch heute zeigen, wie ich meine Guaven ernte und was ihr dabei beachten solltet, damit ihr auch eine reiche Ernte einfahren könnt. Keine Sorge, es ist einfacher als ihr denkt!
Was du für die Guaven-Ernte brauchst:
* Eine stabile Leiter (wenn dein Baum höher ist)
* Eine Gartenschere oder ein scharfes Messer
* Einen Korb oder eine Schüssel für die geernteten Guaven
* Gartenhandschuhe (optional, aber empfehlenswert)
* Eventuell eine lange Stange mit einem Pflückeraufsatz (für schwer erreichbare Früchte)
Wann sind Guaven reif?
Das ist eine der wichtigsten Fragen! Eine unreife Guave schmeckt nicht besonders gut. Hier sind ein paar Anzeichen, auf die du achten solltest:
* Farbe: Die Farbe der Guave ändert sich von einem leuchtenden Grün zu einem Gelbgrün oder sogar Gelb, je nach Sorte.
* Duft: Reife Guaven verströmen einen süßen, aromatischen Duft. Wenn du eine Guave in die Hand nimmst und sie riecht gut, ist das ein gutes Zeichen.
* Festigkeit: Die Frucht sollte leicht nachgeben, wenn du sie sanft drückst. Sie sollte nicht steinhart sein, aber auch nicht matschig.
* Leichter Fall: Manchmal fallen reife Guaven von selbst vom Baum. Das ist ein sicheres Zeichen, dass sie reif sind. Aber Achtung, nicht alle heruntergefallenen Früchte sind automatisch gut. Überprüfe sie trotzdem auf Druckstellen oder Schäden.
Schritt-für-Schritt-Anleitung zur Guaven-Ernte
1. Vorbereitung ist alles: Bevor du loslegst, zieh deine Gartenhandschuhe an (wenn du welche benutzt) und stell sicher, dass du deine Leiter sicher aufgestellt hast, falls du sie brauchst. Lege deinen Korb oder deine Schüssel bereit, damit du die geernteten Guaven direkt hineinlegen kannst.
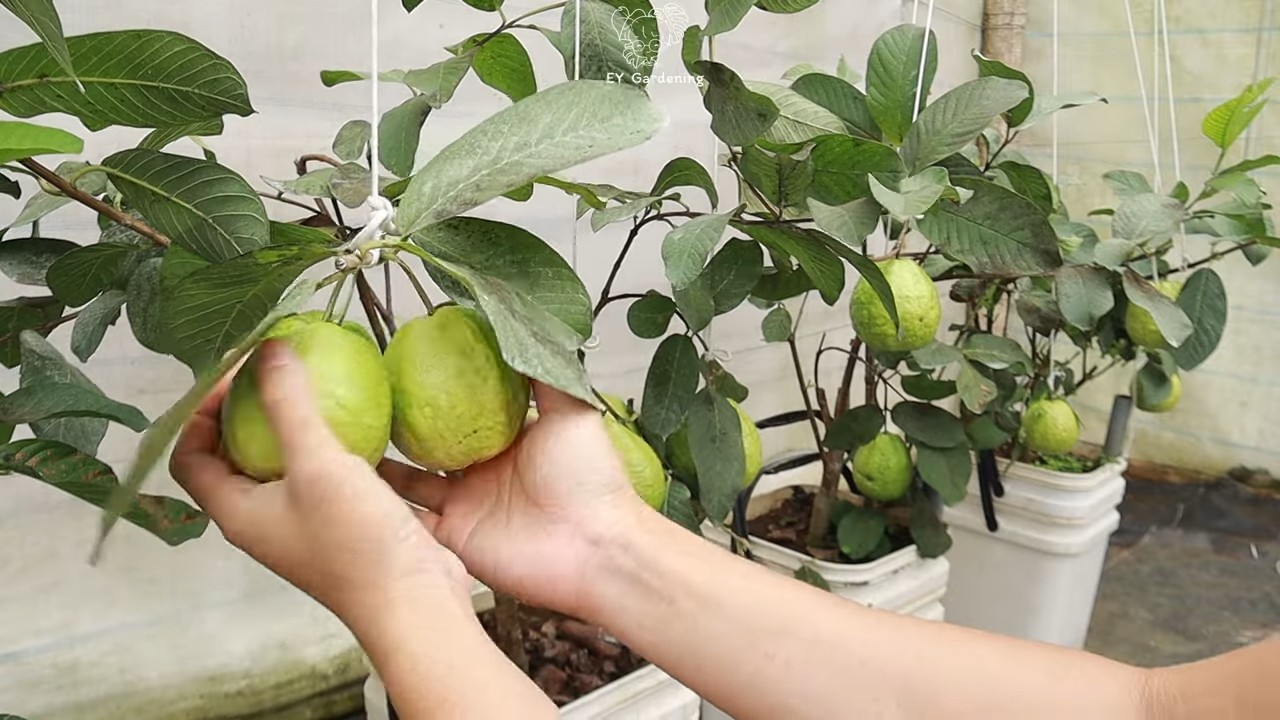
2. Die richtige Guave auswählen: Geh um den Baum herum und suche nach den reifen Guaven. Achte auf die Farbe, den Duft und die Festigkeit, wie oben beschrieben.
3. Die Erntetechnik:
* Mit der Hand: Wenn die Guave leicht zu erreichen ist, kannst du sie einfach mit der Hand pflücken. Greife die Frucht vorsichtig und drehe sie leicht, bis sie sich vom Zweig löst. Ziehe nicht zu fest, sonst beschädigst du den Zweig.
* Mit der Gartenschere oder dem Messer: Wenn die Guave schwer zu erreichen ist oder der Stiel sehr fest ist, verwende deine Gartenschere oder dein Messer. Schneide den Stiel vorsichtig ab, so nah wie möglich an der Frucht, aber ohne die Frucht selbst zu beschädigen.
* Mit dem Pflückeraufsatz: Wenn du einen Pflückeraufsatz hast, befestige ihn an deiner langen Stange. Platziere den Pflückeraufsatz um die Guave und ziehe vorsichtig am Seil oder Hebel, um die Frucht zu lösen.
4. Die geernteten Guaven behandeln: Lege die geernteten Guaven vorsichtig in deinen Korb oder deine Schüssel. Vermeide es, sie zu quetschen oder zu stapeln, da sie leicht Druckstellen bekommen können.
5. Den Baum überprüfen: Nachdem du die reifen Guaven geerntet hast, überprüfe den Baum noch einmal auf weitere reife Früchte. Es ist gut möglich, dass du nicht alle auf einmal ernten kannst, da sie nicht alle gleichzeitig reif werden.
6. Reinigung und Lagerung: Reinige die geernteten Guaven vorsichtig mit Wasser, um Schmutz oder Insekten zu entfernen. Trockne sie anschließend mit einem sauberen Tuch ab. Du kannst die Guaven im Kühlschrank lagern, wo sie sich einige Tage halten.
Was tun mit der Guaven-Ernte?
Jetzt kommt der spaßige Teil! Du hast eine reiche Ernte eingefahren, aber was machst du jetzt damit? Hier sind ein paar Ideen:
* Frisch essen: Guaven schmecken pur einfach köstlich! Schneide sie in Scheiben oder Würfel und genieße sie als gesunden Snack.
* Guaven-Saft: Mixe die Guaven mit etwas Wasser und Zucker (oder Honig) zu einem erfrischenden Saft.
* Guaven-Marmelade oder Gelee: Guaven eignen sich hervorragend zur Herstellung von Marmelade oder Gelee.
* Guaven-Smoothie: Füge Guaven zu deinem Lieblings-Smoothie hinzu, um ihm einen exotischen Geschmack zu verleihen.
* Guaven-Kuchen oder -Desserts: Verwende Guaven in Kuchen, Torten oder anderen Desserts.
* Einfrieren: Wenn du zu viele Guaven hast, kannst du sie auch einfrieren. Schneide sie in Stücke und friere sie in einem Gefrierbeutel oder einer Dose ein.
Zusätzliche Tipps für eine erfolgreiche Guaven-Ernte
* Schädlinge und Krankheiten: Achte auf Schädlinge und Krankheiten, die deine Guaven befallen könnten. Wenn du Probleme feststellst, behandle sie so schnell wie möglich mit geeigneten Mitteln.
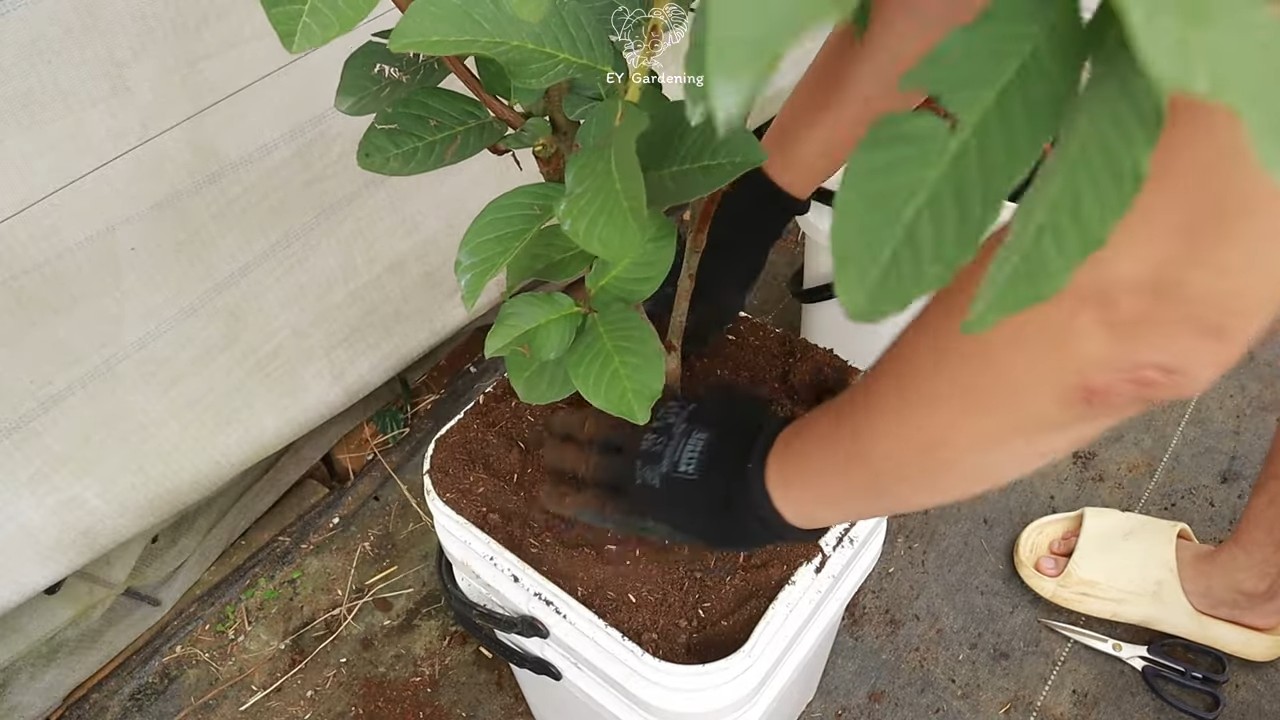
* Bewässerung: Guaven brauchen ausreichend Wasser, besonders während der Fruchtbildung. Gieße deinen Baum regelmäßig, aber vermeide Staunässe.
* Düngung: Dünge deinen Guavenbaum regelmäßig mit einem ausgewogenen Dünger, um eine reiche Ernte zu fördern.
* Schnitt: Schneide deinen Guavenbaum regelmäßig, um ihn in Form zu halten und die Fruchtbildung zu fördern. Entferne abgestorbene oder kranke Äste.
* Geduld: Nicht alle Guaven werden gleichzeitig reif. Hab Geduld und ernte sie, wenn sie reif sind.
Häufige Fehler bei der Guaven-Ernte
* Zu frühes Ernten: Ernte die Guaven nicht, bevor sie reif sind. Unreife Guaven schmecken nicht gut und sind hart.
* Zu spätes Ernten: Warte nicht zu lange mit der Ernte, sonst werden die Guaven überreif und matschig.
* Beschädigung der Früchte: Sei vorsichtig beim Ernten, um die Früchte nicht zu beschädigen. Druckstellen können dazu führen, dass die Früchte schneller verderben.
* Vernachlässigung des Baumes: Vernachlässige deinen Guavenbaum nicht. Achte auf seine Bedürfnisse und pflege ihn regelmäßig, um eine reiche Ernte zu gewährleisten.
Ich hoffe, diese Anleitung hilft dir bei deiner Guaven-Ernte! Viel Spaß beim Ernten und Genießen deiner selbst angebauten Guaven! Lass mich wissen, wenn du Fragen hast oder deine eigenen Tipps teilen möchtest. Ich freue mich darauf, von dir zu hören!
Conclusion
So, there you have it! Transforming your freshly harvested rooftop guava into a delectable guava paste is not only incredibly rewarding but also a fantastic way to minimize waste and maximize the deliciousness of your homegrown bounty. This simple yet effective DIY trick unlocks the full potential of your guava harvest, turning what might otherwise be an overwhelming amount of fruit into a versatile and long-lasting treat.
Why is this a must-try? Because store-bought guava paste simply can’t compare to the vibrant flavor and satisfying texture of homemade. You control the ingredients, ensuring a product free from artificial preservatives and excessive sugar. Plus, the process itself is a deeply satisfying connection to your garden and the food you create. Imagine the pride you’ll feel serving this homemade delicacy to friends and family, knowing it came directly from your own rooftop!
But the fun doesn’t stop there! Feel free to experiment with variations to personalize your guava paste. Add a pinch of chili flakes for a subtle kick, a splash of lime juice for extra tang, or a sprinkle of cinnamon for warmth. Consider incorporating other fruits like pineapple or mango for a tropical twist. You can even adjust the sugar content to suit your preference – a lower sugar version will highlight the natural tartness of the guava.
This DIY guava paste recipe is more than just a method; it’s an invitation to connect with your food, explore your creativity, and savor the fruits (literally!) of your labor. Don’t be intimidated by the process; it’s surprisingly straightforward, and the results are well worth the effort.
We wholeheartedly encourage you to give this DIY trick a try. Share your experience with us! Let us know what variations you experimented with, what challenges you encountered, and, most importantly, how delicious your homemade guava paste turned out. Post pictures of your creations on social media using #RooftopGuavaPaste and tag us so we can admire your handiwork. We can’t wait to see what you create! This is a fantastic way to preserve your harvest and enjoy the taste of summer all year round. So, get cooking and enjoy the sweet rewards of your rooftop guava tree!
Frequently Asked Questions (FAQ)
What kind of guava is best for making guava paste?
The best guava for making guava paste is one that is ripe but still firm. Pink guavas are generally preferred for their flavor and color, but white guavas will also work. Avoid using overly ripe or bruised guavas, as they will result in a paste with a less desirable texture and flavor. The key is to find guavas that have a strong, sweet aroma and a slightly yielding flesh when gently pressed. Remember, the quality of your guava directly impacts the quality of your final guava paste.
How long does homemade guava paste last?
When stored properly, homemade guava paste can last for several months. The high sugar content acts as a natural preservative. To maximize its shelf life, store the guava paste in an airtight container in the refrigerator. You can also wrap it tightly in plastic wrap and then place it in a freezer bag for longer storage in the freezer. If you notice any mold or an off odor, discard the paste immediately. Properly stored, refrigerated guava paste should last for 2-3 months, while frozen guava paste can last for up to 6 months.
Can I reduce the amount of sugar in the recipe?
Yes, you can reduce the amount of sugar in the recipe, but keep in mind that sugar plays a crucial role in preserving the guava paste. Reducing the sugar will shorten the shelf life and may affect the texture. If you choose to reduce the sugar, start by reducing it by about 25% and taste as you go. You may also need to adjust the cooking time, as the paste may take longer to thicken with less sugar. Consider adding a natural sweetener like honey or agave nectar in small amounts to compensate for the reduced sweetness. Remember to store the lower-sugar guava paste in the refrigerator and consume it within a shorter timeframe.
What can I do if my guava paste is too soft?
If your guava paste is too soft, it means it hasn’t cooked long enough to evaporate enough moisture. Simply return the paste to the pot and continue cooking over low heat, stirring frequently, until it reaches the desired consistency. Be patient, as it may take some time for the paste to thicken further. You can also add a small amount of pectin, a natural thickening agent, to help firm up the paste. Remember to stir constantly to prevent burning.
Can I use a food processor instead of a blender to puree the guava?
Yes, you can use a food processor instead of a blender to puree the guava. However, a blender will generally produce a smoother puree. If using a food processor, make sure to process the guava until it is as smooth as possible. You may need to scrape down the sides of the bowl several times during processing. If you prefer a very smooth paste, you can strain the puree through a fine-mesh sieve after processing, regardless of whether you use a blender or a food processor.
What are some creative ways to use guava paste?
Guava paste is incredibly versatile and can be used in a variety of ways. It’s delicious on its own as a sweet treat, paired with cheese and crackers, or used as a filling for pastries and empanadas. You can also melt it down and use it as a glaze for meats or vegetables. Try adding it to smoothies or milkshakes for a tropical flavor boost. Guava paste also makes a wonderful addition to desserts like cheesecakes, tarts, and ice cream. Get creative and experiment with different ways to incorporate this delicious ingredient into your favorite recipes!
How do I know when the guava paste is done cooking?
The best way to tell if the guava paste is done cooking is to perform the “sheet test.” Place a small spoonful of the paste on a chilled plate. Let it cool for a few seconds, then gently push it with your finger. If the paste wrinkles and forms a sheet, it is ready. If it remains runny, it needs to cook longer. Another indicator is the consistency of the paste in the pot. It should be thick and easily pull away from the sides of the pot when stirred. Remember to stir frequently during the final stages of cooking to prevent burning.
Can I add spices to my guava paste?
Absolutely! Adding spices is a great way to customize your guava paste and add depth of flavor. Cinnamon, nutmeg, cloves, and ginger are all excellent choices. You can also add a pinch of chili flakes for a subtle kick. Experiment with different spice combinations to find your favorite flavor profile. Add the spices towards the end of the cooking process to preserve their aroma and flavor. Start with small amounts and taste as you go, adding more as needed.
Is it necessary to remove the seeds from the guava before making paste?
While it’s not strictly necessary to remove all the seeds, removing as many as possible will result in a smoother and more pleasant texture. Some people don’t mind the small seeds, but others find them distracting. You can use a fine-mesh sieve to strain the guava puree and remove the seeds. Alternatively, you can use a food mill to separate the pulp from the seeds. The choice is yours, depending on your personal preference.
What if I don’t have a rooftop guava tree? Can I still make this recipe?
Of course! While this article focuses on using rooftop-grown guavas, you can easily adapt the recipe using store-bought guavas. Look for ripe but firm guavas at your local grocery store or farmers market. The quality of the guavas will still impact the final product, so choose the best ones you can find. This recipe is all about enjoying the delicious flavor of guava paste, regardless of where the guavas come from.

Leave a Comment