
Grow mushrooms at home? Absolutely! Imagine harvesting fresh, flavorful mushrooms right from your own kitchen – it’s easier than you think, and incredibly rewarding. Forget those expensive grocery store prices and questionable freshness; with a few simple tricks and a little DIY magic, you can become a mushroom-growing maestro.
Cultivating mushrooms has a rich history, dating back centuries in various cultures. From ancient Chinese medicinal practices to European culinary traditions, mushrooms have always held a special place. Today, the demand for diverse and high-quality mushrooms is soaring, making home cultivation a fantastic way to enjoy these delicacies while connecting with nature.
Why should you learn to grow mushrooms at home? Well, for starters, it’s a sustainable way to source your food. You’ll reduce your carbon footprint by cutting down on transportation and packaging. Plus, you’ll have complete control over the growing environment, ensuring your mushrooms are free from harmful pesticides and chemicals. More importantly, it’s a fun and educational experience that can be enjoyed by the whole family. I’m excited to share some easy-to-follow DIY tricks that will have you harvesting your own delicious mushrooms in no time!
Pilzzucht für Anfänger: Dein eigenes Pilzparadies zu Hause
Hey Pilzfreunde! Habt ihr euch jemals gefragt, wie es wäre, eure eigenen frischen Pilze zu Hause zu züchten? Es ist einfacher als ihr denkt und unglaublich befriedigend! In diesem Artikel zeige ich euch, wie ihr mit einfachen Mitteln und etwas Geduld eure eigenen köstlichen Pilze anbauen könnt. Wir konzentrieren uns auf Austernpilze (Pleurotus ostreatus), da diese relativ einfach zu züchten sind und schnell Ergebnisse liefern. Los geht’s!
Was du für deine Pilzzucht brauchst
Bevor wir loslegen, hier eine Liste der Materialien, die du benötigst. Keine Sorge, die meisten davon sind leicht zu bekommen:
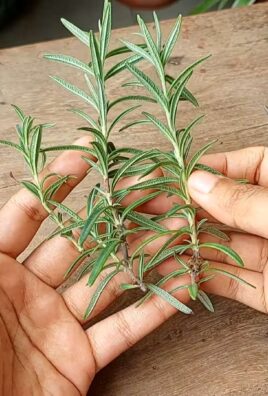
* Pilzbrut (Austernpilze): Das ist das “Saatgut” für deine Pilze. Du bekommst sie online oder in spezialisierten Gartenfachgeschäften. Achte darauf, dass die Brut frisch und von guter Qualität ist.
* Substrat: Das ist das Material, auf dem deine Pilze wachsen werden. Stroh (Weizenstroh ist ideal), Kaffeesatz oder Holzspäne sind gute Optionen. Wir verwenden hier Stroh, da es leicht verfügbar und kostengünstig ist.
* Hitzebeständige Beutel oder Eimer: Zum Pasteurisieren des Substrats.
* Großer Topf oder Behälter: Zum Erhitzen des Wassers für die Pasteurisierung.
* Thermometer: Um die Temperatur des Wassers zu überwachen.
* Sprühflasche: Zum Befeuchten der Pilze während der Wachstumsphase.
* Saubere Arbeitsfläche: Hygiene ist wichtig, um Kontaminationen zu vermeiden.
* Handschuhe: Um deine Hände sauber zu halten.
* Mundschutz (optional): Um das Einatmen von Staub zu vermeiden.
* Dunkler, kühler Raum: Für die Inkubationsphase.
* Raum mit indirektem Licht: Für die Fruchtungsphase.
Schritt-für-Schritt-Anleitung zur Pilzzucht
Hier ist eine detaillierte Anleitung, wie du deine eigenen Austernpilze zu Hause züchten kannst.
1. Das Substrat vorbereiten: Pasteurisierung des Strohs
Die Pasteurisierung ist ein wichtiger Schritt, um unerwünschte Mikroorganismen abzutöten, die mit den Pilzen konkurrieren könnten.
1. Stroh zerkleinern: Schneide oder zerkleinere das Stroh in kleinere Stücke (ca. 5-10 cm lang). Das erleichtert die Pasteurisierung und die spätere Besiedlung durch die Pilze.
2. Stroh einweichen: Fülle einen großen Topf oder Behälter mit Wasser und bringe es zum Kochen. Gib das zerkleinerte Stroh hinzu und stelle sicher, dass es vollständig mit Wasser bedeckt ist.
3. Pasteurisieren: Reduziere die Hitze, so dass das Wasser nur noch leicht köchelt (ca. 65-75°C). Halte diese Temperatur für etwa 1-1,5 Stunden. Das tötet die meisten unerwünschten Mikroorganismen ab, ohne die nützlichen Nährstoffe im Stroh zu zerstören.
4. Abkühlen lassen: Schalte die Hitze aus und lasse das Stroh im Wasser abkühlen, bis du es anfassen kannst, ohne dich zu verbrennen. Das dauert in der Regel mehrere Stunden.
5. Abtropfen lassen: Nimm das Stroh aus dem Wasser und lasse es gut abtropfen. Es sollte feucht, aber nicht tropfnass sein. Du kannst es in einem sauberen Sieb oder auf einer sauberen Oberfläche ausbreiten.
2. Das Substrat beimpfen: Die Pilzbrut hinzufügen
Jetzt kommt der spannende Teil: Wir beimpfen das pasteurisierte Stroh mit der Pilzbrut.
1. Arbeitsfläche vorbereiten: Reinige deine Arbeitsfläche gründlich mit Desinfektionsmittel. Trage Handschuhe und gegebenenfalls einen Mundschutz.
2. Beutel oder Eimer vorbereiten: Verwende hitzebeständige Beutel oder Eimer mit Löchern für die Belüftung. Die Löcher können mit Filterpflaster oder Mikroporenpflaster abgedeckt werden, um Kontaminationen zu vermeiden.
3. Schichtweise beimpfen: Gib eine Schicht pasteurisiertes Stroh in den Beutel oder Eimer. Streue dann eine Schicht Pilzbrut darüber. Wiederhole diesen Vorgang, bis der Beutel oder Eimer fast voll ist. Die letzte Schicht sollte aus Stroh bestehen.
4. Verhältnis beachten: Verwende etwa 5-10% Pilzbrut im Verhältnis zum Gewicht des feuchten Strohs. Das bedeutet, dass du für 1 kg feuchtes Stroh etwa 50-100 g Pilzbrut benötigst.
5. Beutel verschließen oder Eimer abdecken: Verschließe den Beutel fest oder decke den Eimer mit einem Deckel ab. Achte darauf, dass die Belüftungslöcher nicht verstopft sind.
3. Die Inkubationsphase: Das Myzel wachsen lassen
In dieser Phase wächst das Myzel (das Pilzgeflecht) im Substrat und besiedelt es.
1. Dunkler, kühler Raum: Stelle den beimpften Beutel oder Eimer in einen dunklen, kühlen Raum mit einer Temperatur von etwa 20-24°C.
2. Ruhe lassen: Lasse den Beutel oder Eimer für etwa 2-3 Wochen in Ruhe. Vermeide es, ihn zu bewegen oder zu öffnen.
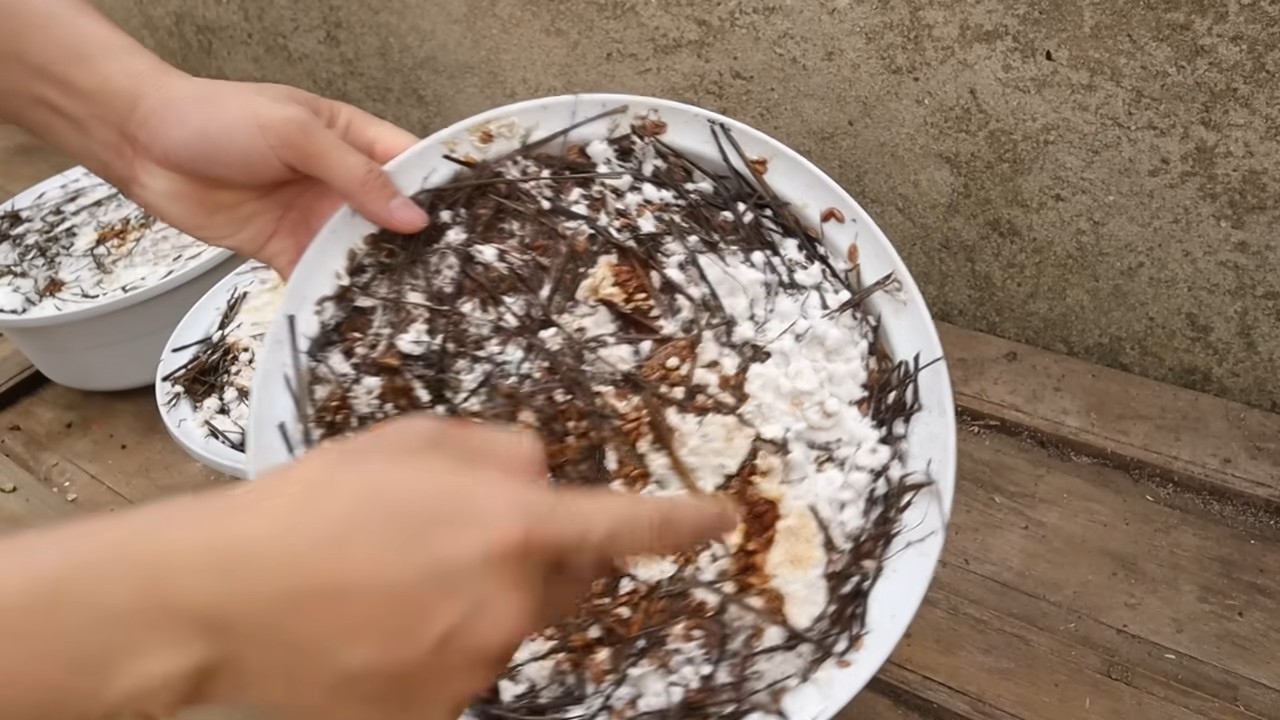
3. Beobachten: Beobachte den Beutel oder Eimer regelmäßig. Du solltest sehen, wie sich ein weißes, flaumiges Myzel im Stroh ausbreitet.
4. Vollständige Besiedlung: Wenn das gesamte Stroh mit dem weißen Myzel bedeckt ist, ist die Inkubationsphase abgeschlossen.
4. Die Fruchtungsphase: Die Pilze wachsen lassen
Jetzt ist es Zeit, die Pilze wachsen zu lassen!
1. Raum mit indirektem Licht: Stelle den Beutel oder Eimer an einen Ort mit indirektem Licht und einer Temperatur von etwa 15-20°C. Austernpilze benötigen Licht, um Fruchtkörper zu bilden, aber direktes Sonnenlicht kann sie austrocknen.
2. Luftfeuchtigkeit erhöhen: Austernpilze benötigen eine hohe Luftfeuchtigkeit (80-90%), um gut zu wachsen. Du kannst die Luftfeuchtigkeit erhöhen, indem du den Raum regelmäßig mit Wasser besprühst oder einen Luftbefeuchter verwendest.
3. Belüftung: Sorge für eine gute Belüftung, um Schimmelbildung zu vermeiden.
4. Einschneiden (optional): Wenn du den Beutel verwendest, kannst du ihn an einigen Stellen einschneiden, um den Pilzen den Weg nach draußen zu erleichtern.
5. Befeuchten: Besprühe die Oberfläche des Substrats regelmäßig mit Wasser, um es feucht zu halten. Achte darauf, dass es nicht zu nass wird.
6. Warten und beobachten: Nach einigen Tagen solltest du kleine Pilzköpfe sehen, die aus dem Substrat wachsen. Beobachte sie, wie sie größer werden.
5. Die Ernte: Frische Pilze genießen
Die Ernte ist der Lohn für deine Geduld!
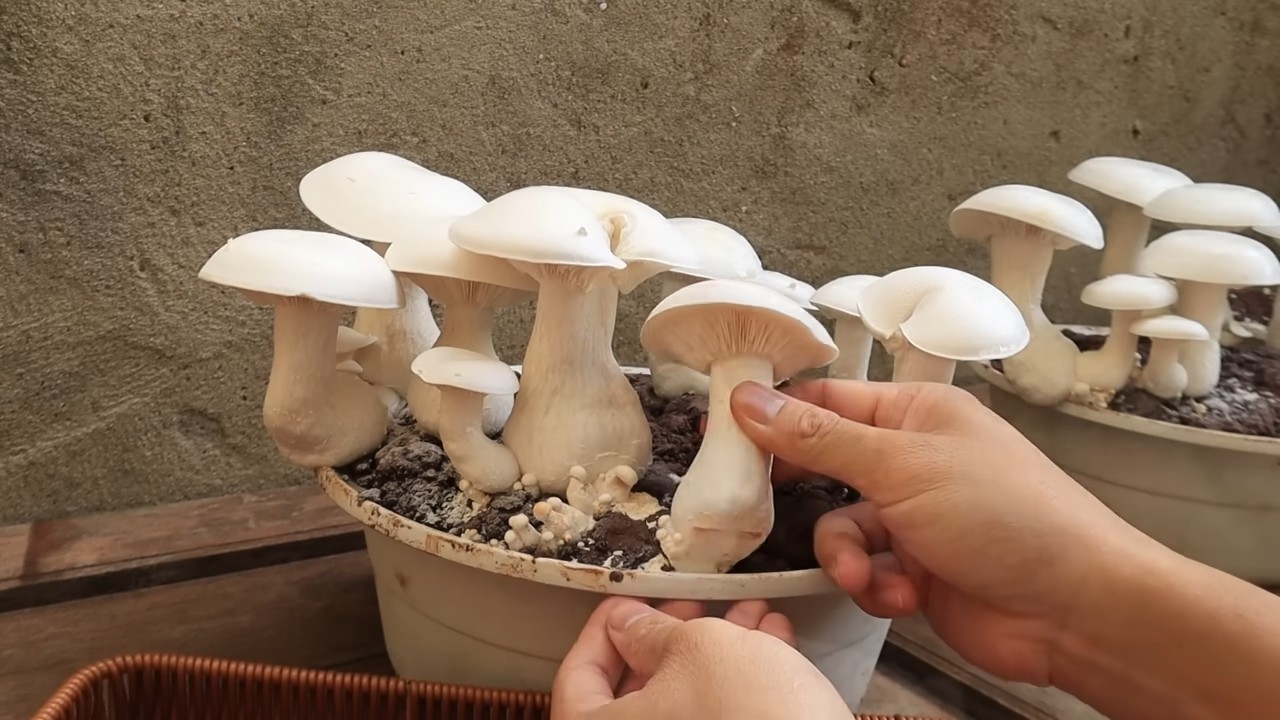
1. Erntezeitpunkt: Ernte die Pilze, wenn die Hüte fast vollständig ausgewachsen sind, aber bevor sie Sporen abwerfen. Die Ränder der Hüte sollten noch leicht nach innen gerollt sein.
2. Erntetechnik: Drehe oder schneide die Pilze vorsichtig vom Substrat ab.
3. Lagerung: Lagere die geernteten Pilze im Kühlschrank in einem Papiersack oder einer offenen Schüssel. Sie sind etwa eine Woche haltbar.
4. Zweite Ernte: Nach der ersten Ernte kannst du das Substrat erneut befeuchten und es für eine zweite oder sogar dritte Ernte vorbereiten. Die Erträge können jedoch mit jeder Ernte abnehmen.
Zusätzliche Tipps und Tricks
* Hygiene ist entscheidend: Achte während des gesamten Prozesses auf Sauberkeit, um Kontaminationen zu vermeiden.
* Experimentiere mit verschiedenen Substraten: Probiere verschiedene Substrate wie Kaffeesatz oder Holzspäne aus,
Conclusion
So, there you have it! Cultivating your own mushrooms at home is not just a fun project; it’s a gateway to fresher, more flavorful ingredients, a deeper connection with nature, and a sustainable way to supplement your diet. Forget those bland, pre-packaged mushrooms from the grocery store. Imagine the satisfaction of harvesting your own plump, earthy oyster mushrooms, or the delicate, nutty flavor of shiitakes grown right in your kitchen. This DIY approach empowers you to control the entire process, from selecting the perfect substrate to ensuring optimal growing conditions, resulting in mushrooms that are bursting with flavor and nutrients.
This method of growing mushrooms at home is a must-try for several reasons. First, the taste difference is undeniable. Homegrown mushrooms are noticeably fresher and more flavorful than their store-bought counterparts. Second, it’s incredibly rewarding to witness the entire life cycle of these fascinating fungi. From the initial inoculation to the final harvest, you’ll gain a newfound appreciation for the natural world. Third, it’s a sustainable practice. By growing your own mushrooms, you’re reducing your reliance on commercially produced options, which often involve significant transportation and packaging. Finally, it’s a cost-effective way to enjoy a gourmet ingredient. Once you’ve invested in the initial supplies, you can continue to harvest mushrooms for months, or even years, with minimal additional expense.
Don’t be afraid to experiment with different varieties of mushrooms and substrates. Oyster mushrooms are a great starting point for beginners, as they are relatively easy to grow and tolerate a wide range of conditions. Shiitake mushrooms require a bit more patience but offer a unique and delicious flavor. Lion’s mane mushrooms are another popular choice, known for their distinctive appearance and health benefits. As for substrates, you can use everything from straw and coffee grounds to hardwood sawdust and cardboard. Each substrate will impart a slightly different flavor and texture to the mushrooms, so feel free to explore and find what works best for you.
Consider these variations to enhance your mushroom growing experience:
* Vertical Gardening: Utilize vertical space by growing mushrooms in stacked containers or hanging bags. This is especially useful for those with limited space.
* Mushroom Logs: Inoculate hardwood logs with mushroom spawn for a more traditional and long-lasting growing method. This is ideal for outdoor cultivation.
* Indoor Mushroom Farms: Create a dedicated space for mushroom cultivation, complete with controlled temperature and humidity. This is perfect for serious mushroom enthusiasts.
* Companion Planting: Grow mushrooms alongside other plants in your garden to create a symbiotic relationship. Some plants can benefit from the nutrients released by the mushrooms, while the mushrooms can benefit from the shade and moisture provided by the plants.
We encourage you to embark on this exciting journey of growing mushrooms at home. It’s a fun, educational, and rewarding experience that will transform the way you think about food. Once you’ve harvested your first batch of homegrown mushrooms, be sure to share your experience with us! Post photos of your mushrooms on social media using #HomegrownMushrooms and tag us in your posts. We can’t wait to see what you create! Let’s build a community of mushroom enthusiasts and inspire others to discover the joys of growing their own food.
Frequently Asked Questions (FAQ)
What are the easiest types of mushrooms to grow at home for beginners?
Oyster mushrooms are generally considered the easiest to grow for beginners. They are fast-growing, relatively tolerant of different conditions, and can be grown on a variety of substrates, including straw, coffee grounds, and cardboard. Shiitake mushrooms are also a good option, although they require a bit more patience and attention to detail. Avoid more complex varieties like morels or truffles when starting out.
What kind of space do I need to grow mushrooms at home?
The amount of space you need depends on the scale of your operation. For small-scale cultivation, a closet, basement, or even a spare room can suffice. The key is to have a space that is dark, humid, and well-ventilated. You can also grow mushrooms outdoors in a shaded area, such as under a tree or in a greenhouse. Vertical growing methods can also help maximize space.
What is the best substrate to use for growing mushrooms?
The best substrate depends on the type of mushroom you are growing. Oyster mushrooms thrive on straw, coffee grounds, and cardboard. Shiitake mushrooms prefer hardwood sawdust or logs. Lion’s mane mushrooms can be grown on a variety of substrates, including sawdust, straw, and grain. It’s important to choose a substrate that is clean, free of contaminants, and properly pasteurized or sterilized to prevent the growth of unwanted molds and bacteria.
How long does it take to grow mushrooms at home?
The time it takes to grow mushrooms varies depending on the variety and growing conditions. Oyster mushrooms can typically be harvested within a few weeks of inoculation. Shiitake mushrooms may take several months to produce their first flush. Factors such as temperature, humidity, and light can also affect the growth rate.
How do I maintain the humidity levels for growing mushrooms?
Maintaining adequate humidity is crucial for successful mushroom cultivation. You can increase humidity by misting the growing area with water several times a day, using a humidifier, or placing the mushrooms in a humidity tent or greenhouse. A hygrometer can help you monitor the humidity levels and ensure they are within the optimal range for your chosen mushroom variety. Aim for humidity levels between 80-95% for most varieties.
How do I prevent contamination when growing mushrooms?
Contamination is a common problem in mushroom cultivation. To prevent contamination, it’s important to use sterile techniques when preparing the substrate and inoculating the spawn. Pasteurize or sterilize your substrate thoroughly to kill any competing organisms. Work in a clean environment and wear gloves and a mask to avoid introducing contaminants. Regularly inspect your growing area for signs of mold or bacteria and remove any contaminated materials immediately. Proper ventilation can also help prevent the buildup of moisture, which can promote the growth of contaminants.
How do I know when my mushrooms are ready to harvest?
The signs of readiness vary depending on the type of mushroom. Oyster mushrooms are typically ready to harvest when the caps are fully formed and the edges are still slightly curled. Shiitake mushrooms are ready when the caps have flattened out and the gills are visible. Lion’s mane mushrooms are ready when the spines are fully developed and have a slightly yellowish tint. Harvest your mushrooms before they start to dry out or release spores.
Can I reuse the substrate after harvesting mushrooms?
Yes, you can often reuse the substrate after harvesting mushrooms, although the yield may be lower on subsequent flushes. After harvesting, remove any remaining mushroom stems and debris from the substrate. You can then rehydrate the substrate by soaking it in water for several hours. After rehydration, place the substrate back in the growing area and wait for new mushrooms to emerge. You can also compost the spent substrate and use it as a soil amendment in your garden.
Are there any health benefits to growing and eating my own mushrooms?
Absolutely! Homegrown mushrooms are a nutritious and delicious addition to your diet. They are a good source of protein, fiber, vitamins, and minerals. They also contain antioxidants and other beneficial compounds that can support immune function and overall health. Growing your own mushrooms ensures that you are consuming fresh, high-quality ingredients that are free of pesticides and other harmful chemicals. Plus, the act of growing your own food can be incredibly rewarding and therapeutic.
What if my mushrooms don’t grow? What could be the problem?
Several factors could contribute to a lack of mushroom growth. The most common issues are:
* Incorrect Temperature: Mushrooms have specific temperature requirements. Research the ideal temperature range for your chosen variety.
* Insufficient Humidity: As mentioned earlier, humidity is crucial. Ensure your growing environment is adequately humid.
* Contamination: Mold or bacteria can outcompete the mushroom mycelium. Ensure sterile practices are followed.
* Poor Ventilation: Stagnant air can lead to the buildup of harmful gases and promote contamination.
* Inadequate Light: While mushrooms don’t need direct sunlight, some ambient light is necessary.
* Old or Inactive Spawn: Ensure your mushroom spawn is fresh and viable.
* Incorrect Substrate: Using the wrong substrate for your chosen mushroom variety can hinder growth.
Carefully review each of these factors to troubleshoot the issue and make necessary adjustments.
Leave a Comment