
Home Mushroom Growing Tips: Unlock the secrets to cultivating your own delicious fungi right in the comfort of your home! Have you ever dreamt of harvesting fresh, flavorful mushrooms without a trip to the grocery store? Well, dream no more! This DIY guide is your passport to the fascinating world of mycology, offering simple yet effective techniques to transform your kitchen, basement, or even a small corner of your garden into a thriving mushroom farm.
The art of mushroom cultivation has ancient roots, dating back centuries to cultures in Asia and Europe, where mushrooms were prized for their culinary and medicinal properties. Imagine our ancestors carefully nurturing these hidden treasures, understanding the delicate balance required for successful growth. Now, you too can tap into this age-old wisdom and experience the satisfaction of growing your own food.
Why should you embark on this exciting journey of home mushroom growing tips? Because it’s not only a rewarding hobby but also a sustainable way to access fresh, organic produce. Store-bought mushrooms can be expensive and often lack the robust flavor of homegrown varieties. Plus, knowing exactly where your food comes from and how it’s grown provides peace of mind. So, let’s dive in and discover the simple steps to cultivating your own bountiful mushroom harvest!
Pilzzucht zu Hause: Dein umfassender DIY-Leitfaden
Hallo Pilzliebhaber! Hast du dich jemals gefragt, wie es wäre, deine eigenen köstlichen Pilze zu Hause zu züchten? Es ist einfacher als du denkst und unglaublich lohnend! In diesem Artikel zeige ich dir Schritt für Schritt, wie du dein eigenes kleines Pilzparadies erschaffen kannst. Keine Sorge, es ist kein Hexenwerk!
Was du für den Start brauchst
Bevor wir loslegen, lass uns sicherstellen, dass du alles Nötige zur Hand hast. Hier ist eine Liste der wichtigsten Materialien und Werkzeuge:
* Pilzbrut (Spawn): Das ist das “Saatgut” für deine Pilze. Du kannst es online oder in spezialisierten Gartencentern kaufen. Beliebte Sorten für Anfänger sind Austernpilze (Pleurotus ostreatus) und Shiitake (Lentinula edodes).
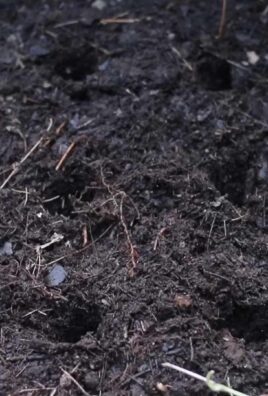
* Substrat: Das ist das Material, auf dem deine Pilze wachsen werden. Geeignete Substrate sind Stroh, Sägemehl, Kaffeesatz oder sogar alte Zeitungen. Die Wahl des Substrats hängt von der Pilzsorte ab.
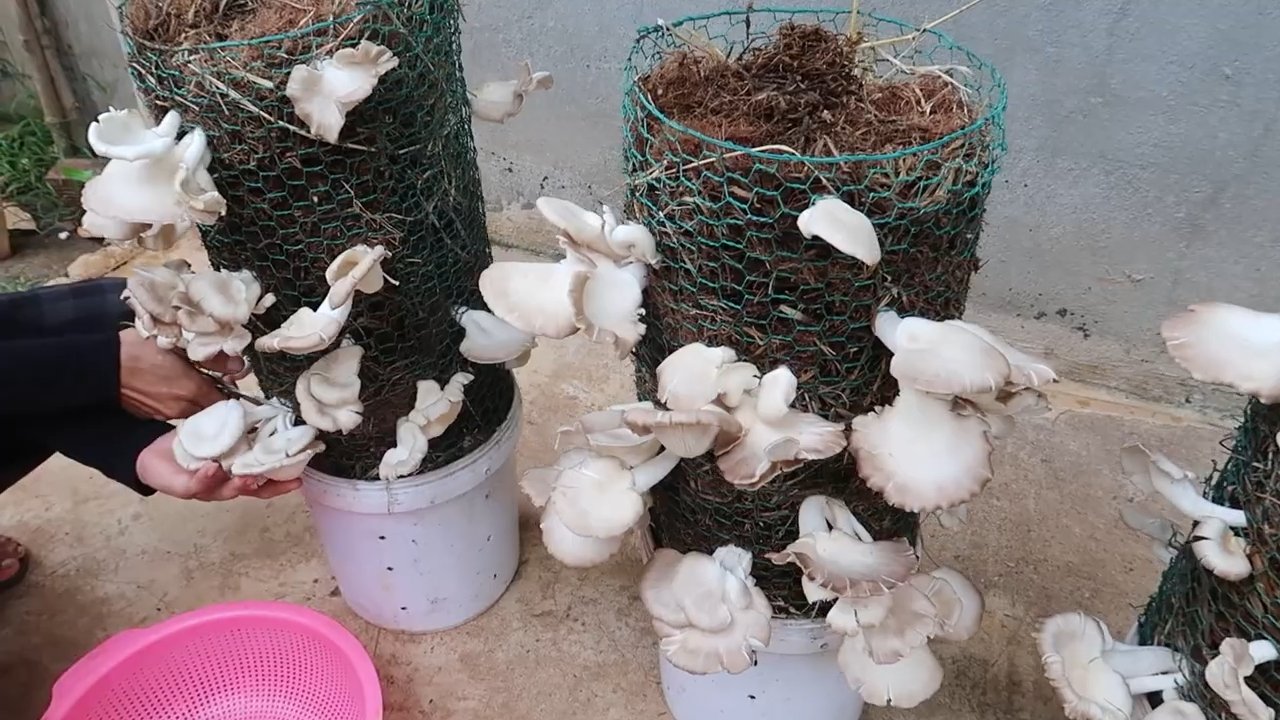
* Behälter: Du brauchst einen Behälter, um dein Substrat und die Pilzbrut zu beherbergen. Das kann ein Eimer, eine Plastiktüte, ein Pflanzsack oder sogar ein umfunktionierter Jutesack sein.
* Sprühflasche: Um die Luftfeuchtigkeit hoch zu halten, ist eine Sprühflasche unerlässlich.
* Alkohol (70% Isopropylalkohol): Für die Desinfektion deiner Arbeitsfläche und Werkzeuge. Sauberkeit ist entscheidend, um Kontaminationen zu vermeiden.
* Handschuhe: Um deine Hände sauber zu halten und das Substrat nicht zu verunreinigen.
* Optional: Eine dunkle Plastikfolie oder ein Karton, um den Behälter abzudecken und eine dunklere Umgebung zu schaffen.
Schritt-für-Schritt-Anleitung zur Pilzzucht
Jetzt, wo wir alles vorbereitet haben, können wir mit der eigentlichen Pilzzucht beginnen. Ich habe den Prozess in übersichtliche Schritte unterteilt, damit du nichts verpasst.
1. Vorbereitung des Substrats
Die Vorbereitung des Substrats ist ein entscheidender Schritt, da es die Grundlage für das Wachstum deiner Pilze bildet.
* Stroh: Wenn du Stroh verwendest, musst du es zuerst pasteurisieren, um unerwünschte Mikroorganismen abzutöten. Das geht am einfachsten, indem du das Stroh in einem großen Topf mit Wasser für etwa eine Stunde kochst. Lasse es danach abkühlen und gut abtropfen. Es sollte feucht, aber nicht nass sein.
* Sägemehl: Sägemehl muss ebenfalls pasteurisiert werden. Du kannst es entweder im Ofen bei niedriger Temperatur (ca. 80°C) für ein paar Stunden erhitzen oder es mit kochendem Wasser übergießen und abkühlen lassen. Achte darauf, dass es nicht zu trocken wird.
* Kaffeesatz: Kaffeesatz ist bereits pasteurisiert, da er durch das heiße Wasser beim Brühen des Kaffees erhitzt wurde. Du kannst ihn direkt verwenden, aber achte darauf, dass er nicht zu feucht ist. Mische ihn am besten mit etwas trockenem Substrat wie Stroh oder Sägemehl.
* Zeitungspapier: Zeitungspapier muss in kleine Stücke gerissen und in Wasser eingeweicht werden, bis es weich ist. Dann wird es abgekocht, um es zu pasteurisieren. Nach dem Abkühlen und Abtropfen kann es verwendet werden.
2. Inokulation des Substrats mit Pilzbrut
Die Inokulation ist der Prozess, bei dem du die Pilzbrut in das vorbereitete Substrat einbringst.
1. Reinigung: Bevor du beginnst, desinfiziere deine Arbeitsfläche und deine Hände gründlich mit Alkohol. Trage Handschuhe, um das Substrat nicht zu verunreinigen.
2. Schichtweise vorgehen: Fülle den Behälter mit einer Schicht Substrat. Verteile dann eine Schicht Pilzbrut darüber. Wiederhole diesen Vorgang, bis der Behälter fast voll ist. Die oberste Schicht sollte aus Substrat bestehen.
3. Verteilung: Achte darauf, dass die Pilzbrut gleichmäßig im Substrat verteilt ist. Je besser die Verteilung, desto schneller wird das Myzel (das Pilzgeflecht) das Substrat durchwachsen.
4. Andrücken: Drücke das Substrat leicht an, um einen guten Kontakt zwischen der Pilzbrut und dem Substrat zu gewährleisten.
3. Inkubation: Das Myzelwachstum fördern
Die Inkubation ist die Phase, in der das Myzel das Substrat durchwächst.
1. Dunkelheit: Stelle den Behälter an einen dunklen, kühlen Ort. Die ideale Temperatur hängt von der Pilzsorte ab, liegt aber meist zwischen 18°C und 24°C.
2. Luftfeuchtigkeit: Halte die Luftfeuchtigkeit hoch, indem du das Substrat regelmäßig mit einer Sprühflasche befeuchtest. Achte darauf, dass es nicht zu nass wird, da dies zu Schimmelbildung führen kann.
3. Belüftung: Sorge für eine gute Belüftung, indem du den Behälter regelmäßig kurz öffnest.
4. Geduld: Das Myzelwachstum kann einige Wochen dauern. Du wirst sehen, wie sich weiße, flaumige Fäden (das Myzel) im Substrat ausbreiten.
4. Fruchtung: Die Pilze wachsen lassen
Sobald das Myzel das Substrat vollständig durchwachsen hat, ist es Zeit für die Fruchtung, also die Bildung der Pilze.
1. Licht: Stelle den Behälter an einen helleren Ort, aber vermeide direkte Sonneneinstrahlung.
2. Luftfeuchtigkeit: Erhöhe die Luftfeuchtigkeit noch weiter, indem du den Behälter mit einer Plastiktüte abdeckst oder ihn in einem Gewächshaus aufstellst. Besprühe die Innenseite der Tüte regelmäßig mit Wasser.
3. Belüftung: Sorge weiterhin für eine gute Belüftung, indem du die Tüte regelmäßig kurz öffnest.
4. Temperatur: Die ideale Temperatur für die Fruchtung hängt von der Pilzsorte ab. Informiere dich, welche Temperatur für deine Pilze am besten geeignet ist.
5. Beobachtung: Beobachte deine Pilze genau. Du wirst sehen, wie sich kleine Pilzköpfe bilden.
5. Ernte: Die Früchte deiner Arbeit genießen
Die Ernte ist der krönende Abschluss deiner Pilzzucht.
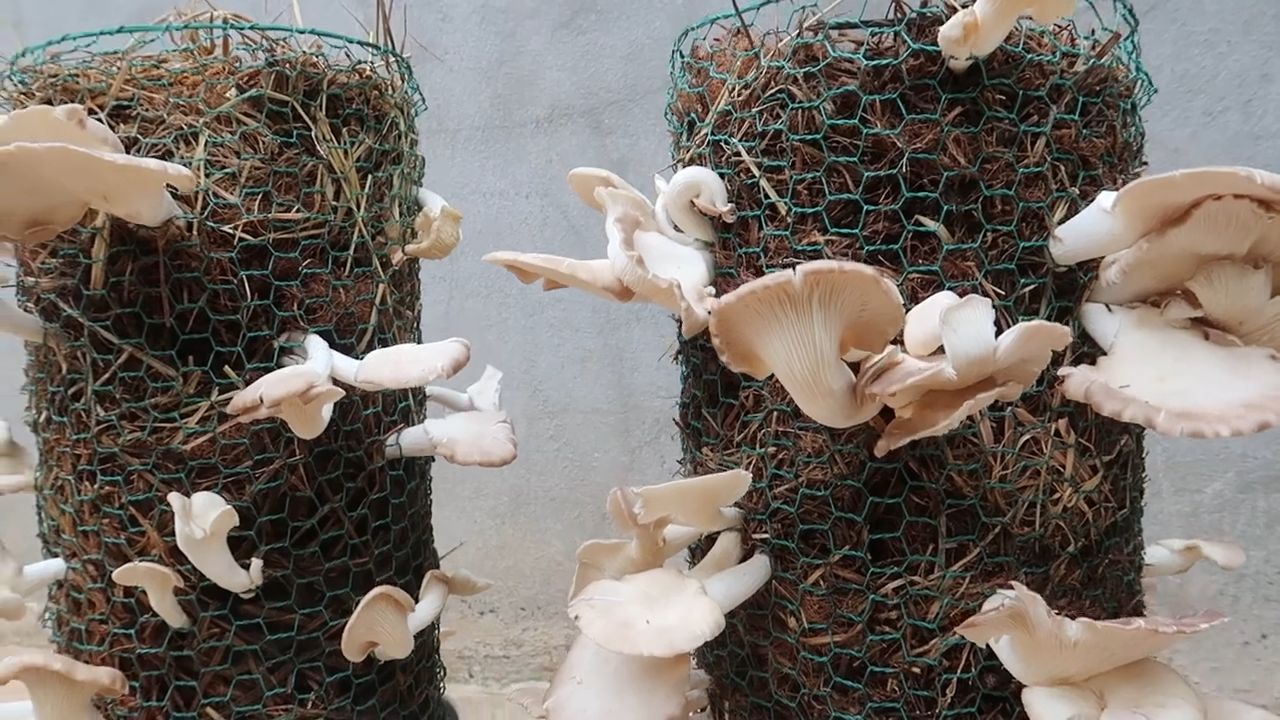
1. Zeitpunkt: Der richtige Zeitpunkt für die Ernte hängt von der Pilzsorte ab. Austernpilze sollten geerntet werden, bevor sich die Ränder der Hüte nach oben biegen. Shiitake-Pilze sind reif, wenn sich die Hüte vollständig geöffnet haben.
2. Erntetechnik: Drehe die Pilze vorsichtig ab oder schneide sie mit einem scharfen Messer ab.
3. Lagerung: Lagere die geernteten Pilze im Kühlschrank. Sie sind am besten, wenn sie frisch verzehrt werden.
Häufige Probleme und Lösungen
Auch bei der Pilzzucht können Probleme auftreten. Hier sind einige der häufigsten Probleme und wie du sie lösen kannst:
* Schimmelbildung: Wenn du Schimmel im Substrat entdeckst, ist es wichtig, schnell zu handeln. Entferne den befallenen Bereich großzügig und entsorge ihn. Sorge für eine bessere Belüftung und reduziere die Luftfeuchtigkeit.
* Kein Myzelwachstum: Wenn das Myzel nicht wächst, kann das an einer zu niedrigen Temperatur, einer zu geringen Luftfeuchtigkeit oder einer Kontamination liegen. Überprüfe die Temperatur und Luftfeuchtigkeit und stelle sicher, dass du alle Werkzeuge und Materialien gründlich desinfiziert hast.
* Kleine Pilze: Wenn die Pilze klein bleiben, kann das an einer zu geringen Luftfeuchtigkeit, einer zu geringen Belüftung oder einem Mangel an Nährstoffen liegen. Erhöhe die Luftfeuchtigkeit und sorge für eine bessere Belüftung. Du kannst auch versuchen, dem Substrat etwas Nährstofflösung hinzuzufügen.
Zusätzliche Tipps für eine erfolgreiche Pilzzucht
Hier sind noch ein paar zusätzliche Tipps, die dir helfen können, deine Pilzzucht noch erfolgreicher zu gestalten:
Conclusion
Embarking on the journey of home mushroom growing is more than just a culinary adventure; it’s a rewarding experience that connects you directly to the source of your food. This guide has illuminated the path to cultivating your own delicious and nutritious mushrooms, offering a sustainable and cost-effective alternative to store-bought varieties. The beauty of this DIY approach lies not only in the freshness and flavor you unlock but also in the control you gain over the entire process, ensuring your mushrooms are grown without harmful chemicals or pesticides.
We’ve covered the essential steps, from selecting the right mushroom species for your environment and skill level to preparing the substrate, inoculating it with spawn, and maintaining the ideal conditions for fruiting. Remember, patience is key. Mushroom growing requires careful observation and a willingness to adapt to the needs of your fungal friends. Don’t be discouraged by initial setbacks; each attempt is a learning opportunity that brings you closer to mastering the art of home cultivation.
This DIY trick of home mushroom growing is a must-try for several compelling reasons. First, the taste of freshly harvested, homegrown mushrooms is unparalleled. The subtle nuances of flavor, often lost in commercially grown varieties due to transportation and storage, are fully realized when you pluck them straight from your growing medium. Second, you gain complete control over the growing environment, ensuring your mushrooms are free from harmful chemicals and pesticides. This is particularly important for health-conscious individuals who prioritize organic and sustainable food sources. Third, home mushroom growing is an incredibly rewarding hobby. Witnessing the transformation from spawn to fully formed mushrooms is a fascinating process that connects you to the natural world.
Variations and Suggestions:
The possibilities for experimentation are endless. Consider exploring different mushroom species beyond the common oyster or shiitake. Lion’s mane, reishi, and even more exotic varieties can be successfully cultivated at home with the right techniques. You can also experiment with different substrates, such as coffee grounds, straw, or wood chips, to find what works best for your chosen mushroom species and your local environment.
For those with limited space, consider vertical growing systems or small-scale indoor setups. Even a small closet or corner of a basement can be transformed into a thriving mushroom farm. If you have access to outdoor space, explore outdoor mushroom cultivation techniques, such as log inoculation or mushroom beds.
A Call to Action:
We encourage you to take the plunge and try this DIY trick of home mushroom growing. Start small, be patient, and don’t be afraid to experiment. The rewards are well worth the effort. Once you’ve harvested your first batch of homegrown mushrooms, we’d love to hear about your experience. Share your successes, challenges, and tips in the comments below. Let’s build a community of home mushroom growers and inspire others to discover the joys of cultivating their own delicious and nutritious fungi. Share your photos and videos on social media using relevant hashtags so others can learn from your experience. Let’s spread the word about the benefits of home mushroom growing and empower more people to take control of their food sources.
FAQ
What are the easiest mushrooms to grow at home for beginners?
Oyster mushrooms are widely considered the easiest mushrooms to grow for beginners. They are fast-growing, relatively forgiving of environmental fluctuations, and can be cultivated on a variety of substrates, including straw, coffee grounds, and even cardboard. Shiitake mushrooms are another good option, although they require a bit more patience as they typically take longer to fruit. Button mushrooms, the kind you commonly find in grocery stores, are more challenging to grow at home and are generally not recommended for beginners.
What kind of space do I need to grow mushrooms at home?
The amount of space you need depends on the scale of your operation. For small-scale indoor cultivation, a closet, basement corner, or even a shelf can suffice. You’ll need enough space to accommodate your growing containers or bags and to provide adequate ventilation and humidity. Outdoor mushroom cultivation, such as log inoculation, requires access to a shaded area where the logs can be kept moist. Vertical growing systems can be a great option for maximizing space in smaller areas.
What is the best substrate for growing mushrooms?
The best substrate depends on the mushroom species you’re growing. Oyster mushrooms thrive on straw, coffee grounds, and cardboard. Shiitake mushrooms are typically grown on hardwood logs or sawdust. Other substrates, such as wood chips, compost, and grain, can also be used depending on the specific mushroom species. It’s important to research the specific substrate requirements of your chosen mushroom species to ensure optimal growth.
How long does it take to grow mushrooms at home?
The time it takes to grow mushrooms at home varies depending on the species, substrate, and environmental conditions. Oyster mushrooms can typically be harvested within a few weeks of inoculation, while shiitake mushrooms may take several months to fruit. Factors such as temperature, humidity, and light can also affect the growth rate. Patience is key, and it’s important to monitor your growing environment closely to ensure optimal conditions.
How do I maintain the proper humidity for growing mushrooms?
Maintaining proper humidity is crucial for successful mushroom cultivation. You can increase humidity by misting your growing containers or bags regularly with water. Enclosing your growing area in a plastic tent or using a humidifier can also help to maintain consistent humidity levels. Monitoring the humidity with a hygrometer is recommended to ensure it stays within the optimal range for your chosen mushroom species.
What are some common problems encountered when growing mushrooms at home, and how can I solve them?
Common problems include contamination, slow growth, and lack of fruiting. Contamination can be prevented by sterilizing your substrate properly and maintaining a clean growing environment. Slow growth can be caused by insufficient humidity, temperature, or light. Lack of fruiting can be due to a variety of factors, including improper substrate, inadequate ventilation, or insufficient light. Researching the specific requirements of your chosen mushroom species and troubleshooting accordingly is essential.
Can I use spent coffee grounds for growing mushrooms?
Yes, spent coffee grounds are an excellent substrate for growing oyster mushrooms. They are readily available, rich in nutrients, and have already been pasteurized during the brewing process. However, it’s important to use fresh coffee grounds and to mix them with other substrates, such as straw or sawdust, to provide a more balanced nutrient profile.
How do I know when my mushrooms are ready to harvest?
Mushrooms are typically ready to harvest when the caps have fully expanded but before they begin to drop spores. The exact timing will vary depending on the species. Oyster mushrooms are ready when the caps are fully formed and slightly curled upwards. Shiitake mushrooms are ready when the caps have flattened out and the edges have begun to unfurl.
Are there any safety precautions I should take when growing mushrooms at home?
It’s important to identify the mushroom species you’re growing correctly to avoid accidentally cultivating poisonous varieties. Always wash your hands thoroughly after handling mushrooms or substrates. If you’re using chemicals to sterilize your substrate, follow the manufacturer’s instructions carefully and wear appropriate protective gear.
Where can I find mushroom spawn?
Mushroom spawn can be purchased from a variety of online retailers and specialty mushroom suppliers. Look for reputable sources that offer high-quality spawn of the species you’re interested in growing. Local mushroom farms or gardening centers may also carry mushroom spawn.


Leave a Comment