
Growing Watermelons in Containers might sound like a far-fetched dream, conjuring images of sprawling vines and sun-drenched fields. But trust me, it’s absolutely achievable, even if you’re working with a small balcony, patio, or just a sunny corner in your yard! For centuries, watermelons have been a symbol of summer, abundance, and sweet, juicy refreshment. From ancient Egypt, where they were depicted in hieroglyphics, to modern-day picnics, this fruit has always held a special place in our hearts (and stomachs!).
But let’s face it, not everyone has the space for a traditional watermelon patch. That’s where the magic of container gardening comes in! I’m going to share some simple yet effective DIY tricks and hacks that will empower you to cultivate your own delicious watermelons, no matter how limited your space may be. Imagine the satisfaction of harvesting your own homegrown watermelon, knowing you nurtured it from a tiny seed to a juicy masterpiece.
This DIY guide is essential because it breaks down the process into manageable steps, demystifying the art of growing watermelons in containers. We’ll cover everything from choosing the right container and variety to providing the perfect soil and support. So, ditch the store-bought melons and get ready to embark on a rewarding gardening adventure! You’ll not only enjoy the fruits (literally!) of your labor but also gain a deeper connection to nature and a newfound appreciation for the power of DIY.
Wassermelonen im Topf ziehen: So klappt’s auch auf kleinem Raum!
Ich liebe Wassermelonen! Saftig, süß und einfach der perfekte Sommersnack. Aber was, wenn man keinen riesigen Garten hat? Keine Sorge, denn ich zeige dir, wie du Wassermelonen auch im Topf erfolgreich anbauen kannst. Es ist einfacher als du denkst und mit ein paar Tricks und Kniffen wirst du bald deine eigene Ernte genießen können.
Was du brauchst: Die Vorbereitung
Bevor wir loslegen, brauchen wir natürlich das richtige Equipment. Hier ist eine Liste mit allem, was du für dein Wassermelonen-Topf-Projekt benötigst:
* Samen: Wähle eine kleinfrüchtige Wassermelonensorte. Sorten wie ‘Sugar Baby’, ‘Bush Sugar Baby’, ‘Golden Midget’ oder ‘Tiger Baby’ eignen sich hervorragend für den Anbau im Topf, da sie kompakter wachsen und kleinere Früchte produzieren.
* Großer Topf: Wassermelonen brauchen Platz! Ein Topf mit mindestens 50 Litern Volumen ist ideal. Je größer, desto besser, denn so haben die Wurzeln genügend Raum, um sich auszubreiten.
* Hochwertige Blumenerde: Verwende eine gut durchlässige Blumenerde, die reich an Nährstoffen ist. Du kannst auch etwas Kompost oder Hornspäne untermischen, um die Erde noch weiter anzureichern.
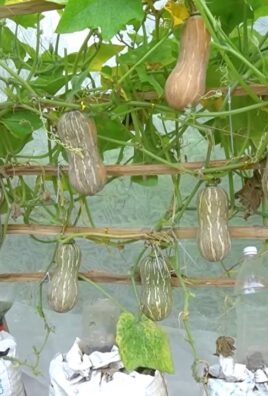
* Rankhilfe: Wassermelonen sind Kletterpflanzen. Eine Rankhilfe, wie ein Spalier oder ein Obelisk, hilft ihnen, sich nach oben zu orientieren und spart Platz.
* Dünger: Ein spezieller Dünger für Gemüse oder Tomaten ist ideal, um deine Wassermelonenpflanzen mit allen wichtigen Nährstoffen zu versorgen.
* Gießkanne oder Schlauch: Wassermelonen brauchen viel Wasser, besonders während der Fruchtbildung.
* Mulch: Mulch hilft, die Feuchtigkeit im Boden zu halten und Unkraut zu unterdrücken. Stroh, Holzhackschnitzel oder Rasenschnitt eignen sich gut als Mulchmaterial.
* Sonniger Standort: Wassermelonen lieben die Sonne! Wähle einen Standort, der mindestens 6-8 Stunden Sonne pro Tag bekommt.
Aussaat und Anzucht: Der Start ins Melonen-Glück
Jetzt geht’s ans Eingemachte! Die Aussaat ist der erste Schritt auf dem Weg zu deiner eigenen Wassermelone.
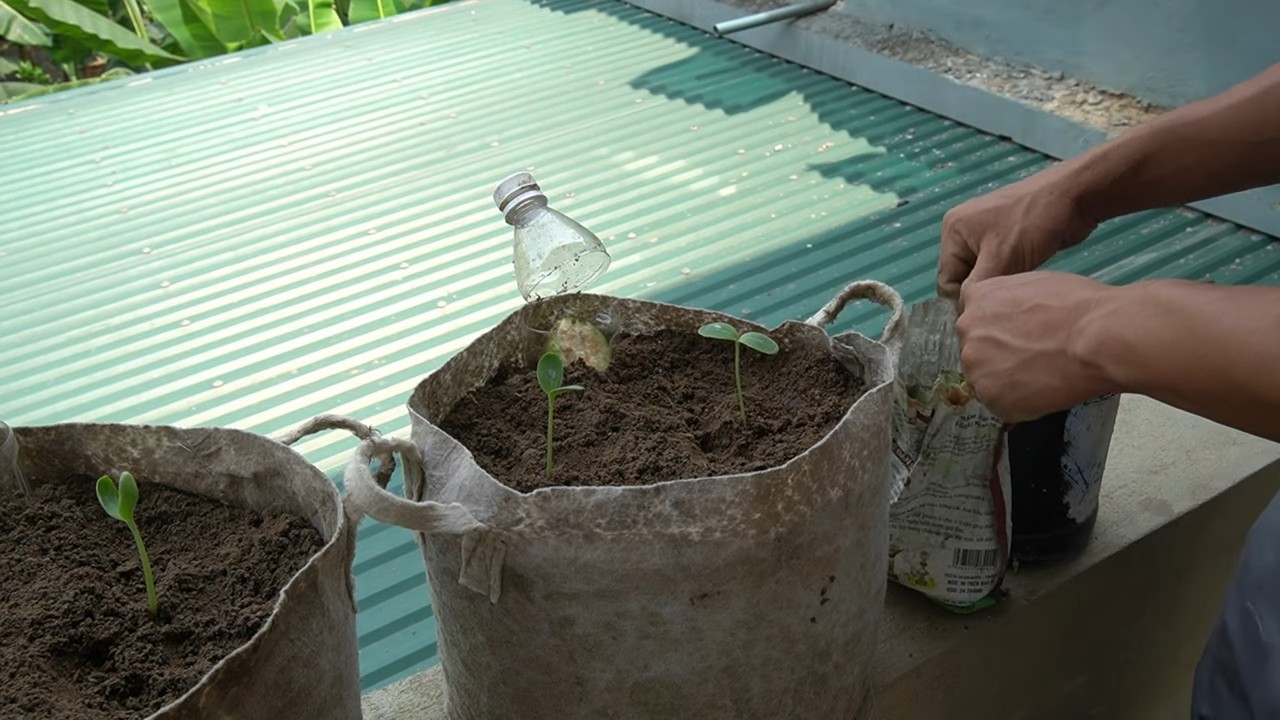
1. Vorkultur starten: Ich empfehle, die Wassermelonensamen im Haus vorzuziehen. Das gibt ihnen einen Vorsprung und schützt sie vor ungünstigen Wetterbedingungen. Fülle kleine Anzuchttöpfe mit Anzuchterde und lege pro Topf 2-3 Samen etwa 2 cm tief hinein.
2. Warm und feucht halten: Stelle die Anzuchttöpfe an einen warmen Ort (ca. 25-28°C) und halte die Erde feucht, aber nicht nass. Eine Mini-Gewächshaus oder eine durchsichtige Plastikfolie über den Töpfen hilft, die Luftfeuchtigkeit zu erhöhen.
3. Keimung abwarten: Nach etwa 7-14 Tagen sollten die Samen keimen. Sobald die Keimlinge erscheinen, stelle die Töpfe an einen helleren Ort, z.B. auf eine Fensterbank.
4. Pikieren: Wenn die Keimlinge 2-3 echte Blätter haben, kannst du sie pikieren. Das bedeutet, dass du die stärksten Pflanzen in größere Töpfe umpflanzt. Achte darauf, die Wurzeln nicht zu beschädigen.
5. Abhärten: Bevor du die Jungpflanzen ins Freie pflanzt, solltest du sie abhärten. Stelle sie tagsüber für ein paar Stunden ins Freie, um sie an die Sonne und die Temperaturen zu gewöhnen.
Umpflanzen in den Topf: Ein neues Zuhause für deine Melone
Sobald die Jungpflanzen kräftig genug sind und die Temperaturen konstant über 15°C liegen (meist ab Mitte Mai), kannst du sie in den großen Topf umpflanzen.
1. Topf vorbereiten: Fülle den Topf mit Blumenerde. Lasse oben einen Rand von etwa 5 cm frei.
2. Pflanzloch graben: Grabe ein Pflanzloch, das groß genug ist, um den Wurzelballen der Jungpflanze aufzunehmen.
3. Pflanze einsetzen: Nimm die Jungpflanze vorsichtig aus dem Topf und setze sie in das Pflanzloch. Achte darauf, dass der Wurzelballen nicht beschädigt wird.
4. Mit Erde auffüllen: Fülle das Pflanzloch mit Erde auf und drücke sie leicht an.
5. Angießen: Gieße die Pflanze gründlich an.
6. Rankhilfe anbringen: Platziere die Rankhilfe in der Nähe der Pflanze, damit sie sich daran hochranken kann.
7. Mulchen: Verteile eine Schicht Mulch um die Pflanze, um die Feuchtigkeit im Boden zu halten und Unkraut zu unterdrücken.
Pflege: Damit deine Wassermelone prächtig gedeiht
Die richtige Pflege ist entscheidend für eine reiche Ernte. Hier sind ein paar Tipps, die du beachten solltest:
* Gießen: Wassermelonen brauchen viel Wasser, besonders während der Fruchtbildung. Gieße regelmäßig und gründlich, aber vermeide Staunässe. Am besten gießt du morgens, damit die Blätter über den Tag abtrocknen können.
* Düngen: Dünge deine Wassermelonenpflanzen regelmäßig mit einem speziellen Dünger für Gemüse oder Tomaten. Beginne etwa 2-3 Wochen nach dem Umpflanzen und wiederhole die Düngung alle 2-3 Wochen.
* Ausgeizen: Entferne regelmäßig Seitentriebe, die aus den Blattachseln wachsen. Das fördert das Wachstum der Haupttriebe und der Früchte.
* Bestäubung: Wassermelonen sind auf die Bestäubung durch Bienen und andere Insekten angewiesen. Wenn du sicherstellen möchtest, dass deine Pflanzen Früchte tragen, kannst du die Blüten auch von Hand bestäuben. Übertrage dazu mit einem Pinsel Pollen von den männlichen auf die weiblichen Blüten. Die weiblichen Blüten erkennst du an dem kleinen Fruchtansatz direkt unter der Blüte.
* Fruchtansatz unterstützen: Wenn die Früchte größer werden, kann es sinnvoll sein, sie mit einem Netz oder einem Tuch zu stützen, um zu verhindern, dass sie abbrechen.
* Schutz vor Schädlingen und Krankheiten: Achte auf Anzeichen von Schädlingen oder Krankheiten und bekämpfe sie gegebenenfalls mit geeigneten Mitteln.
Ernte: Der Lohn deiner Mühe
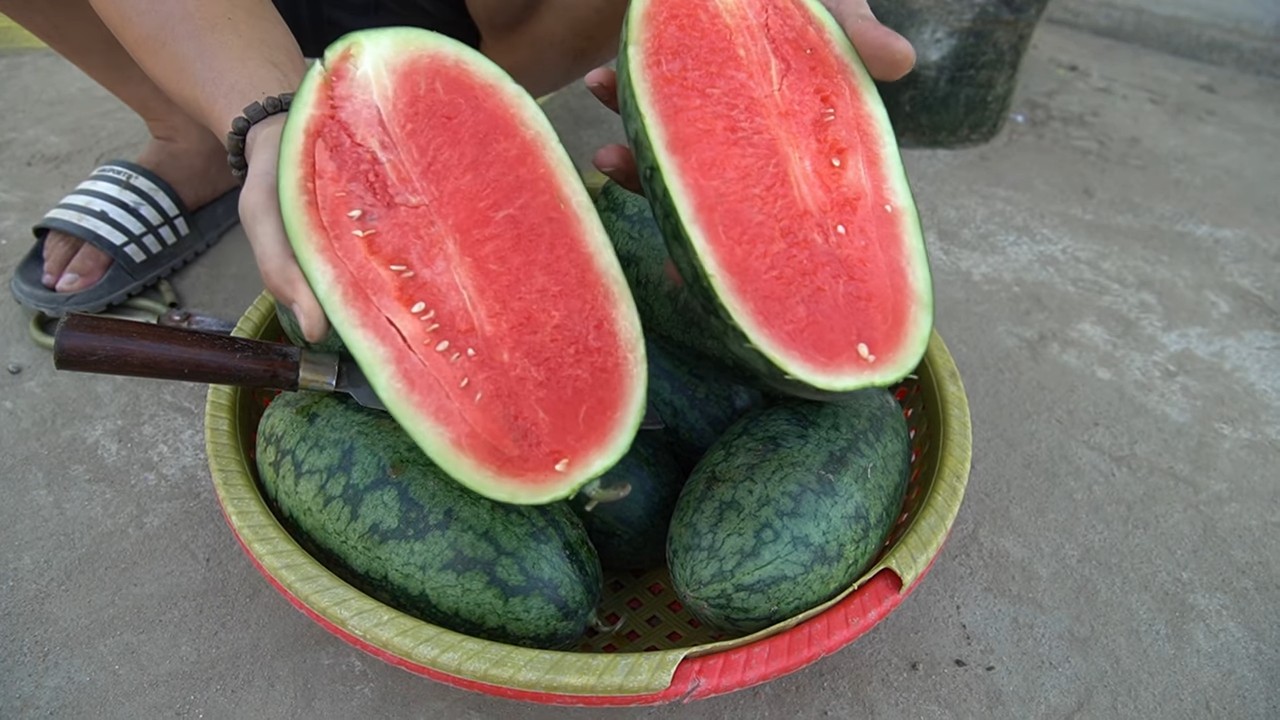
Nach etwa 80-100 Tagen, je nach Sorte, sind deine Wassermelonen reif. Aber wie erkennst du, wann der richtige Zeitpunkt für die Ernte gekommen ist?
1. Klopftest: Klopfe leicht auf die Melone. Wenn sie hohl klingt, ist sie reif.
2. Ranke: Die Ranke, die sich direkt an der Frucht befindet, sollte braun und trocken sein.
3. Auflagefläche: Die Stelle, an der die Melone auf dem Boden aufliegt, sollte gelblich verfärbt sein.
4. Duft: Reife Wassermelonen haben oft einen süßlichen Duft.
Wenn du dir unsicher bist, kannst du auch eine Melone anschneiden und probieren. Wenn sie saftig und süß schmeckt, ist sie reif.
Schneide die Melone vorsichtig von der Pflanze ab und genieße deine selbstgezogene Wassermelone!
Extra Tipps für den erfolgreichen Anbau im Topf
* Wähle den richtigen Topf: Ein Terrakottatopf ist zwar schön, aber er trocknet schneller aus als ein Kunststofftopf. Ein dunkler Topf kann sich in der Sonne stark aufheizen, was den Wurzeln schaden kann.
* Verwende eine gute Drainage: Achte darauf, dass der Topf Abzugslöcher hat, damit überschüssiges Wasser ablaufen kann. Eine Schicht Kies oder Blähton am Boden des Topfes verbessert die Drainage.
* Schütze die Pflanzen vor Wind: Ein windgeschützter Standort ist ideal, da starke Winde die Pflanzen beschädigen können.
* Drehe den Topf regelmäßig: Drehe den
Conclusion
So, there you have it! Growing watermelons in containers might seem like a daunting task, reserved for sprawling farms and endless fields, but as we’ve shown, it’s entirely achievable, even in the smallest of spaces. This DIY trick opens up a world of possibilities for urban gardeners, balcony enthusiasts, and anyone who dreams of biting into a juicy, homegrown watermelon without the commitment of a traditional garden plot.
Why is this a must-try? Because it’s empowering! Imagine the satisfaction of nurturing a tiny seed into a thriving vine, laden with sweet, refreshing fruit. It’s a testament to your green thumb, a conversation starter, and a delicious reward all rolled into one. Plus, container gardening offers unparalleled control over your watermelon’s environment. You can tailor the soil, water, and sunlight to its exact needs, maximizing its chances of success.
But the fun doesn’t stop there! Feel free to experiment with different watermelon varieties. While smaller, bush-type watermelons are ideal for containers, you might be surprised at what you can achieve with a little extra support and pruning. Consider trying ‘Sugar Baby’ for its compact size and early maturity, or ‘Bush Sugar Baby’ which is specifically bred for container growing. For a unique twist, explore yellow or orange-fleshed varieties like ‘Golden Midget’ or ‘Orange Tendersweet’.
Don’t be afraid to get creative with your container setup. While a large pot is essential, you can also use grow bags, repurposed tubs, or even half whiskey barrels. Just ensure adequate drainage and plenty of space for the roots to spread. You can also explore companion planting. Marigolds can help deter pests, while basil can improve the flavor of your watermelons.
Remember, success with container watermelons hinges on consistent care. Regular watering, fertilization, and pest control are crucial. Keep a close eye on your plants and adjust your approach as needed. And don’t forget the importance of pollination! If you’re not seeing fruit set, you may need to hand-pollinate the female flowers.
We wholeheartedly encourage you to give this DIY trick a try. It’s a rewarding experience that will connect you with nature and provide you with delicious, homegrown watermelons. And most importantly, share your journey with us! We’d love to hear about your successes, challenges, and any unique tips or tricks you discover along the way. Post pictures of your container watermelons, share your favorite varieties, and let’s build a community of container gardening enthusiasts. Let’s all learn how to master the art of **growing watermelons in containers** together!
Frequently Asked Questions (FAQ)
1. What is the best size container for growing watermelons?
The ideal container size for growing watermelons is at least 20 gallons, but larger is always better. A 25-30 gallon container will provide ample space for the roots to develop and support a healthy vine. Ensure the container has drainage holes to prevent waterlogging. Smaller, bush-type varieties might tolerate a slightly smaller container, but generally, err on the side of larger. Remember, the bigger the container, the more stable the growing environment will be, reducing the risk of stress from fluctuations in temperature and moisture.
2. What type of soil should I use for container watermelons?
Watermelons need well-draining, nutrient-rich soil. A good mix consists of equal parts potting soil, compost, and peat moss (or coco coir). Avoid using garden soil, as it can become compacted in containers and hinder drainage. The compost provides essential nutrients, while the peat moss or coco coir helps retain moisture. You can also add a slow-release fertilizer to the soil mix to provide a steady supply of nutrients throughout the growing season. Consider testing your soil pH; watermelons prefer a slightly acidic to neutral pH of 6.0 to 6.8.
3. How often should I water my container watermelons?
Watermelons are thirsty plants, especially when grown in containers. Water deeply and regularly, especially during hot, dry weather. Check the soil moisture daily by sticking your finger about an inch into the soil. If it feels dry, it’s time to water. Avoid letting the soil dry out completely, as this can stress the plant and affect fruit development. During peak growing season, you may need to water your watermelons daily, or even twice a day in extremely hot climates. Consider using a soaker hose or drip irrigation system to deliver water directly to the roots.
4. How much sunlight do container watermelons need?
Watermelons need at least 6-8 hours of direct sunlight per day to thrive. Choose a location that receives full sun for the majority of the day. If you live in a particularly hot climate, some afternoon shade may be beneficial to prevent the plants from overheating. If you’re growing watermelons indoors or in a shaded area, you may need to supplement with grow lights to provide adequate light. Rotate the container regularly to ensure all sides of the plant receive equal sunlight.
5. How do I fertilize my container watermelons?
Watermelons are heavy feeders and require regular fertilization. Start with a balanced fertilizer (e.g., 10-10-10) when planting, and then switch to a fertilizer higher in phosphorus and potassium (e.g., 5-10-10) once the plants start to flower. Fertilize every 2-3 weeks throughout the growing season. You can use a liquid fertilizer or a slow-release granular fertilizer. Avoid over-fertilizing, as this can lead to excessive foliage growth at the expense of fruit production. Consider using organic fertilizers like compost tea or fish emulsion for a more sustainable approach.
6. How do I pollinate my container watermelons?
Watermelons have separate male and female flowers. The female flowers have a small, immature watermelon at the base. If you’re not seeing fruit set, it may be due to poor pollination. You can hand-pollinate the flowers by using a small brush to transfer pollen from the male flowers to the female flowers. Do this in the morning, when the pollen is most viable. You can also attract pollinators to your garden by planting flowers that attract bees and other beneficial insects.
7. How do I support the watermelon vines in a container?
Watermelon vines can become quite long and heavy, so it’s important to provide support. You can use a trellis, stake, or tomato cage to support the vines. For larger watermelons, you may need to create a sling to support the fruit as it grows. This can be made from netting, fabric, or even an old t-shirt. Secure the sling to the trellis or support structure to prevent the watermelon from breaking off the vine.
8. What are some common pests and diseases that affect container watermelons?
Common pests that affect watermelons include aphids, squash bugs, and cucumber beetles. These pests can be controlled with insecticidal soap, neem oil, or by hand-picking them off the plants. Common diseases include powdery mildew and fusarium wilt. Powdery mildew can be prevented by ensuring good air circulation and avoiding overhead watering. Fusarium wilt is a soilborne disease that can be difficult to control. Choose disease-resistant varieties and practice crop rotation to minimize the risk of infection.
9. How do I know when my container watermelon is ripe?
There are several indicators that a watermelon is ripe. The tendril closest to the fruit should be brown and dry. The underside of the watermelon (where it rests on the ground) should be yellow or cream-colored. The watermelon should also sound hollow when you thump it. With practice, you’ll develop a feel for when your watermelons are ripe.
10. Can I grow watermelons in containers indoors?
While it’s possible to grow watermelons in containers indoors, it’s more challenging than growing them outdoors. You’ll need to provide adequate light, pollination, and ventilation. Grow lights are essential, and you’ll need to hand-pollinate the flowers. Indoor watermelons may also be more susceptible to pests and diseases. If you’re determined to grow watermelons indoors, choose a smaller, bush-type variety and provide the best possible growing conditions.
Leave a Comment