
Growing Watermelons in Containers might sound like a summer dream reserved for those with sprawling gardens, but I’m here to tell you it’s absolutely achievable, even if your “garden” is a sunny balcony or a small patio! Forget the image of endless vines taking over your yard; we’re about to unlock the secrets to cultivating juicy, delicious watermelons in a surprisingly compact space.
Watermelons have a rich history, dating back thousands of years to Africa, where they were prized for their hydrating properties in arid climates. Over time, different varieties have been cultivated across the globe, each adapted to specific environments. Now, thanks to innovative techniques, we can enjoy this summertime staple regardless of our garden size.
Why should you try growing watermelons in containers? Well, for starters, it’s incredibly rewarding to nurture a plant from seed to fruit, especially one as iconic as a watermelon. But more practically, it allows those of us with limited space to enjoy fresh, homegrown produce. Plus, container gardening offers greater control over soil quality, watering, and pest management, leading to healthier, happier plants. I’m excited to share these simple yet effective DIY tricks and hacks that will transform your container into a mini watermelon oasis. Let’s get started and discover the joy of growing watermelons in containers!
Wassermelonen im Topf ziehen: So klappt’s auch auf kleinem Raum!
Ich liebe Wassermelonen! Saftig, süß und einfach der perfekte Sommersnack. Aber was, wenn man keinen riesigen Garten hat? Keine Sorge, denn ich zeige dir, wie du auch auf dem Balkon oder der Terrasse deine eigenen Wassermelonen im Topf ziehen kannst. Es ist einfacher als du denkst!
Was du brauchst: Die richtige Vorbereitung ist alles!
Bevor wir loslegen, brauchen wir natürlich das richtige Equipment und die passenden Materialien. Hier ist eine Liste, damit du nichts vergisst:
* Samen: Wähle am besten eine kompakte Wassermelonensorte, die für den Anbau im Topf geeignet ist. Sorten wie ‘Sugar Baby’, ‘Bush Sugar Baby’ oder ‘Golden Midget’ sind ideal.
* Topf: Ein großer Topf ist entscheidend! Er sollte mindestens 50 Liter Fassungsvermögen haben, besser noch 70-80 Liter. Je größer, desto besser für die Wurzeln.
* Erde: Verwende eine hochwertige, gut durchlässige Blumenerde. Du kannst sie mit Kompost oder Hornspänen anreichern, um die Nährstoffversorgung zu verbessern.
* Rankhilfe: Wassermelonenpflanzen brauchen Unterstützung, um nicht am Boden zu liegen. Ein Rankgitter, ein Obelisk oder ein stabiler Bambusstab sind perfekt.
* Dünger: Ein Langzeitdünger oder ein Flüssigdünger speziell für Gemüse ist wichtig, um die Pflanzen während der Wachstumsphase mit ausreichend Nährstoffen zu versorgen.
* Gießkanne oder Schlauch: Regelmäßiges Gießen ist unerlässlich, besonders an heißen Tagen.
* Mulch: Mulch hilft, die Feuchtigkeit im Boden zu halten und Unkraut zu unterdrücken. Stroh, Holzhackschnitzel oder Rasenschnitt eignen sich gut.
* Sonniger Standort: Wassermelonen lieben die Sonne! Wähle einen Standort, an dem die Pflanzen mindestens 6-8 Stunden direkte Sonneneinstrahlung pro Tag bekommen.
Aussaat: Der Grundstein für eine reiche Ernte
Die Aussaat ist der erste Schritt zum Erfolg. Du kannst die Samen entweder direkt in den Topf säen oder sie vorziehen. Ich bevorzuge die Vorzucht, da sie die Keimung beschleunigt und die Pflanzen einen Vorsprung haben.
1. Vorzucht (optional): Fülle kleine Anzuchttöpfe mit Anzuchterde. Lege in jeden Topf 2-3 Samen und bedecke sie leicht mit Erde. Befeuchte die Erde vorsichtig mit einer Sprühflasche.
2. Standort: Stelle die Anzuchttöpfe an einen warmen, hellen Ort. Eine Fensterbank oder ein Gewächshaus sind ideal. Die ideale Keimtemperatur liegt bei 25-30°C.
3. Feuchtigkeit: Halte die Erde feucht, aber nicht nass. Vermeide Staunässe, da dies zu Schimmelbildung führen kann.
4. Keimung: Die Samen keimen in der Regel innerhalb von 7-14 Tagen. Sobald die Keimlinge 2-3 Blätter haben, kannst du sie pikieren.
5. Pikieren: Wähle den stärksten Keimling pro Topf aus und entferne die anderen. Setze den Keimling vorsichtig in einen größeren Topf mit Blumenerde.
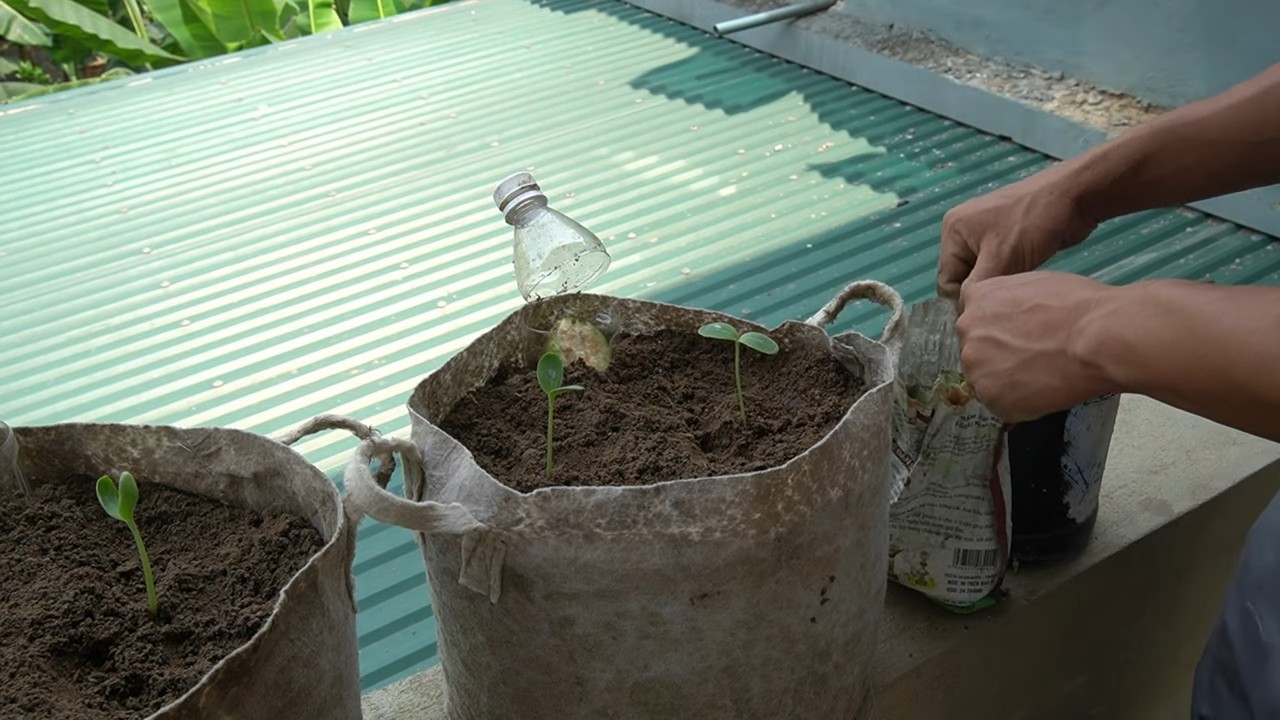
Pflanzung: Ab in den großen Topf!
Sobald die Jungpflanzen kräftig genug sind (ca. 15-20 cm hoch), können sie in den großen Topf umgepflanzt werden.
1. Topf vorbereiten: Fülle den großen Topf mit Blumenerde. Lasse oben einen Rand von ca. 5 cm frei.
2. Pflanzloch: Grabe ein Pflanzloch, das groß genug ist, um den Wurzelballen der Jungpflanze aufzunehmen.
3. Einsetzen: Nimm die Jungpflanze vorsichtig aus dem Anzuchttopf und setze sie in das Pflanzloch. Achte darauf, die Wurzeln nicht zu beschädigen.
4. Auffüllen: Fülle das Pflanzloch mit Erde auf und drücke sie leicht an.
5. Gießen: Gieße die Pflanze gründlich an.
6. Rankhilfe anbringen: Platziere die Rankhilfe im Topf und leite die Triebe der Wassermelone daran entlang.
Pflege: Damit deine Wassermelone prächtig gedeiht
Die richtige Pflege ist entscheidend für eine reiche Ernte. Hier sind einige Tipps, die du beachten solltest:
* Gießen: Wassermelonen brauchen viel Wasser, besonders während der Blüte- und Fruchtbildungsphase. Gieße regelmäßig und gründlich, am besten morgens oder abends. Vermeide es, die Blätter zu benetzen, um Pilzkrankheiten vorzubeugen.
* Düngen: Dünge die Pflanzen regelmäßig mit einem Flüssigdünger oder einem Langzeitdünger. Befolge die Anweisungen auf der Verpackung.
* Ausgeizen: Entferne regelmäßig Seitentriebe, um die Bildung von Früchten zu fördern. Lasse nur die Haupttriebe wachsen.
* Bestäubung: Wassermelonen sind auf die Bestäubung durch Bienen und andere Insekten angewiesen. Wenn du wenig Insekten in deinem Garten hast, kannst du die Blüten auch von Hand bestäuben. Übertrage dazu mit einem Pinsel Pollen von den männlichen auf die weiblichen Blüten. Die weiblichen Blüten erkennst du an dem kleinen Fruchtansatz unterhalb der Blüte.
* Fruchtunterlage: Lege unter die wachsenden Früchte eine Unterlage aus Stroh oder Holz, um sie vor Fäulnis zu schützen.
* Schutz vor Schädlingen und Krankheiten: Kontrolliere die Pflanzen regelmäßig auf Schädlinge und Krankheiten. Bei Bedarf kannst du biologische Pflanzenschutzmittel einsetzen.
Ernte: Der Lohn für deine Mühe
Die Erntezeit ist der Höhepunkt der Wassermelonen-Zucht. Aber wann ist der richtige Zeitpunkt?
1. Reifezeichen: Achte auf folgende Reifezeichen:
* Die Schale der Wassermelone verliert ihren Glanz und wird matter.
* Die Stelle, an der die Wassermelone auf dem Boden liegt, verfärbt sich von weiß nach gelblich.
* Wenn du auf die Wassermelone klopfst, sollte sie hohl klingen.
* Die Ranke, die mit der Wassermelone verbunden ist, wird trocken und braun.
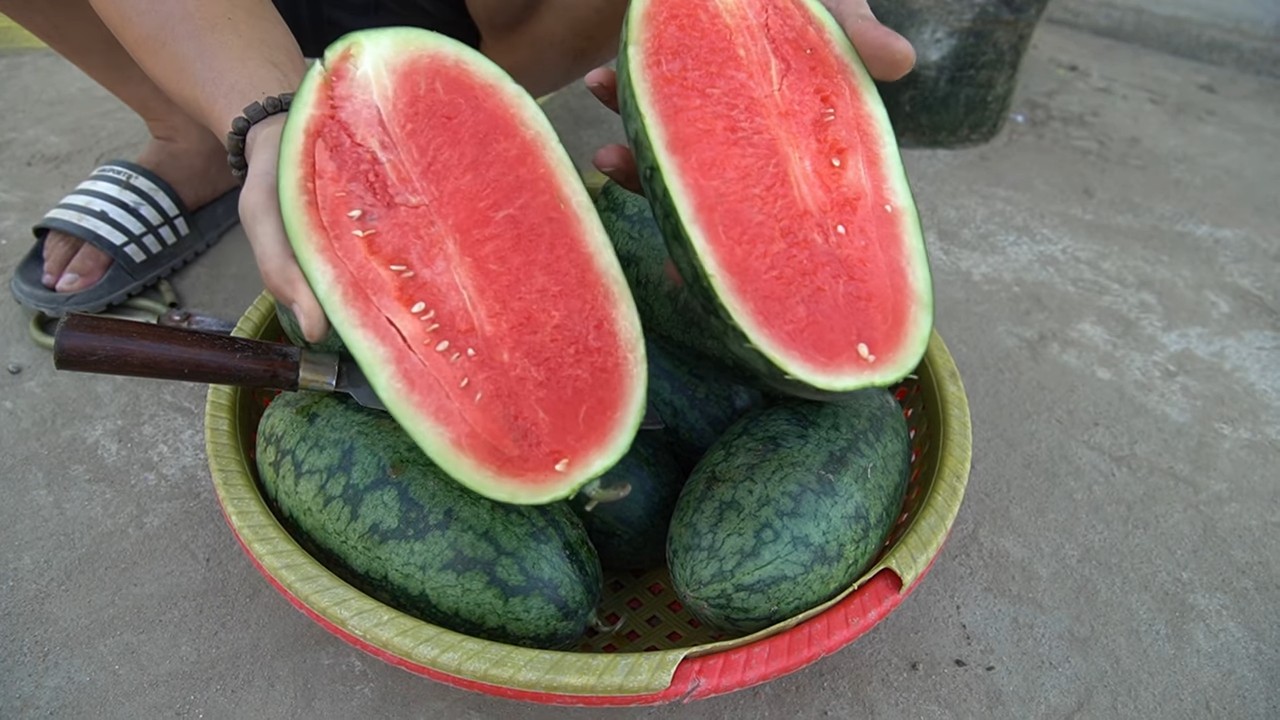
2. Ernte: Schneide die Wassermelone vorsichtig mit einem scharfen Messer von der Ranke ab. Lasse einen kleinen Stielansatz stehen.
3. Genießen: Jetzt kannst du deine selbst gezogene Wassermelone genießen! Sie schmeckt am besten gekühlt.
Zusätzliche Tipps für eine erfolgreiche Wassermelonen-Zucht im Topf
* Sortenwahl: Achte bei der Sortenwahl auf die Größe der Früchte. Kleinere Sorten sind besser für den Anbau im Topf geeignet.
* Bewässerungssystem: Ein automatisches Bewässerungssystem kann dir viel Arbeit ersparen, besonders an heißen Tagen.
* Windschutz: Stelle den Topf an einen windgeschützten Ort, um zu verhindern, dass die Pflanzen umknicken.
* Schattierung: An sehr heißen Tagen kann eine Schattierung die Pflanzen vor Verbrennungen schützen.
* Geduld: Die Wassermelonen-Zucht braucht Zeit und Geduld. Lass dich nicht entmutigen, wenn es nicht gleich beim ersten Mal klappt.
Ich hoffe, diese Anleitung hilft dir dabei, deine eigenen Wassermelonen im Topf zu ziehen. Es ist ein tolles Gefühl, die Früchte seiner Arbeit zu ernten und zu genießen. Viel Erfolg und guten Appetit!
Conclusion
So, there you have it! Growing watermelons in containers might seem like a daunting task, reserved for sprawling farms and endless fields, but as we’ve shown, it’s entirely achievable, even in the smallest of spaces. This DIY trick opens up a world of possibilities for urban gardeners, balcony enthusiasts, and anyone who dreams of biting into a juicy, homegrown watermelon without the commitment of a traditional garden plot.
The beauty of this method lies in its accessibility and control. You dictate the soil quality, the watering schedule, and the sun exposure, creating the perfect microclimate for your watermelon to thrive. No more battling unpredictable weather patterns or contending with nutrient-depleted soil. Container gardening puts you firmly in the driver’s seat.
But why is this DIY trick a must-try? Beyond the sheer satisfaction of nurturing a watermelon from seed to fruit, it’s about reclaiming your food source. It’s about knowing exactly what goes into your food, free from harmful pesticides and artificial fertilizers. It’s about reducing your carbon footprint by eliminating the transportation miles associated with store-bought watermelons. And, let’s be honest, there’s nothing quite like the taste of a watermelon you’ve grown yourself – the sweetness is simply unparalleled.
Ready to take your container gardening to the next level? Consider these variations:
* Vertical Watermelon Growing: Utilize trellises or sturdy supports to train your watermelon vines upwards. This saves space and improves air circulation, reducing the risk of fungal diseases. Choose smaller, bush-type watermelon varieties for best results.
* Companion Planting: Plant basil, marigolds, or nasturtiums around your watermelon container. These companion plants can deter pests and attract beneficial insects, creating a healthier growing environment.
* Grafted Watermelons: Explore grafted watermelon plants, which are often more disease-resistant and produce higher yields. These are readily available at many nurseries.
* Different Varieties: Experiment with different watermelon varieties suited for container growing. Sugar Baby, Bush Sugar Baby, and Golden Midget are all excellent choices. Don’t be afraid to try something new and discover your favorite!
We’ve armed you with the knowledge and the inspiration. Now, it’s your turn to get your hands dirty! Gather your supplies, choose your watermelon variety, and embark on this rewarding gardening adventure. We’re confident that you’ll be amazed by the results.
Don’t forget to document your journey! Share your photos, tips, and experiences with us and the wider gardening community. Let’s inspire others to embrace the joy of growing their own watermelons, one container at a time. Use the hashtag #ContainerWatermelon or tag us in your posts. We can’t wait to see your watermelon growing success stories! Happy gardening!
Frequently Asked Questions (FAQ)
1. What is the best size container for growing watermelons?
The ideal container size for growing watermelons is at least 20 gallons, but larger is generally better. A half-barrel planter or a large, sturdy plastic tub works well. The key is to provide ample space for the roots to develop and support the growing vine and fruit. Smaller varieties like Sugar Baby might tolerate a slightly smaller container (around 15 gallons), but larger varieties will definitely need the extra room. Ensure the container has adequate drainage holes to prevent waterlogging.
2. What type of soil should I use for container watermelons?
Use a high-quality potting mix that is well-draining and rich in organic matter. Avoid using garden soil, as it can become compacted in containers and hinder root growth. A good potting mix will retain moisture while allowing excess water to drain away. You can also amend the potting mix with compost or aged manure to provide additional nutrients. A slightly acidic to neutral pH (around 6.0 to 7.0) is ideal for watermelons.
3. How often should I water my container watermelon plant?
Watermelon plants need consistent moisture, especially during hot weather and fruit development. Water deeply whenever the top inch of soil feels dry to the touch. This may mean watering daily or even twice a day during peak summer months. Avoid overhead watering, as it can increase the risk of fungal diseases. Instead, water at the base of the plant. Monitor the plant closely for signs of overwatering (yellowing leaves) or underwatering (wilting leaves).
4. How much sunlight do container watermelons need?
Watermelons require at least 6-8 hours of direct sunlight per day to thrive. Choose a location that receives ample sunlight throughout the day. If you live in a particularly hot climate, some afternoon shade may be beneficial to prevent the plant from overheating. If you don’t have a sunny spot, consider using grow lights to supplement the sunlight.
5. How do I pollinate my watermelon flowers?
Watermelons have separate male and female flowers. Bees and other pollinators typically handle pollination, but if you’re growing watermelons indoors or in an area with limited pollinators, you may need to hand-pollinate. To hand-pollinate, use a small paintbrush to collect pollen from the male flower (which has a long, thin stem) and transfer it to the female flower (which has a small, immature watermelon at its base). Do this in the morning when the flowers are open.
6. How do I fertilize my container watermelon plant?
Watermelons are heavy feeders and require regular fertilization. Start with a balanced fertilizer (e.g., 10-10-10) when planting. Once the plant starts to flower, switch to a fertilizer higher in phosphorus and potassium (e.g., 5-10-10) to promote fruit development. Fertilize every 2-3 weeks, following the instructions on the fertilizer package. You can also supplement with compost tea or liquid seaweed extract.
7. How do I know when my watermelon is ripe?
Determining when a watermelon is ripe can be tricky, but here are a few indicators:
* The tendril closest to the fruit turns brown and dry.
* The underside of the watermelon (where it rests on the ground) turns from white to a creamy yellow.
* The watermelon sounds dull and hollow when you thump it.
* The skin becomes slightly dull and less shiny.
It takes practice to master the art of watermelon ripeness, so don’t be discouraged if you don’t get it right the first time.
8. What are some common pests and diseases that affect container watermelons?
Common pests that can affect container watermelons include aphids, spider mites, and squash bugs. Regularly inspect your plants for signs of infestation and treat accordingly with insecticidal soap or neem oil. Common diseases include powdery mildew and fusarium wilt. Ensure good air circulation and avoid overhead watering to prevent these diseases. If necessary, use a fungicide labeled for use on watermelons.
9. Can I grow watermelons in hanging baskets?
While it’s technically possible to grow very small, miniature watermelon varieties in hanging baskets, it’s generally not recommended. Watermelons are heavy feeders and require a lot of space for their roots to develop. A hanging basket is unlikely to provide sufficient support for the growing vine and fruit. It’s better to stick to larger containers for growing watermelons.
10. How do I support the weight of the watermelon fruit?
As the watermelon fruit grows, it can become quite heavy and may need support to prevent the vine from breaking. You can use slings made from old t-shirts, pantyhose, or netting to support the fruit. Tie the slings to a sturdy trellis or support structure. This will help distribute the weight of the watermelon and prevent it from falling off the vine prematurely.


Leave a Comment