
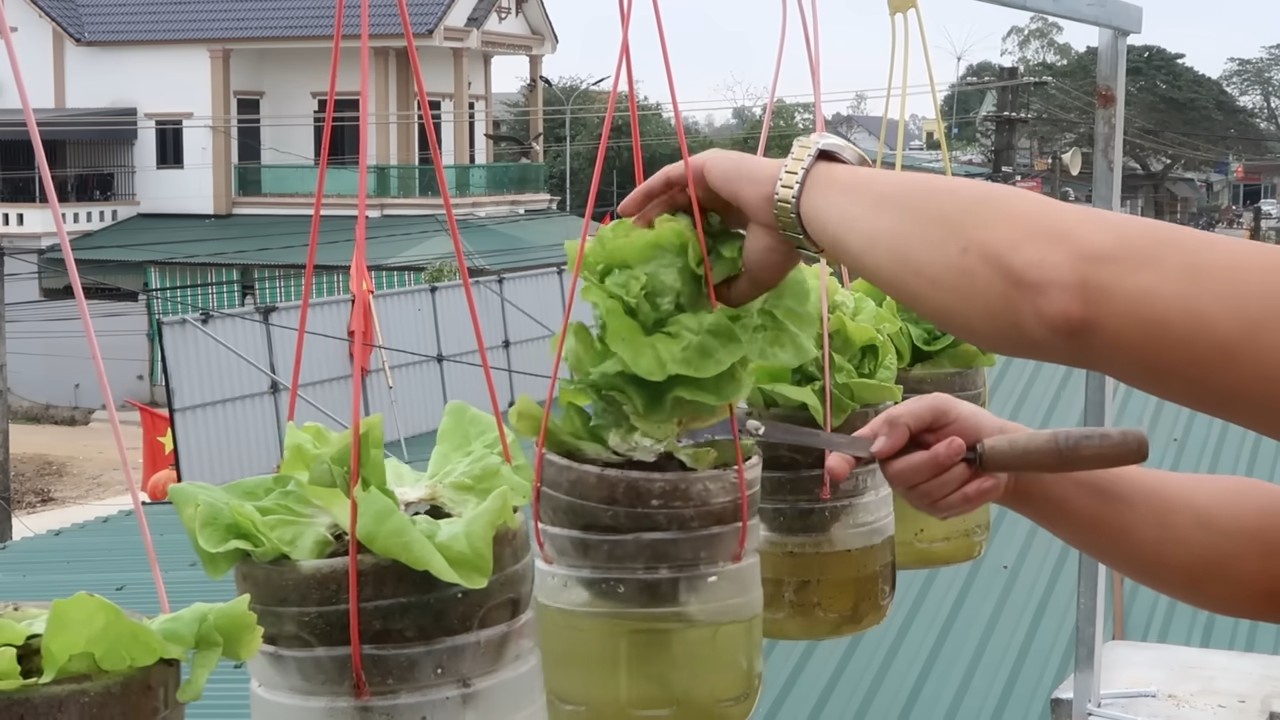
Self Watering Hanging Lettuce: Imagine fresh, crisp lettuce, bursting with flavor, hanging right outside your kitchen window, ready to be snipped and tossed into your salad. Sounds dreamy, right? Well, it doesn’t have to be just a dream! In this article, I’m going to show you how to create your very own self-watering hanging lettuce garden – a simple, affordable, and incredibly rewarding DIY project.
Hanging gardens, in general, have a rich history, evoking images of the legendary Hanging Gardens of Babylon, one of the Seven Wonders of the Ancient World. While we might not be building anything quite that grand, the principle remains the same: bringing greenery and sustenance into our living spaces in innovative ways. For centuries, people have cultivated plants vertically, maximizing space and adding beauty to their surroundings.
But why self watering hanging lettuce, specifically? Well, let’s face it, life gets busy! We all want fresh, healthy food, but remembering to water our plants every single day can be a challenge. This DIY project solves that problem. The self-watering system ensures your lettuce stays consistently hydrated, even when you’re away on vacation or simply forget. Plus, growing lettuce vertically saves space, making it perfect for apartments, balconies, or even small patios. You’ll not only enjoy delicious, homegrown lettuce, but you’ll also add a touch of green elegance to your home. So, let’s get started and create your own little slice of edible paradise!
DIY Selbstbewässernder Hänge-Kopfsalat: Eine Schritt-für-Schritt Anleitung
Hallo liebe Gartenfreunde! Habt ihr Lust auf frischen Kopfsalat direkt von eurem Balkon oder eurer Terrasse? Dann habe ich hier das perfekte DIY-Projekt für euch: einen selbstbewässernden Hänge-Kopfsalat! Das ist nicht nur super praktisch, sondern auch ein echter Hingucker. Und das Beste daran? Es ist einfacher, als ihr denkt! Lasst uns loslegen!
Was du brauchst: Die Materialliste
Bevor wir starten, hier eine Liste aller Materialien, die du für dieses Projekt benötigst. Keine Sorge, die meisten davon hast du wahrscheinlich schon zu Hause!
* Zwei gleich große Pflanzgefäße (aus Plastik oder Terrakotta, ca. 25-30 cm Durchmesser)
* Einen Bohrer mit verschiedenen Aufsätzen (für Holz und Plastik/Terrakotta)
* Eine Stichsäge (optional, für größere Löcher)
* Pflanzerde (am besten Bio-Qualität)
* Kopfsalat-Setzlinge (oder Samen, wenn du etwas mehr Geduld hast)
* Eine alte Plastikflasche (ca. 1,5-2 Liter)
* Ein Stück Stoff (z.B. ein altes T-Shirt oder ein Stück Vlies)
* Eine Schere oder ein Messer
* Eine stabile Kette oder starkes Seil (zum Aufhängen)
* Ein paar Steine oder Kies (für die Drainage)
* Handschuhe (zum Schutz deiner Hände)
* Gießkanne oder Schlauch
Die Vorbereitung: Alles bereit machen
Bevor wir mit dem eigentlichen Bau beginnen, ist es wichtig, alles vorzubereiten. Das spart Zeit und Nerven!
1. Die Pflanzgefäße reinigen: Reinige beide Pflanzgefäße gründlich mit Wasser und eventuell etwas Spülmittel. So entfernst du Schmutz und eventuelle Krankheitserreger.
2. Die Plastikflasche vorbereiten: Entferne das Etikett von der Plastikflasche und spüle sie gründlich aus. Diese Flasche wird unser Wasserreservoir.
3. Den Stoff zuschneiden: Schneide ein Stück Stoff zu, das groß genug ist, um den Boden des oberen Pflanzgefäßes abzudecken. Dieses Stück Stoff dient als Filter, damit die Erde nicht in das Wasserreservoir gelangt.
4. Die Werkzeuge bereitlegen: Stelle sicher, dass du alle Werkzeuge griffbereit hast. Das spart Zeit und vermeidet unnötige Unterbrechungen.
Der Bau: Schritt für Schritt zum selbstbewässernden Hänge-Kopfsalat
Jetzt geht es ans Eingemachte! Folge diesen Schritten, um deinen eigenen selbstbewässernden Hänge-Kopfsalat zu bauen.
1. Das untere Pflanzgefäß vorbereiten (Wasserreservoir)
1. Bohre Löcher für die Aufhängung: Bohre mit einem geeigneten Bohraufsatz drei oder vier Löcher gleichmäßig verteilt am oberen Rand des unteren Pflanzgefäßes. Diese Löcher dienen zur Befestigung der Kette oder des Seils zum Aufhängen. Achte darauf, dass die Löcher groß genug sind, um die Kette oder das Seil hindurchzufädeln.
2. Die Plastikflasche vorbereiten: Schneide den Boden der Plastikflasche ab. Du kannst dafür eine Schere oder ein Messer verwenden. Sei dabei vorsichtig, um dich nicht zu verletzen. Die abgeschnittene Flasche wird kopfüber in das untere Pflanzgefäß gestellt und dient als Wasserreservoir.
3. Die Plastikflasche fixieren: Bohre kleine Löcher in den Deckel der Plastikflasche. Diese Löcher ermöglichen es dem Wasser, langsam in die Erde des oberen Pflanzgefäßes zu sickern.
4. Die Plastikflasche einsetzen: Stelle die vorbereitete Plastikflasche kopfüber in das untere Pflanzgefäß. Der Deckel mit den Löchern sollte nach oben zeigen.
2. Das obere Pflanzgefäß vorbereiten (Pflanzgefäß)
1. Bohre Löcher für die Drainage: Bohre mit einem geeigneten Bohraufsatz mehrere Löcher in den Boden des oberen Pflanzgefäßes. Diese Löcher sorgen für eine gute Drainage und verhindern Staunässe.
2. Bohre Löcher für die Aufhängung: Bohre auch hier drei oder vier Löcher gleichmäßig verteilt am oberen Rand des oberen Pflanzgefäßes. Diese Löcher müssen mit den Löchern im unteren Pflanzgefäß übereinstimmen, damit du die Kette oder das Seil durch beide Gefäße fädeln kannst.
3. Den Stoff einlegen: Lege das zugeschnittene Stück Stoff über die Drainagelöcher im Boden des oberen Pflanzgefäßes. Der Stoff verhindert, dass die Erde in das Wasserreservoir gelangt.
4. Die Drainage hinzufügen: Fülle eine Schicht Steine oder Kies auf den Stoff. Diese Schicht sorgt für eine zusätzliche Drainage und verhindert, dass die Erde die Drainagelöcher verstopft.
3. Die Montage: Alles zusammenfügen
1. Das obere Pflanzgefäß aufsetzen: Setze das obere Pflanzgefäß auf das untere Pflanzgefäß. Achte darauf, dass die Löcher für die Aufhängung übereinstimmen.
2. Die Aufhängung befestigen: Fädle die Kette oder das Seil durch die Löcher in beiden Pflanzgefäßen. Achte darauf, dass die Aufhängung stabil ist und das Gewicht der Pflanzgefäße und der Erde tragen kann.
3. Die Erde einfüllen: Fülle das obere Pflanzgefäß mit Pflanzerde. Lasse dabei etwa 2-3 cm Platz bis zum Rand.
4. Das Bepflanzen: Der Kopfsalat zieht ein
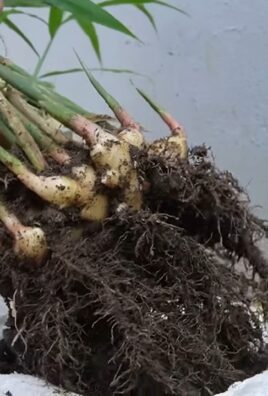
1. Die Setzlinge vorbereiten: Nimm die Kopfsalat-Setzlinge vorsichtig aus ihren Töpfen. Lockere die Wurzeln etwas auf, damit sie besser anwachsen können.
2. Die Setzlinge einpflanzen: Pflanze die Kopfsalat-Setzlinge in die Erde. Achte darauf, dass sie genügend Platz haben, um zu wachsen. Der Abstand zwischen den Setzlingen sollte etwa 15-20 cm betragen.
3. Angießen: Gieße die Setzlinge nach dem Einpflanzen gründlich an.
5. Die Bewässerung: Das Wasserreservoir füllen
1. Das Wasserreservoir füllen: Fülle das untere Pflanzgefäß durch die Öffnung der Plastikflasche mit Wasser. Achte darauf, dass du nicht zu viel Wasser einfüllst, damit die Erde im oberen Pflanzgefäß nicht zu nass wird.
2. Regelmäßig kontrollieren: Kontrolliere regelmäßig den Wasserstand im unteren Pflanzgefäß und fülle bei Bedarf Wasser nach. Wie oft du nachfüllen musst, hängt von der Witterung und dem Wasserbedarf des Kopfsalats ab.
Die Pflege: Damit dein Kopfsalat prächtig gedeiht
Damit dein selbstbewässernder Hänge-Kopfsalat prächtig gedeiht, solltest du folgende Tipps beachten:
* Standort: Stelle den Hänge-Kopfsalat an einen sonnigen bis halbschattigen Standort. Kopfsalat benötigt mindestens 4-6 Stunden Sonnenlicht pro Tag.
* Bewässerung: Kontrolliere regelmäßig den Wasserstand im unteren Pflanzgefäß und fülle bei Bedarf Wasser nach. Achte darauf, dass die Erde im oberen Pflanzgefäß nicht zu nass wird.
* Düngung: Dünge den Kopfsalat regelmäßig mit einem organischen Dünger. Das sorgt für ein gesundes Wachstum und eine reiche Ernte.
* Schutz vor Schädlingen: Kontrolliere den Kopfsalat regelmäßig auf Schädlinge wie Schnecken oder Blattläuse. Bei Bedarf kannst du natürliche Schädlingsbekämpfungsmittel einsetzen.
* Ernte: Ernte den Kopfsalat, sobald er die gewünschte Größe erreicht hat. Du kannst entweder ganze Köpfe ernten oder nur einzelne Blätter abzupfen.
Zusätzliche Tipps und Tricks
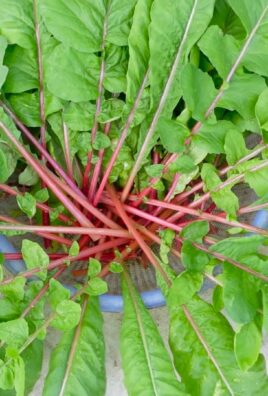
* Verwende verschiedene Kopfsalatsorten: Probiere verschiedene Kopfsalatsorten aus, um herauszufinden, welche dir am besten schmecken. Es gibt viele verschiedene Sorten mit unterschiedlichen Geschmacksrichtungen und Texturen.
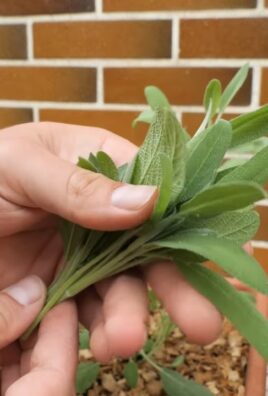
* Kombiniere mit anderen Kräutern: Pflanze neben dem Kopfsalat auch andere Kräuter wie Petersilie, Schnittlauch

Conclusion
So, there you have it! Creating your own self-watering hanging lettuce planter is not just a fun weekend project; it’s a game-changer for anyone who loves fresh, homegrown greens but struggles with space or time. We’ve walked you through the simple steps, highlighting how easy it is to repurpose materials and create a thriving vertical garden.
Why is this DIY trick a must-try? Because it addresses several key challenges faced by home gardeners. First, it maximizes space. If you’re living in an apartment, have a small balcony, or simply want to make the most of your existing garden, a hanging planter is the perfect solution. It allows you to grow a substantial amount of lettuce without taking up valuable ground space. Second, it simplifies watering. The self-watering reservoir ensures that your lettuce receives a consistent supply of moisture, reducing the risk of underwatering or overwatering – common mistakes that can lead to wilting or root rot. This is especially beneficial for those who travel frequently or have busy schedules. Third, it elevates your lettuce, literally! Hanging the planter helps to deter pests like slugs and snails, which can wreak havoc on your leafy greens. It also improves air circulation around the plants, reducing the risk of fungal diseases.
But the benefits don’t stop there. This project is incredibly customizable. Feel free to experiment with different types of containers. While we’ve suggested using a plastic bucket or basket, you could also repurpose old tires, wooden crates, or even fabric grow bags. Just make sure that the container is sturdy enough to hold the weight of the soil and water, and that it has adequate drainage holes.
Consider exploring different lettuce varieties as well. While romaine and butter lettuce are popular choices, you could also try growing loose-leaf varieties like oakleaf or red sails, which are known for their vibrant colors and textures. For a spicier kick, add some arugula or mustard greens to the mix.
And don’t limit yourself to just lettuce! This self-watering system can also be used to grow other herbs and vegetables, such as spinach, kale, strawberries, and even cherry tomatoes. Just be sure to choose plants that have similar watering requirements.
Ready to take the plunge and create your own self-watering hanging lettuce garden? We encourage you to give it a try! Not only will you enjoy a bountiful harvest of fresh, delicious lettuce, but you’ll also experience the satisfaction of creating something beautiful and functional with your own two hands.
Once you’ve built your planter and started growing your lettuce, we’d love to hear about your experience. Share your photos, tips, and tricks on social media using the hashtag #SelfWateringLettuce. Let’s inspire others to embrace the joys of homegrown food and sustainable gardening practices. We are confident that you will find that this method of growing lettuce is a rewarding and efficient way to enjoy fresh greens all season long. So, get your hands dirty and start growing!
Frequently Asked Questions (FAQ)
What type of container is best for a self-watering hanging lettuce planter?
The best type of container is one that is durable, lightweight, and has good drainage. Plastic buckets, hanging baskets, and even repurposed containers like old tires or wooden crates can work well. Ensure the container is strong enough to hold the weight of the soil and water. Also, make sure to drill adequate drainage holes in the bottom to prevent waterlogging. The size of the container will depend on how much lettuce you want to grow. A 5-gallon bucket is a good starting point.
What kind of soil should I use for my self-watering hanging lettuce planter?
Use a well-draining potting mix that is rich in organic matter. Avoid using garden soil, as it can become compacted and prevent proper drainage. A good potting mix will retain moisture while still allowing air to circulate around the roots. You can also amend the potting mix with compost or other organic materials to improve its fertility. Consider adding perlite or vermiculite to further enhance drainage.
How often should I water my self-watering hanging lettuce planter?
The beauty of a self-watering system is that it reduces the frequency of watering. However, you’ll still need to check the water reservoir regularly and refill it as needed. The frequency will depend on factors such as the weather, the size of the container, and the type of lettuce you’re growing. In general, you’ll need to refill the reservoir every few days during hot, dry weather, and less frequently during cooler, wetter weather. Check the soil moisture level by sticking your finger into the soil. If the top inch or two feels dry, it’s time to refill the reservoir.
What type of lettuce grows best in a hanging planter?
Loose-leaf lettuce varieties, such as romaine, butter lettuce, oakleaf, and red sails, are well-suited for hanging planters. These varieties tend to be more compact and have shallower root systems than head lettuce varieties. They also offer a continuous harvest, as you can pick individual leaves as needed. Experiment with different varieties to find your favorites.
How much sunlight does my hanging lettuce planter need?
Lettuce needs at least 6 hours of sunlight per day to thrive. Choose a location for your hanging planter that receives plenty of sunlight, especially in the morning. If you live in a hot climate, consider providing some afternoon shade to prevent the lettuce from bolting (going to seed). You can also use shade cloth to protect the plants from intense sunlight.
How do I prevent pests from attacking my lettuce?
Hanging the planter helps to deter some pests, such as slugs and snails. However, other pests, such as aphids and cabbage worms, may still be a problem. Inspect your lettuce plants regularly for signs of pests. If you find any, you can try spraying them with insecticidal soap or neem oil. You can also use row covers to protect the plants from pests. Companion planting with herbs like basil and mint can also help to repel pests.
How do I harvest my lettuce?
Harvest lettuce by picking individual leaves as needed. Start with the outer leaves, which are the oldest and largest. Leave the inner leaves to continue growing. This will allow you to enjoy a continuous harvest for several weeks. Avoid harvesting lettuce during the hottest part of the day, as the leaves will be more likely to wilt.
Can I grow other vegetables in my self-watering hanging planter?
Yes, you can grow other herbs and vegetables in your self-watering hanging planter, as long as they have similar watering requirements to lettuce. Good choices include spinach, kale, strawberries, and cherry tomatoes. Be sure to choose plants that are appropriate for the size of the container.
How do I prevent my lettuce from bolting?
Bolting is when lettuce plants prematurely go to seed, which can make the leaves bitter. To prevent bolting, choose bolt-resistant lettuce varieties, provide afternoon shade, and water regularly. You can also harvest the lettuce frequently to encourage new growth.
How do I overwinter my self-watering hanging lettuce planter?
In mild climates, you may be able to overwinter your lettuce plants. Move the planter to a sheltered location, such as a greenhouse or garage. Provide supplemental light if needed. Water sparingly during the winter months. In colder climates, it’s best to start new lettuce plants in the spring.
Leave a Comment