
Clean Grout and Tile: Your Guide to Sparkling Floors
I love the feeling of walking into a bathroom or kitchen with sparkling clean floors. There’s something incredibly satisfying about that fresh, clean look, and it instantly elevates the entire space. But let’s be honest, keeping grout and tile clean can feel like a never-ending battle! That’s why I’m so excited to share my favorite clean grout and tile tricks and DIY solutions with you today. This isn’t just about aesthetics; it’s about creating a healthier home environment. Dirty grout can harbor bacteria and allergens, impacting the air quality we breathe.
Historically, maintaining clean tile floors was a significant undertaking. Before the advent of modern cleaning products, people relied on natural ingredients and elbow grease. Think scrubbing with homemade pastes and using natural abrasives. While those methods still hold merit, we now have access to a wider range of effective and efficient clean grout and tile solutions that make the process much easier.
Why You Need These DIY Clean Grout and Tile Hacks
This article isn’t just about cleaning; it’s about empowering you to tackle this chore effectively and affordably. Whether you’re a seasoned DIY enthusiast or a complete beginner, these simple yet powerful techniques will help you achieve professional-looking results without breaking the bank. You’ll learn how to banish stubborn grime, restore the original color of your grout, and prevent future build-up. Get ready to transform your floors and rediscover the beauty of your tiles!
Cleaning Grout and Tile: A Sparkling DIY Guide
I’ve always loved the look of clean, bright grout and tile. It makes such a difference in a bathroom or kitchen! But let’s be honest, keeping it that way can be a real chore. This guide will walk you through my favorite method for getting your grout and tile sparkling clean, even if it’s looking pretty grim. Get ready to be amazed!
Gathering Your Supplies
- Cleaning Solution: I prefer a mixture of baking soda and white vinegar. It’s natural, effective, and readily available. You can also use a commercial grout cleaner, but I’ll focus on the DIY method here.
- Spray Bottle: To easily apply your cleaning solution.
- Scrub Brush: A stiff-bristled brush is essential for tackling stubborn grout stains. An old toothbrush works great for smaller areas or detailed cleaning.
- Bucket: For rinsing your brush and cleaning cloths.
- Cleaning Cloths or Sponges: Microfiber cloths are my go-to for their absorbency and effectiveness.
- Protective Gloves: Always protect your hands with rubber gloves when using cleaning solutions.
- Optional: A grout brush with a pointed tip for reaching those hard-to-clean corners. A small handheld steam cleaner can also be a game changer for tough stains.
Preparing the Area
1. Clear the Area: Remove any items from the area you’ll be cleaning. This includes toiletries, rugs, and anything else that might get in the way. The more space you have, the easier the cleaning process will be.
2. Pre-Clean: Give the tile and grout a quick sweep or vacuum to remove loose dirt and debris. This prevents you from spreading grime around as you clean.
3. Protect Surrounding Areas: If you’re concerned about getting cleaning solution on nearby surfaces, use painter’s tape to mask off the areas you don’t want to clean.
Mixing Your Cleaning Solution
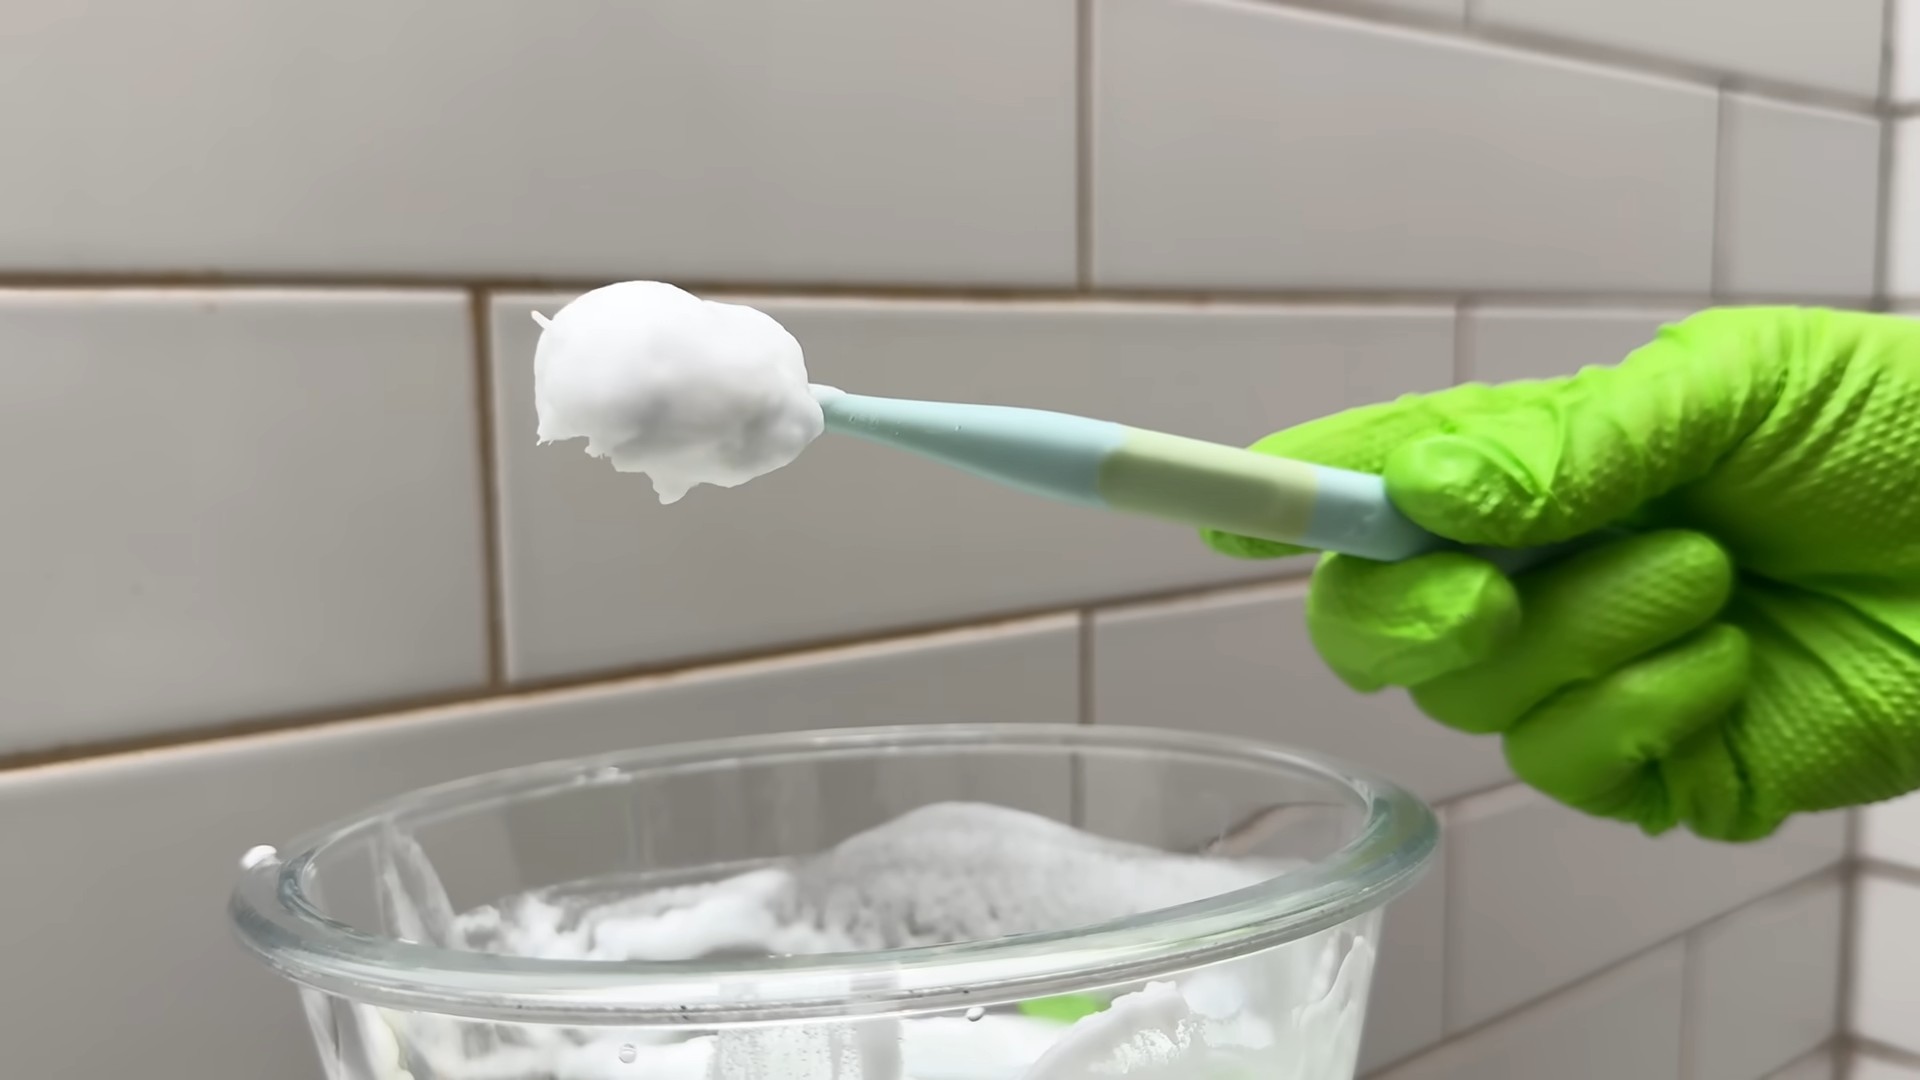
1. Baking Soda Paste (for tough stains): In a small bowl, mix 1/4 cup of baking soda with just enough water to create a thick paste. This paste is excellent for scrubbing away stubborn stains.
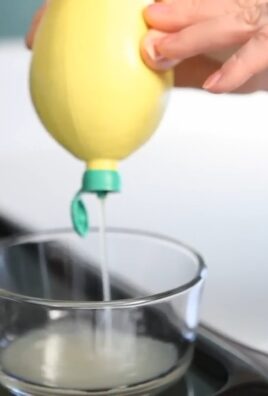
2. Vinegar Solution (for general cleaning): In your spray bottle, combine equal parts white vinegar and water. Shake well to mix. This solution is perfect for loosening dirt and grime.
Cleaning the Grout and Tile
1. Apply the Cleaning Solution: For general cleaning, spray the vinegar solution liberally onto the grout and tile. For tough stains, apply the baking soda paste directly to the affected areas using a brush or your finger (wearing gloves!).
2. Scrub-a-dub-dub: Using your scrub brush, vigorously scrub the grout and tile. Pay special attention to areas with heavy staining. Don’t be afraid to put some elbow grease into it! For really stubborn stains, let the baking soda paste sit for 10-15 minutes before scrubbing.
3. Rinse Thoroughly: Once you’ve scrubbed the entire area, rinse the tile and grout with clean water. Use a bucket and cleaning cloths to wipe away the cleaning solution and loosened dirt. Make sure to rinse well to remove all traces of the cleaning solution.
4. Repeat if Necessary: If some stains persist, repeat steps 1-3. For extremely stubborn stains, you may need to repeat the process several times or consider using a stronger commercial cleaner. However, I’ve found that the baking soda and vinegar combination works wonders for most situations.
Dealing with Specific Problems
Mildew and Mold
Prevention is Key:
Good ventilation is crucial in preventing mildew and mold growth. Always ensure proper ventilation in your bathroom or kitchen.
Treatment:
For mildew and mold, you might need a stronger approach. A solution of bleach and water (1 part bleach to 10 parts water) can be effective, but always wear protective gear, including gloves, eye protection, and a mask, when working with bleach. Make sure to test this solution in an inconspicuous area first to ensure it doesn’t damage your tile. After applying the bleach solution, rinse thoroughly. Never mix bleach with other cleaning products.
Grout that’s Cracked or Damaged
If your grout is severely cracked or damaged, cleaning alone won’t solve the problem. You’ll likely need to re-grout the affected areas. This is a more involved process that requires specific tools and materials. Consider consulting a professional for this task if you’re not comfortable doing it yourself.
Drying and Finishing Touches
1. Dry the Area: After rinsing, use clean, dry cloths or sponges to wipe down the tile and grout. Make sure to remove all excess water to prevent water spots.
2. Let it Air Dry: Allow the area to air dry completely. You can speed up the process by using a fan, but avoid using harsh heat.
3. Admire Your Work: Step back and admire your sparkling clean grout and tile! You’ve worked hard, and the results are well worth the effort.
Maintaining Cleanliness
To keep your grout and tile looking their best, try to clean them regularly. A quick wipe-down after each shower or use will prevent dirt and grime from building up. Regular cleaning will make future deep cleans much easier. Consider using a grout sealer to help prevent staining in the future.

Conclusion
So there you have it! Our guide to achieving sparkling clean grout and tile. This DIY method isn’t just about saving money on expensive cleaning services; it’s about reclaiming control over your home’s cleanliness and achieving a level of shine that professional cleaners often struggle to match. This simple, effective, and affordable approach to clean grout and tile is a must-try for anyone looking to revitalize their bathroom or kitchen. The satisfaction of transforming dingy, grimy grout into bright, pristine surfaces is incredibly rewarding. You’ll be amazed at the difference a little elbow grease and the right techniques can make. The results speak for themselves – a cleaner, healthier, and more aesthetically pleasing space. Forget harsh chemicals and expensive equipment; this method empowers you to achieve professional-level results using readily available ingredients. It’s a testament to the power of simple solutions and a reminder that sometimes, the best cleaning methods are the most straightforward.
Beyond the basic method outlined, there are several ways to personalize your clean grout and tile experience. For stubborn stains, consider pre-treating the grout with a paste of baking soda and water, allowing it to sit for 15-20 minutes before scrubbing. If you have particularly porous grout, you might find that a second application of the cleaning solution enhances the results. Experiment with different types of brushes – a stiff-bristled brush is great for heavy-duty cleaning, while a softer brush is ideal for delicate tiles. For larger areas, consider using a grout brush with a long handle to avoid unnecessary bending and strain. Remember, safety first! Always wear gloves to protect your hands from harsh chemicals (even natural ones) and ensure proper ventilation.
Ultimately, the best way to experience the transformative power of this DIY clean grout and tile method is to try it yourself. Don’t be afraid to experiment and find what works best for your specific tiles and grout. We encourage you to share your before-and-after photos with us on social media – we’d love to see the amazing results you achieve! Let us know what variations you tried and what worked best for you. Your feedback will help inspire others to tackle their own grout cleaning projects with confidence. Join the clean grout and tile revolution and experience the joy of a sparkling clean home!
Frequently Asked Questions
What types of grout are suitable for this cleaning method?
This method works effectively on most types of grout, including ceramic, porcelain, and natural stone grout. However, always test a small, inconspicuous area first to ensure the cleaning solution doesn’t damage the grout or tiles. For delicate or antique tiles, a gentler approach might be necessary. Always refer to the manufacturer’s recommendations for cleaning your specific tiles and grout.
How often should I clean my grout and tiles using this method?
The frequency of cleaning depends on the level of traffic and use in your bathroom or kitchen. For high-traffic areas, you might need to clean your grout and tiles every few weeks. For less frequently used areas, cleaning every few months might suffice. Regular cleaning prevents dirt and grime from building up, making future cleaning sessions much easier.
Can I use this method on all types of tiles?
While this method is generally safe for most tile types, it’s crucial to test a small, inconspicuous area first. Some delicate tiles, such as certain types of marble or polished stone, might be susceptible to scratching or damage. Always consult the manufacturer’s instructions for cleaning your specific tiles.
What if I have stubborn stains that won’t come out?
For stubborn stains, consider pre-treating the grout with a paste of baking soda and water, allowing it to sit for 15-20 minutes before scrubbing. You can also try using a commercial grout cleaner as a last resort, but always follow the manufacturer’s instructions carefully. For particularly persistent stains, professional cleaning might be necessary.
Are there any safety precautions I should take?
Always wear gloves to protect your hands from the cleaning solution, even if it’s a natural one. Ensure proper ventilation in the area you’re cleaning to avoid inhaling any fumes. Avoid getting the cleaning solution in your eyes. If you experience any irritation, rinse the affected area with plenty of water and seek medical attention if necessary. Remember to always follow the safety instructions on any cleaning products you use.
What if my grout is cracked or damaged?
If your grout is significantly cracked or damaged, cleaning alone might not be sufficient. Cracked grout can allow water to penetrate, leading to mold and mildew growth. In such cases, it’s best to repair or replace the damaged grout. Consider consulting a professional tile and grout repair specialist for extensive damage.
Can I use this method on shower grout?
Absolutely! This method is particularly effective for cleaning shower grout, which is prone to mold and mildew buildup. The combination of baking soda and vinegar is a powerful natural disinfectant. Remember to thoroughly rinse the shower after cleaning to prevent residue buildup. Regular cleaning of shower grout is essential for maintaining a clean and healthy bathroom environment. This DIY clean grout and tile method is a great way to keep your shower sparkling.
What are some alternative cleaning solutions I can use?
While the baking soda and vinegar combination is highly effective, you can also experiment with other natural cleaning solutions. A solution of hydrogen peroxide and water can also be effective for cleaning grout. However, always test a small area first to ensure it doesn’t damage your tiles or grout. Commercial grout cleaners are also available, but always follow the manufacturer’s instructions carefully. Remember to choose cleaning solutions that are appropriate for your specific tile and grout type.


Leave a Comment