
Growing Lemon Cucumbers from Seed
Growing Lemon Cucumbers from Seed might sound intimidating, but trust me, it’s easier than you think! I’ve always loved the vibrant yellow color and slightly sweet taste of these unique cucumbers, and after years of experimenting, I’ve perfected some simple yet effective home gardening tricks that will have you harvesting your own delicious crop in no time. This isn’t just about growing cucumbers; it’s about connecting with nature, enjoying fresh, homegrown produce, and experiencing the immense satisfaction of nurturing something from seed to table.
The history of cucumbers stretches back millennia, with evidence suggesting cultivation in ancient India and Egypt. While lemon cucumbers are a relatively newer variety, their bright color and delightful flavor have quickly made them a favorite among home gardeners. And let’s be honest, there’s nothing quite like biting into a crisp, juicy cucumber you’ve grown yourself – it’s a taste of summer sunshine!
Why Grow Your Own Lemon Cucumbers?
In today’s world, we often rely on supermarkets for our produce. But growing your own lemon cucumbers from seed offers a unique connection to the food you eat. You control the growing process, ensuring pesticide-free, flavorful fruits. Plus, it’s a rewarding experience for the whole family, especially for children who can learn about the miracle of nature firsthand. This DIY guide will walk you through every step, from selecting the right seeds to harvesting your bountiful crop. So, let’s get started on your journey of Growing Lemon Cucumbers from Seed and unlock the secrets to a successful harvest!
Growing Lemon Cucumbers from Seed: A Complete Guide
Lemon cucumbers, with their adorable size and slightly lemony flavor, are a fun addition to any garden. Growing them from seed is incredibly rewarding, and this guide will walk you through the entire process. Let’s get started!
Phase 1: Seed Starting – Preparing for Success
- Choose your seeds: Select high-quality lemon cucumber seeds from a reputable supplier. Look for descriptions indicating disease resistance and suitability for your climate.
- Timing is key: Start seeds indoors 6-8 weeks before the last expected frost in your area. This allows the seedlings to develop strong root systems before transplanting outdoors.
- Gather your supplies: You’ll need seed starting mix (not garden soil!), small pots or seed trays with drainage holes, a watering can with a fine rose, and a warm, sunny location.
- Prepare the seed starting mix: Moisten the seed starting mix thoroughly. It should be damp but not soggy. Squeeze a handful – it should hold its shape but not drip water.
Phase 2: Sowing the Seeds
- Fill the pots: Fill your small pots or seed trays with the moistened seed starting mix, leaving about ½ inch of space from the top.
- Plant the seeds: Plant one or two seeds per pot or cell, about ½ inch deep. Gently cover the seeds with the seed starting mix.
- Water gently: Water the seeds lightly using a watering can with a fine rose. Avoid overwatering, which can lead to damping off (a fungal disease).
- Provide warmth and light: Place the pots in a warm location (ideally 70-75°F) with plenty of sunlight. A sunny windowsill or a grow light is ideal. Ensure at least 6 hours of light per day.
- Maintain moisture: Keep the seed starting mix consistently moist but not waterlogged. Check the moisture level daily and water as needed. Allow the top inch of soil to dry slightly between waterings.
- Monitor for germination: Germination usually takes 7-10 days, but it can vary depending on the temperature and seed quality. Once you see sprouts, you can reduce watering slightly to prevent leggy seedlings.
Phase 3: Seedling Care – Nurturing Young Plants
- Thinning (if necessary): If you planted two seeds per pot and both germinated, carefully remove the weaker seedling, leaving the strongest one. Do this gently to avoid damaging the roots of the remaining seedling.
- Hardening off: Before transplanting outdoors, gradually acclimate your seedlings to outdoor conditions. This process, called hardening off, reduces transplant shock. Start by placing the seedlings outdoors for a few hours each day, gradually increasing the time over a week. Protect them from direct sunlight and strong winds during this period.
- Fertilizing: Once the seedlings have developed their first true leaves (the leaves that appear after the cotyledons), you can start fertilizing them with a diluted liquid fertilizer specifically formulated for seedlings. Follow the instructions on the fertilizer label carefully. Over-fertilizing can harm young plants.
- Pest and disease control: Regularly inspect your seedlings for pests and diseases. Address any issues promptly using appropriate organic methods. Good air circulation can help prevent fungal diseases.
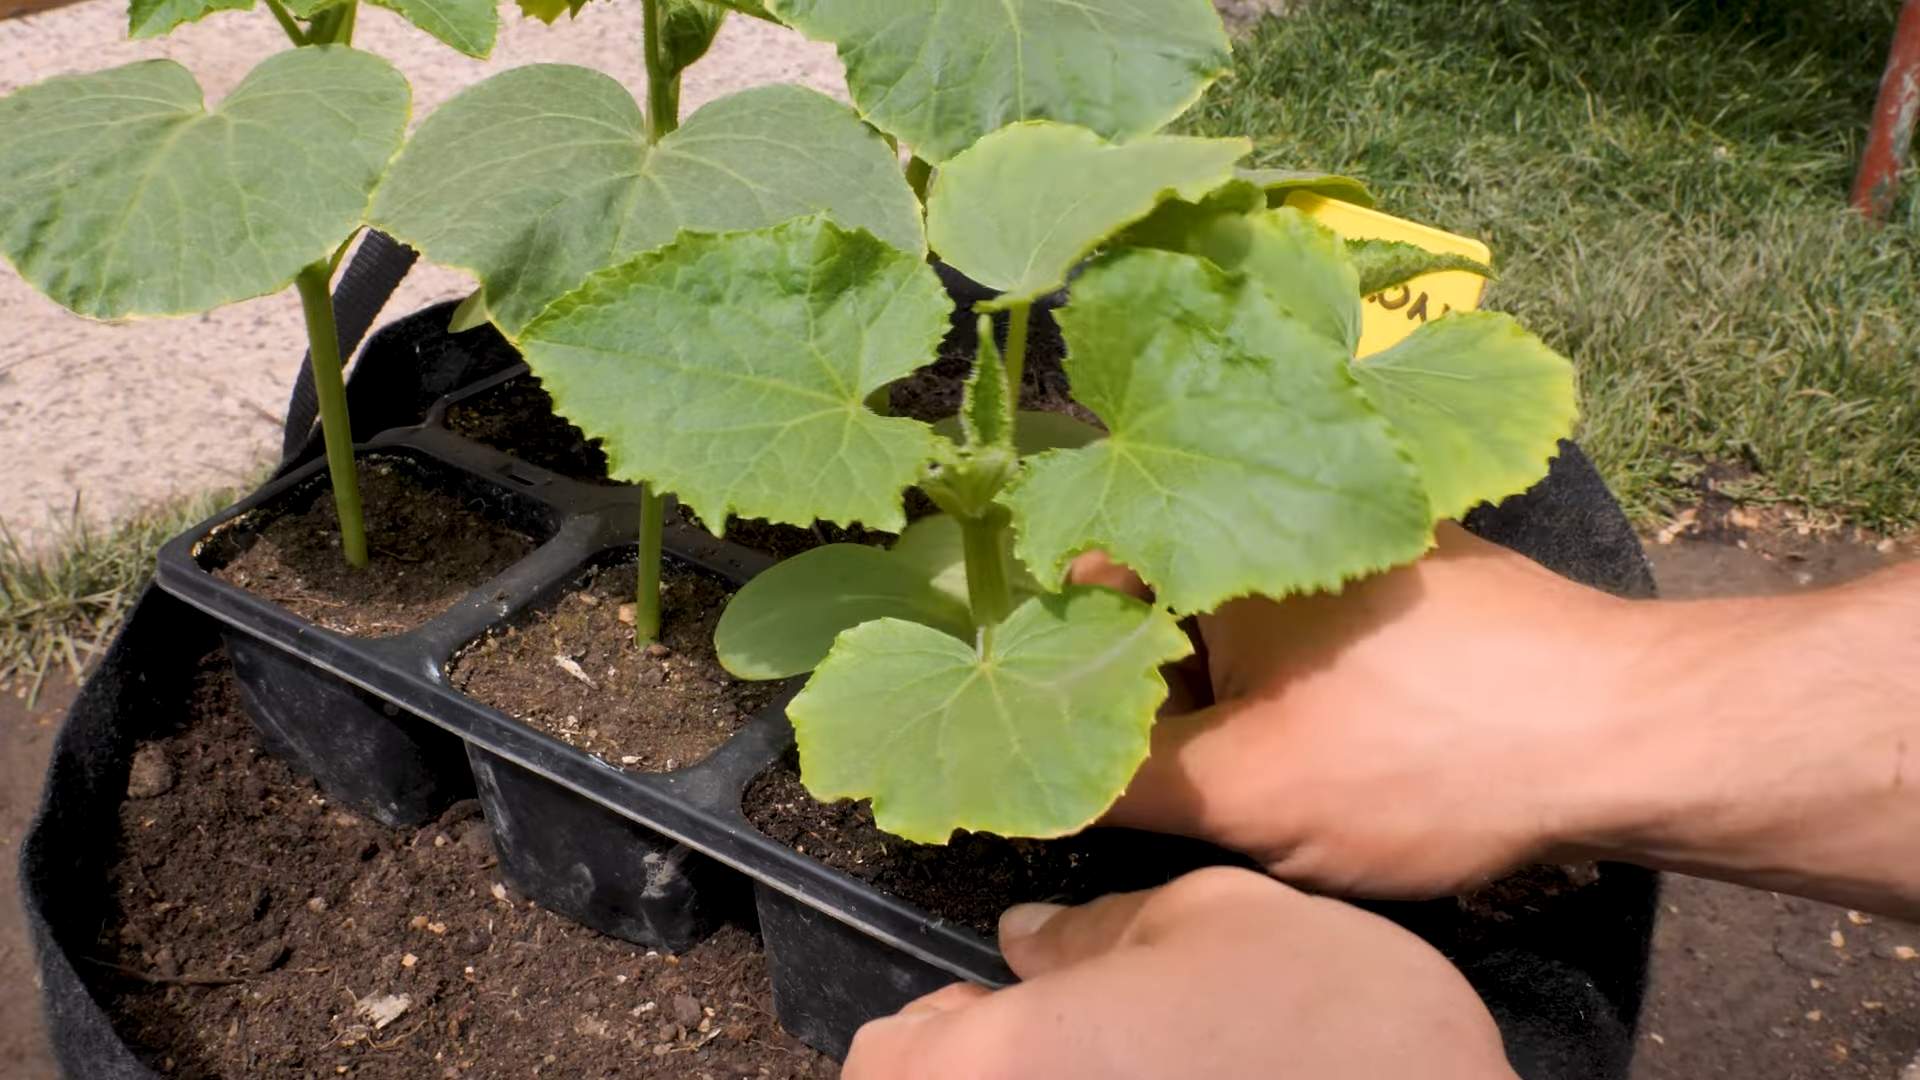
Phase 4: Transplanting – Moving to the Garden
- Choose the right location: Select a sunny location in your garden with well-drained soil. Lemon cucumbers need at least 6-8 hours of sunlight per day.
- Prepare the soil: Amend the soil with compost or other organic matter to improve drainage and fertility. This will provide your cucumbers with the nutrients they need to thrive.
- Dig planting holes: Dig holes slightly larger than the root balls of your seedlings.
- Transplant the seedlings: Carefully remove the seedlings from their pots, being careful not to damage the roots. Plant them in the prepared holes, covering the roots with soil. Gently firm the soil around the base of each plant.
- Water thoroughly: Water the newly transplanted seedlings deeply to help them settle into their new home.
- Mulching: Apply a layer of mulch around the plants to help retain moisture, suppress weeds, and regulate soil temperature.
Phase 5: Ongoing Care – Supporting Growth
- Watering: Water regularly, especially during dry periods. Aim to keep the soil consistently moist but not waterlogged. Deep watering encourages deeper root growth.
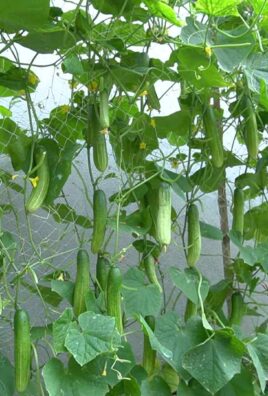
- Support system: Lemon cucumbers are relatively small, but providing a trellis or other support system can help keep the vines off the ground and improve air circulation, reducing the risk of diseases.
- Pest and disease monitoring: Continue to monitor your plants for pests and diseases throughout the growing season. Address any issues promptly.
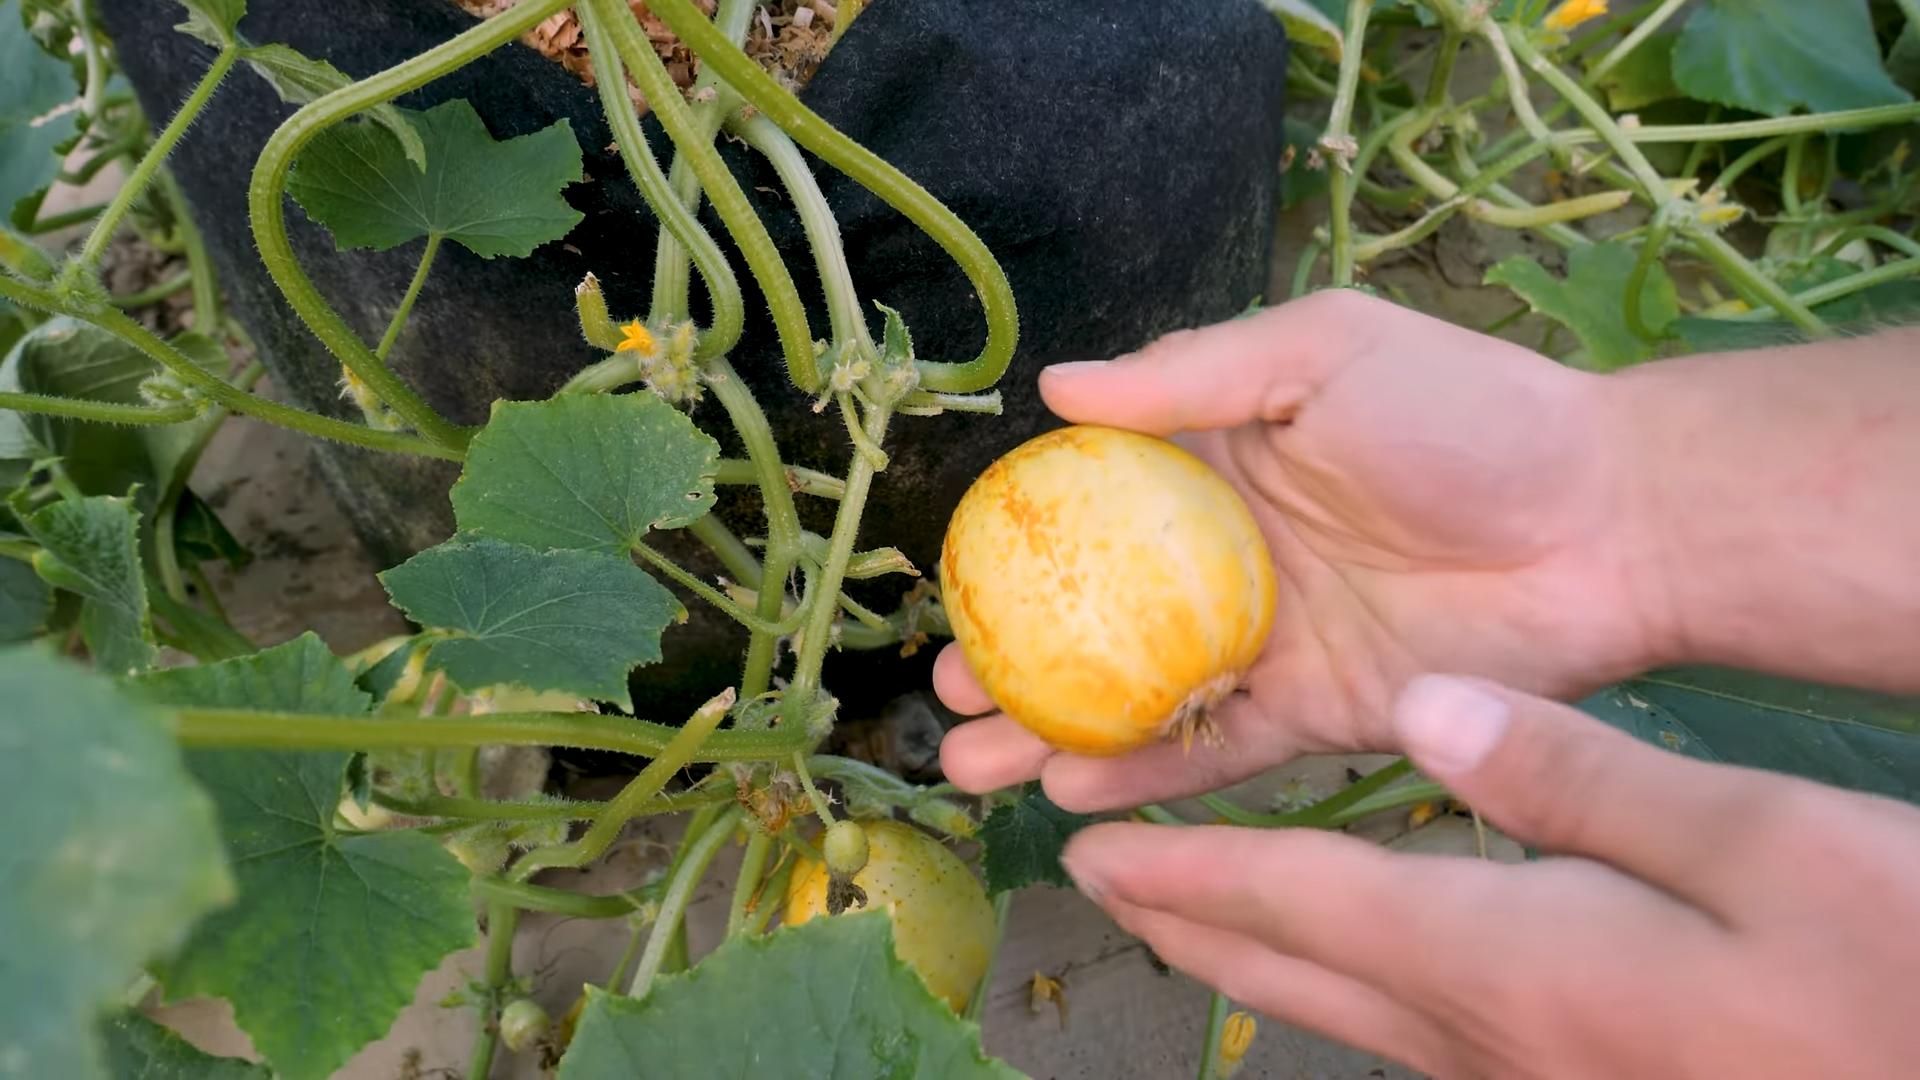
- Harvesting: Harvest the cucumbers when they reach the desired size. Lemon cucumbers are typically ready for harvest when they are about 2-3 inches long. Harvest regularly to encourage continued production.
- Enjoy your harvest: Once harvested, enjoy your homegrown lemon cucumbers in salads, sandwiches, or as a tasty snack!
Phase 6: Troubleshooting Common Issues
- Yellowing leaves: This could indicate overwatering, underwatering, nutrient deficiency, or disease. Check the soil moisture, adjust watering accordingly, and consider a soil test.
- Wilting plants: This could be due to underwatering, pest infestation, or disease. Check the soil moisture and inspect the plants for pests or signs of disease.
- Poor fruit set: This could be due to insufficient pollination, temperature stress, or nutrient deficiency. Ensure adequate pollination (bees are helpful!), maintain optimal temperatures, and provide adequate nutrients.
Remember, patience and consistent care are key to successfully growing lemon cucumbers from seed. Happy gardening!
Conclusion
So there you have it – a complete guide to growing lemon cucumbers from seed! This DIY approach offers a rewarding experience, allowing you to cultivate these unique and flavorful cucumbers from the comfort of your own home or garden. The satisfaction of nurturing a seed into a thriving plant laden with bright yellow, subtly sweet cucumbers is unparalleled. This method not only saves you money compared to buying pre-grown plants, but it also gives you greater control over the growing process, ensuring healthier and more flavorful fruits. The ability to select specific varieties and tailor your growing environment to your local climate makes growing lemon cucumbers from seed a truly superior method. It’s a fantastic project for both seasoned gardeners and enthusiastic beginners alike.
Beyond the basic method outlined, there are numerous avenues for experimentation and customization. Consider starting your seeds indoors several weeks before the last expected frost to give them a head start. This is particularly beneficial in cooler climates. You can also explore different growing mediums, such as coco coir or a well-draining soil mix specifically formulated for cucumbers. Experiment with different trellising techniques to maximize space and support the growth of your plants. Vertical gardening is a great space-saving option, especially for smaller gardens or patios. Furthermore, you can explore companion planting, using herbs like basil or dill to deter pests and attract beneficial insects. These additions can enhance the overall health and yield of your lemon cucumber plants.
For those with limited space, consider growing your lemon cucumbers in containers. Choose large containers with ample drainage holes to prevent root rot. Remember to select a sunny location and water regularly, keeping the soil consistently moist but not waterlogged. You can even try different varieties of lemon cucumbers to discover your personal favorite. Some varieties are known for their superior disease resistance, while others boast exceptional flavor profiles. The possibilities are endless!
Don’t be afraid to experiment and adapt the techniques to suit your specific needs and environment. Growing lemon cucumbers from seed is a journey of discovery, and each attempt will bring you closer to mastering this rewarding skill. The unique flavor and vibrant color of these cucumbers make them a delightful addition to salads, sandwiches, and pickles. The versatility of lemon cucumbers extends beyond their culinary applications; their attractive appearance also makes them a beautiful addition to any garden.
We strongly encourage you to try growing lemon cucumbers from seed. It’s a fun, educational, and ultimately delicious experience. Share your successes (and even your learning curves!) with us and other gardening enthusiasts. Post pictures of your thriving plants and delicious harvests on social media using the hashtag #LemonCucumberDIY. Let’s build a community of lemon cucumber growers and share our collective knowledge and passion for this delightful fruit. We can’t wait to see your results! Remember, the journey of growing your own food is as rewarding as the harvest itself. So, grab those seeds, get your hands dirty, and embark on this exciting adventure! Happy growing!
Frequently Asked Questions
What type of soil is best for growing lemon cucumbers from seed?
Lemon cucumbers thrive in well-draining soil that is rich in organic matter. A soil mix specifically formulated for cucumbers is ideal, but you can also amend your existing garden soil with compost or other organic materials to improve its drainage and fertility. Ensure the soil pH is slightly acidic to neutral (6.0-7.0). Poor drainage can lead to root rot, so proper soil preparation is crucial.
How much sunlight do lemon cucumber plants need?
Lemon cucumbers require at least six to eight hours of direct sunlight per day to thrive. Choose a sunny location in your garden or ensure your containers receive ample sunlight. Insufficient sunlight can lead to poor growth and reduced fruit production. Observe your plants; if they appear leggy or pale, they may not be receiving enough sunlight.
How often should I water my lemon cucumber plants?
Consistent watering is essential for healthy lemon cucumber plants. Water deeply and regularly, keeping the soil consistently moist but not soggy. The frequency of watering will depend on your climate and soil type. Check the soil moisture regularly by sticking your finger a couple of inches into the soil. If the soil feels dry, it’s time to water. Avoid overhead watering, which can promote fungal diseases. Instead, water at the base of the plants.
What are some common pests and diseases that affect lemon cucumbers?
Lemon cucumbers can be susceptible to various pests and diseases, including aphids, cucumber beetles, powdery mildew, and downy mildew. Regularly inspect your plants for signs of infestation or disease. Implementing preventative measures, such as companion planting and proper spacing, can help minimize pest and disease problems. If problems arise, consider using organic pest control methods or consulting a local gardening expert for advice.
When can I expect to harvest my lemon cucumbers?
The time it takes to harvest lemon cucumbers depends on the variety and growing conditions. Generally, you can expect to harvest your first cucumbers about 50-70 days after planting the seeds. Harvest cucumbers when they are young and tender, typically when they are about 6-8 inches long. Regular harvesting encourages the plant to produce more cucumbers.
Can I save seeds from my harvested lemon cucumbers to plant next year?
Yes, you can save seeds from your harvested lemon cucumbers for planting the following year. Allow the cucumbers to fully ripen on the vine until they turn a deep yellow and are slightly soft. Remove the seeds, clean them, and allow them to dry completely before storing them in a cool, dry place. Proper seed saving ensures you have a supply of seeds for future plantings.
What are some creative ways to use lemon cucumbers?
Lemon cucumbers are incredibly versatile! They are delicious in salads, sandwiches, and as a refreshing snack. They can also be pickled, added to stir-fries, or used to make cucumber relish or other preserves. Their mild, slightly sweet flavor pairs well with a variety of dishes. Experiment with different recipes and discover your favorite ways to enjoy these unique cucumbers.

Leave a Comment