
Spinach in Planters: Imagine stepping outside your door and harvesting fresh, vibrant spinach leaves for your salad, smoothie, or side dish. Sounds idyllic, right? Well, it’s more achievable than you think! For centuries, humans have cultivated food in small spaces, from the hanging gardens of Babylon to the humble window boxes of today. This DIY guide will unlock the secrets to growing your own delicious spinach, even if you only have a balcony or a sunny windowsill.
Let’s face it, store-bought spinach can be expensive and sometimes lacks that fresh, crisp flavor we crave. Plus, there’s nothing quite like the satisfaction of nurturing a plant from seed to harvest. Growing spinach in planters is a fantastic way to enjoy fresh, organic greens, save money, and connect with nature, all from the comfort of your own home. I’m going to show you some simple, yet effective tricks and hacks that will ensure a bountiful harvest. Get ready to transform your space into a mini-vegetable garden and enjoy the taste of homegrown goodness!
Growing Spinach in Planters: A Beginner’s Guide
Hey there, fellow gardening enthusiasts! I’m super excited to share my experience with growing spinach in planters. It’s surprisingly easy and rewarding, even if you don’t have a huge backyard. Fresh, homegrown spinach is so much tastier than the store-bought stuff, and knowing you grew it yourself? That’s the best feeling! So, let’s dive in and get our hands dirty!
Choosing the Right Planter and Location
Before we even think about seeds, we need to set the stage for our spinach to thrive. This means picking the perfect planter and finding the ideal spot for it.
* Planter Size: Spinach needs room for its roots to grow, so opt for a planter that’s at least 6-8 inches deep and wide. A rectangular planter is great if you want to grow a good amount of spinach. I personally love using 12-inch deep planters.
* Drainage: This is crucial! Spinach hates soggy roots. Make sure your planter has drainage holes at the bottom. If it doesn’t, you can drill some yourself (carefully, of course!).
* Material: Plastic, terracotta, or even fabric planters work well. I’ve had success with all three. Just keep in mind that terracotta dries out faster, so you’ll need to water more frequently.
* Sunlight: Spinach loves sunshine, but not too much! Aim for at least 4-6 hours of direct sunlight per day. If you live in a hot climate, afternoon shade is your friend. A spot that gets morning sun and afternoon shade is ideal.
Preparing the Soil
Now, let’s talk about the foundation of our spinach garden: the soil!
* Potting Mix is Key: Don’t use garden soil in your planters! It’s too heavy and doesn’t drain well. Instead, use a high-quality potting mix specifically designed for containers.
* Amendments (Optional): I like to add a little compost or well-rotted manure to my potting mix for extra nutrients. This gives the spinach a boost right from the start. You can also add some perlite to improve drainage.
* Mixing it Up: In a large container or wheelbarrow, thoroughly mix your potting mix with any amendments you’re using. This ensures everything is evenly distributed.
Planting the Spinach Seeds
Alright, time to get those seeds in the ground!
1. Moisten the Soil: Before planting, lightly water the potting mix in your planter. You want it to be damp, but not soaking wet.
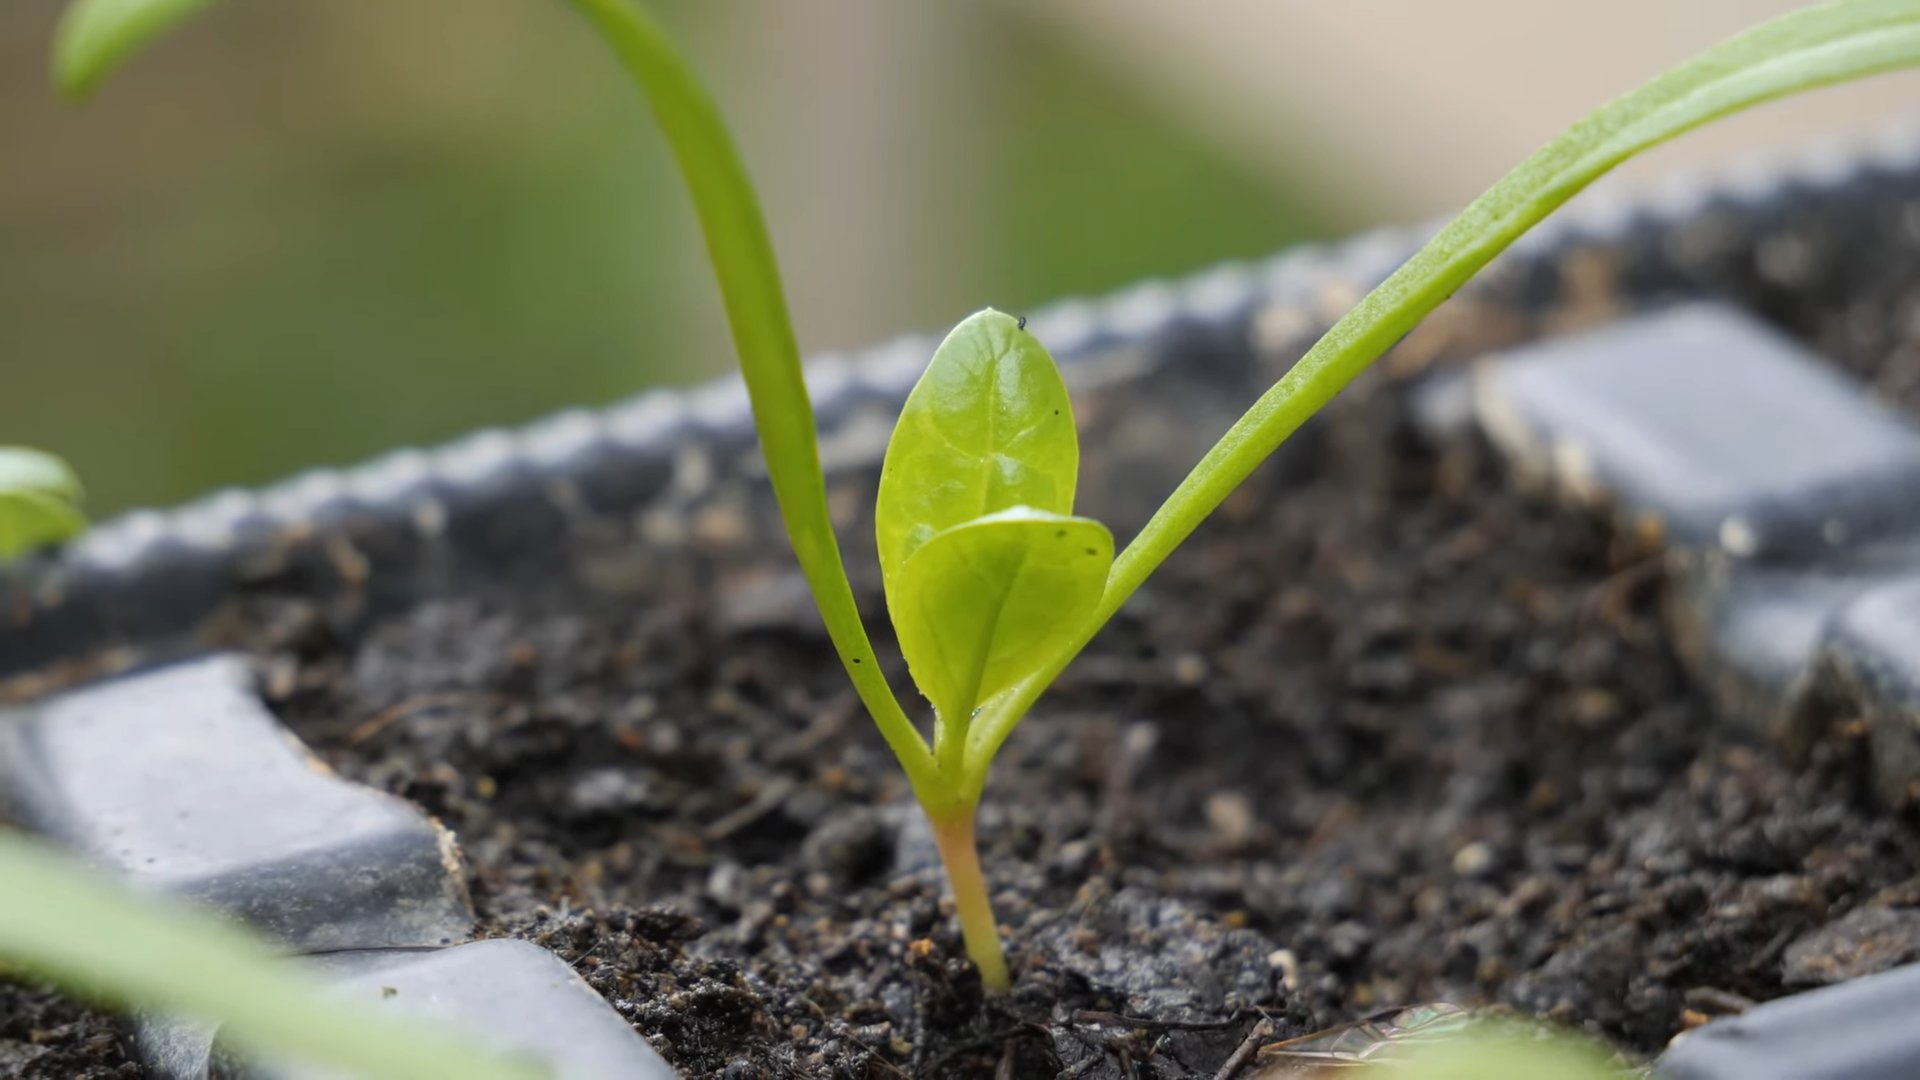
2. Sowing the Seeds: Spinach seeds are tiny, so handle them carefully. Sow the seeds about ½ inch deep and 1 inch apart. You can sprinkle them evenly over the surface and then gently press them into the soil.
3. Covering the Seeds: Lightly cover the seeds with more potting mix.
4. Watering Gently: Water the planter gently using a watering can with a rose head or a spray bottle. Avoid blasting the seeds with water, as this can dislodge them.
5. Labeling: Don’t forget to label your planter with the date and the type of spinach you’re growing! It’s easy to forget later on.
Caring for Your Spinach Plants
This is where the magic happens! Consistent care is key to a bountiful spinach harvest.
* Watering: Spinach needs consistent moisture, but avoid overwatering. Check the soil regularly by sticking your finger about an inch deep. If it feels dry, it’s time to water. Water deeply until you see water draining from the bottom of the planter.
* Fertilizing: Spinach is a heavy feeder, so it benefits from regular fertilization. I like to use a liquid fertilizer diluted to half strength every 2-3 weeks. Look for a fertilizer that’s high in nitrogen, which promotes leafy growth. Fish emulsion is a great organic option.
* Thinning: Once your spinach seedlings are a few inches tall, you’ll need to thin them out. This means removing some of the plants to give the remaining ones more room to grow. Aim for a spacing of about 3-4 inches between plants. Don’t throw away the thinned seedlings! You can eat them as microgreens.
* Weeding: Keep an eye out for weeds and remove them promptly. Weeds compete with your spinach for nutrients and water.
* Pest Control: Spinach is relatively pest-resistant, but aphids and slugs can sometimes be a problem. Check your plants regularly for signs of infestation. You can control aphids with a strong spray of water or insecticidal soap. Slugs can be handpicked or trapped with beer traps.
* Bolting: Bolting is when spinach plants start to produce flowers and seeds. This usually happens when the weather gets too hot. Bolted spinach leaves become bitter and less palatable. To prevent bolting, try to provide afternoon shade during hot weather and harvest your spinach regularly.
Harvesting Your Spinach
The moment we’ve all been waiting for!
* When to Harvest: You can start harvesting spinach leaves when they’re about 4-6 inches long.
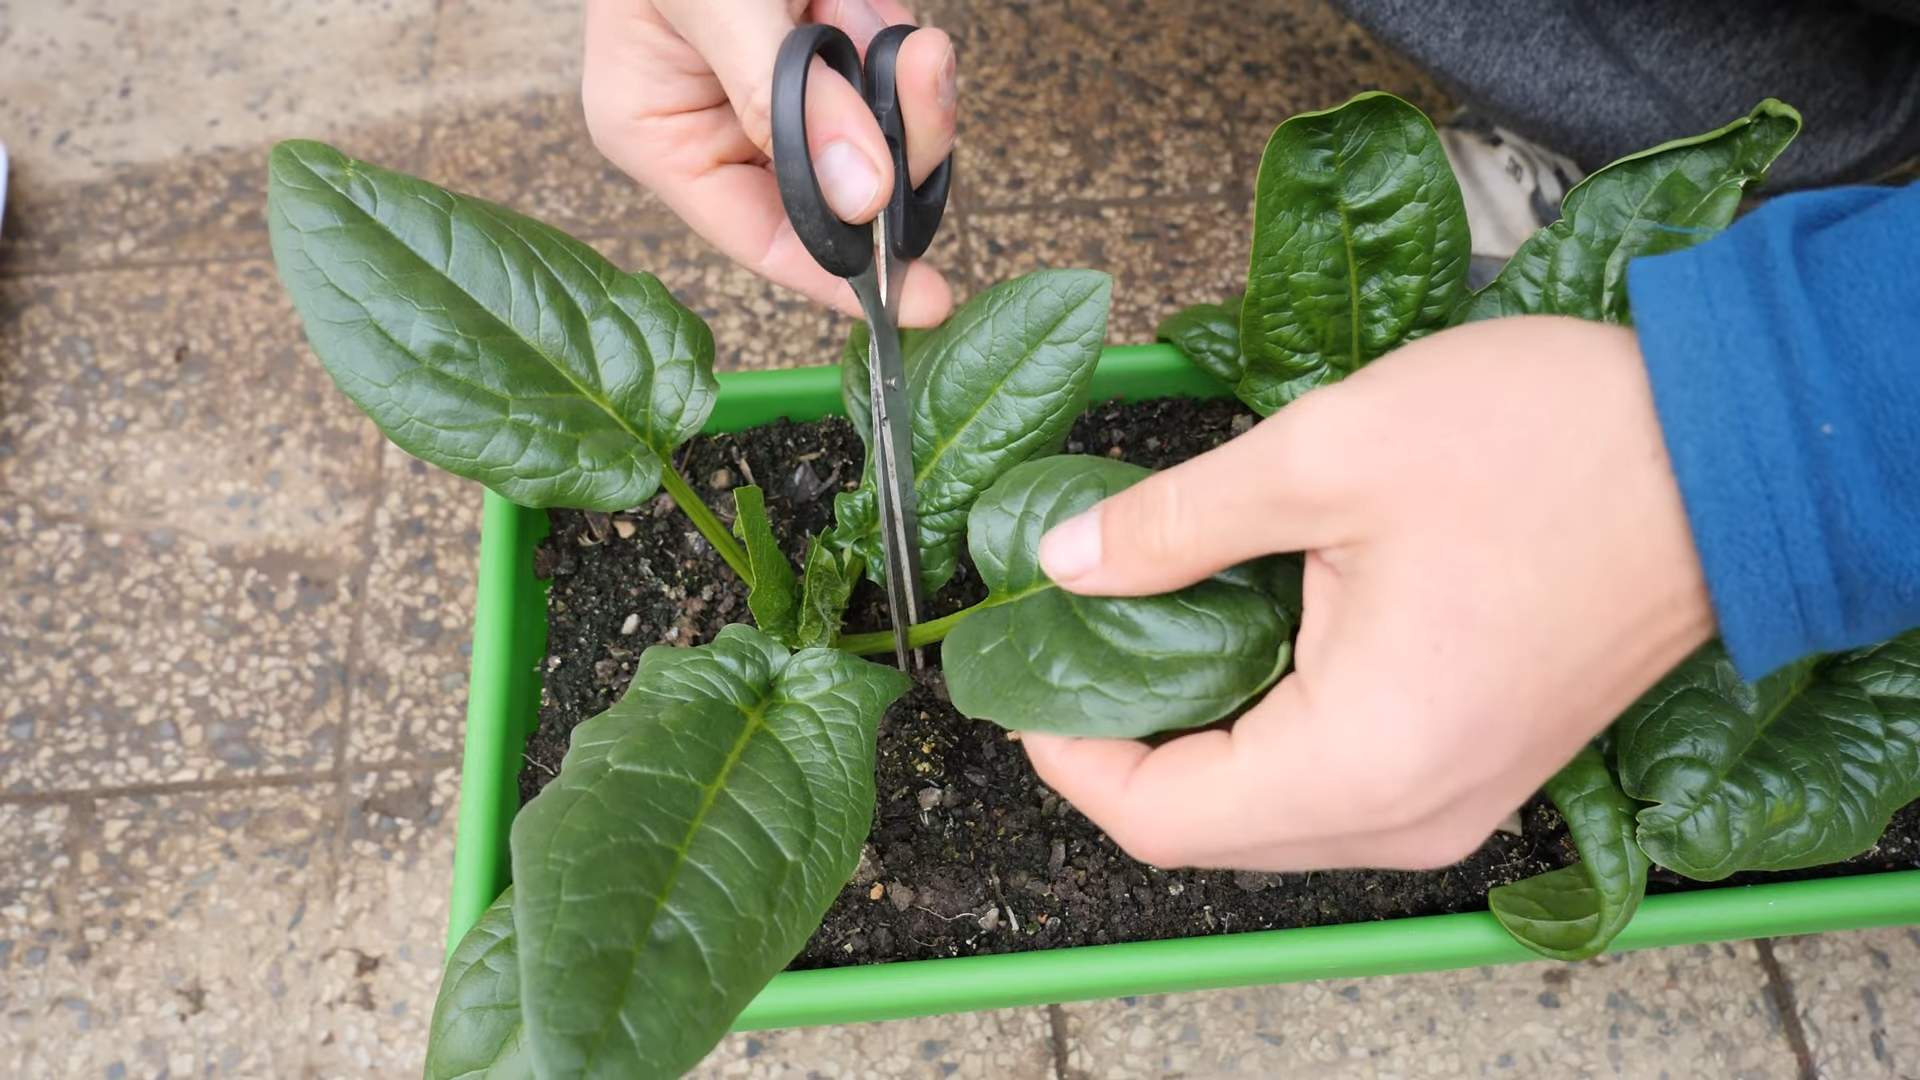
* How to Harvest: Use scissors or a sharp knife to cut the outer leaves, leaving the inner leaves to continue growing. This is called “cut and come again” harvesting, and it allows you to enjoy fresh spinach for weeks.
* Harvesting the Whole Plant: If you prefer, you can also harvest the entire plant at once. Simply cut the plant off at the base.
* Washing and Storing: Wash your harvested spinach thoroughly to remove any dirt or debris. Store it in a plastic bag in the refrigerator. It will stay fresh for several days.
Troubleshooting
Even with the best care, sometimes things can go wrong. Here are a few common problems and how to fix them:
* Yellowing Leaves: This could be a sign of nutrient deficiency. Try fertilizing with a balanced fertilizer.
* Slow Growth: This could be due to insufficient sunlight or poor soil. Make sure your spinach is getting enough sun and that your soil is well-draining and nutrient-rich.
* Pests: As mentioned earlier, aphids and slugs can be a problem. Take action promptly to control them.
* Bolting: If your spinach bolts prematurely, it could be due to heat stress. Provide afternoon shade and harvest regularly.
Choosing Spinach Varieties
There are many different varieties of spinach to choose from, each with its own unique characteristics. Here are a few popular options:
* Bloomsdale Long Standing: This is a classic variety that’s known for its resistance to bolting.
* Giant Nobel: This variety produces large, thick leaves.
* Tyee: This is a fast-growing variety that’s ideal for succession planting.
* Red Cardinal: This variety has beautiful red veins and stems.
* Malabar Spinach (Basella alba): While not a true spinach, Malabar spinach is a heat-tolerant alternative that thrives in warm weather. It has a similar flavor and texture to spinach.
Succession Planting for Continuous Harvest
To enjoy a continuous supply of fresh spinach, practice succession planting. This means planting new seeds every 2-3 weeks. This way, you’ll always have a new batch of spinach coming up as the older plants are harvested.
Spinach in Different Seasons
Spinach is a cool-season crop, which means it grows best in spring and fall. However, you can grow spinach year-round in some climates.
* Spring: Spring is a great time to plant spinach. Start seeds indoors 4-6 weeks before the last frost or direct sow them in your planters once the soil has warmed up.
* Summer: Spinach can bolt in hot weather, so it’s important to provide afternoon shade during the summer months. You can also choose heat-tolerant varieties like Malabar spinach.
* Fall: Fall is another ideal time to plant spinach. Direct sow seeds in your planters in late summer or early fall for a fall harvest.
* Winter: In mild climates, you can grow spinach throughout the winter. Protect your plants from frost with row covers or a cold frame.
Enjoying Your Homegrown Spinach
Now that you’ve successfully grown your own spinach, it’s time to enjoy the fruits (or rather, leaves!) of your labor. Here are a few ideas:
* Salads: Fresh spinach is a delicious addition to any salad.
* Smoothies: Add a handful of spinach to your smoothies for a healthy boost.
* Sautéed Spinach: Sauté spinach with garlic and olive oil for a simple and flavorful side dish.
* Spinach Dip: Make a creamy spinach dip for parties or gatherings.
* Spinach and Artichoke Dip: A classic appetizer that’s always a crowd-pleaser.
* Spinach Pie: Use your homegrown spinach
Conclusion
So, there you have it! Growing your own spinach in planters isn’t just a gardening trend; it’s a gateway to fresher, more flavorful meals and a deeper connection with your food. We’ve walked you through the simple steps, from choosing the right planter and soil to nurturing your leafy greens to harvest. But why is this DIY trick a must-try?
Firstly, the taste difference is undeniable. Store-bought spinach, often transported long distances and stored for extended periods, simply can’t compare to the vibrant, slightly sweet flavor of freshly picked spinach. Imagine adding a handful of your own homegrown spinach to a morning smoothie, a lunchtime salad, or a comforting pasta dish. The burst of freshness will elevate your culinary creations to a whole new level.
Secondly, growing spinach in planters offers unparalleled convenience. Whether you have a sprawling backyard or a small balcony, you can enjoy a continuous supply of this nutritious vegetable right at your fingertips. No more last-minute trips to the grocery store when you realize you’re out of spinach!
Thirdly, it’s incredibly rewarding. There’s something deeply satisfying about nurturing a plant from seed to harvest. Watching your spinach seedlings sprout and flourish is a testament to your green thumb and a reminder of the simple joys of nature.
But the benefits don’t stop there. Growing your own spinach is also a sustainable choice. You’re reducing your carbon footprint by eliminating the need for transportation and packaging. Plus, you have complete control over the growing process, ensuring that your spinach is free from harmful pesticides and herbicides.
Looking for variations? Consider experimenting with different varieties of spinach. Some are better suited for warmer climates, while others thrive in cooler temperatures. Try ‘Bloomsdale Long Standing’ for its heat tolerance or ‘Winter Bloomsdale’ for its cold hardiness. You can also companion plant your spinach with other herbs and vegetables, such as radishes, lettuce, or strawberries, to create a thriving and diverse planter garden.
Another fun variation is to create a tiered planter system. This allows you to maximize your growing space and create a visually appealing display. You can also use different types of planters, such as terracotta pots, hanging baskets, or even repurposed containers, to add a touch of personality to your garden.
We encourage you to embrace this DIY trick and experience the joy of growing your own spinach. It’s a simple, rewarding, and sustainable way to enhance your meals and connect with nature. Don’t be afraid to experiment, adapt the techniques to your own environment, and most importantly, have fun!
Now, we want to hear from you! Have you tried growing spinach in planters before? What tips and tricks have you learned along the way? Share your experiences, photos, and questions in the comments below. Let’s create a community of spinach-loving gardeners and inspire others to embark on this rewarding journey. Let us know if this **spinach in planters** guide helped you!
Frequently Asked Questions (FAQ)
What is the best type of planter for growing spinach?
The ideal planter for spinach should be at least 6-8 inches deep to accommodate the root system. Choose a container with good drainage holes to prevent waterlogging, which can lead to root rot. Terracotta pots, plastic containers, and even repurposed buckets can work well, as long as they meet these requirements. Consider the size of your growing space and the number of spinach plants you want to grow when selecting the size of your planter. A wider planter will allow for more plants and better air circulation.
What kind of soil should I use for growing spinach in planters?
Spinach thrives in well-draining, nutrient-rich soil. A good quality potting mix specifically formulated for vegetables is an excellent choice. Avoid using garden soil, as it can be too heavy and compact, hindering root growth. You can also amend your potting mix with compost or other organic matter to improve its fertility and drainage. Aim for a soil pH between 6.0 and 7.0 for optimal spinach growth.
How often should I water my spinach plants in planters?
Water your spinach plants regularly, keeping the soil consistently moist but not waterlogged. Check the soil moisture by sticking your finger about an inch deep. If the soil feels dry, it’s time to water. Water deeply, allowing the water to drain out of the drainage holes. Avoid overhead watering, as it can promote fungal diseases. During hot weather, you may need to water more frequently.
How much sunlight does spinach need when grown in planters?
Spinach prefers full sun (6-8 hours of direct sunlight per day) but can tolerate partial shade, especially in warmer climates. If you live in a hot region, providing some afternoon shade can help prevent the leaves from wilting or burning. Place your planters in a location that receives ample sunlight throughout the day. If you don’t have access to enough natural light, you can supplement with grow lights.
How do I fertilize my spinach plants in planters?
Spinach is a heavy feeder and benefits from regular fertilization. Use a balanced, water-soluble fertilizer specifically formulated for vegetables. Follow the instructions on the fertilizer package for application rates and frequency. You can also use organic fertilizers, such as compost tea or fish emulsion. Fertilize your spinach plants every 2-3 weeks during the growing season.
When is the best time to harvest spinach from planters?
You can start harvesting spinach leaves when they are about 4-6 inches long. Harvest the outer leaves first, allowing the inner leaves to continue growing. You can harvest spinach multiple times throughout the growing season. Avoid harvesting during the hottest part of the day, as the leaves may be wilted. Cut the leaves with scissors or a sharp knife, leaving about an inch of stem attached.
How can I prevent pests and diseases from affecting my spinach plants in planters?
Regularly inspect your spinach plants for signs of pests or diseases. Common pests that affect spinach include aphids, spider mites, and leaf miners. You can control these pests with insecticidal soap or neem oil. To prevent fungal diseases, ensure good air circulation around your plants and avoid overhead watering. Remove any infected leaves promptly to prevent the spread of disease.
Can I grow spinach in planters indoors?
Yes, you can grow spinach in planters indoors, provided you have adequate lighting. Place your planters near a sunny window that receives at least 6 hours of direct sunlight per day. If you don’t have enough natural light, you can supplement with grow lights. Use a well-draining potting mix and water regularly. Indoor spinach may require more frequent fertilization than outdoor spinach.
What are some companion plants for spinach in planters?
Spinach grows well with a variety of companion plants, including radishes, lettuce, strawberries, and garlic. Radishes help to deter pests, while lettuce provides shade and helps to keep the soil cool. Strawberries attract beneficial insects, and garlic repels aphids. Avoid planting spinach near fennel, as it can inhibit its growth.
How long does it take for spinach to grow in planters?
Spinach typically takes about 4-6 weeks to mature from seed to harvest. The exact time will depend on the variety of spinach, the growing conditions, and the climate. You can speed up the germination process by soaking the seeds in water for 24 hours before planting. Keep the soil consistently moist and provide adequate sunlight for optimal growth.


Leave a Comment