
Growing Artichokes at Home might seem like a challenge reserved for seasoned gardeners, but I’m here to tell you it’s absolutely achievable, even if you’re just starting out! Forget those pricey grocery store artichokes – imagine plucking your own fresh, flavorful globes right from your backyard.
Artichokes have a rich history, dating back to ancient Roman times where they were considered a delicacy. They’ve graced the tables of royalty and are celebrated in Mediterranean cuisine. But you don’t need a royal garden to enjoy this regal vegetable.
Why should you try growing artichokes at home? Well, for starters, homegrown produce always tastes better! Plus, you’ll know exactly what’s gone into nurturing your plants, avoiding any unwanted chemicals. But more importantly, learning to cultivate your own food is incredibly rewarding. It connects you to nature, provides a sense of accomplishment, and can even save you money in the long run. This DIY guide will break down the process into simple, manageable steps, so you can confidently embark on your artichoke-growing adventure. I’ll share my favorite tips and tricks for success, ensuring you’ll be harvesting delicious artichokes in no time. Let’s get started!
Growing Artichokes: A DIY Guide to Bountiful Blooms and Delicious Hearts!
Alright, artichoke enthusiasts! Ever dreamt of harvesting your own spiky treasures right from your backyard? Well, dream no more! Growing artichokes at home is totally achievable, and I’m here to guide you through the whole process. It might seem a little intimidating at first, but trust me, with a little patience and the right know-how, you’ll be enjoying homegrown artichoke hearts in no time.
Choosing Your Artichoke Variety
First things first, let’s talk varieties. Not all artichokes are created equal, and some are better suited for home gardens than others. Here are a few popular choices:
* ‘Green Globe’: This is the classic artichoke, known for its large, round buds and delicious flavor. It’s a reliable choice and widely available.
* ‘Violetta’: If you’re looking for something a little different, ‘Violetta’ artichokes have beautiful purple-tinged buds. They’re also known for being slightly more cold-hardy.
* ‘Imperial Star’: This variety is a good option for gardeners in cooler climates, as it matures relatively quickly.
* ‘Big Heart’: As the name suggests, this artichoke produces large, meaty hearts.
Consider your climate and personal preferences when choosing your variety. I personally love ‘Green Globe’ for its consistent performance and classic artichoke flavor.
Preparing Your Artichoke Bed
Artichokes are hungry plants, so preparing your soil is crucial for success. They need well-drained soil that’s rich in organic matter.
* Sunlight: Artichokes need at least 6-8 hours of sunlight per day. Choose a sunny spot in your garden.
* Soil Drainage: Artichokes hate soggy feet! Make sure your soil drains well. If you have heavy clay soil, amend it with plenty of compost and other organic matter.
* Soil pH: Artichokes prefer a slightly acidic to neutral soil pH (around 6.0-7.0). You can test your soil pH with a home testing kit.
* Fertilizing: Artichokes are heavy feeders. Before planting, amend your soil with compost, well-rotted manure, or a slow-release fertilizer.
Starting Your Artichokes
You can start artichokes from seed or from bare-root plants. Starting from seed takes longer, but it’s a more economical option. Bare-root plants will give you a head start.
Starting from Seed:
1. Start Indoors: Start your seeds indoors 8-10 weeks before the last expected frost.
2. Sowing Seeds: Sow seeds about 1/4 inch deep in seed-starting trays or pots filled with seed-starting mix.
3. Warmth and Moisture: Keep the soil consistently moist and provide bottom heat (a heat mat works well) to encourage germination.
4. Light: Once the seedlings emerge, provide them with plenty of light. A grow light is ideal.
5. Hardening Off: Gradually acclimate the seedlings to outdoor conditions before transplanting them into the garden. This process, called “hardening off,” involves exposing the seedlings to increasing amounts of sunlight and wind over a period of 1-2 weeks.
Planting Bare-Root Artichokes:
1. Soak the Roots: Soak the bare roots in water for a few hours before planting.
2. Dig a Hole: Dig a hole that’s large enough to accommodate the roots.
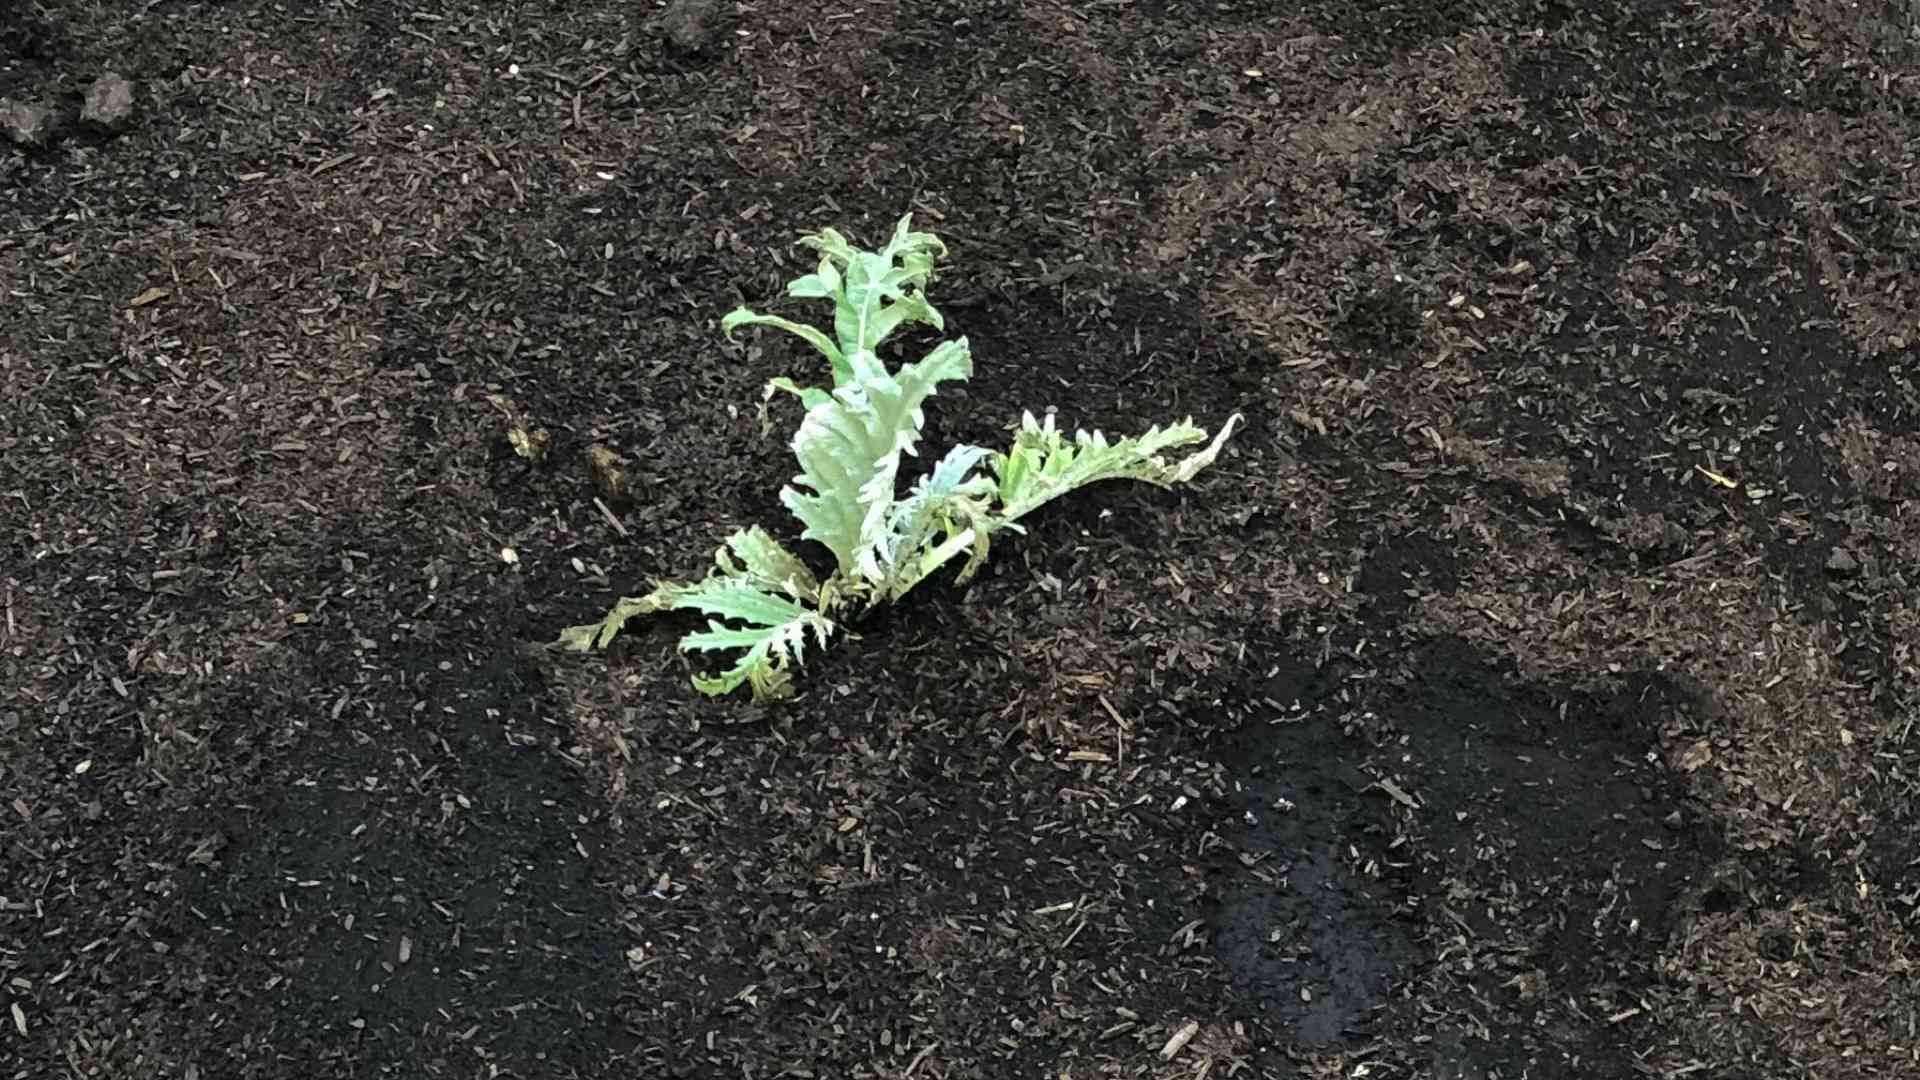
3. Planting Depth: Plant the artichoke so that the crown (where the roots meet the stem) is at soil level.
4. Spacing: Space artichoke plants 3-4 feet apart.
5. Water Well: Water the newly planted artichokes thoroughly.
Caring for Your Artichokes
Once your artichokes are planted, it’s time to provide them with the care they need to thrive.
* Watering: Artichokes need consistent moisture, especially during hot, dry weather. Water deeply and regularly, but avoid overwatering.
* Fertilizing: Fertilize your artichokes every few weeks with a balanced fertilizer. You can also side-dress them with compost or well-rotted manure.
* Mulching: Mulch around your artichoke plants with straw, wood chips, or other organic mulch to help retain moisture, suppress weeds, and regulate soil temperature.
* Weeding: Keep the area around your artichoke plants free of weeds. Weeds compete with artichokes for nutrients and water.
* Pest Control: Artichokes can be susceptible to pests such as aphids, snails, and slugs. Inspect your plants regularly and take action if you see any signs of infestation. You can use organic pest control methods such as insecticidal soap or diatomaceous earth.
* Pruning: After harvesting the main bud, cut back the stem to encourage the growth of side shoots. These side shoots will produce smaller, but still delicious, artichokes. In the fall, after the plant has finished producing, cut it back to the ground. In colder climates, you’ll need to protect the crown of the plant from freezing temperatures. You can do this by covering it with a thick layer of mulch.
Harvesting Your Artichokes
Harvesting artichokes is the most rewarding part of the process!
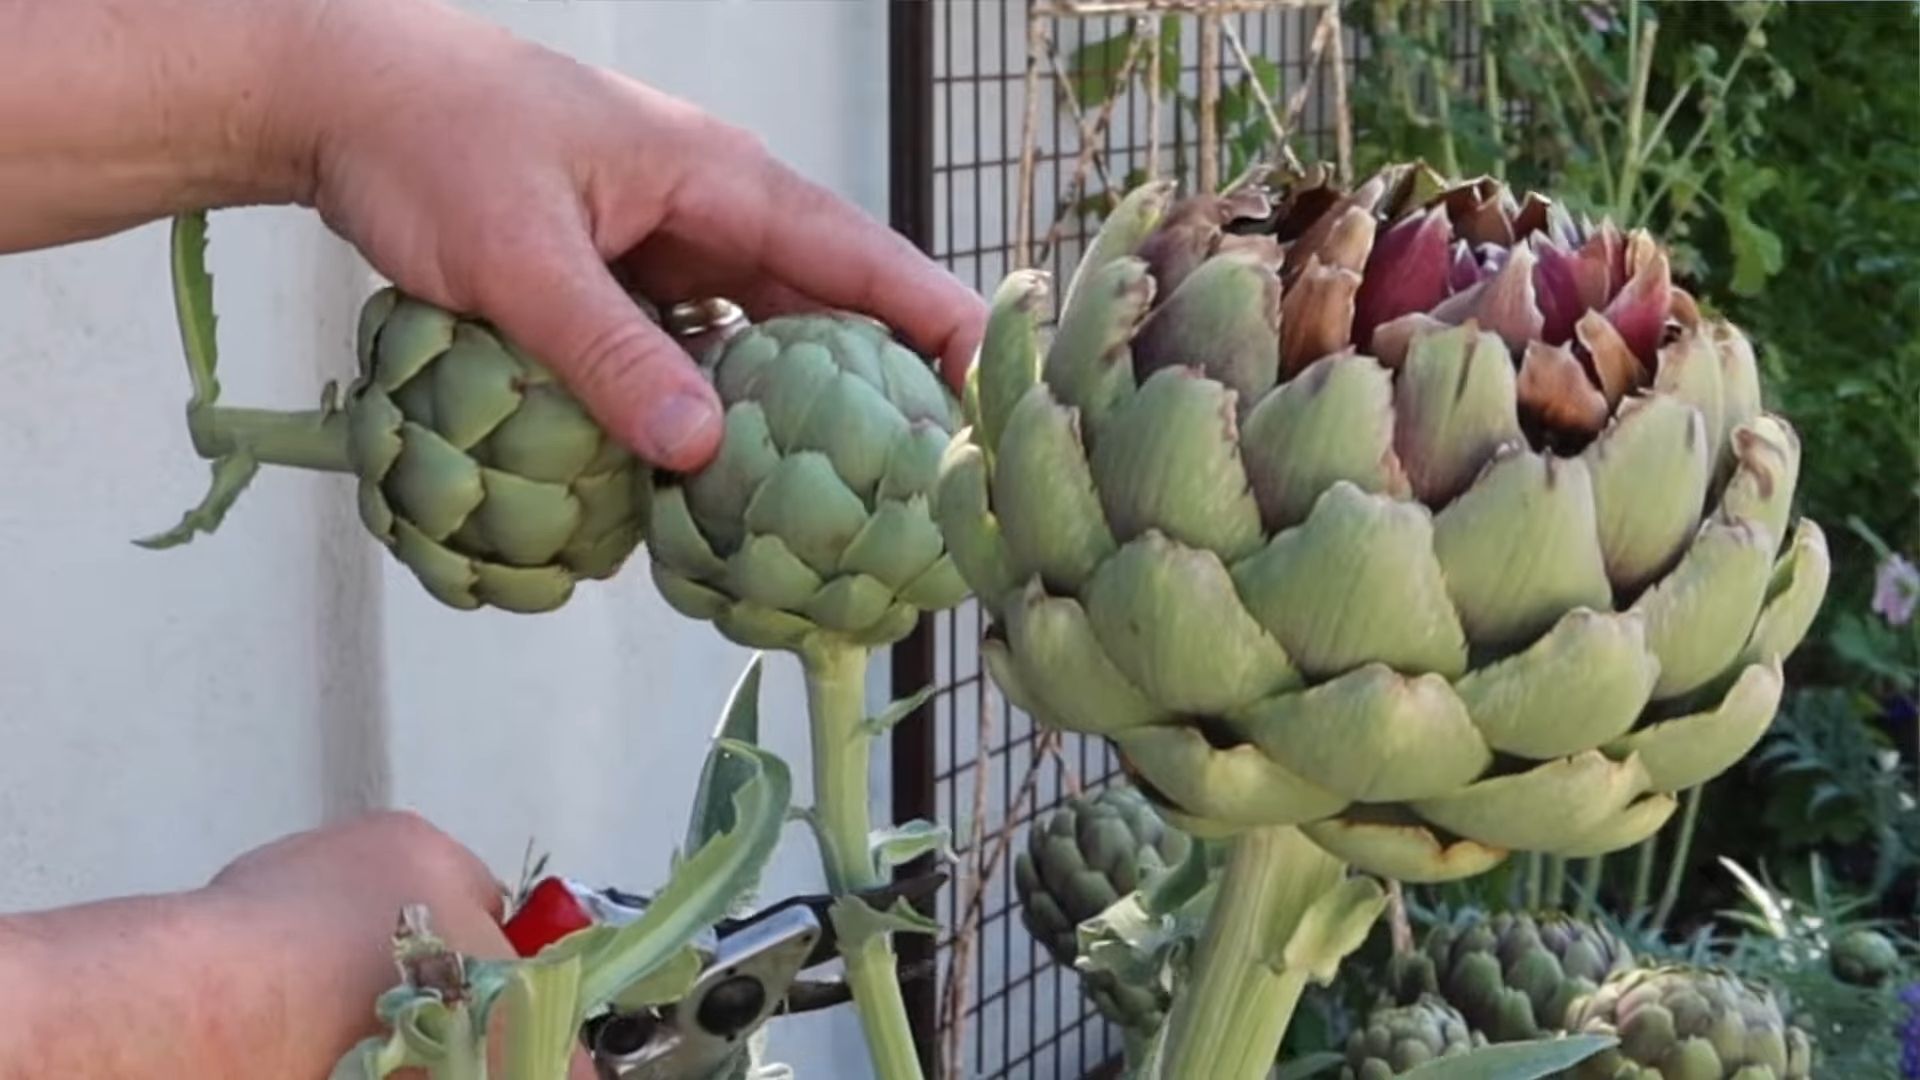
* Timing: Harvest artichokes when the buds are still tight and the bracts (the outer leaves) are just beginning to open.
* Size: The size of the artichoke will vary depending on the variety, but generally, you should harvest them when they are about 3-4 inches in diameter.
* Cutting: Cut the artichoke stem about 2-3 inches below the bud.
* Enjoy! Cook and enjoy your homegrown artichokes!
Overwintering Artichokes (for colder climates)
If you live in a colder climate (zones 6 and below), you’ll need to take steps to protect your artichoke plants from freezing temperatures. Artichokes are perennials, meaning they can live for several years, but they are not very cold-hardy.
1. Cut Back the Plant: In the fall, after the plant has finished producing, cut it back to the ground.
2. Mulch Heavily: Cover the crown of the plant with a thick layer of mulch, such as straw, leaves, or wood chips. This will help insulate the plant and protect it from freezing temperatures.
3. Optional: Cover with a Bucket or Pot: For extra protection, you can cover the plant with an upside-down bucket or pot.
4. Remove Protection in Spring: In the spring, after the last frost, remove the mulch and any other protection you’ve provided. The plant should start to regrow from the crown.
Troubleshooting
Even with the best care, you might encounter some problems when growing artichokes. Here are a few common issues and how to address them:
* Aphids: These tiny pests can suck the sap from artichoke leaves, causing them to become distorted and yellow. Control aphids with insecticidal soap or by introducing beneficial insects such as ladybugs.
* Snails and Slugs: These pests can damage artichoke leaves and buds. Control snails and slugs with beer traps, copper tape, or by hand-picking them off the plants.
* Artichoke Plume Moth: The larvae of this moth can bore into artichoke buds, causing them to rot. Control artichoke plume moth with pheromone traps or by spraying with Bacillus thuringiensis (Bt).
* Lack of Buds: If your artichoke plants are not producing buds, it could be due to a lack of sunlight, water, or nutrients. Make sure your plants are getting enough of all three.
Enjoying Your Harvest
Now for the best part – enjoying the fruits (or rather, the buds!) of your labor. There are countless ways to prepare artichokes. Here are a few of my favorites:
* Steamed Artichokes: This is the classic way to enjoy artichokes. Simply steam them until the bracts are tender and the heart is easily pierced with a fork. Serve with melted butter or your favorite dipping sauce.
* Grilled Artichokes: Grilling artichokes gives them a smoky flavor that’s absolutely delicious.
* Artichoke Hearts: Artichoke hearts can be used in a variety of dishes, such as salads, pasta, and dips.
* Artichoke Dip: This is a crowd-pleasing appetizer that’s perfect for parties.
Growing artichokes at home is a rewarding experience that will provide you with delicious and nutritious food. With a little planning and effort, you can enjoy homegrown artichokes for years to come. Happy gardening!
Conclusion
So, there you have it! Growing artichokes at home, while it might seem daunting at first, is a deeply rewarding experience that brings a touch of the Mediterranean to your garden and your table. We’ve walked through the essential steps, from selecting the right variety and preparing your soil to nurturing your plants and harvesting those prized buds.
Why is this DIY trick a must-try? Because it’s about more than just saving money on store-bought artichokes. It’s about connecting with the food you eat, understanding the growing process, and enjoying the unparalleled flavor of freshly harvested produce. Imagine the satisfaction of serving a dish featuring artichokes you nurtured from tiny seedlings! Plus, homegrown artichokes often boast a superior taste and texture compared to those that have traveled long distances. They are fresher, more tender, and bursting with flavor.
But the benefits don’t stop there. Growing artichokes is also an environmentally friendly choice. You’re reducing your carbon footprint by eliminating transportation costs and supporting sustainable gardening practices. You’re also creating a haven for pollinators in your garden, as artichoke flowers are a magnet for bees and other beneficial insects.
Now, let’s talk about variations and suggestions. Feel free to experiment with different artichoke varieties to find your favorite. ‘Green Globe’ is a classic choice, but ‘Violetta’ offers a beautiful purple hue and a slightly sweeter flavor. Consider companion planting to enhance your artichoke’s growth. Planting basil, marigolds, or rosemary nearby can help deter pests and attract beneficial insects.
For those in colder climates, consider growing artichokes in large containers that can be moved indoors during the winter months. This allows you to enjoy the beauty and bounty of artichokes even if you don’t have a year-round growing season. You can also try forcing artichokes by chilling the roots in the fall to encourage earlier bud production the following spring.
Don’t be afraid to get your hands dirty and embrace the learning process. Gardening is all about experimentation and adapting to your local conditions. Observe your plants closely, pay attention to their needs, and adjust your care accordingly.
We are confident that with a little patience and effort, you can successfully grow delicious artichokes in your own backyard. The taste of freshly harvested, homegrown artichokes is truly unmatched.
So, what are you waiting for? Grab your gardening gloves, prepare your soil, and embark on this exciting culinary adventure. We encourage you to try this DIY trick and experience the joy of growing your own artichokes. And most importantly, we want to hear about your experiences! Share your tips, successes, and challenges in the comments below. Let’s create a community of artichoke enthusiasts and learn from each other. Happy gardening!
Frequently Asked Questions (FAQ)
What is the best time of year to plant artichokes?
The ideal time to plant artichokes depends on your climate. In regions with mild winters, you can plant artichokes in the fall for a spring harvest. In colder climates, it’s best to start artichokes indoors in late winter or early spring and transplant them outdoors after the last frost. This gives them a head start and allows them to establish themselves before the heat of summer.
How much space do artichoke plants need?
Artichoke plants can grow quite large, so they need plenty of space to thrive. As a general rule, allow at least 3 to 4 feet between plants and 4 to 6 feet between rows. This will ensure that each plant has enough room to spread out and receive adequate sunlight and air circulation.
What kind of soil is best for growing artichokes?
Artichokes prefer well-drained, fertile soil that is rich in organic matter. Amend your soil with compost or well-rotted manure before planting to improve its drainage and nutrient content. Artichokes also prefer a slightly acidic to neutral soil pH, ideally between 6.0 and 7.0. You can test your soil pH with a simple soil testing kit and adjust it accordingly.
How often should I water my artichoke plants?
Artichokes need consistent moisture, especially during hot, dry weather. Water deeply and regularly, aiming to keep the soil consistently moist but not waterlogged. Avoid overhead watering, as this can promote fungal diseases. Instead, water at the base of the plants, using a soaker hose or drip irrigation system. Mulching around the plants can also help retain moisture and suppress weeds.
How do I fertilize my artichoke plants?
Artichokes are heavy feeders and benefit from regular fertilization. Apply a balanced fertilizer, such as a 10-10-10 or 14-14-14, according to the package directions. You can also supplement with organic fertilizers, such as compost tea or fish emulsion. Fertilize your artichokes in the spring, after they have started to grow, and again in mid-summer to encourage continued bud production.
How do I protect my artichoke plants from pests and diseases?
Artichokes can be susceptible to a variety of pests and diseases, including aphids, snails, slugs, and powdery mildew. Regularly inspect your plants for signs of infestation or disease and take action promptly. You can control aphids with insecticidal soap or neem oil. Handpick snails and slugs or use traps. Prevent powdery mildew by ensuring good air circulation and avoiding overhead watering.
When are artichokes ready to harvest?
Artichokes are typically ready to harvest in the spring or early summer, depending on your climate and the variety you are growing. The buds should be firm and plump, with tightly closed scales. Harvest the buds when they are about two-thirds of their mature size. Use a sharp knife to cut the stem about 2 to 3 inches below the bud.
Can I grow artichokes in containers?
Yes, you can grow artichokes in containers, especially if you live in a colder climate. Choose a large container, at least 24 inches in diameter, and fill it with well-draining potting mix. Water and fertilize your container-grown artichokes regularly, and provide them with plenty of sunlight. In colder climates, you can move the containers indoors during the winter months.
How do I overwinter artichoke plants?
In regions with mild winters, you can leave your artichoke plants in the ground over the winter. Cut back the foliage to about 6 inches above the ground and mulch heavily around the plants to protect them from frost. In colder climates, you can dig up the plants and store them in a cool, dark place, such as a garage or basement. Alternatively, you can grow artichokes as annuals and replant them each spring.
My artichoke plant produced buds the first year, is this normal?
While artichokes are technically perennials, they often don’t produce buds until their second year. However, some varieties, especially when started early indoors, may produce a few buds in their first year. If this happens, enjoy the harvest! But remember that the plant’s primary focus in its first year is establishing a strong root system, so don’t be disappointed if bud production is limited. The following year, you should see a much more abundant harvest.

Leave a Comment