
Grow Peas at Home – imagine stepping into your backyard and plucking fresh, sweet peas straight from the vine! It’s a dream many gardeners share, and I’m here to tell you it’s totally achievable, even if you’re short on space or experience. Forget those bland, store-bought peas; homegrown flavor is in a league of its own.
Peas have a rich history, dating back thousands of years. They were a staple food in ancient civilizations and have been cultivated across the globe. From humble peasant fare to royal delicacies, peas have nourished and delighted people for generations. But beyond their historical significance, growing your own peas is incredibly rewarding.
Why should you bother with this DIY project? Well, for starters, the taste is unbeatable. Plus, you’ll know exactly what’s gone into your food – no pesticides or mystery ingredients! More importantly, grow peas at home is a fantastic way to connect with nature, reduce your carbon footprint, and enjoy the satisfaction of nurturing something from seed to table. This article is packed with simple, effective tricks and DIY hacks to help you cultivate a thriving pea patch, no matter your gardening skill level. Let’s get started and unlock the secrets to a bountiful pea harvest!
Growing Peas at Home: A Beginner’s Guide
Hey there, fellow gardening enthusiasts! I’m so excited to share my experience with growing peas at home. It’s surprisingly easy and incredibly rewarding. Nothing beats the taste of fresh, homegrown peas straight from the pod! This guide will walk you through everything you need to know, from choosing the right variety to harvesting your delicious crop.
Choosing Your Pea Variety
Before we dive into the nitty-gritty, let’s talk about pea varieties. There are three main types:
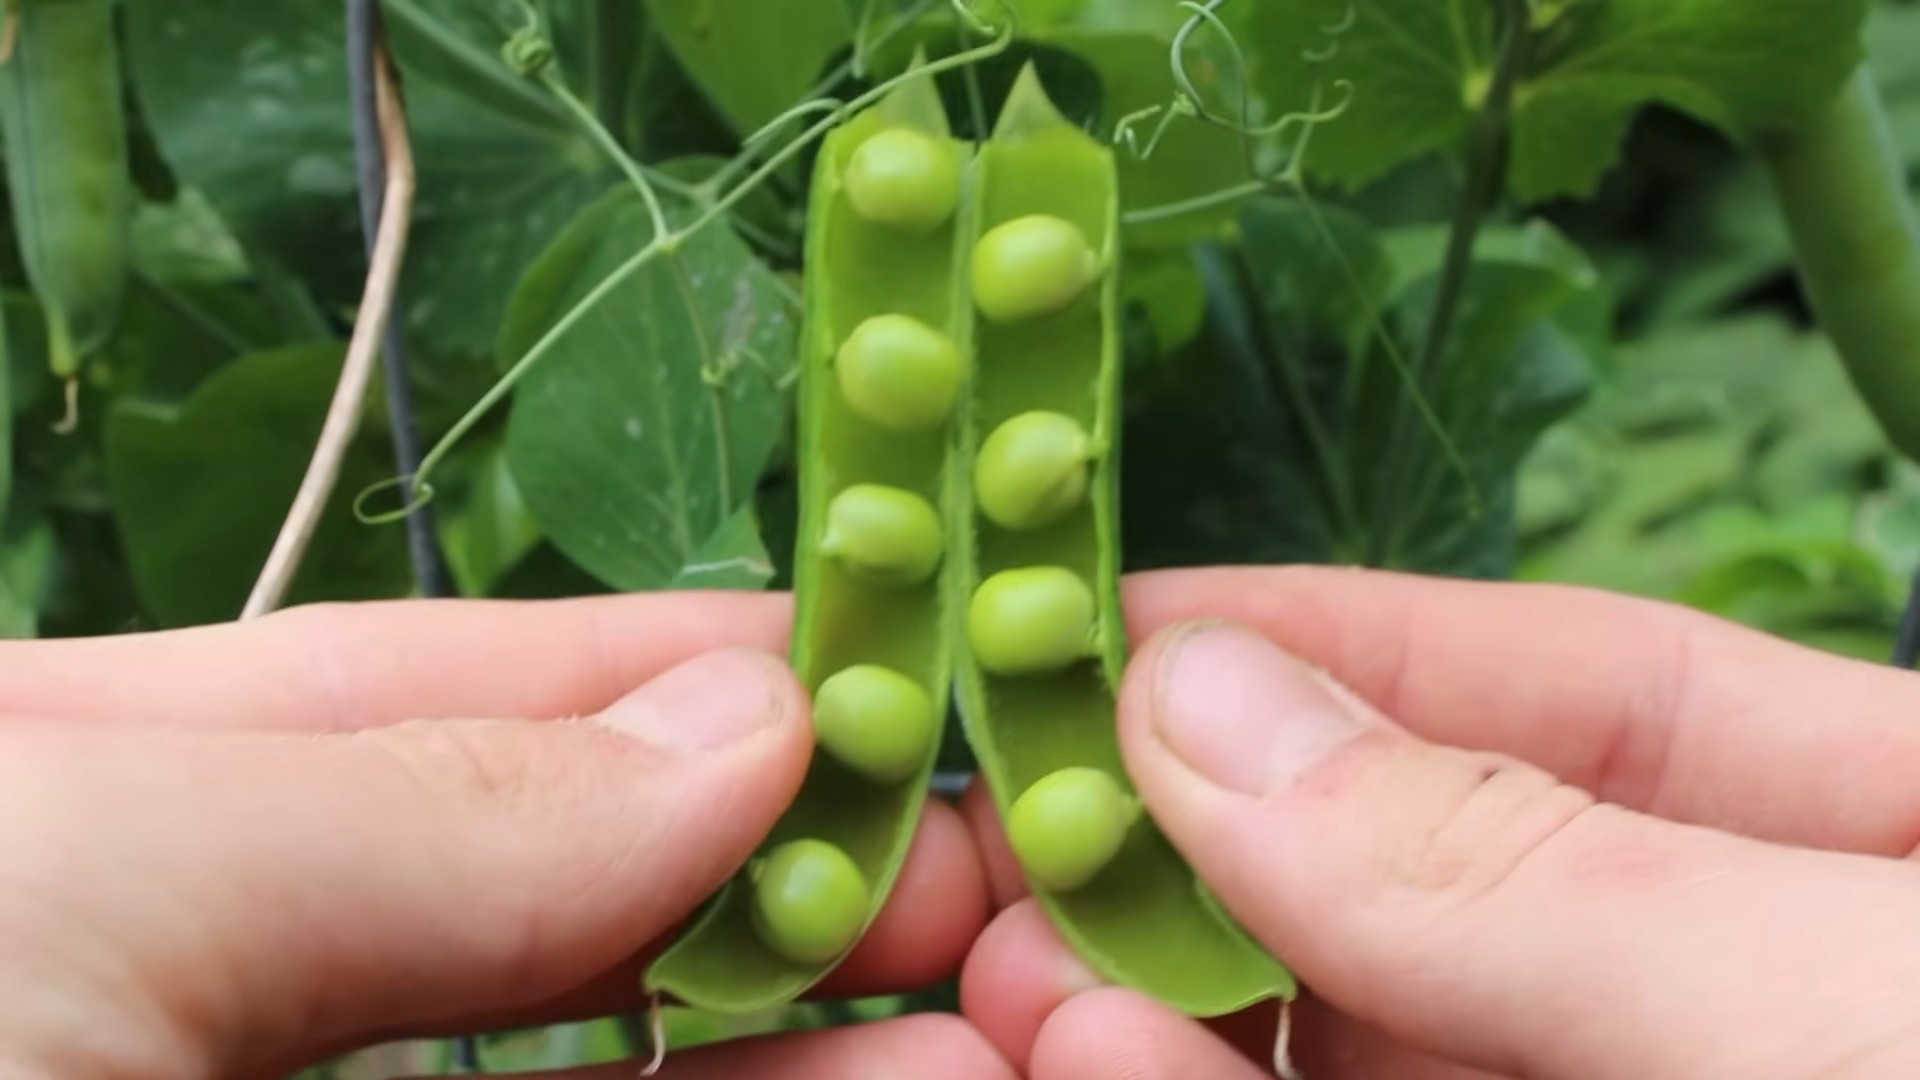
* Shelling Peas (English Peas): These are the classic peas you’re probably most familiar with. You pop them out of their pods to eat the sweet, round peas inside.
* Snap Peas: These are a game-changer! You can eat the entire pod, which is crisp and sweet. They’re perfect for snacking or adding to stir-fries.
* Snow Peas: These have flat pods with small peas inside. They’re also eaten whole and are often used in Asian cuisine.
I personally love growing snap peas because they’re so versatile and easy to eat. But feel free to experiment and find your favorite! Consider your climate and growing space when making your choice. Some varieties are bush types, perfect for containers, while others are vining types that need support.
Getting Started: What You’ll Need
Okay, let’s gather our supplies. Here’s what you’ll need to get started:
* Pea Seeds: Choose your favorite variety!
* Well-Draining Soil: Peas prefer soil that’s rich in organic matter. You can use a good quality potting mix if you’re growing in containers, or amend your garden soil with compost.
* A Sunny Location: Peas need at least 6 hours of sunlight per day.
* Support Structure (for vining varieties): This could be a trellis, netting, or even just some sturdy sticks.
* Watering Can or Hose: For keeping your peas hydrated.
* Optional: Compost or fertilizer for boosting growth.
Step-by-Step Planting Guide
Now for the fun part – planting! Here’s how I plant my peas:
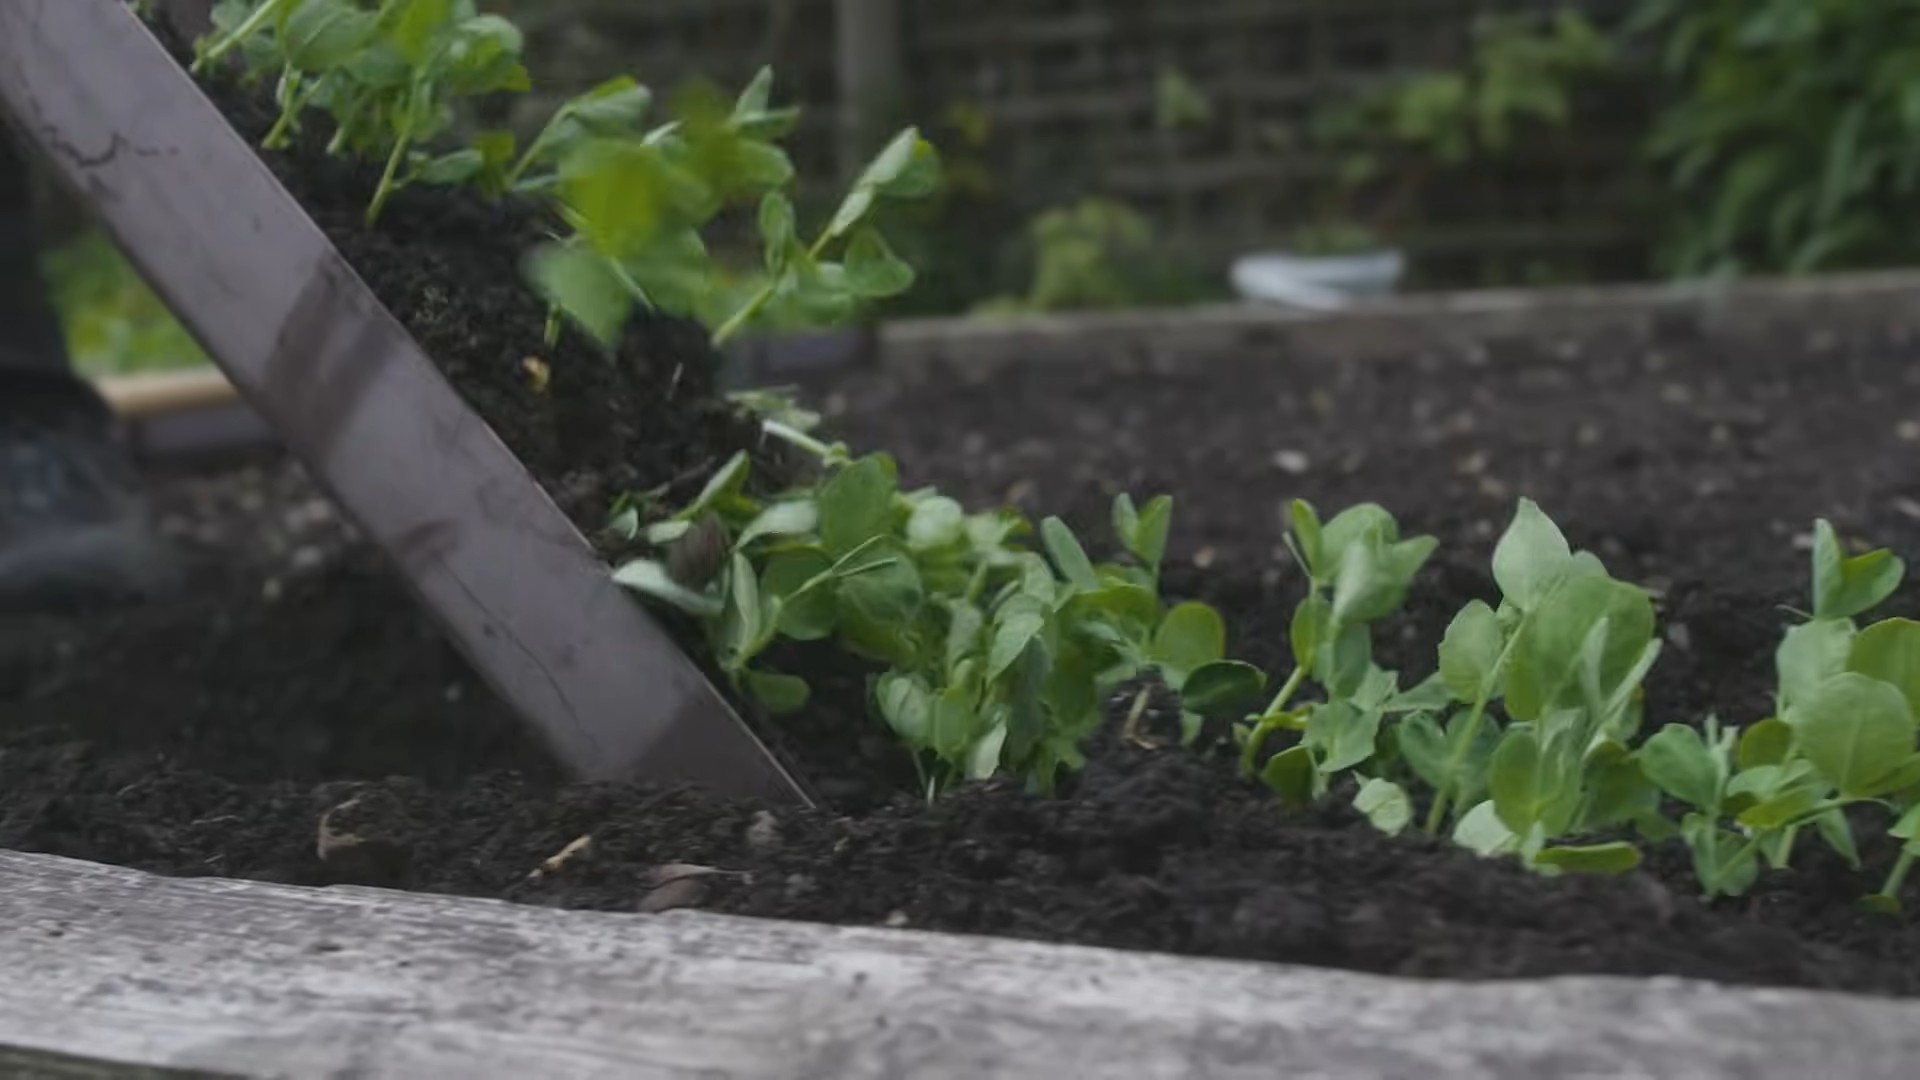
1. Prepare the Soil: Whether you’re using a container or a garden bed, make sure the soil is loose and well-draining. If you’re using garden soil, amend it with compost to improve its fertility and drainage. I like to work the compost in about 6-8 inches deep.
2. Soak the Seeds (Optional): Soaking your pea seeds in water for a few hours before planting can help speed up germination. I usually soak mine for about 2-4 hours. Don’t soak them for too long, or they might rot.
3. Plant the Seeds: Sow the seeds directly into the soil, about 1 inch deep and 1-2 inches apart. If you’re planting in rows, space the rows about 18-24 inches apart.
4. Water Gently: After planting, water the soil gently to moisten it. Be careful not to overwater, as this can cause the seeds to rot.
5. Install Support Structure (if needed): If you’re growing a vining variety, install your trellis or netting now. This will give the pea plants something to climb on as they grow. I find that installing it early prevents disturbing the roots later.
6. Be Patient: Pea seeds typically germinate in 7-14 days, depending on the soil temperature. Keep the soil consistently moist during this time.
Caring for Your Pea Plants
Once your pea plants have sprouted, it’s important to provide them with the right care to ensure a bountiful harvest.
1. Watering: Peas need consistent moisture, especially during flowering and pod development. Water deeply whenever the top inch of soil feels dry. Avoid overhead watering, as this can promote fungal diseases. I prefer to water at the base of the plants.
2. Fertilizing: Peas are relatively light feeders, but they can benefit from a boost of nutrients. You can side-dress your plants with compost or a balanced fertilizer every few weeks. Be careful not to over-fertilize, as this can lead to excessive foliage growth at the expense of pod production.
3. Weeding: Keep the area around your pea plants free of weeds. Weeds can compete with your peas for nutrients and water. I like to hand-pull weeds regularly.
4. Pest Control: Peas are generally pest-resistant, but they can sometimes be affected by aphids or pea weevils. Check your plants regularly for signs of pests. If you find any, you can try spraying them with insecticidal soap or neem oil.
5. Support: As your pea plants grow, make sure they’re properly supported by your trellis or netting. Gently guide the vines onto the support structure as needed. This will help keep the plants off the ground and prevent them from rotting.
Harvesting Your Peas
This is the moment we’ve all been waiting for – harvesting! The timing of your harvest will depend on the type of pea you’re growing.
* Shelling Peas: Harvest when the pods are plump and filled with peas. The pods should be firm but not hard.
* Snap Peas: Harvest when the pods are fully developed but still tender and crisp. The peas inside should be small.
* Snow Peas: Harvest when the pods are flat and the peas are just beginning to develop. The pods should be tender and translucent.
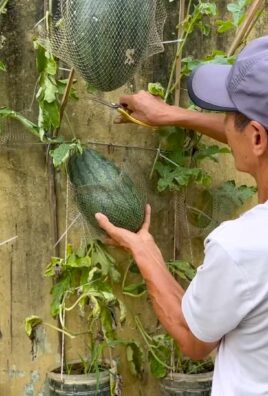
To harvest, simply snip the pods off the vine with scissors or garden shears. Be careful not to damage the plant. Harvest regularly to encourage continued production. I usually harvest every 2-3 days once the peas start producing.
Troubleshooting Common Problems
Even with the best care, you might encounter some problems while growing peas. Here are a few common issues and how to address them:
* Poor Germination: If your pea seeds aren’t germinating, it could be due to several factors, such as cold soil, overwatering, or old seeds. Make sure the soil temperature is above 40°F (4°C) before planting. Avoid overwatering, and use fresh seeds.
* Yellowing Leaves: Yellowing leaves can be a sign of nutrient deficiency, overwatering, or disease. Check the soil drainage and adjust your watering accordingly. You can also try fertilizing your plants with a balanced fertilizer.
* Powdery Mildew: Powdery mildew is a fungal disease that can affect peas, especially in humid conditions. It appears as a white, powdery coating on the leaves. To prevent powdery mildew, provide good air circulation around your plants and avoid overhead watering. If you see signs of powdery mildew, you can try spraying your plants with a fungicide.
* Aphids: Aphids are small, sap-sucking insects that can weaken your pea plants. They often cluster on the undersides of leaves. You can control aphids by spraying them with insecticidal soap or neem oil.
Extending Your Pea Season
Want to enjoy fresh peas for longer? Here are a few tips for extending your pea season:
* Succession Planting: Plant new pea seeds every 2-3 weeks to ensure a continuous harvest.
* Choose Early and Late Varieties: Select pea varieties that mature at different times. This will help you spread out your harvest.
* Protect from Frost: If you live in an area with late frosts, protect your pea plants with row covers or blankets.
* Plant in the Fall: In mild climates, you can plant peas in the fall for a winter or early spring harvest.
Enjoying Your Harvest
Now that you’ve harvested your delicious peas, it’s time to enjoy them! Here are a few of my favorite ways to eat fresh peas:
* Raw: Snap peas and snow peas are delicious eaten raw, straight from the pod.
* Steamed: Steaming peas is a quick and easy way to cook them.
* Sautéed: Sautéed peas are a great addition to stir-fries and other dishes.
* In Salads: Add fresh peas to your favorite salads for a burst of sweetness.
* In Soups: Peas are a classic ingredient in pea soup.
* Frozen: If you have a surplus of peas, you can freeze them for later use. Simply blanch them in boiling water for a few minutes, then cool them in ice water before freezing.
Saving Pea Seeds
If you want to save seeds from your pea plants for next year, here’s how:
1. Allow Pods to Dry on the Vine: Choose a few healthy pea plants and allow some of the pods to dry completely on the vine. The pods should turn brown and brittle.
2. Harvest the Dry Pods: Once the pods are dry, harvest them and remove the seeds.
3. Dry the Seeds: Spread the seeds out on a tray and allow them to dry completely in
Conclusion
So, there you have it! Growing peas at home is not only achievable, but it’s also incredibly rewarding. From the vibrant green shoots emerging from the soil to the sweet, satisfying snap of a freshly picked pod, the entire process is a testament to the magic of nature and the joy of DIY gardening. We’ve walked you through the essential steps, from selecting the right variety and preparing your soil to providing the necessary support and protecting your precious plants from pests.
But why is this DIY trick a must-try? Beyond the obvious benefit of having access to the freshest, most flavorful peas imaginable, growing your own offers a unique connection to your food. You know exactly where your peas came from, how they were grown, and what (or wasn’t) used on them. This translates to peace of mind and a healthier, more sustainable way of eating. Plus, let’s be honest, there’s a certain pride that comes with serving a dish featuring ingredients you nurtured yourself.
Growing peas at home is also a fantastic way to introduce children to the wonders of gardening and healthy eating. They can participate in every stage of the process, from planting the seeds to harvesting the bounty, fostering a lifelong appreciation for fresh produce.
Don’t be afraid to experiment with different varieties of peas to find your favorites. Consider trying snow peas for their edible pods, snap peas for their plump, juicy sweetness, or shelling peas for their classic flavor. You can also adapt the growing method to suit your space. If you’re short on ground space, try growing peas in containers or hanging baskets. Just be sure to provide adequate support for the vines to climb.
For a fun variation, try companion planting. Peas thrive alongside carrots, radishes, and cucumbers, creating a mutually beneficial ecosystem in your garden. These companion plants can help deter pests and improve soil health, leading to even more abundant harvests.
We’ve covered the basics, but the real learning happens when you get your hands dirty. So, grab some seeds, prepare your soil, and embark on your own pea-growing adventure. We’re confident that you’ll be amazed by the results.
Don’t just take our word for it! We encourage you to try this DIY trick and experience the joy of growing your own peas firsthand. And most importantly, share your experiences with us! We’d love to hear about your successes, challenges, and any tips or tricks you discover along the way. Post photos of your pea plants, share your favorite pea recipes, and let’s create a community of home gardeners who are passionate about growing their own food. Let’s get growing!
Frequently Asked Questions (FAQ)
What is the best time of year to plant peas?
Peas are a cool-season crop, meaning they thrive in cooler temperatures. The best time to plant peas is in early spring, as soon as the soil can be worked. In many regions, this is typically around March or April. You can also plant peas in the fall for a late-season harvest, but be sure to plant them early enough so they have time to mature before the first frost. Generally, aim to plant 6-8 weeks before the expected first frost.
What kind of soil do peas need?
Peas prefer well-drained soil that is rich in organic matter. Before planting, amend your soil with compost or other organic materials to improve its fertility and drainage. Peas also prefer a slightly acidic to neutral soil pH, ideally between 6.0 and 7.0. You can test your soil pH with a simple soil testing kit available at most garden centers.
How much sunlight do peas need?
Peas need at least 6-8 hours of sunlight per day to thrive. Choose a planting location that receives plenty of direct sunlight throughout the day. If you live in a particularly hot climate, providing some afternoon shade can help prevent the plants from overheating.
Do peas need support to grow?
Yes, most varieties of peas are vining and require support to climb. This support can be in the form of a trellis, fence, or even just some sturdy sticks. Providing support helps keep the plants off the ground, which improves air circulation and reduces the risk of disease. It also makes harvesting easier.
How often should I water my pea plants?
Peas need consistent moisture to thrive, especially during flowering and pod development. Water your pea plants regularly, especially during dry periods. Aim to keep the soil consistently moist but not waterlogged. A good rule of thumb is to water deeply once or twice a week, depending on the weather conditions.
What are some common pests and diseases that affect peas?
Some common pests that can affect peas include aphids, pea weevils, and slugs. Diseases that can affect peas include powdery mildew, root rot, and fusarium wilt. To prevent pests and diseases, practice good garden hygiene, such as removing weeds and debris from around your plants. You can also use organic pest control methods, such as insecticidal soap or neem oil, to control pests. Ensure good air circulation to minimize fungal diseases.
How do I know when my peas are ready to harvest?
The timing of harvest depends on the variety of pea you are growing. Snow peas are ready to harvest when the pods are flat and the peas inside are just beginning to develop. Snap peas are ready to harvest when the pods are plump and the peas inside are fully developed but still tender. Shelling peas are ready to harvest when the pods are plump and the peas inside are fully developed and firm. The best way to tell if your peas are ready to harvest is to taste them!
Can I grow peas in containers?
Yes, you can grow peas in containers, but you will need to choose a container that is large enough to accommodate the plant’s root system. A container that is at least 12 inches deep and 12 inches wide is a good size for growing peas. Be sure to use a well-draining potting mix and provide adequate support for the vines to climb. Container-grown peas may need to be watered more frequently than peas grown in the ground.
Can I save pea seeds for next year?
Yes, you can save pea seeds for next year. To save pea seeds, allow the pods to dry completely on the plant. Once the pods are dry and brittle, shell the peas and store them in an airtight container in a cool, dry place. Be sure to label the container with the variety of pea and the date of harvest.
Are there any companion plants that are beneficial for peas?
Yes, there are several companion plants that can be beneficial for peas. Some good companion plants for peas include carrots, radishes, cucumbers, and lettuce. These plants can help deter pests, improve soil health, and provide shade for the pea plants. Avoid planting peas near onions or garlic, as these plants can inhibit pea growth.
Leave a Comment