
Rubber Band Life Hacks: Who knew these humble little loops could be the secret weapon in your home garden arsenal? I’m always on the lookout for clever and cost-effective ways to make gardening easier and more enjoyable, and trust me, you’re going to love these simple yet brilliant rubber band tricks!
For generations, resourceful gardeners have relied on ingenuity and readily available materials to nurture their green spaces. While we might not think of rubber bands as a traditional gardening tool, their versatility is undeniable. Think of it as a modern twist on age-old practices of resourcefulness – a way to connect with the past while embracing innovative solutions.
Are you tired of struggling with unruly tomato plants? Do you find yourself constantly battling pests nibbling on your precious seedlings? Or perhaps you’re just looking for a way to organize your gardening tools without breaking the bank? That’s where these rubber band life hacks come in! I’ll show you how to use them for everything from supporting delicate stems to creating makeshift plant markers. These hacks are not only incredibly practical, but they’re also a fantastic way to reduce waste and save money. Get ready to unlock the hidden potential of rubber bands and transform your gardening experience!
Rubber Band Life Hacks: Unleash the Power of Elasticity!
Hey there, fellow DIY enthusiasts! I’m super excited to share some amazing rubber band life hacks with you. These little elastic wonders are incredibly versatile and can solve a surprising number of everyday problems. Get ready to be amazed by the power of a simple rubber band!
Preventing Slippage and Improving Grip
One of the most common uses for rubber bands is to prevent things from slipping. Here’s how you can use them to your advantage:
Securing Cutting Boards
Tired of your cutting board sliding all over the counter while you’re trying to chop veggies? I know I am! This is a super simple fix:
1. Gather your materials: You’ll need four rubber bands (the thicker, the better) and your slippery cutting board.
2. Position the rubber bands: Flip your cutting board over. Place one rubber band around each corner of the board. Make sure they’re snug but not so tight that they’re about to snap.
3. Test it out: Flip the cutting board back over and give it a push. You should notice a significant improvement in grip! The rubber bands create friction between the board and the countertop, preventing it from sliding around.
Enhancing Grip on Tools
Do you ever struggle to get a good grip on tools, especially when your hands are wet or greasy? Rubber bands to the rescue!
1. Choose your tool: Select the tool you want to improve the grip on. This works great for screwdrivers, pliers, wrenches, and even gardening tools.
2. Wrap the handle: Wrap a rubber band tightly around the handle of the tool. Overlap the rubber band as you wrap to create a textured surface. You can use multiple rubber bands for a thicker grip.
3. Secure the ends: Tuck the ends of the rubber band under the wrapped portion to secure them.
4. Test the grip: Give the tool a try. You should notice a much better grip, even with wet or greasy hands.
Preventing Clothes Hangers from Slipping
Ugh, clothes constantly sliding off hangers is so frustrating! Here’s a quick and easy solution:
1. Grab some rubber bands: You’ll need two rubber bands per hanger.
2. Attach the rubber bands: Wrap one rubber band around each end of the hanger, near the shoulders.
3. Hang your clothes: Now, hang your clothes as usual. The rubber bands will create friction, preventing them from slipping off the hanger. This works especially well for silky or delicate fabrics.
Organizing and Securing Items
Rubber bands are also fantastic for organizing and securing various items around your home.
Bundling Cables and Cords
Tired of tangled messes of cables behind your TV or computer? I feel your pain! Rubber bands are a simple and effective solution:
1. Gather your cables: Collect the cables you want to organize.
2. Bundle them together: Neatly bundle the cables together.
3. Secure with a rubber band: Wrap a rubber band tightly around the bundled cables to keep them together. You can use multiple rubber bands for larger bundles.
4. Label (optional): For extra organization, you can label each bundle with a small tag indicating what the cables are for.
Keeping Drawers and Cabinets Closed
Do you have drawers or cabinets that won’t stay closed? This is a common problem, especially with older furniture. Here’s a clever fix:
1. Find a suitable rubber band: You’ll need a rubber band that’s long enough to stretch around the drawer or cabinet and its frame.
2. Attach the rubber band: Loop one end of the rubber band around the knob or handle of the drawer or cabinet.
3. Stretch and secure: Stretch the rubber band around the side of the drawer or cabinet and loop the other end around a knob, screw, or other protrusion on the frame.
4. Adjust tension: Adjust the tension of the rubber band as needed to keep the drawer or cabinet closed securely.
Securing Lids on Containers
Loose lids on containers can be a real pain, especially when you’re transporting food or liquids. Rubber bands can help keep those lids in place:
1. Choose your container: Select the container with the loose lid.
2. Wrap with a rubber band: Wrap a rubber band tightly around the container, securing the lid in place. Make sure the rubber band is snug enough to prevent the lid from coming off.
3. Double up (optional): For extra security, you can use two rubber bands, one on each side of the container.
Creative Uses and DIY Projects
Beyond the practical applications, rubber bands can also be used for some fun and creative DIY projects.
Creating a Makeshift Phone Stand
Need a quick and easy phone stand? Rubber bands to the rescue!
1. Gather your materials: You’ll need several rubber bands (the more, the sturdier the stand) and a small, flat object like a credit card or business card.
2. Create a triangle: Form a triangle shape with the rubber bands, overlapping them to create a stable base.
3. Insert the card: Slide the credit card or business card into the triangle, creating a support for your phone.
4. Adjust the angle: Adjust the angle of the card to find the perfect viewing position for your phone.
Making a Rubber Band Powered Car
This is a fun project for kids (and adults!) that demonstrates the power of potential energy:
1. Gather your materials: You’ll need a small toy car (preferably one with a lightweight body), a rubber band, and a paper clip or small hook.
2. Attach the rubber band: Tie one end of the rubber band to the rear axle of the car.
3. Create a hook: Bend the paper clip into a small hook shape.
4. Attach the hook: Attach the hook to the front of the car.
5. Wind up the rubber band: Hook the other end of the rubber band onto the hook. Wind up the rubber band by turning the rear wheels backwards.
6. Release and watch it go: Place the car on a flat surface and release the rear wheels. The unwinding rubber band will propel the car forward.
Creating a Rubber Band Bracelet
This is a fun and easy craft project that can be customized with different colors and patterns:
1. Gather your materials: You’ll need a variety of colored rubber bands and a small clasp or S-clip.
2. Create a loop: Take one rubber band and twist it into a figure eight shape. Place it on your fingers or a loom.
3. Add more rubber bands: Add two more rubber bands on top of the first one, without twisting them.
4. Loop the bottom band: Use a hook or your fingers to loop the bottom rubber band over the top two rubber bands.
5. Repeat the process: Add another rubber band on top and loop the bottom band over it. Continue this process until the bracelet is the desired length.
6. Attach the clasp: Attach the clasp or S-clip to both ends of the bracelet to secure it.
Household Hacks
Rubber bands can also be used for some clever household hacks.
Preventing Paint Drips
When painting, a rubber band can help prevent messy drips down the side of the can:
1. Find a suitable rubber band: You’ll need a rubber band that’s large enough to stretch around the paint can.
2. Wrap around the can: Stretch the rubber band around the paint can, positioning it across the opening.
3. Wipe the brush: When you dip your brush into the paint, wipe off the excess paint on the rubber band. This will prevent drips from running down the side of the can.
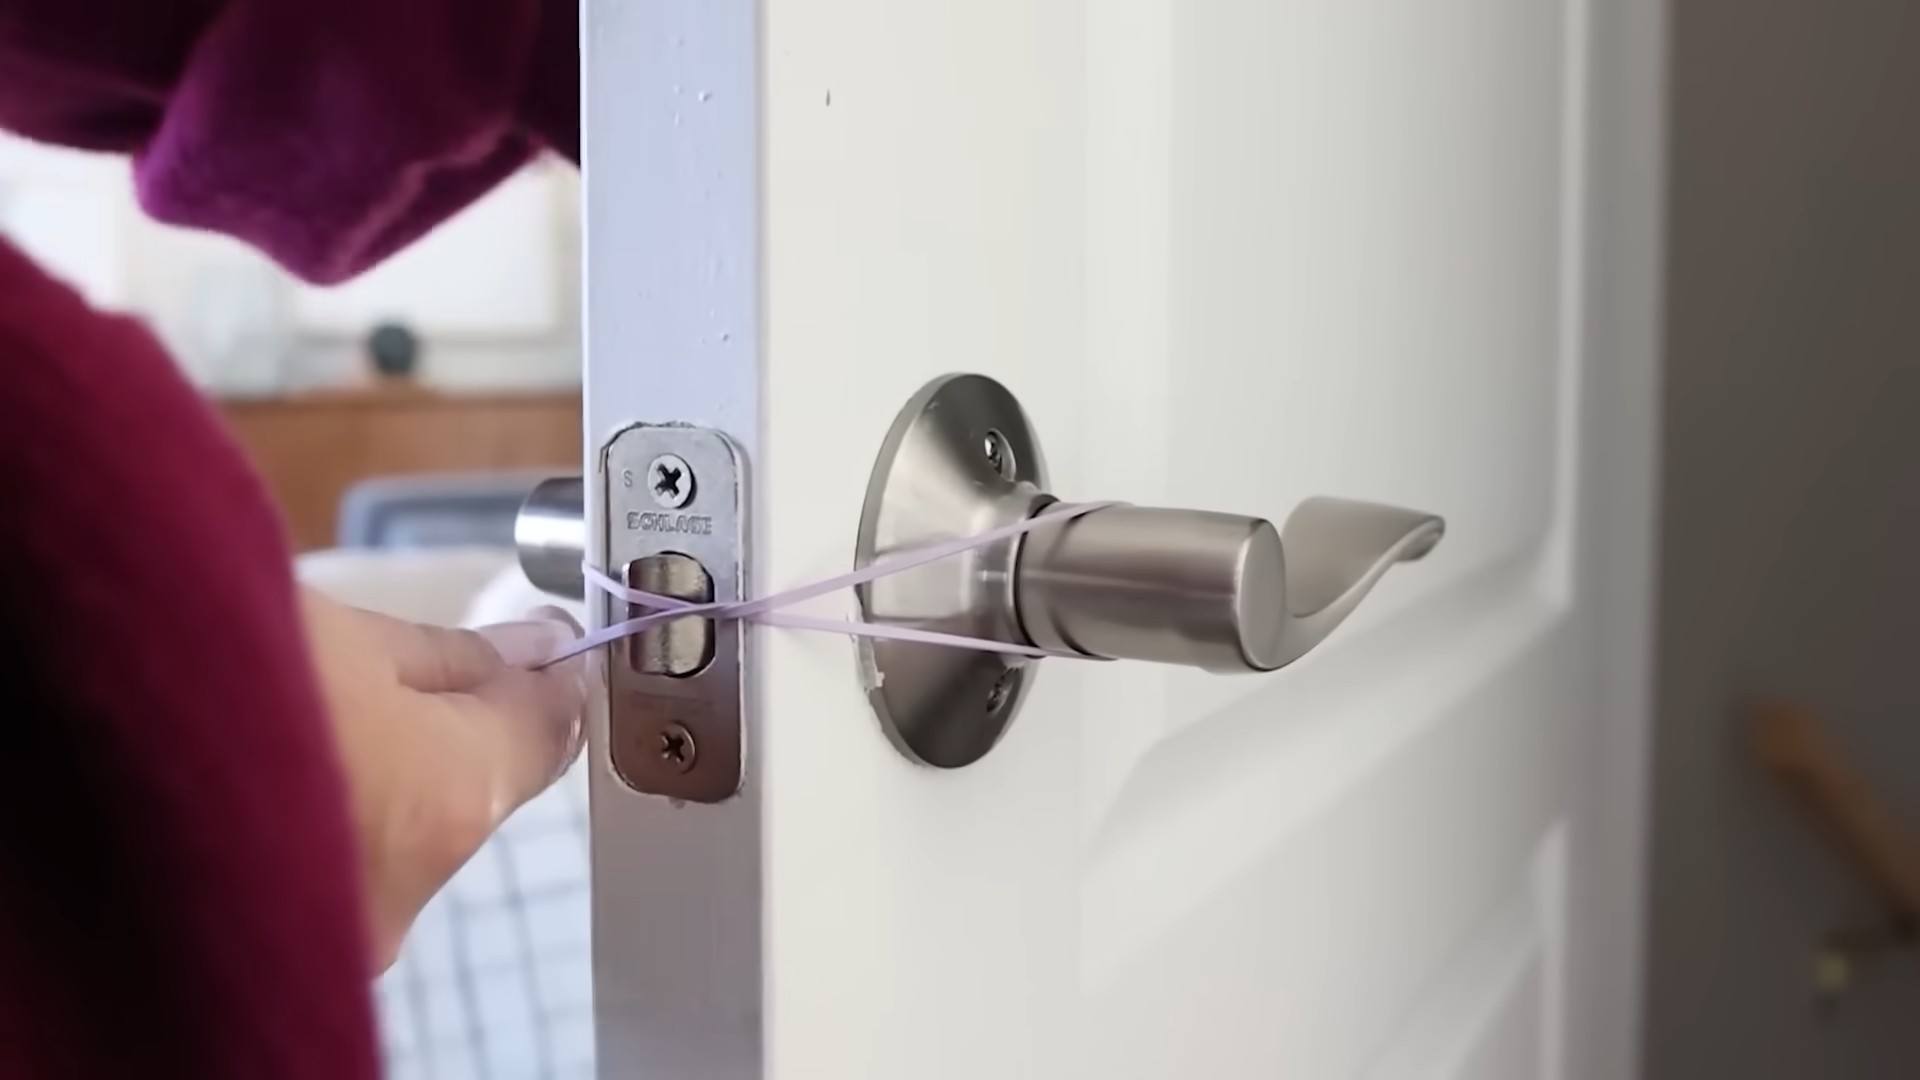
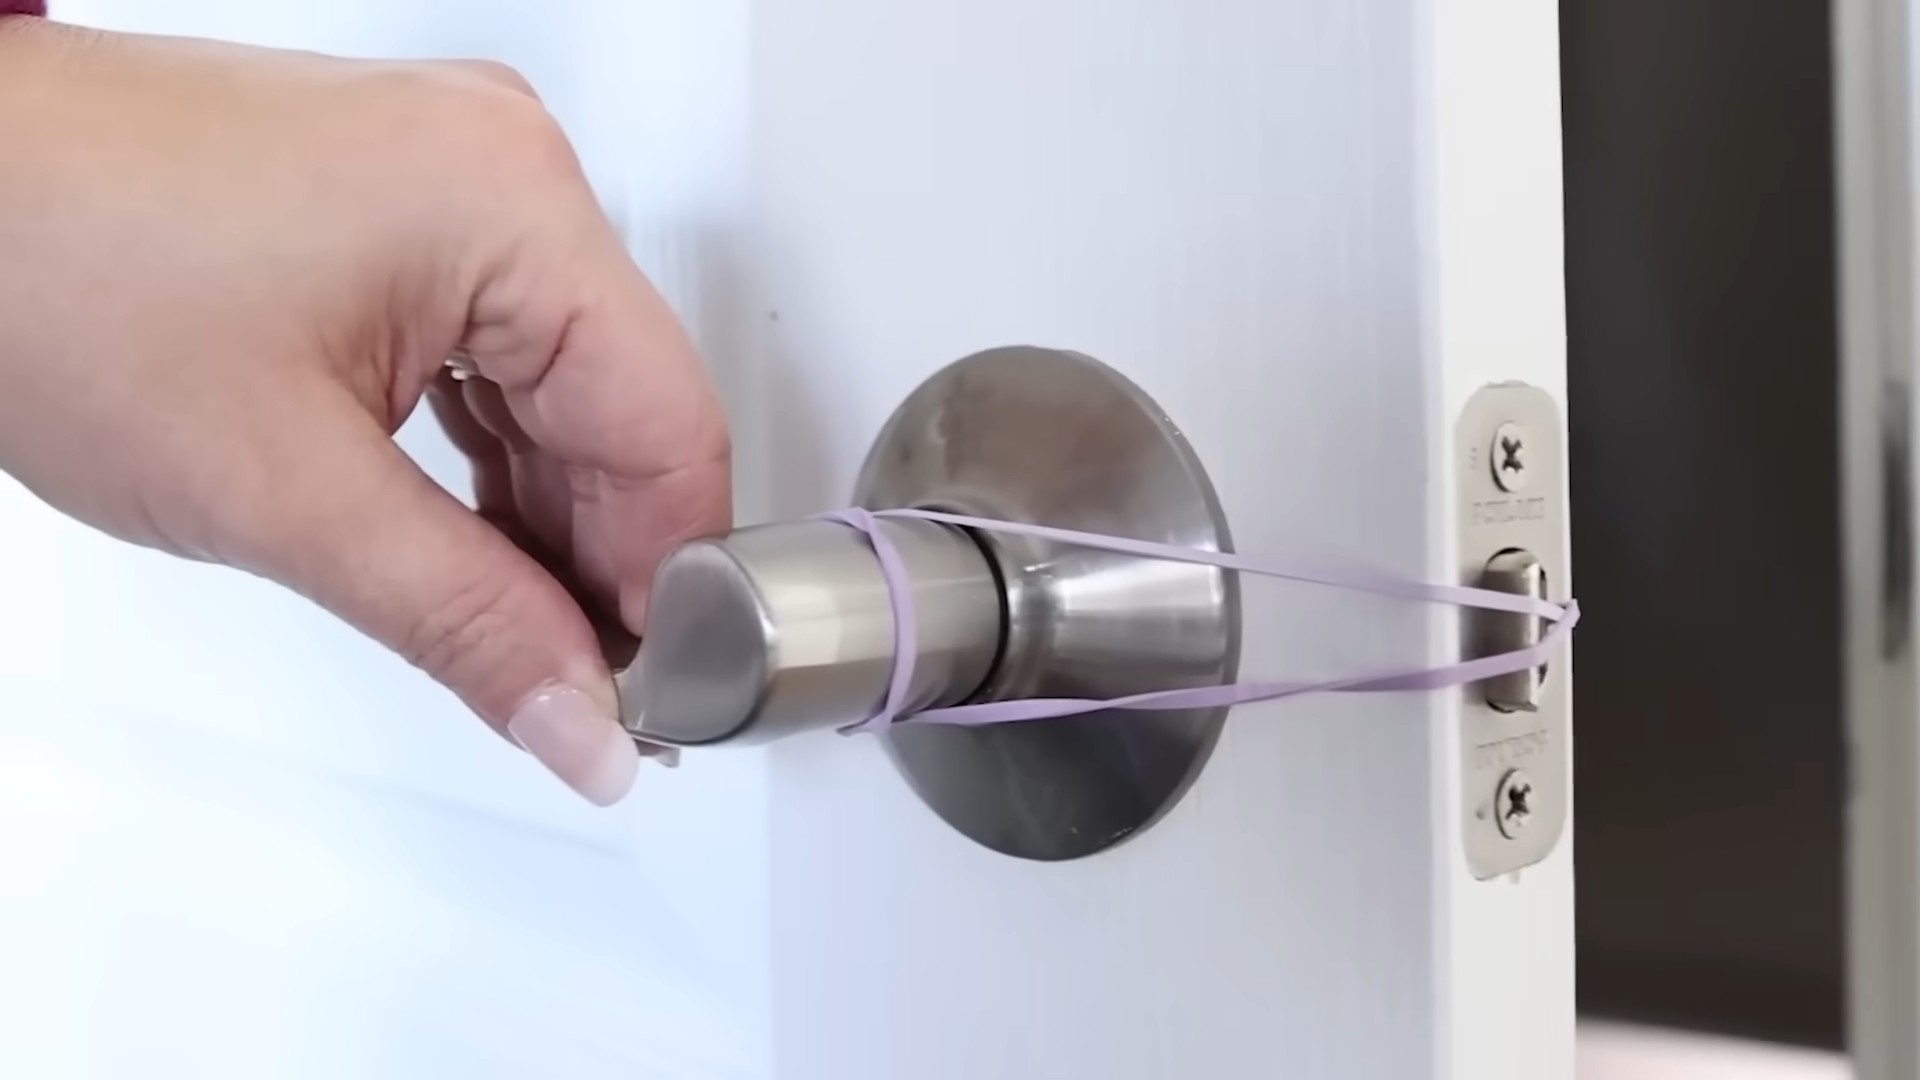
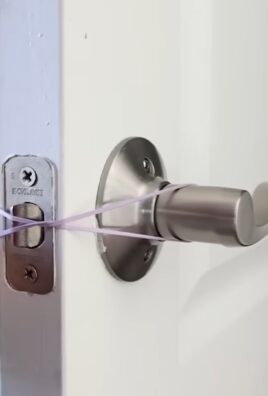
Opening Stuck Jars
Struggling to open a stubborn jar lid? A rubber band can provide extra grip:
1. Grab a rubber band: You’ll need a wide rubber band.
2. Wrap around the lid: Wrap the rubber band tightly around the edge of the jar lid.
3. Grip and twist: Grip the rubber band-covered lid firmly and twist. The rubber band will provide extra friction, making it easier to open the jar.
Keeping Apples from Browning
Cut apples tend to brown quickly. A rubber band can help slow down this process:
1. Cut the apple: Cut the apple into slices.
2. Reassemble the apple: Put the apple slices back together to form the original shape.
3. Secure with a rubber band: Wrap a rubber band tightly around the apple to hold the slices together. This will minimize exposure to air and slow down browning.
Marking Your Glass
At a party, it’s easy to
Conclusion
So, there you have it! A collection of incredibly simple, yet remarkably effective rubber band life hacks that can genuinely make your day-to-day life a little easier, a little more organized, and a whole lot less frustrating. From preventing slipping cutting boards to creating makeshift phone stands, the versatility of these humble elastic bands is truly astounding.
What makes these hacks a must-try? It’s the sheer accessibility and affordability. Rubber bands are inexpensive, readily available in almost every household, and require absolutely no special skills or tools to implement. You’re not investing in expensive gadgets or complicated systems; you’re simply leveraging the inherent properties of elasticity and friction to solve common problems. Think about the time you’ve spent searching for a grip to open a stubborn jar, or the frustration of a sliding cutting board while you’re trying to prepare dinner. These are minor inconveniences, yes, but they add up. These rubber band solutions offer instant relief, transforming those moments of annoyance into moments of effortless efficiency.
Beyond the basic hacks we’ve covered, the possibilities are truly endless. Consider using thicker, wider rubber bands for heavier-duty tasks, like securing larger items or providing extra grip on tools. Experiment with different colors to color-code your organization systems – use red rubber bands to bundle cables related to your computer, blue for those connected to your TV, and so on. Get creative with your crafting projects! Rubber bands can be used to create unique textures, secure embellishments, or even build entire structures.
Don’t be afraid to adapt these hacks to your specific needs and circumstances. The beauty of DIY is in the personalization. If a particular method doesn’t quite work for you, tweak it, modify it, and make it your own. The key is to embrace the spirit of experimentation and discover the rubber band life hacks that resonate most with your lifestyle.
We wholeheartedly encourage you to try out these rubber band life hacks and see for yourself the difference they can make. Start with the ones that seem most relevant to your daily routines, and gradually explore the others. You might be surprised at how quickly you become reliant on these simple yet ingenious solutions.
But most importantly, we want to hear about your experiences! Did you discover a new and innovative way to use rubber bands? Did you find a variation that worked particularly well for you? Share your tips, tricks, and stories in the comments below. Let’s build a community of rubber band enthusiasts and collectively unlock the full potential of these amazing little bands. Your insights could inspire others and contribute to a growing library of DIY solutions. So go ahead, grab a handful of rubber bands, and start hacking your way to a more organized, efficient, and stress-free life!
FAQ
What types of rubber bands work best for these hacks?
The best type of rubber band depends on the specific hack you’re trying to implement. For general-purpose tasks like bundling items or providing grip, standard-sized rubber bands are usually sufficient. However, for heavier-duty applications, such as securing larger objects or providing extra grip on tools, thicker and wider rubber bands are recommended. You can also find specialized rubber bands designed for specific purposes, such as orthodontic rubber bands or industrial-strength rubber bands. Experiment with different sizes and thicknesses to find what works best for your needs. Consider the elasticity and durability of the rubber band as well. Some cheaper rubber bands may snap easily, while higher-quality ones will last longer and provide better performance.
Are there any safety precautions I should take when using rubber bands?
Yes, there are a few safety precautions to keep in mind when using rubber bands. First, avoid stretching rubber bands excessively, as they can snap and potentially cause injury, especially to the eyes. Always wear safety glasses if you’re working with rubber bands that are under high tension. Second, be mindful of small children and pets, as rubber bands can be a choking hazard. Keep them out of reach and supervise children when they are using rubber bands. Third, avoid using rubber bands in areas where they might be exposed to extreme heat or sunlight, as this can cause them to degrade and lose their elasticity. Finally, be careful when removing rubber bands from sharp objects, as they can snap back quickly and cause cuts or scratches.
Can I use these rubber band hacks on delicate surfaces without causing damage?
When using rubber bands on delicate surfaces, it’s important to exercise caution to avoid scratching or damaging the material. Before applying a rubber band directly to a delicate surface, consider placing a protective layer of cloth or padding underneath. This will help to cushion the surface and prevent any direct contact with the rubber band. Additionally, avoid using excessive force when stretching or tightening the rubber band, as this can increase the risk of damage. If you’re unsure whether a particular rubber band hack is safe for a delicate surface, it’s always best to test it in an inconspicuous area first.
How can I prevent rubber bands from drying out and cracking?
To prevent rubber bands from drying out and cracking, store them in a cool, dark, and dry place. Avoid exposing them to direct sunlight, heat, or humidity, as these conditions can accelerate the degradation process. You can also store rubber bands in an airtight container or bag to protect them from the elements. Some people recommend dusting rubber bands with talcum powder or cornstarch to help absorb moisture and prevent them from sticking together. Another option is to apply a small amount of silicone lubricant to the rubber bands to keep them supple and prevent them from drying out. Regularly inspect your rubber bands for signs of cracking or deterioration, and discard any that are damaged.
What are some alternative materials I can use if I don’t have rubber bands?
While rubber bands are incredibly versatile, there are several alternative materials you can use in a pinch. Twist ties, commonly found on bread bags or electronic cables, can be used to bundle items or secure objects. String or twine can also be used for tying and securing purposes. Velcro straps or cable ties are another option for organizing and managing cables. For providing grip, you can use non-slip mats or pads. In some cases, you can even use tape as a temporary solution. However, keep in mind that these alternatives may not be as elastic or durable as rubber bands, so they may not be suitable for all applications. The best alternative will depend on the specific task you’re trying to accomplish.
Can I reuse rubber bands, or should I discard them after each use?
You can definitely reuse rubber bands multiple times, as long as they are still in good condition and haven’t lost their elasticity. However, it’s important to inspect rubber bands before each use to ensure that they are not cracked, torn, or excessively stretched. If a rubber band shows signs of damage, it’s best to discard it to avoid breakage and potential injury. When removing rubber bands from objects, be careful not to overstretch them or damage them with sharp objects. Store used rubber bands in a cool, dry place to prevent them from drying out and cracking. With proper care and maintenance, you can extend the lifespan of your rubber bands and reuse them for a variety of purposes.
Are there any environmentally friendly alternatives to traditional rubber bands?
Yes, there are several environmentally friendly alternatives to traditional rubber bands. One option is to use biodegradable rubber bands made from natural rubber or other sustainable materials. These rubber bands will decompose naturally over time, reducing their impact on the environment. Another alternative is to use reusable silicone bands, which are durable and can be used repeatedly. You can also find rubber bands made from recycled materials, such as recycled tires or plastic bottles. When purchasing rubber bands, look for products that are labeled as eco-friendly or sustainable. By choosing environmentally friendly alternatives, you can reduce your reliance on traditional rubber bands and minimize your environmental footprint.
Leave a Comment