
Dollar Tree Rack Ideas: Unlock your home’s hidden potential with budget-friendly organization! Have you ever felt overwhelmed by clutter, wishing you had a magic wand to create instant storage? Well, maybe I can’t offer magic, but I can offer something just as good: ingenious DIY rack solutions using materials from the Dollar Tree!
For generations, resourceful individuals have found creative ways to organize their homes without breaking the bank. From repurposing old crates to crafting makeshift shelves, the spirit of “making do” has always been a cornerstone of home management. Today, we’re channeling that same spirit, but with a modern twist, leveraging the affordability and accessibility of Dollar Tree finds.
Why do you need these Dollar Tree rack ideas? Because a well-organized space is a happy space! Clutter can lead to stress, decreased productivity, and even difficulty finding what you need. These DIY hacks are designed to help you maximize your storage, minimize your spending, and create a more functional and aesthetically pleasing home environment. I’m excited to share these simple, yet effective, projects that will transform your space and your peace of mind. Let’s get started!
Transform Your Space: Amazing DIY Projects with Dollar Tree Racks!
Hey there, fellow DIY enthusiasts! I’m so excited to share some incredibly versatile and budget-friendly projects you can create using those simple wire racks from Dollar Tree. Seriously, these things are a goldmine for organization and creativity. I’ve been experimenting with them for ages, and I’m constantly amazed at what you can achieve with a little imagination and a few dollars. Let’s dive in!
Project 1: DIY Stackable Storage Bins
This project is perfect for decluttering your pantry, closet, or even your garage. I love how easily these bins stack, maximizing vertical space.
Materials You’ll Need:
* 4 Dollar Tree wire racks per bin
* Zip ties (lots of them!)
* Wire cutters or strong scissors
* Optional: Shelf liner or fabric to line the bottom
Step-by-Step Instructions:
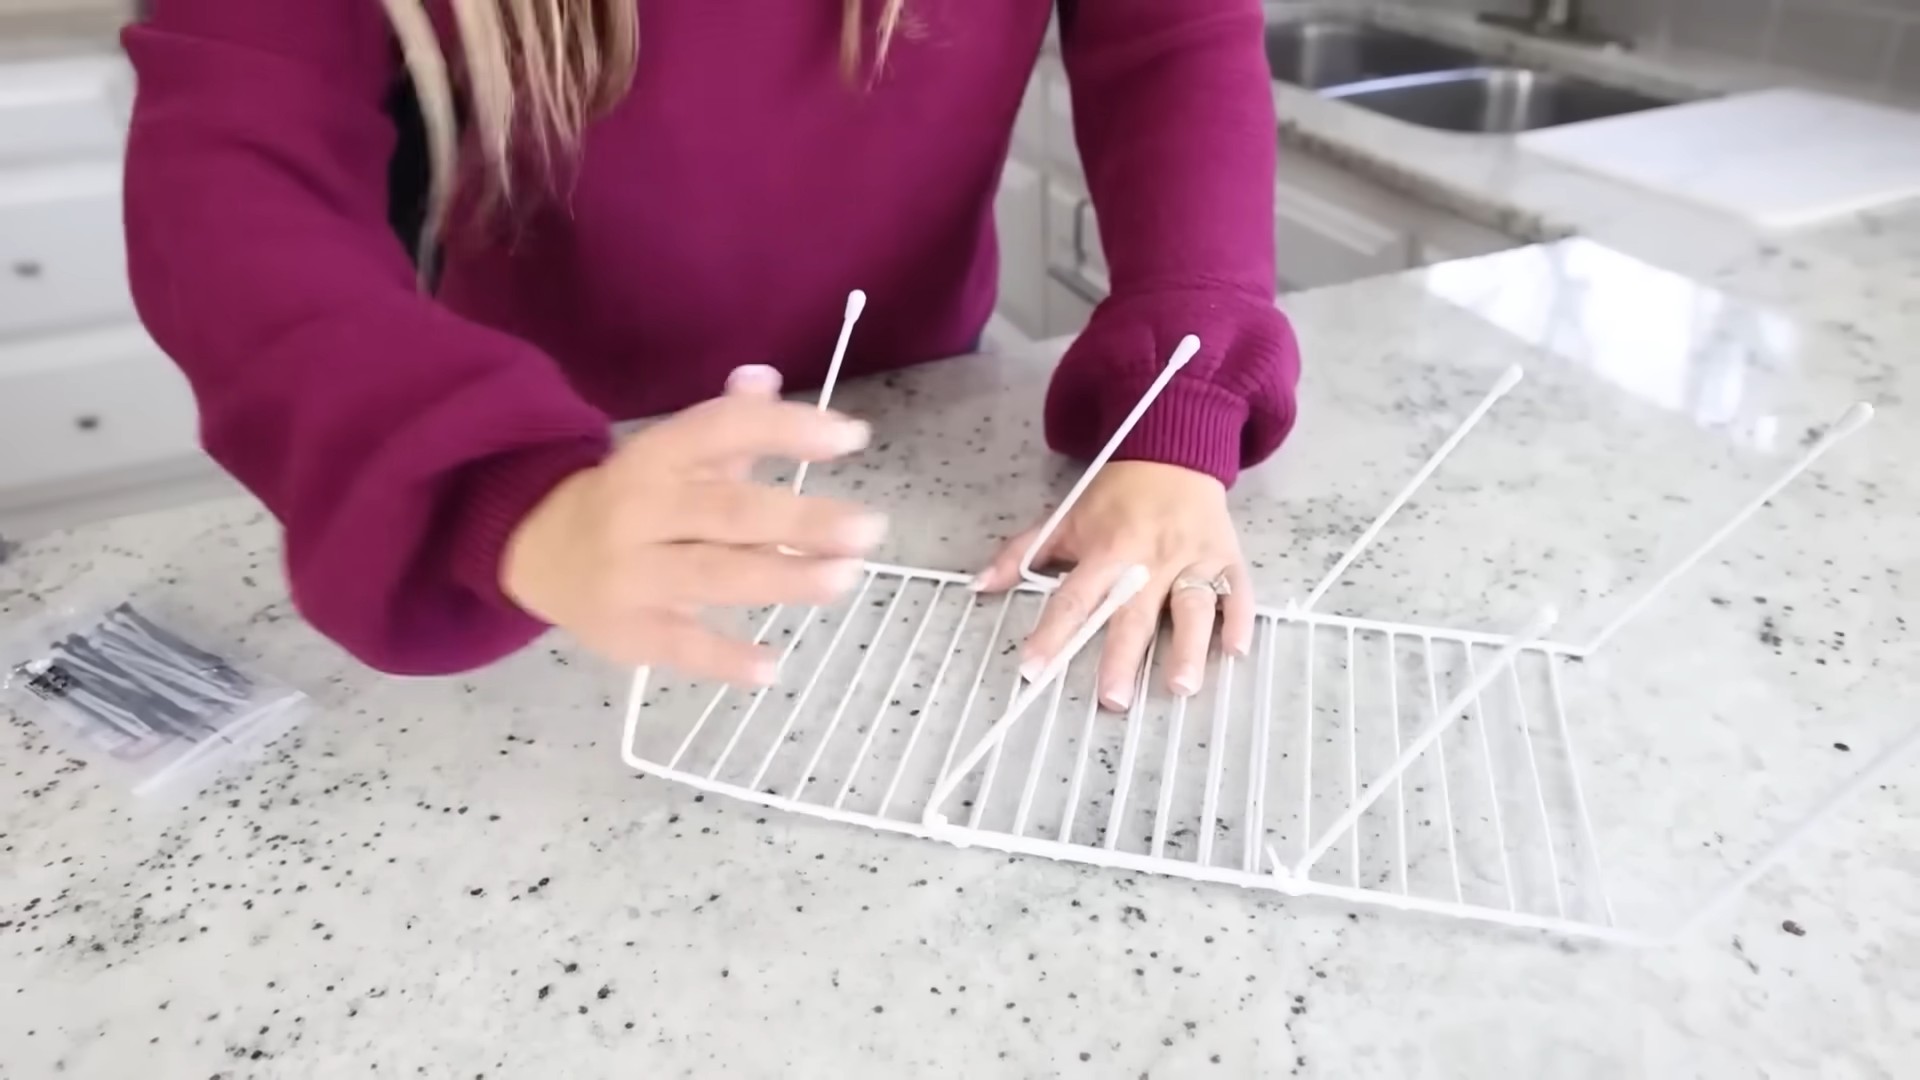
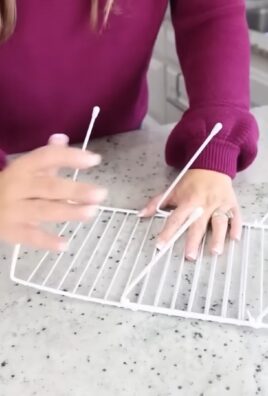
1. Form the Base: Take one wire rack and lay it flat. This will be the bottom of your bin.
2. Create the Sides: Position the remaining three racks vertically around the base rack, forming the sides of the bin. Make sure the edges are aligned as best as possible.
3. Secure with Zip Ties: This is where the zip ties come in handy! Start by attaching the side racks to the base rack. Use multiple zip ties along each edge for added stability. I usually place them about every 2-3 inches. Snug them up tight!
4. Connect the Sides: Now, connect the side racks to each other at the corners. Again, use plenty of zip ties to ensure a strong and secure connection. I like to double up on the zip ties at the corners for extra reinforcement.
5. Trim the Excess: Once all the racks are securely connected, use your wire cutters or scissors to trim the excess length of the zip ties. Be careful not to cut yourself!
6. Lining (Optional): If you want to prevent small items from falling through the wire mesh, you can line the bottom of the bin with shelf liner or fabric. Cut the liner or fabric to fit the base and secure it with glue dots or double-sided tape.
7. Stack and Organize: That’s it! Your DIY stackable storage bin is ready to use. Create multiple bins and stack them to maximize your storage space. I use these in my pantry for canned goods, snacks, and even cleaning supplies.
Project 2: Hanging Herb Drying Rack
If you’re a gardener like me, you’ll love this simple and effective way to dry your herbs. It’s much cheaper than buying a fancy herb dryer, and it works just as well.
Materials You’ll Need:
* 3-4 Dollar Tree wire racks (depending on how many tiers you want)
* Zip ties
* S-hooks or chain for hanging
* Wire cutters or strong scissors
Step-by-Step Instructions:
1. Create the Tiers: Lay one wire rack flat. This will be your bottom tier.
2. Attach the Next Tier: Place another wire rack on top of the first one, leaving a few inches of space between them. This space will allow for air circulation and proper drying.
3. Secure with Zip Ties: Use zip ties to connect the two racks at the corners and along the sides. Make sure the racks are securely attached and the spacing is consistent.
4. Add More Tiers (Optional): If you want to create a multi-tiered drying rack, repeat steps 2 and 3 for each additional rack. I usually make mine with three tiers, but you can add more if you have a lot of herbs to dry.
5. Attach Hanging Hardware: Now, you need to attach the S-hooks or chain to the top rack so you can hang the drying rack. You can attach the S-hooks directly to the wire mesh, or you can use zip ties to create loops for the hooks to hang from. If you’re using chain, attach it to the corners of the top rack using zip ties.
6. Hang and Dry: Hang your herb drying rack in a well-ventilated area, away from direct sunlight. Spread your freshly harvested herbs on the racks and let them dry completely. I usually check them every few days and turn them over to ensure even drying.
Project 3: DIY Desk Organizer
Keep your desk clutter-free with this easy and customizable desk organizer. It’s perfect for storing pens, pencils, notebooks, and other office supplies.
Materials You’ll Need:
* 2 Dollar Tree wire racks
* Zip ties
* Optional: Spray paint (any color you like!)
* Optional: Small containers or cups to hold pens and pencils
Step-by-Step Instructions:
1. Prepare the Racks: If you want to customize the look of your desk organizer, now is the time to spray paint the wire racks. Choose a color that complements your desk or office decor. Let the paint dry completely before proceeding.
2. Form the Base: Take one wire rack and lay it flat. This will be the base of your organizer.
3. Create the Back: Position the second wire rack vertically behind the base rack, forming the back of the organizer.
4. Secure with Zip Ties: Use zip ties to connect the back rack to the base rack. Focus on the bottom edge and the corners for maximum stability.
5. Add Containers (Optional): If you want to add containers to hold pens, pencils, and other small items, you can attach them to the wire mesh using zip ties. I like to use small plastic cups or containers from Dollar Tree.
6. Organize Your Desk: Place your DIY desk organizer on your desk and start organizing your supplies. You can use it to store pens, pencils, notebooks, paper clips, and anything else that tends to clutter your workspace.
Project 4: DIY Rolling Cart
This project takes a little more effort, but the result is a super functional and stylish rolling cart that you can use in your kitchen, bathroom, or anywhere you need extra storage.
Materials You’ll Need:
* 4 Dollar Tree wire racks
* 4 Swivel casters (available at hardware stores or online)
* Zip ties
* Screws and a screwdriver (if attaching casters with screws)
* Optional: Spray paint
* Optional: Wood or cardboard for shelves
Step-by-Step Instructions:
1. Prepare the Racks: As with the desk organizer, you can spray paint the wire racks if you want to customize the look of your rolling cart. Let the paint dry completely.
2. Form the Base: Take one wire rack and lay it flat. This will be the base of your cart.
3. Attach the Casters: Attach the swivel casters to the bottom of the base rack. You can use screws and a screwdriver if the casters have screw holes, or you can use zip ties to secure them to the wire mesh. Make sure the casters are securely attached and can swivel freely.
4. Create the Sides: Position the remaining three racks vertically around the base rack, forming the sides of the cart.
5. Secure with Zip Ties: Use zip ties to connect the side racks to the base rack and to each other at the corners. Use plenty of zip ties for added stability.
6. Add Shelves (Optional): If you want to add shelves to your rolling cart, you can cut pieces of wood or cardboard to fit inside the wire frame. Secure the shelves to the wire mesh using zip ties or glue.
7. Roll and Organize: Your DIY rolling cart is now ready to use! Roll it around your home and use it to store kitchen supplies, bathroom essentials, or anything else you need to keep organized.
Project 5: DIY Photo Display Grid
Show off your favorite memories with this simple and stylish photo display grid. It’s a great way to personalize your space and add a touch of personality to any room.
Materials You’ll Need:
* 1 or 2 Dollar Tree wire racks (depending on the size you want)
* Clothespins or clips
* Optional: Spray paint
* Optional: String lights
Step-by-Step Instructions:
1. Prepare the Rack(s): Spray paint the wire rack(s) if you want to customize the color. Let the paint dry completely.
2. Hang the Grid: Hang the wire rack(s) on your wall using nails, hooks, or command strips. Make sure the grid is securely attached to the wall.
3. Attach Photos: Use clothespins or clips to attach your favorite photos to the wire mesh. You can arrange the photos in any way you like.
4. Add String Lights (Optional): For a cozy and festive look, you can add string lights to your photo display grid. Wrap the lights around the wire mesh and secure them with zip
Conclusion
So, there you have it! Transforming ordinary Dollar Tree racks into extraordinary organizational solutions is not just a budget-friendly endeavor; it’s a testament to the power of creativity and resourcefulness. We’ve explored a myriad of ways to repurpose these humble wire racks, from creating stylish shoe storage to crafting space-saving pantry organizers and even building unique wall decor. The possibilities are truly endless, limited only by your imagination.
Why is this DIY trick a must-try? Because it offers a trifecta of benefits: affordability, customization, and sustainability. You’re not just saving money by opting for Dollar Tree racks; you’re also creating organizational solutions perfectly tailored to your specific needs and aesthetic preferences. And by repurposing these readily available items, you’re contributing to a more sustainable lifestyle, reducing waste and giving new life to something that might otherwise end up in a landfill.
But the beauty of this DIY approach lies in its adaptability. Feel free to experiment with different configurations, colors, and embellishments. Consider spray painting the racks to match your existing decor, adding fabric liners to create enclosed storage compartments, or even combining multiple racks to build larger, more complex structures. For example, if you’re using the racks for shoe storage, try adding a small piece of wood or cardboard to the bottom of each shelf to prevent heels from slipping through. If you’re organizing your pantry, consider labeling each rack with clear containers to easily identify the contents. And if you’re feeling particularly adventurous, you could even try incorporating other Dollar Tree items, such as zip ties, adhesive hooks, or decorative contact paper, to further enhance your creations.
Don’t be afraid to think outside the box and let your creativity shine! The key is to have fun and embrace the process of experimentation. Remember, there are no right or wrong answers when it comes to DIY projects. The goal is to create something that is both functional and aesthetically pleasing, something that reflects your personal style and makes your life a little bit easier.
We wholeheartedly encourage you to try these Dollar Tree rack ideas and discover the transformative power of budget-friendly DIY. Whether you’re a seasoned crafter or a complete beginner, you’ll be amazed at what you can achieve with a little bit of ingenuity and a few Dollar Tree racks.
And most importantly, we want to hear about your experiences! Share your creations with us on social media using [Your Hashtag Here] and let us know how these DIY tricks have helped you organize your home and simplify your life. We’re eager to see your innovative solutions and learn from your creative insights. Together, we can inspire others to embrace the joy of DIY and unlock the potential of everyday items. So go ahead, grab some Dollar Tree racks, unleash your inner artist, and start creating! You won’t regret it. This is a fantastic way to get organized on a dime.
Frequently Asked Questions (FAQs)
What kind of Dollar Tree racks work best for these projects?
The most commonly used racks are the wire cooling racks, dish drying racks, and small shelving units. The specific type you choose will depend on the project you have in mind. For example, cooling racks are great for creating small shelves or organizers, while dish drying racks can be repurposed as shoe storage or pantry organizers. Consider the size, shape, and sturdiness of the rack when making your selection. Also, check for any sharp edges or imperfections that might need to be addressed before you start your project.
Are these DIY projects sturdy enough to hold heavier items?
The sturdiness of your finished project will depend on the type of rack you use and how you construct it. Dollar Tree racks are generally not designed to hold extremely heavy items. However, you can reinforce them by using zip ties, adhesive hooks, or even small pieces of wood or cardboard to provide additional support. For heavier items, consider using multiple racks to distribute the weight more evenly. Always test the sturdiness of your project before placing heavy items on it. If you’re concerned about weight capacity, it’s best to err on the side of caution and choose a more robust storage solution.
How can I customize the look of my Dollar Tree rack projects?
There are countless ways to customize the look of your Dollar Tree rack projects! Spray paint is a great way to change the color and give the racks a more polished appearance. You can also add fabric liners, decorative contact paper, or even embellishments like beads, ribbons, or stickers. Consider using stencils to create unique patterns or designs. The key is to let your creativity shine and personalize the projects to match your existing decor. Don’t be afraid to experiment with different colors, textures, and materials to create a truly unique and eye-catching piece.
What tools do I need for these DIY projects?
The tools you’ll need will vary depending on the specific project you’re undertaking. However, some common tools that you might find useful include:
* Zip ties: For securing racks together and adding extra support.
* Adhesive hooks: For hanging racks on walls or doors.
* Spray paint: For changing the color of the racks.
* Scissors or a utility knife: For cutting fabric, contact paper, or other materials.
* Pliers: For bending or shaping the wire racks.
* Measuring tape: For ensuring accurate measurements.
* Safety glasses: To protect your eyes from debris.
* Gloves: To protect your hands from paint or sharp edges.
How do I clean and maintain my Dollar Tree rack organizers?
Cleaning and maintaining your Dollar Tree rack organizers is relatively simple. For most projects, you can simply wipe them down with a damp cloth and mild soap. For more stubborn stains, you can use a scrub brush or a cleaning solution specifically designed for metal or plastic. If you’ve added fabric liners, you can remove them and wash them separately. To prevent rust, make sure to dry the racks thoroughly after cleaning. Regularly inspect your organizers for any signs of damage or wear and tear, and make any necessary repairs to ensure their longevity.
Can I use these racks outdoors?
While some Dollar Tree racks may be suitable for limited outdoor use, they are generally not designed to withstand harsh weather conditions. Exposure to rain, sun, and extreme temperatures can cause the racks to rust, fade, or become brittle. If you do choose to use them outdoors, consider applying a protective coating to prevent rust and fading. Also, make sure to secure the racks properly to prevent them from being blown away by the wind. For long-term outdoor storage solutions, it’s best to invest in more durable, weather-resistant materials.
Where can I find more inspiration for Dollar Tree rack DIY projects?
The internet is a treasure trove of inspiration for Dollar Tree rack DIY projects! You can find countless ideas on Pinterest, YouTube, and various DIY blogs and websites. Search for terms like “Dollar Tree organization,” “DIY rack ideas,” or “budget-friendly storage solutions” to discover a wealth of creative projects. Don’t be afraid to browse through different sources and adapt the ideas to suit your own needs and preferences. And remember to share your own creations with the online community to inspire others!

Leave a Comment