
Grow Watermelon Easily, even if you think you don’t have a green thumb! Have you ever dreamed of biting into a juicy, homegrown watermelon on a hot summer day? It’s a quintessential summer experience, evoking memories of picnics, family gatherings, and pure, unadulterated joy. Watermelons have been cultivated for thousands of years, with evidence suggesting their origins in Africa, where they were prized for their hydrating properties in arid climates. From ancient royalty to modern-day families, the watermelon has always held a special place in our hearts (and stomachs!).
But let’s be honest, the thought of growing your own watermelon can be a little intimidating. They seem so big and demanding! That’s where I come in. I’m here to share some simple, yet effective, DIY tricks and hacks that will make growing watermelons easier than you ever imagined.
Why do you need these tricks? Because store-bought watermelons often lack the flavor and freshness of homegrown ones. Plus, knowing you nurtured that sweet, refreshing fruit from a tiny seed to a magnificent melon is incredibly rewarding. With a few clever techniques, even those with limited space or gardening experience can successfully grow watermelon easily and enjoy the taste of summer right from their own backyard. Let’s dive in and unlock the secrets to a bountiful watermelon harvest!
Grow Watermelon Like a Pro: My Foolproof DIY Guide
Okay, watermelon lovers, listen up! I’m going to share my secrets to growing juicy, delicious watermelons right in your own backyard. Forget those bland, overpriced grocery store melons – we’re talking homegrown goodness here! This guide is packed with everything you need to know, from seed to slice. Let’s get started!
Choosing the Right Watermelon Variety
First things first, you need to pick the perfect watermelon variety for your climate and space. Here are a few of my favorites:
* Sugar Baby: This is a classic for a reason! It’s a smaller melon (perfect for smaller gardens) and matures quickly. Plus, it’s incredibly sweet.
* Crimson Sweet: A larger variety with a vibrant red flesh and excellent flavor. It’s a popular choice for a reason!
* Jubilee: A long, striped watermelon that’s known for its disease resistance. Great if you’re worried about common watermelon problems.
* Bush Sugar Baby: If you’re really short on space, this bush variety is your best bet. It produces smaller melons on compact vines.
Consider your growing season length and the amount of space you have before making your decision. Seed packets will provide valuable information about each variety’s specific needs.
Preparing Your Watermelon Patch
Watermelons are heavy feeders, so soil preparation is key! They need plenty of sunshine and well-drained soil.
* Sunlight: Watermelons need at least 6-8 hours of direct sunlight per day. Choose a spot in your yard that gets plenty of sunshine.
* Soil: Watermelons thrive in well-drained, sandy loam soil with a pH between 6.0 and 6.8. If your soil is heavy clay, amend it with plenty of organic matter like compost or well-rotted manure.
* Nutrients: Watermelons need a lot of nutrients, especially nitrogen, phosphorus, and potassium. Before planting, amend your soil with a balanced fertilizer or compost.
Starting Watermelon Seeds Indoors (Optional)
While you can direct sow watermelon seeds, starting them indoors gives them a head start, especially in cooler climates. I usually start mine about 4-6 weeks before the last expected frost.
1. Gather Your Supplies: You’ll need seed starting trays or small pots, seed starting mix, watermelon seeds, and a heat mat (optional but helpful).
2. Sow the Seeds: Fill your trays or pots with seed starting mix. Make a small hole (about 1 inch deep) in each cell or pot. Place 2-3 watermelon seeds in each hole. Cover the seeds with soil and gently water.
3. Provide Warmth and Light: Place the trays or pots on a heat mat (if using) and under grow lights or in a sunny window. Watermelon seeds need warmth to germinate.
4. Keep the Soil Moist: Keep the soil consistently moist, but not soggy. Water when the top of the soil feels dry to the touch.
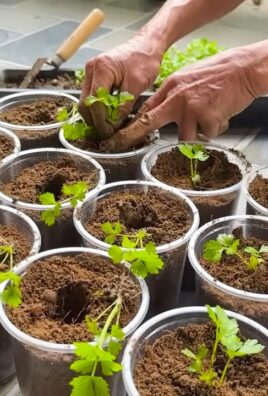
5. Thin the Seedlings: Once the seedlings emerge and have their first true leaves (the second set of leaves), thin them to one seedling per cell or pot. Choose the strongest, healthiest seedling.
Transplanting Watermelon Seedlings (or Direct Sowing)
Once the danger of frost has passed and the soil has warmed up, it’s time to transplant your seedlings (or direct sow your seeds).
1. Harden Off Seedlings: If you started your seeds indoors, you’ll need to harden them off before transplanting them. This means gradually exposing them to outdoor conditions over a period of 7-10 days. Start by placing them outside for a few hours each day in a sheltered location, gradually increasing the amount of time they spend outdoors.
2. Prepare the Planting Holes: Dig holes that are slightly larger than the root balls of your seedlings. Space the holes 3-5 feet apart, depending on the variety. Watermelons need plenty of room to spread out.
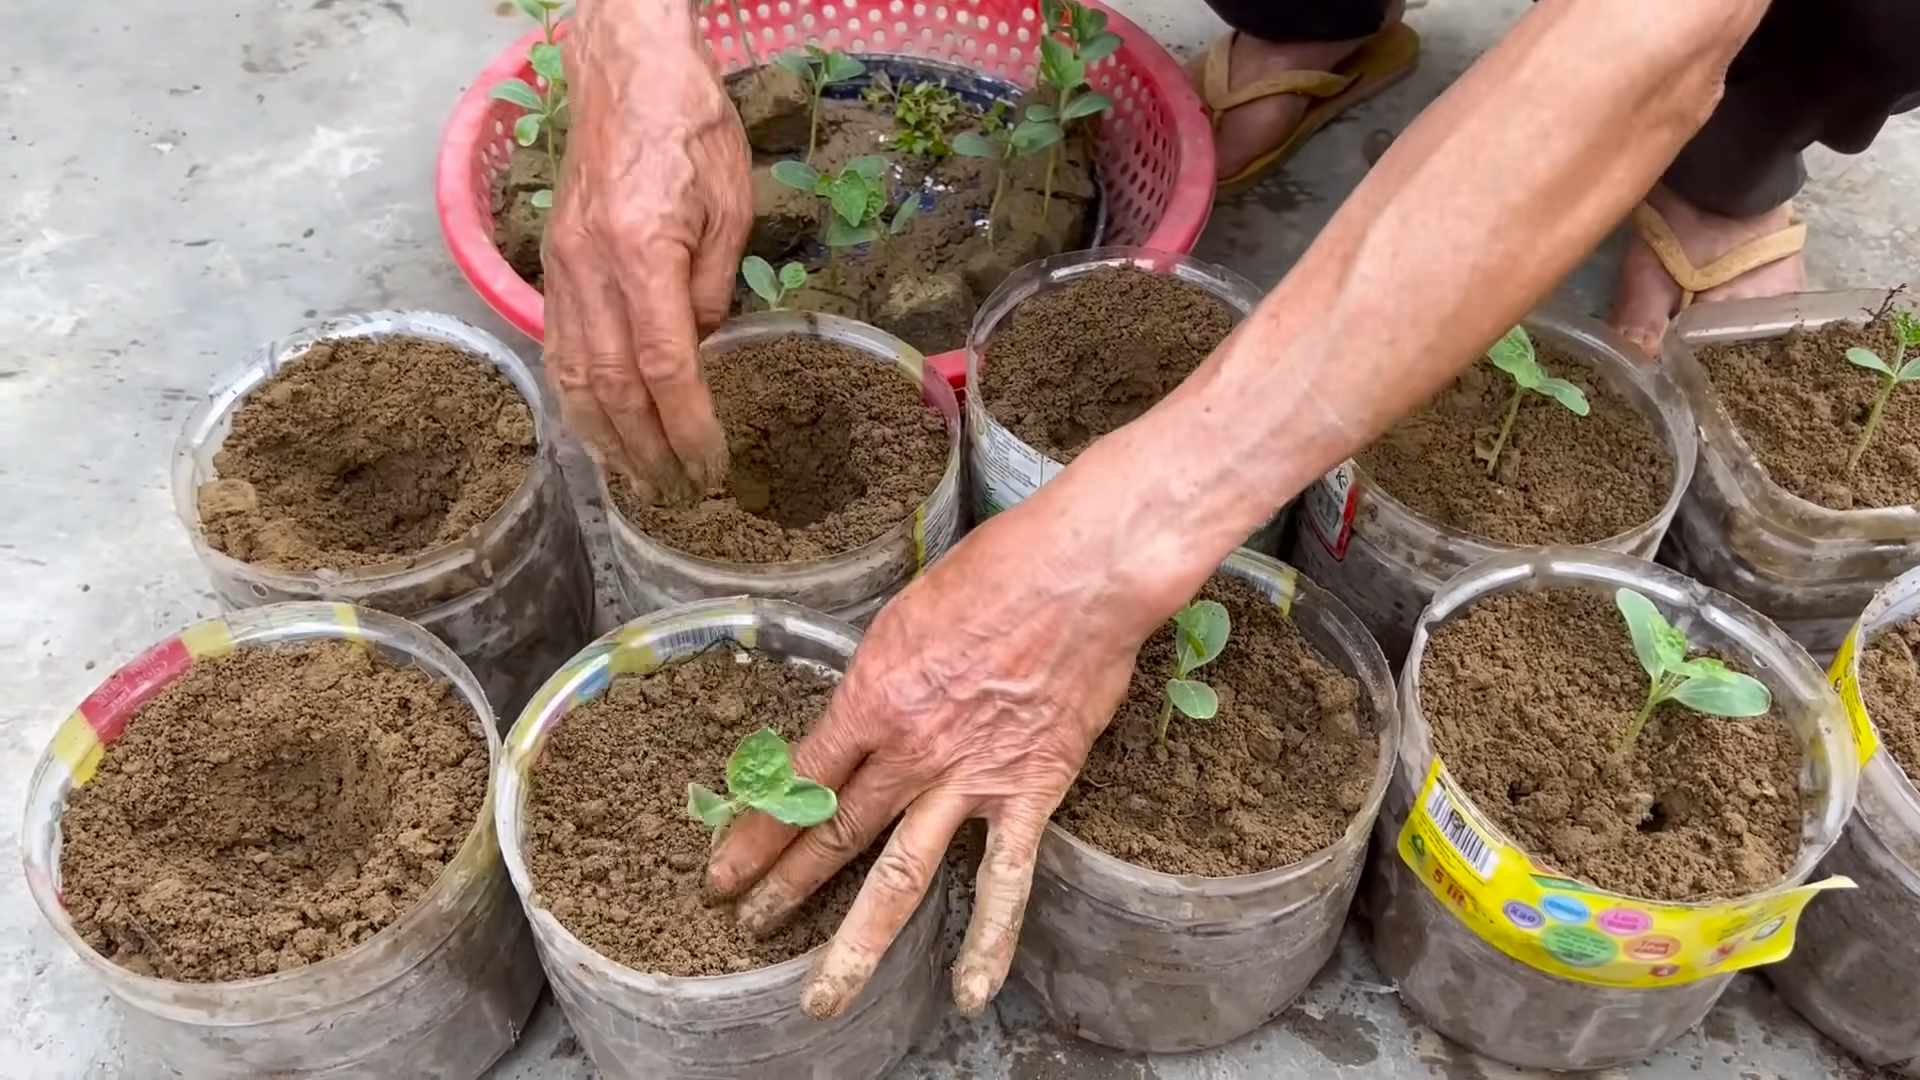
3. Transplant the Seedlings: Gently remove the seedlings from their trays or pots. Loosen the roots slightly and place the seedlings in the holes. Backfill with soil and gently firm the soil around the base of the plants.
4. Direct Sowing (Alternative): If you’re direct sowing, plant the seeds about 1 inch deep and space them according to the variety’s recommendations. You’ll likely need to thin the seedlings later, keeping the strongest plants.
5. Water Thoroughly: Water the newly transplanted seedlings (or direct sown seeds) thoroughly. This will help settle the soil and encourage root growth.
Watering and Fertilizing Watermelons
Watermelons need consistent watering, especially during hot, dry weather.
* Watering: Water deeply and regularly, especially when the fruits are developing. Aim for about 1-2 inches of water per week. Avoid overhead watering, as this can lead to fungal diseases. Drip irrigation or soaker hoses are ideal.
* Fertilizing: Side-dress your watermelon plants with a balanced fertilizer every 2-3 weeks. You can also use a liquid fertilizer diluted according to the package directions. When the fruits start to develop, switch to a fertilizer that’s higher in potassium and phosphorus to promote fruit growth and sweetness. I like to use a fertilizer specifically formulated for tomatoes and vegetables.
Controlling Weeds and Pests
Weeds can compete with watermelons for nutrients and water, so it’s important to keep your watermelon patch weed-free.
* Weeding: Hand-pull weeds regularly. Be careful not to damage the watermelon roots.
* Mulching: Apply a layer of mulch around your watermelon plants to help suppress weeds, retain moisture, and regulate soil temperature. Straw, wood chips, or black plastic mulch are all good options.
* Pests: Keep an eye out for common watermelon pests like aphids, squash bugs, and cucumber beetles. You can control these pests with insecticidal soap, neem oil, or by hand-picking them off the plants.
* Diseases: Watermelons can be susceptible to fungal diseases like powdery mildew and anthracnose. To prevent these diseases, avoid overhead watering, provide good air circulation, and apply a fungicide if necessary.
Pollinating Watermelons
Watermelons need to be pollinated in order to produce fruit. Bees are the primary pollinators, so it’s important to attract them to your garden.
* Attract Pollinators: Plant flowers that attract bees and other pollinators near your watermelon patch. Some good choices include sunflowers, zinnias, and lavender.
* Hand Pollination (If Necessary): If you’re not seeing a lot of bee activity, you can hand-pollinate your watermelons. To do this, use a small paintbrush to transfer pollen from the male flowers to the female flowers. Male flowers have a long, thin stem, while female flowers have a small, immature watermelon at the base.
Training Watermelon Vines
Watermelon vines can get quite long, so it’s helpful to train them to grow in a specific direction.
* Pruning: You can prune your watermelon vines to encourage fruit production. Remove any suckers (small shoots that grow from the base of the plant) and any dead or diseased leaves.
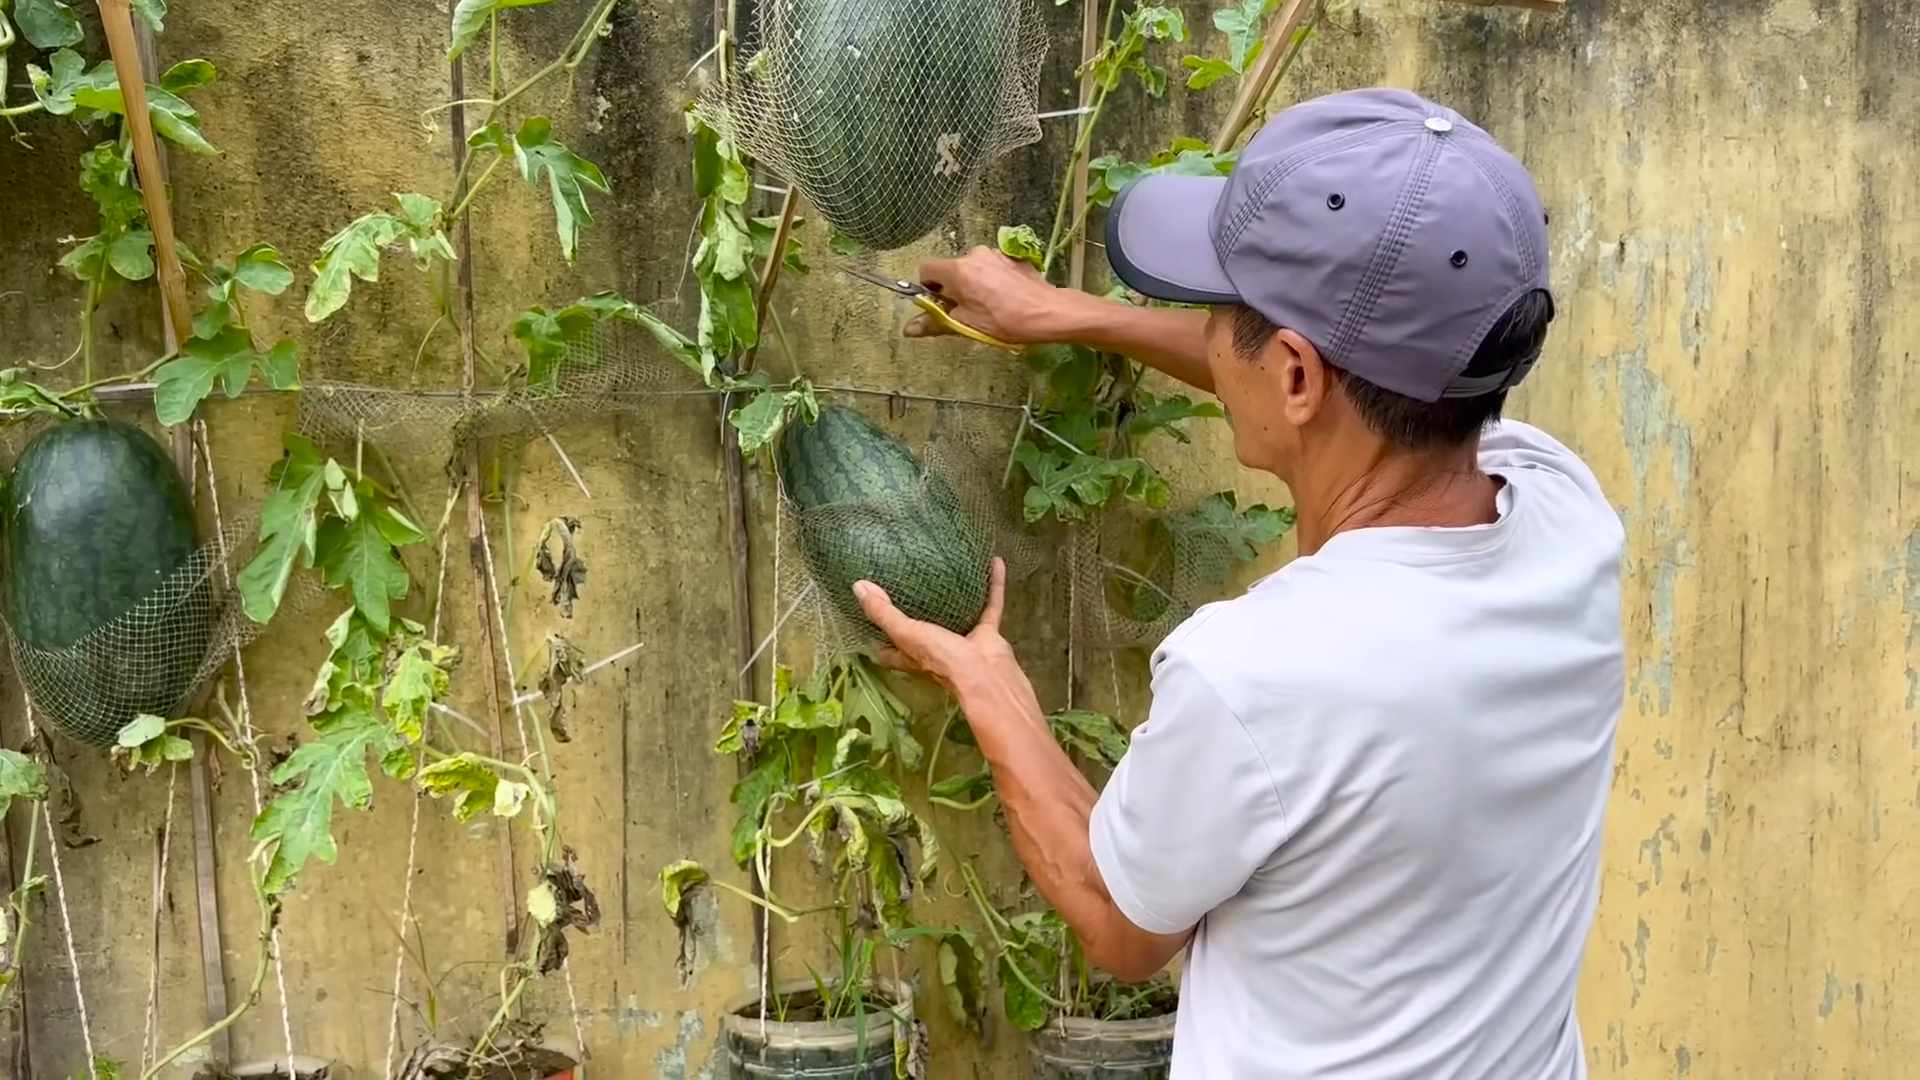
* Support: If you’re growing watermelons on a trellis, you’ll need to provide support for the fruits as they grow. You can use slings made from old t-shirts or pantyhose to support the watermelons.
Harvesting Watermelons
Knowing when to harvest a watermelon can be tricky, but here are a few signs to look for:
1. The Tendril: The tendril closest to the watermelon should be brown and dry.
2. The Ground Spot: The ground spot (the area where the watermelon rests on the ground) should be yellow or cream-colored.
3. The Thump Test: Give the watermelon a thump. A ripe watermelon will sound hollow.
4. Days to Maturity: Check your seed packet for the number of days to maturity. This will give you a general idea of when your watermelons will be ready to harvest.
Once you’ve determined that your watermelon is ripe, use a sharp knife to cut it from the vine. Leave a few inches of stem attached.
Enjoying Your Homegrown Watermelon
Now for the best part – enjoying your delicious, homegrown watermelon! Slice it up and enjoy it fresh, or use it in smoothies, salads, or desserts. You can even pickle the rind!
Storing Watermelon:
* Whole Watermelon: Store whole watermelons in a cool, dry place for up to two weeks.
* Cut Watermelon: Store cut watermelon in the refrigerator for up to 3-4 days.
Growing watermelons can be a rewarding experience. With a little bit of care and attention, you can enjoy fresh, juicy watermelons all summer long. Happy gardening!
Conclusion
So, there you have it! Growing watermelons doesn’t have to be a daunting task reserved for seasoned gardeners. With this simple, yet effective DIY trick, you can unlock the potential for a bountiful harvest of juicy, sweet watermelons right in your own backyard, even if you’re short on space or experience. This method focuses on maximizing sunlight exposure and optimizing nutrient delivery, two crucial elements for watermelon success.
Why is this a must-try? Because it simplifies the process, increases your chances of success, and ultimately, allows you to enjoy the unparalleled satisfaction of biting into a watermelon you nurtured from seed to fruit. Imagine the bragging rights! Think of the delicious summer salads, refreshing drinks, and delightful desserts you can create with your homegrown watermelons.
But don’t stop there! Feel free to experiment with variations. For example, if you live in a particularly hot climate, consider using a shade cloth during the hottest part of the day to prevent sunscald. You can also adjust the type of fertilizer you use based on your soil’s specific needs. Some gardeners swear by adding Epsom salts to the soil to boost magnesium levels, which can enhance sweetness. Another variation involves training the vines to grow vertically on a trellis, saving even more space and improving air circulation. This is especially helpful if you’re trying to grow watermelons in a smaller garden or on a balcony.
The key is to observe your plants closely and adapt your approach as needed. Pay attention to the color of the leaves, the size of the fruit, and any signs of pests or diseases. The more you learn about your watermelons, the better you’ll become at growing them.
We are confident that this DIY trick will revolutionize your watermelon-growing experience. It’s a game-changer for both novice and experienced gardeners alike. The secret to success in growing watermelon easily lies in understanding its needs and providing the right environment.
Now, it’s your turn! We wholeheartedly encourage you to give this DIY trick a try. Plant those seeds, nurture those vines, and watch your watermelons flourish. And most importantly, don’t forget to share your experience with us! We’d love to hear about your successes, your challenges, and any variations you’ve discovered along the way. Post pictures of your watermelons on social media using #DIYWatermelon and tag us so we can celebrate your gardening triumphs with you. Let’s create a community of watermelon enthusiasts, sharing tips and tricks to help everyone enjoy the fruits (literally!) of their labor. Happy gardening!
Frequently Asked Questions (FAQ)
What type of soil is best for growing watermelons?
Watermelons thrive in well-drained, sandy loam soil that is rich in organic matter. The ideal pH range is between 6.0 and 6.8. If your soil is heavy clay, amend it with compost, peat moss, or other organic materials to improve drainage. You can also perform a soil test to determine its pH and nutrient levels, and adjust accordingly. Adding aged manure can also significantly improve soil fertility.
How much sunlight do watermelons need?
Watermelons are sun-loving plants and require at least 6-8 hours of direct sunlight per day to produce sweet, juicy fruit. Choose a planting location that receives full sun throughout the day. If you live in a particularly hot climate, some afternoon shade may be beneficial to prevent sunscald, but ensure they still get a solid 6 hours of direct sun.
How often should I water my watermelon plants?
Watermelons need consistent moisture, especially during fruit development. Water deeply and regularly, aiming for about 1-2 inches of water per week. Avoid overhead watering, as this can promote fungal diseases. Instead, water at the base of the plant. Check the soil moisture regularly; if the top inch feels dry, it’s time to water. Reduce watering as the fruits ripen to concentrate the sugars and enhance sweetness.
What kind of fertilizer should I use for watermelons?
Watermelons are heavy feeders and benefit from regular fertilization. Use a balanced fertilizer (e.g., 10-10-10) at planting time, and then switch to a fertilizer higher in phosphorus and potassium (e.g., 5-10-10) as the plants begin to flower and set fruit. You can also supplement with compost tea or liquid seaweed extract to provide additional nutrients. Avoid over-fertilizing with nitrogen, as this can promote leafy growth at the expense of fruit production.
How do I know when my watermelon is ripe?
Determining when a watermelon is ripe can be tricky, but there are several indicators to look for. First, check the tendril closest to the fruit stem; it should be brown and dry. Second, the underside of the watermelon (where it rests on the ground) should turn from white to a creamy yellow. Third, give the watermelon a gentle thump; a ripe watermelon will sound hollow. Finally, the skin should be dull rather than shiny. With practice, you’ll develop a knack for identifying ripe watermelons.
How can I protect my watermelons from pests and diseases?
Watermelons are susceptible to various pests and diseases, including aphids, squash bugs, vine borers, and fungal diseases like powdery mildew. Regularly inspect your plants for signs of infestation or disease. Use organic pest control methods, such as insecticidal soap or neem oil, to control pests. Ensure good air circulation around the plants to prevent fungal diseases. Crop rotation can also help to reduce the risk of soilborne diseases. Consider using row covers early in the season to protect young plants from pests.
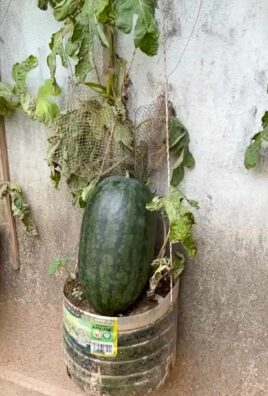
Can I grow watermelons in containers?
Yes, you can grow watermelons in containers, but you’ll need a large container (at least 20 gallons) and a dwarf or bush variety of watermelon. Ensure the container has good drainage and use a high-quality potting mix. Provide adequate support for the vines, such as a trellis or stake. Container-grown watermelons may require more frequent watering and fertilization than those grown in the ground.
How do I pollinate my watermelon flowers?
Watermelons have separate male and female flowers. Bees are the primary pollinators, but if bee activity is low, you may need to hand-pollinate the flowers. To hand-pollinate, use a small paintbrush to transfer pollen from the male flower to the female flower. The female flower has a small, immature watermelon at its base. Pollinate in the morning, when the flowers are open.
What are some good companion plants for watermelons?
Companion planting can benefit watermelons by attracting beneficial insects, repelling pests, or improving soil health. Good companion plants for watermelons include marigolds, nasturtiums, basil, oregano, and radishes. Avoid planting watermelons near potatoes or other members of the cucurbit family (e.g., cucumbers, squash), as they can compete for nutrients and attract similar pests and diseases.
How do I store my harvested watermelons?
Store harvested watermelons in a cool, dry place. Whole watermelons can be stored at room temperature for about a week or in the refrigerator for up to two weeks. Cut watermelons should be stored in the refrigerator, wrapped tightly in plastic wrap or in an airtight container, and consumed within a few days.
Leave a Comment