
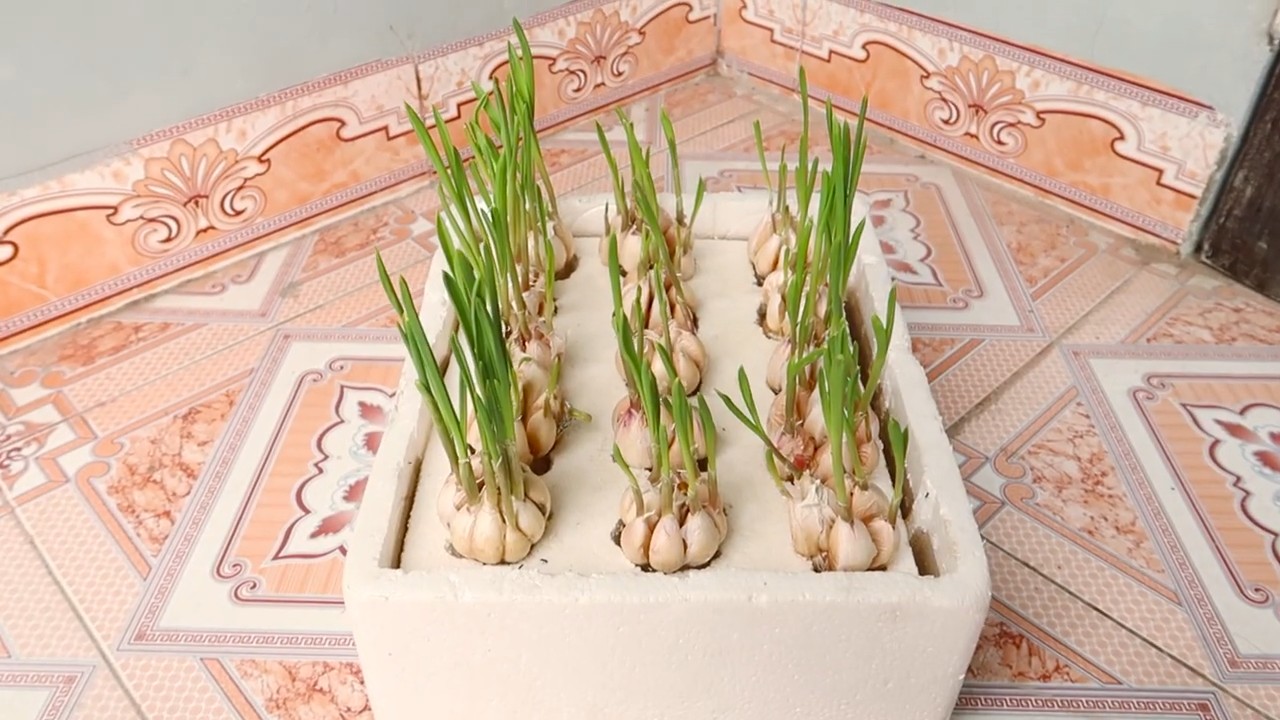
Grow garlic in the kitchen? Absolutely! Imagine the satisfaction of snipping fresh, pungent garlic greens right from your windowsill, ready to add a burst of flavor to your favorite dishes. This isn’t some futuristic fantasy; it’s a simple, rewarding DIY project that anyone can undertake, regardless of gardening experience.
For centuries, garlic has been revered not only for its culinary uses but also for its medicinal properties. From ancient Egypt, where it fueled the pyramid builders, to traditional Chinese medicine, garlic has held a prominent place in cultures worldwide. Now, you can bring this historical powerhouse right into your home.
In today’s fast-paced world, access to fresh, healthy ingredients is more important than ever. Store-bought garlic can sometimes lack the vibrant flavor and freshness we crave. That’s where this DIY trick comes in! Learning how to grow garlic in the kitchen offers a sustainable and convenient solution. Not only will you have a constant supply of fresh garlic greens, but you’ll also reduce food waste by utilizing those sprouting cloves you might otherwise toss. Plus, it’s a fantastic way to add a touch of green to your indoor space and connect with nature, even in the heart of the city. Let’s dive in and discover how easy it is to cultivate your own little garlic garden!

Growing Garlic from Kitchen Scraps: A Simple DIY Guide
Hello, fellow garden lovers! Have you ever wondered if you can simply grow garlic from the cloves you normally throw away? The answer is a clear YES! It’s not only super easy but also a great way to reduce kitchen waste and have fresh garlic right at your doorstep (or on the balcony). I’ll show you how it’s done!
What you need:
- Garlic cloves (organic garlic is best, as it’s less likely to have been treated with growth inhibitors)
- A pot or container with good drainage
- High-quality potting soil or garden soil
- Water
- (Optional) Liquid fertilizer for vegetables
Choosing the right garlic clove:
- Firmness is important: Choose firm, plump garlic cloves. Avoid soft, shriveled, or damaged cloves.
- No signs of mold: Make sure the cloves show no signs of mold or rot.
- Organic is better: As mentioned, organic garlic is often the better choice, as it’s less likely to have been treated with chemicals that could inhibit growth.
- Large cloves, large harvest: Larger cloves generally have more stored energy and lead to larger garlic bulbs.
Step-by-Step Guide:
1. Prepare the pot:
- Choose a pot with enough space. A pot with a diameter of at least 15 cm (6 inches) and a depth of 20 cm (8 inches) is ideal for a few garlic cloves.
- Make sure the pot has holes in the bottom so excess water can drain. Waterlogging can lead to rot.
- Fill the pot with high-quality potting soil or garden soil. I personally like to mix in some compost to provide the garlic with additional nutrients.
2. Plant the garlic cloves:
- Push the garlic cloves about 5-8 cm (2-3 inches) deep into the soil. Make sure the pointed side of the clove is facing up, as this is where the leaves will grow from.
- Plant the cloves with a spacing of about 8-10 cm (3-4 inches) from each other so they have enough room to grow.
- Cover the cloves with soil and press down lightly.
3. Watering and Location:
- Water the soil thoroughly after planting until water runs out of the drainage holes.
- Place the pot in a sunny location. Garlic needs at least 6 hours of sunlight per day to grow optimally. A south-facing window or a sunny balcony is ideal.
4. Care and Watering:
- Keep the soil moist, but not wet. Water regularly, especially during dry periods. Avoid waterlogging, as this can lead to rot.
- Fertilize the garlic every few weeks with a liquid fertilizer for vegetables. Follow the instructions on the packaging.
- Regularly remove any weeds that grow in the pot.
5. Observation and Pest Control:
- Watch for signs of pests or diseases. Aphids, onion flies, and fungal diseases can affect garlic.
- In case of an infestation, you can use natural pesticides like neem oil or a soap solution.
- Remove infested leaves or cloves to prevent the spread of disease.
The Growth Stages of Garlic
Garlic goes through different growth stages that are important to be aware of for a successful harvest.
1. Germination and Leaf Growth:
- After planting, it usually takes 1-2 weeks for the first green leaves to sprout from the soil.
- During this phase, it’s important to water the garlic sufficiently and provide it with nutrients to promote strong growth.
2. Bulb Formation:
- During the summer, the garlic begins to form bulbs underground.
- In this phase, it is particularly important to fertilize the garlic regularly to ensure good bulb formation.
- Make sure the soil does not dry out, as this can impair bulb growth.
3. Maturation Phase:
- When the garlic leaves turn yellow and die back, the garlic is ready for harvest.
- This is usually the case in late summer or fall.
- Stop watering when the leaves begin to turn yellow to protect the bulbs from rot.
Harvesting the Garlic
The harvest is the most exciting part! Here are a few tips to ensure you harvest your garlic correctly.
1. The Right Time:
- The best time to harvest is when about half of the leaves have turned yellow and are dying back.
- If you harvest too early, the bulbs may not be fully developed. If you harvest too late, the bulbs can split open and will not store well.
2. The Harvesting Method:
- Gently loosen the soil around the garlic plant with a digging fork or a spade.
- Carefully pull the garlic plant out of the soil.
- Shake the soil off the bulbs.
3. Drying:
- Let the garlic bulbs dry in a dry, airy place for 2-3 weeks.
- You can either lay the garlic bulbs on a wire rack or braid them and hang them up.
- Drying is important to make the garlic bulbs last and to prevent rot.
4. Storage:
- Store the dried garlic bulbs in a cool, dry, and dark place.
- A cellar or a pantry is ideal.
- Avoid storing in the refrigerator, as this can lead to mold.
- Properly dried and stored garlic can last for several months.
Additional Tips and Tricks
Growing garlic in water: If you don’t have space for a pot, you can also grow garlic in water. Simply place the garlic clove in a glass of water so that the bottom half is submerged. Change the water regularly and place the glass in a bright spot. After a few days, roots and green leaves will form.
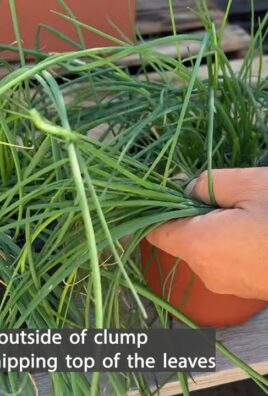
Using the garlic greens: The green leaves of the garlic are edible and can be used like chives. They have a mild garlic flavor and are excellent for seasoning salads, soups, and other dishes.
Harvesting garlic scapes: Some garlic varieties form long, curly stalks with flower heads in the spring, called scapes. These are also edible and have a delicious, slightly pungent garlic flavor. Harvest the scapes before they open to encourage bulb formation. You can grill, fry, process them into pesto, or simply chop them raw into salads.
Try different varieties: There are many different garlic varieties with different flavors and characteristics. Try different types to find out which one you like best and which grows best in your climate.
Conclusion
So, there you have it! Transforming your kitchen into a mini garlic farm is not only surprisingly simple, but also incredibly rewarding. Forget those bland, pre-packaged garlic cloves from the supermarket. With this easy DIY trick, you can have a constant supply of fresh, pungent, and flavorful garlic right at your fingertips. Imagine the burst of flavor you’ll add to your pasta sauces, stir-fries, and roasted vegetables – all thanks to your own homegrown garlic.
This isn’t just about saving a few dollars; it’s about connecting with your food, understanding where it comes from, and experiencing the satisfaction of nurturing something from a single clove to a thriving plant. Plus, the vibrant green shoots of garlic add a touch of natural beauty to your kitchen windowsill. It’s a win-win!
But the fun doesn’t stop there. Feel free to experiment with different varieties of garlic. Try growing elephant garlic for its milder flavor and massive cloves, or explore heirloom varieties for unique tastes and textures. You can also adjust the growing medium to see what works best for you. Some people prefer using a well-draining potting mix, while others have success with just water.
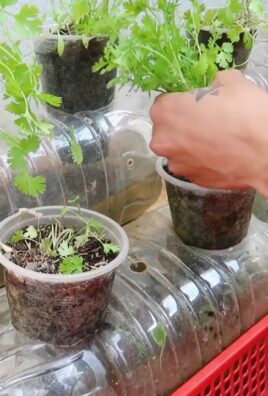
Don’t be afraid to get creative with your containers, too. While a simple glass of water works perfectly well for sprouting, you can also use small pots filled with soil for a more established plant. Consider using recycled containers like yogurt cups or plastic bottles to reduce waste and add a personal touch to your indoor garden.
And remember, growing garlic in the kitchen is a continuous process. Once your garlic plants have grown sufficiently, you can harvest the green shoots for a delicious garlic-infused flavor in your cooking. These shoots, often called garlic scapes, are a culinary delight and can be used in a variety of dishes.
We wholeheartedly encourage you to give this DIY trick a try. It’s a fantastic way to add fresh flavor to your meals, brighten up your kitchen, and connect with nature. And most importantly, we want to hear about your experiences! Share your photos, tips, and tricks in the comments below. Let’s create a community of indoor garlic growers and inspire others to embrace the joy of homegrown goodness. What are you waiting for? Start growing garlic in your kitchen today!
Frequently Asked Questions (FAQ)
What kind of garlic should I use?
You can use any garlic cloves you find at the grocery store, but organic garlic is generally recommended. Non-organic garlic may have been treated with chemicals that can inhibit sprouting. Look for firm, plump cloves that are free from blemishes or soft spots. Different varieties of garlic will have different flavors, so feel free to experiment and find your favorite. Softneck varieties tend to be easier to grow indoors.
How long does it take for garlic to sprout?
Garlic typically starts to sprout within a week or two, but it can take longer depending on the variety and environmental conditions. Be patient and make sure the cloves are kept consistently moist. If you don’t see any signs of growth after three weeks, try using a different batch of garlic.
How much light does garlic need?
Garlic needs plenty of light to thrive. Place your sprouting garlic cloves in a sunny windowsill that receives at least six hours of direct sunlight per day. If you don’t have a sunny windowsill, you can use a grow light to supplement the natural light.
Can I grow garlic in soil instead of water?
Yes, you can definitely grow garlic in soil. In fact, growing garlic in soil will eventually be necessary if you want to harvest full bulbs. Once your garlic cloves have sprouted in water, you can transplant them into small pots filled with well-draining potting mix. Make sure the pots have drainage holes to prevent waterlogging.
How often should I water garlic grown in soil?
Water your garlic plants regularly, keeping the soil consistently moist but not soggy. Allow the top inch of soil to dry out between waterings. Overwatering can lead to root rot, so it’s important to monitor the moisture levels carefully.
When can I harvest the garlic?
If you are growing garlic for the green shoots (garlic scapes), you can harvest them as soon as they are large enough to use. Simply snip them off at the base of the plant. If you are growing garlic for the bulbs, you will need to transplant them into larger containers or outdoors. The bulbs are typically ready to harvest in the late summer or early fall, when the leaves start to turn yellow and brown.
Can I eat the green shoots of the garlic?
Absolutely! The green shoots of garlic, also known as garlic scapes, are delicious and can be used in a variety of dishes. They have a milder garlic flavor than the bulbs and can be used in salads, stir-fries, soups, and sauces.
My garlic is growing mold. What should I do?
Mold can sometimes grow on garlic cloves, especially if they are kept too moist. If you see mold, remove the affected cloves immediately and discard them. Make sure the remaining cloves are not sitting in standing water and that the container is well-ventilated. You can also try wiping the cloves with a diluted solution of hydrogen peroxide and water.
Can I grow garlic indoors year-round?
Yes, you can grow garlic indoors year-round, but you may need to provide supplemental light during the winter months. Garlic typically requires a period of cold dormancy to produce bulbs, so you may not get full-sized bulbs if you grow it indoors continuously. However, you can still harvest the green shoots for a continuous supply of fresh garlic flavor.
Is growing garlic in the kitchen worth it?
Absolutely! Growing garlic in the kitchen is a fun, easy, and rewarding way to add fresh flavor to your meals. It’s also a great way to connect with nature and learn about the growing process. Plus, the vibrant green shoots of garlic add a touch of natural beauty to your kitchen. Give it a try and see for yourself!
Leave a Comment