Home Garden Melon Cultivation: Imagine biting into a juicy, sun-ripened melon, bursting with flavor, knowing you nurtured it from a tiny seed right in your own backyard! That’s the magic we’re unlocking today. For centuries, melons have been cherished across cultures – from ancient Egypt, where they were buried with pharaohs, to the vibrant gardens of Renaissance Europe. These sweet fruits have always symbolized abundance and the simple pleasures of life.
But let’s be honest, growing melons can seem intimidating. Maybe you’ve tried before and ended up with small, bland fruits, or perhaps you’re just not sure where to start. That’s where this DIY guide comes in! I’m here to share my tried-and-true secrets for successful home garden melon cultivation, even if you’re a complete beginner. We’ll cover everything from choosing the right varieties for your climate to simple hacks for boosting growth and preventing common problems.
Why is this DIY trick so important? Because store-bought melons often lack the intense flavor and sweetness of homegrown varieties. Plus, there’s nothing quite like the satisfaction of harvesting your own food and sharing it with family and friends. So, grab your gardening gloves, and let’s dive into the wonderful world of melon growing! I promise, with a little know-how, you’ll be enjoying delicious, homegrown melons in no time.

DIY Home Garden Melon Cultivation: A Sweet Success Story
Okay, melon lovers, gather ’round! I’m going to walk you through everything you need to know to grow your own juicy, delicious melons right in your backyard. Forget those bland supermarket melons – we’re talking about homegrown flavor that will knock your socks off. This guide is packed with tips and tricks I’ve learned over the years, so get ready to get your hands dirty!
Choosing Your Melon Variety
Before we even think about planting, we need to decide what kind of melon we want to grow. There are so many options, it can be a little overwhelming! Here’s a quick rundown of some popular choices:
* Watermelon: The classic summer treat! Watermelons need a lot of space and sunshine. Consider smaller “icebox” varieties if you have limited space.
* Cantaloupe: Sweet and fragrant, cantaloupes are relatively easy to grow. They prefer warm weather and well-drained soil.
* Honeydew: Similar to cantaloupe, honeydew melons have a smooth, pale green rind and a sweet, mild flavor.
* Galia Melon: A cross between a cantaloupe and a honeydew, Galia melons have a unique flavor and a distinctive netted rind.
* Casaba Melon: These melons have a wrinkled, yellow rind and a mild, slightly tangy flavor. They store well, making them a good choice if you want to extend your harvest.
Pro Tip: Check your local climate and growing season before choosing a variety. Some melons need a longer growing season than others. Also, consider disease resistance – look for varieties that are resistant to common melon diseases in your area.
Preparing Your Melon Patch
Melons are sun-loving, hungry plants, so site preparation is key. Here’s what you need to do:
* Sunlight: Melons need at least 6-8 hours of direct sunlight per day. Choose a spot in your garden that gets plenty of sunshine.
* Soil: Melons prefer well-drained, sandy loam soil with a pH between 6.0 and 6.8. If your soil is heavy clay, amend it with compost, aged manure, or other organic matter to improve drainage.
* Nutrients: Melons are heavy feeders, so you’ll need to enrich the soil with plenty of nutrients. Work in compost and aged manure before planting. You can also add a balanced fertilizer (like 10-10-10) according to the package directions.
* Space: Melons need plenty of space to spread out. Watermelons, in particular, can take up a lot of room. Allow at least 3-4 feet between plants for smaller varieties and 6-8 feet for larger varieties.
Starting Your Melon Seeds
You can either start your melon seeds indoors or direct sow them in the garden. Starting them indoors gives you a head start, especially if you have a short growing season.
Starting Seeds Indoors:
1. Timing: Start your seeds about 4-6 weeks before the last expected frost in your area.
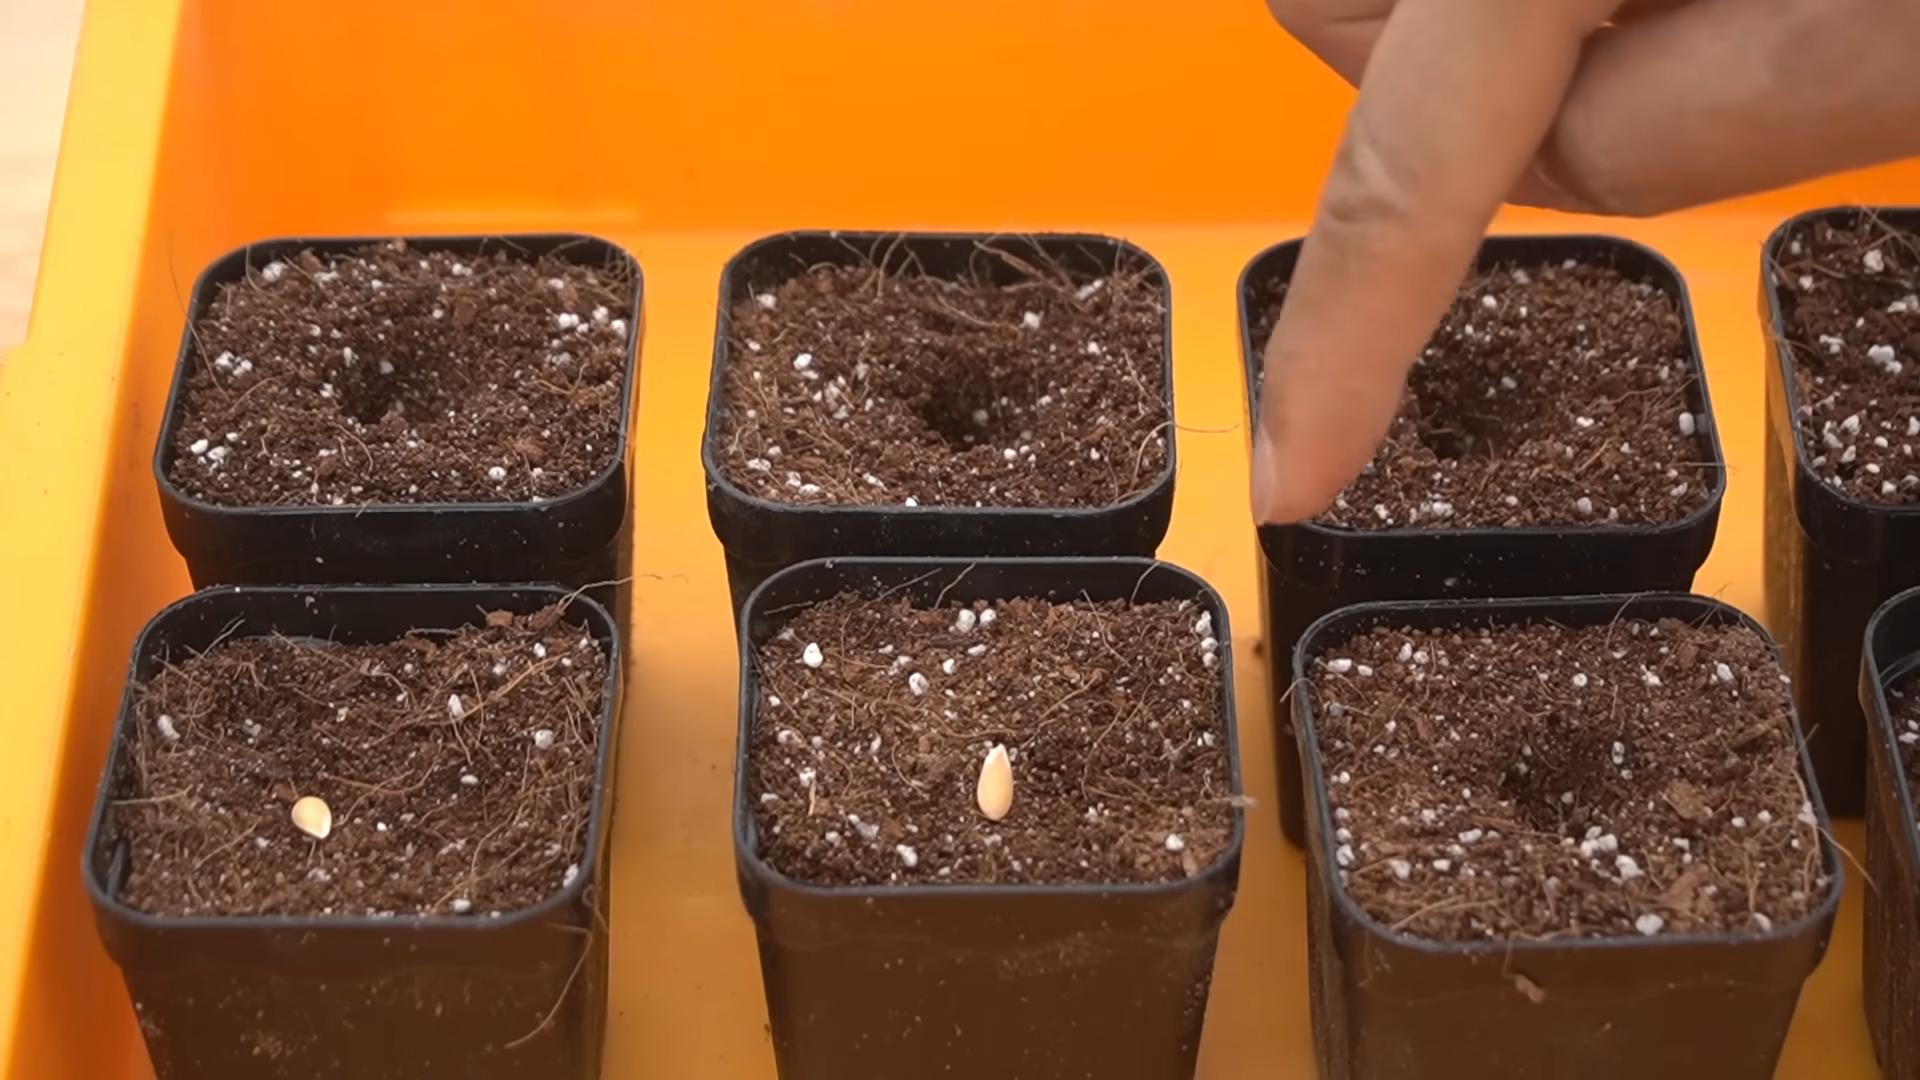
2. Containers: Use peat pots or biodegradable pots to avoid disturbing the roots when transplanting.
3. Soil: Use a seed-starting mix that is light and well-draining.
4. Planting: Plant 2-3 seeds per pot, about 1 inch deep.
5. Watering: Keep the soil moist but not soggy.
6. Warmth: Melons need warm temperatures to germinate. Use a heat mat to keep the soil temperature around 80-85°F (27-29°C).
7. Light: Once the seeds germinate, provide plenty of light. Use grow lights or place the seedlings in a sunny window.
8. Thinning: Once the seedlings have a few true leaves, thin them to one plant per pot. Choose the strongest, healthiest seedling.
9. Hardening Off: Before transplanting, gradually acclimate the seedlings to outdoor conditions. Start by placing them outside for a few hours each day, increasing the time each day for a week or two.
Direct Sowing Seeds:
1. Timing: Direct sow your seeds after the last expected frost, when the soil temperature is at least 70°F (21°C).
2. Planting: Plant the seeds about 1 inch deep, spacing them according to the variety you’re growing.
3. Watering: Keep the soil moist until the seeds germinate.
4. Thinning: Once the seedlings emerge, thin them to one plant per hill or row.
Transplanting Your Melon Seedlings
Once your seedlings are hardened off (or your direct-sown seedlings have emerged and been thinned), it’s time to transplant them into the garden.
1. Timing: Transplant your seedlings on a cloudy day or in the late afternoon to avoid shocking them.
2. Holes: Dig holes that are slightly larger than the root balls of the seedlings.
3. Planting: Gently remove the seedlings from their pots and place them in the holes. Make sure the top of the root ball is level with the soil surface.
4. Watering: Water the seedlings thoroughly after planting.
5. Mulching: Mulch around the plants with straw, hay, or black plastic to help retain moisture, suppress weeds, and warm the soil. Black plastic is especially helpful for watermelons.
Caring for Your Melon Plants
Now that your melon plants are in the ground, it’s time to give them the TLC they need to thrive.
* Watering: Melons need consistent watering, especially during hot, dry weather. Water deeply and regularly, aiming for about 1-2 inches of water per week. Avoid overhead watering, which can promote fungal diseases. Drip irrigation is ideal.
* Fertilizing: Side-dress your melon plants with a balanced fertilizer every 2-3 weeks. You can also use a liquid fertilizer, such as fish emulsion or seaweed extract.
* Weeding: Keep the area around your melon plants free of weeds. Weeds compete with the melons for water and nutrients.
* Pest Control: Keep an eye out for common melon pests, such as aphids, squash bugs, and cucumber beetles. Use insecticidal soap or neem oil to control these pests. You can also use row covers to protect your plants from pests early in the season.
* Disease Control: Melons are susceptible to fungal diseases, such as powdery mildew and fusarium wilt. To prevent these diseases, provide good air circulation, avoid overhead watering, and use disease-resistant varieties. If you see signs of disease, treat your plants with a fungicide.
* Pollination: Melons need to be pollinated in order to produce fruit. Bees are the primary pollinators, so encourage them to visit your garden by planting flowers nearby. If you’re not seeing enough bees, you can hand-pollinate your melons. To hand-pollinate, use a small paintbrush to transfer pollen from the male flowers to the female flowers. Female flowers have a small fruit at the base of the flower, while male flowers do not.
Training Your Melon Vines
Melon vines can get quite long and unruly, so it’s helpful to train them.
* Trellising: You can train your melon vines to grow up a trellis. This is especially helpful for smaller melon varieties, such as cantaloupes and honeydews. Trellising helps to save space and improve air circulation.
* Pruning: You can prune your melon vines to encourage fruit production. Remove any suckers (small shoots that grow from the base of the plant) and any dead or diseased leaves. You can also pinch off the tips of the vines to encourage branching.
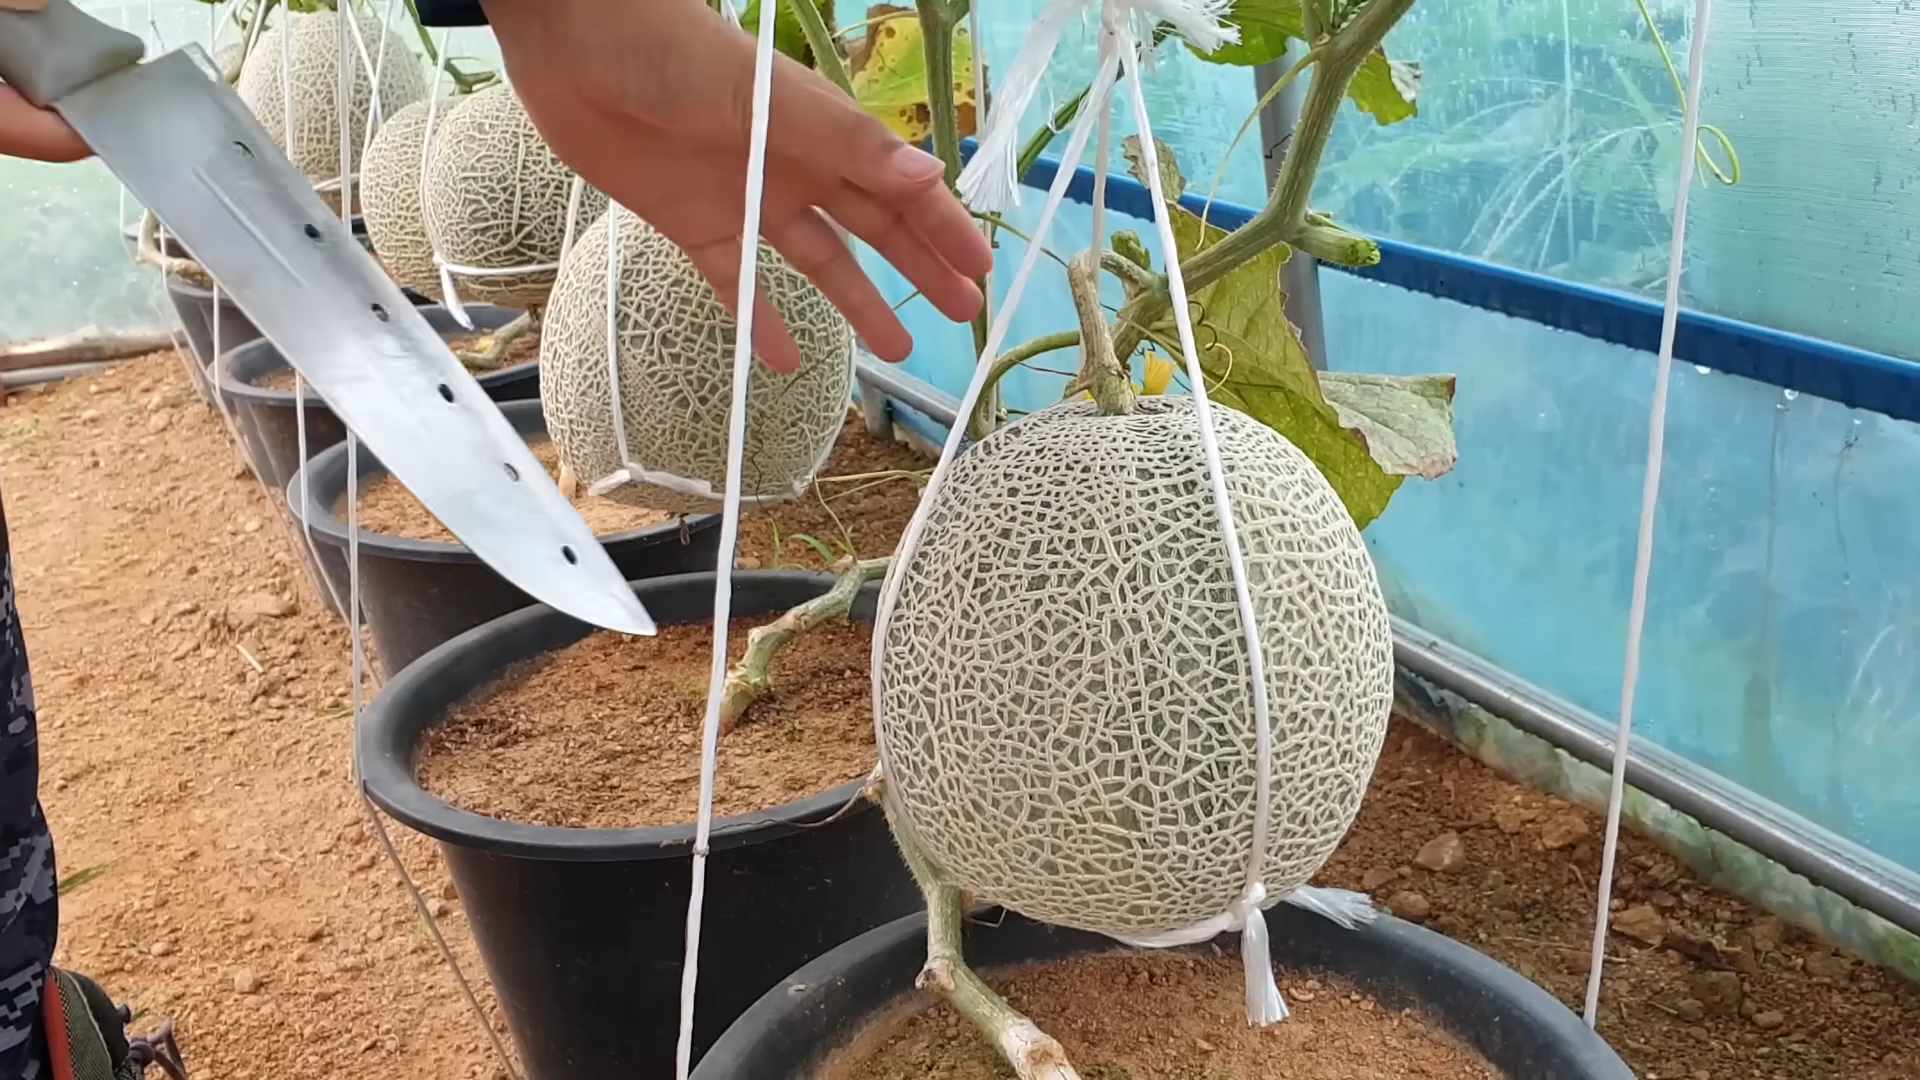
* Supporting Fruit: As your melons grow, they may need support to prevent them from breaking off the vine. Use slings made of netting or fabric to support the fruit.
Harvesting Your Melons
Harvesting your melons at the right time is crucial for getting the best flavor. Here are some tips for knowing when your melons are ripe:
* Watermelons: Look for a dull, rather than shiny, rind. The spot where the melon rests on the ground (the “ground spot”) should be yellow or cream-colored. Thump the melon – a ripe watermelon will sound hollow. The tendril closest to the melon should be brown and dry.
* Cantaloupes: The melon should slip easily from the vine when it’s ripe. The rind should be a golden color, and the melon should have a sweet, musky aroma.
* Honeydews: The melon should feel slightly soft to the touch. The rind should be a creamy yellow color.
* Galia Melons: The rind should turn from green to yellow, and the melon should have a sweet aroma.
* Casaba

Conclusion
So, there you have it! Cultivating your own melons at home isn’t just a rewarding gardening experience; it’s a gateway to enjoying the freshest, most flavorful fruit imaginable. Forget those bland, store-bought melons that lack character. With a little effort and these simple DIY tricks, you can transform your garden into a melon paradise, bursting with juicy goodness.
Why is this a must-try? Because the difference between a commercially grown melon and a homegrown melon is night and day. The flavor is more intense, the texture is more succulent, and the satisfaction of harvesting something you nurtured from seed is unparalleled. Plus, you have complete control over the growing process, ensuring your melons are free from unwanted chemicals and pesticides. You’re not just growing food; you’re growing health and happiness.
But the beauty of home gardening lies in its adaptability. Feel free to experiment with different melon varieties. Watermelons, cantaloupes, honeydews – the possibilities are endless! Try growing them vertically on trellises to save space, or companion planting with herbs like basil and marigolds to deter pests naturally. Consider using different types of soil amendments to see how they affect the sweetness and size of your melons.
Don’t be afraid to get your hands dirty and personalize your melon cultivation journey.
And speaking of personalization, consider these variations:
* **Grafted Melons:** For those looking to maximize yield and disease resistance, explore the world of grafted melons. Grafting involves joining the top part of one plant (the scion, in this case, your desired melon variety) to the root system of another (the rootstock, often a hardier, disease-resistant variety). This can lead to stronger, more productive plants.
* **Container Gardening:** If you’re short on space, don’t despair! Many melon varieties can be successfully grown in large containers. Just ensure you choose a pot that’s at least 24 inches in diameter and provides adequate drainage. Dwarf or bush varieties are particularly well-suited for container gardening.
* **Hydroponic Melon Growing:** For the more adventurous gardener, hydroponics offers a soilless alternative to traditional melon cultivation. This method involves growing melons in a nutrient-rich water solution, allowing for precise control over growing conditions and potentially faster growth rates.
Ultimately, the goal is to find what works best for you and your garden. The tips and tricks we’ve shared are a starting point, a foundation upon which you can build your own unique melon-growing empire.
So, what are you waiting for? Grab some seeds, prepare your soil, and embark on this delicious adventure. We’re confident that you’ll be amazed by the results. And once you’ve tasted the fruits (or rather, melons) of your labor, we encourage you to share your experiences with us. Tell us about your favorite varieties, your biggest challenges, and your most successful techniques. Let’s create a community of home garden melon cultivation enthusiasts, sharing knowledge and inspiring each other to grow the best melons possible.
Share your photos, tips, and stories on social media using #HomeGrownMelons and #DIYGardening. We can’t wait to see what you create! Happy gardening!
Frequently Asked Questions (FAQ)
What is the best time to start melon seeds indoors?
The ideal time to start melon seeds indoors is typically 4-6 weeks before the last expected frost in your area. This gives the seedlings a head start and allows them to establish a strong root system before being transplanted outdoors. Check your local weather forecasts and planting calendars to determine the appropriate timing for your region. Starting too early can lead to leggy, weak seedlings, while starting too late may result in a delayed harvest.
How much sunlight do melons need?
Melons are sun-loving plants and require at least 6-8 hours of direct sunlight per day to thrive. Insufficient sunlight can lead to poor fruit development, reduced sweetness, and increased susceptibility to diseases. Choose a planting location that receives ample sunlight throughout the day. If you’re growing melons in containers, make sure to position them in a sunny spot. If natural sunlight is limited, consider using grow lights to supplement their light exposure.
What kind of soil is best for growing melons?
Melons prefer well-drained, fertile soil that is rich in organic matter. The ideal soil pH is between 6.0 and 7.0. Before planting, amend the soil with compost, aged manure, or other organic materials to improve its drainage, fertility, and water-holding capacity. Avoid heavy clay soils, as they can become waterlogged and hinder root development. If you have clay soil, consider adding sand or perlite to improve drainage. Raised beds can also be beneficial for growing melons in areas with poor soil drainage.
How often should I water my melon plants?
Melons need consistent moisture, especially during fruit development. Water deeply and regularly, aiming to keep the soil consistently moist but not waterlogged. The frequency of watering will depend on factors such as weather conditions, soil type, and plant size. As a general rule, water deeply once or twice a week, providing enough water to reach the roots. Avoid overhead watering, as it can increase the risk of fungal diseases. Drip irrigation or soaker hoses are excellent options for delivering water directly to the roots.
How do I know when my melons are ripe?
Determining when a melon is ripe can be tricky, as different varieties have different indicators. However, here are some general guidelines:
* **Watermelons:** Look for a dull, rather than shiny, rind. The underside of the melon (where it rests on the ground) should turn from white to a creamy yellow. Thump the melon; a ripe watermelon will have a deep, hollow sound.
* **Cantaloupes:** The melon should have a fragrant aroma, and the stem should easily slip from the vine with gentle pressure. The rind should also have a distinct netting pattern.
* **Honeydews:** The rind should turn from green to a creamy yellow, and the blossom end (opposite the stem) should feel slightly soft and yielding to pressure.
It’s always best to err on the side of caution and harvest a melon slightly underripe rather than overripe.
What are some common pests and diseases that affect melon plants?
Melon plants can be susceptible to various pests and diseases, including:
* **Squash bugs:** These pests can damage leaves and stems, leading to stunted growth.
* **Cucumber beetles:** These beetles can transmit diseases and feed on leaves and flowers.
* **Aphids:** These small insects can suck sap from leaves, causing them to curl and distort.
* **Powdery mildew:** This fungal disease can cause a white, powdery coating on leaves.
* **Fusarium wilt:** This soilborne disease can cause wilting and death of plants.
To prevent and control pests and diseases, practice good garden hygiene, such as removing plant debris and weeds. Use insecticidal soap or neem oil to control pests, and apply fungicides to prevent or treat fungal diseases. Choose disease-resistant melon varieties whenever possible.
Can I save seeds from my homegrown melons?
Yes, you can save seeds from your homegrown melons, but keep in mind that hybrid varieties may not produce true-to-type offspring. Open-pollinated varieties are more likely to produce plants that resemble the parent plant. To save seeds, allow the melon to fully ripen on the vine. Scoop out the seeds and rinse them thoroughly to remove any pulp. Spread the seeds on a paper towel to dry completely, then store them in an airtight container in a cool, dry place.
How can I improve the sweetness of my melons?
Several factors can influence the sweetness of melons, including:
* **Sunlight:** Ensure your melon plants receive at least 6-8 hours of direct sunlight per day.
* **Watering:** Avoid overwatering, especially as the melons approach maturity.
* **Soil fertility:** Provide adequate nutrients, particularly potassium, which is essential for sugar production.
* **Variety:** Choose melon varieties that are known for their sweetness.
* **Harvesting:** Harvest melons at the peak of ripeness.
By optimizing these factors, you can significantly improve the sweetness of your homegrown melons.


Leave a Comment