
Bay Leaf Propagation Cuttings: Unlock the secrets to multiplying your bay laurel tree and enjoy a constant supply of aromatic leaves right from your backyard! Have you ever admired a lush bay laurel tree, imagining the delicious dishes you could create with its fragrant leaves? I know I have! But buying bay leaves from the store can be expensive, and sometimes they just don’t have that fresh, vibrant flavor. That’s where the magic of propagation comes in.
For centuries, gardeners have used cuttings to clone their favorite plants, and bay laurel is no exception. In ancient Greece and Rome, bay laurel wreaths were symbols of victory and honor, highlighting the plant’s cultural significance. Today, we can tap into that same tradition by cultivating our own bay laurel trees through simple, effective methods.
This DIY guide will walk you through the process of bay leaf propagation cuttings, step-by-step. You’ll learn how to select the best cuttings, prepare them for rooting, and provide the ideal environment for them to thrive. Imagine the satisfaction of nurturing new bay laurel plants from just a few cuttings! Not only will you save money, but you’ll also gain a deeper connection to your garden and the food you create. So, grab your gardening gloves, and let’s get started on this exciting journey of propagation!

Propagating Bay Laurel from Cuttings: A Gardener’s Guide
Hey there, fellow plant enthusiasts! Ever wanted to expand your bay laurel collection without shelling out cash for a new tree? Well, you’re in the right place! Propagating bay laurel ( *Laurus nobilis*) from cuttings is a rewarding and relatively straightforward process. I’m going to walk you through everything you need to know to successfully clone your favorite bay tree. Let’s get started!
Choosing the Right Cuttings
First things first, selecting the right cuttings is crucial for success. Not all cuttings are created equal!
* Timing is Key: The best time to take bay laurel cuttings is in late spring or early summer. This is when the plant is actively growing, and the cuttings have the best chance of rooting.
* Semi-Hardwood Cuttings: Look for semi-hardwood cuttings. These are stems that have started to mature but are still somewhat flexible. They should be green but not too soft and new.
* Healthy Stems: Choose healthy, disease-free stems. Avoid stems with any signs of pests, discoloration, or damage.
* Length Matters: Aim for cuttings that are about 4-6 inches long. This gives them enough stem to root while still being manageable.
* Leaf Nodes: Make sure your cuttings have several leaf nodes. These are the points where leaves grow from the stem, and they’re where roots will eventually emerge.
Gathering Your Supplies
Before you start snipping away, gather all the necessary supplies. Having everything on hand will make the process much smoother.
* Sharp Pruning Shears or Knife: A clean, sharp cutting tool is essential to prevent disease and ensure a clean cut.
* Rooting Hormone: Rooting hormone isn’t strictly necessary, but it significantly increases your chances of success. I highly recommend using it!
* Small Pots or Containers: Choose pots that are about 2-3 inches in diameter. They should have drainage holes to prevent waterlogging.
* Well-Draining Potting Mix: A mix of perlite and peat moss or coco coir works well. You want something that retains moisture but also allows for good drainage.
* Spray Bottle: For misting the cuttings to keep them humid.
* Plastic Bag or Humidity Dome: To create a humid environment for the cuttings.
* Water: For soaking the cuttings and watering the potting mix.
* Labels: To label your cuttings with the date and type of plant.
Taking the Cuttings
Alright, let’s get to the fun part – taking the cuttings!
1. Prepare Your Tools: Sterilize your pruning shears or knife with rubbing alcohol to prevent the spread of disease.
2. Select Your Stem: Choose a healthy, semi-hardwood stem from your bay laurel tree.
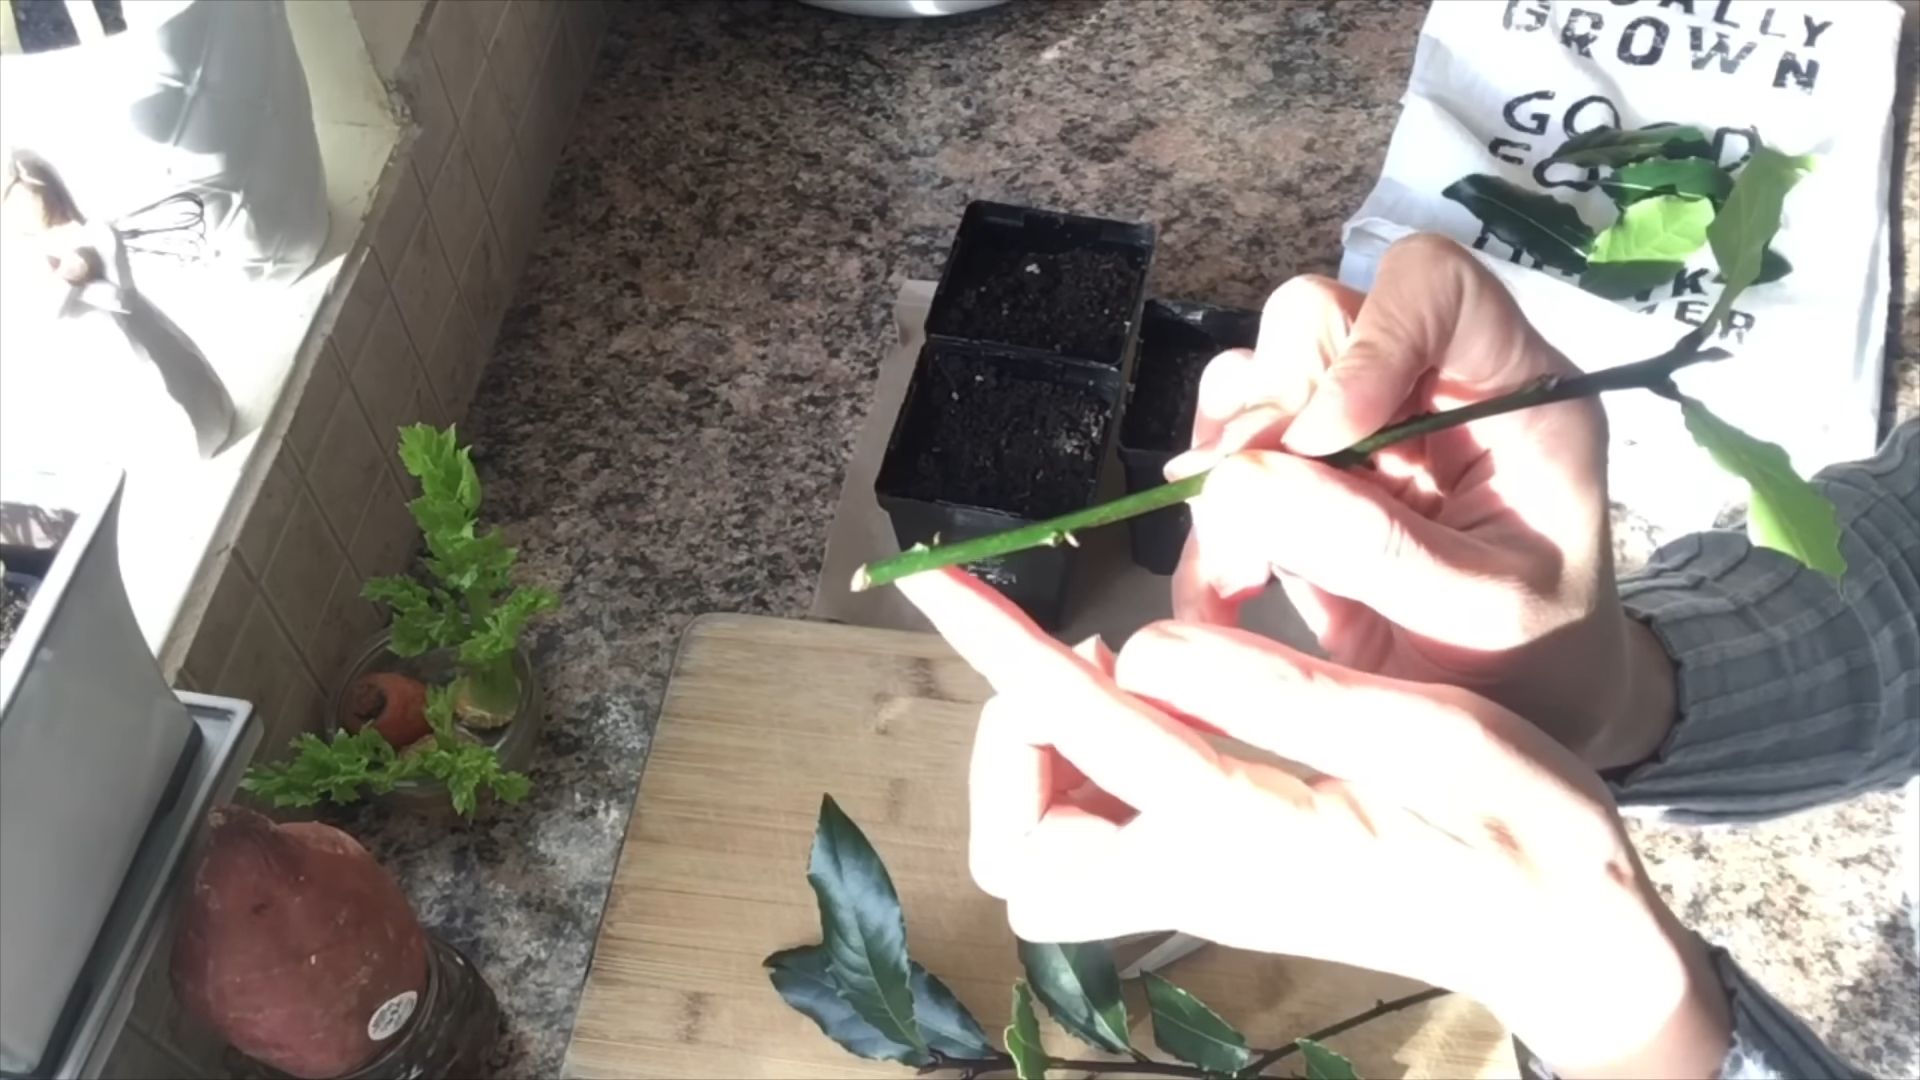
3. Make the Cut: Using your sterilized pruning shears or knife, make a clean cut at a 45-degree angle just below a leaf node. This maximizes the surface area for root development.
4. Remove Lower Leaves: Remove the leaves from the bottom 1-2 inches of the cutting. This prevents them from rotting in the soil and encourages root growth.
5. Prepare the Cutting: If the remaining leaves are large, you can cut them in half to reduce moisture loss.
6. Repeat: Take several cuttings to increase your chances of success. I usually take at least 5-10 cuttings.
Rooting the Cuttings
Now that you have your cuttings, it’s time to get them rooting!
1. Apply Rooting Hormone: Dip the cut end of each cutting into rooting hormone powder or liquid. Tap off any excess. This will stimulate root growth.
2. Prepare the Potting Mix: Moisten the potting mix with water. It should be damp but not soggy.
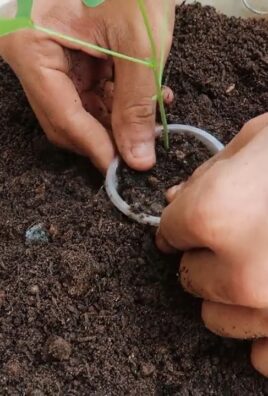
3. Plant the Cuttings: Make a small hole in the potting mix with a pencil or your finger. Insert the cutting into the hole, making sure the bottom 1-2 inches are buried. Gently firm the soil around the cutting.
4. Water the Cuttings: Water the cuttings gently to settle the soil.
5. Create a Humid Environment: Place the pots in a plastic bag or under a humidity dome. This will help keep the cuttings moist and prevent them from drying out. You can also use a clear plastic container with a lid.
6. Provide Indirect Light: Place the cuttings in a location with bright, indirect light. Avoid direct sunlight, which can scorch the leaves.
7. Maintain Humidity: Mist the cuttings regularly with water to keep the humidity high. Open the plastic bag or humidity dome for a few minutes each day to allow for air circulation and prevent fungal growth.
8. Check for Rooting: After a few weeks, gently tug on the cuttings to check for root development. If you feel resistance, it means roots have formed. You can also gently remove a cutting from the pot to inspect the roots.
Caring for Rooted Cuttings
Once your cuttings have rooted, it’s time to transition them to individual pots and provide them with the care they need to thrive.
1. Transplant the Cuttings: Carefully remove the rooted cuttings from their original pots. Gently tease apart the roots if they are tangled.
2. Potting Up: Plant each cutting in its own pot filled with well-draining potting mix. Choose a pot that is slightly larger than the root ball.
3. Watering: Water the newly potted cuttings thoroughly. Allow the soil to dry out slightly between waterings.
4. Fertilizing: After a few weeks, you can start fertilizing the cuttings with a diluted liquid fertilizer. Follow the instructions on the fertilizer label.
5. Light: Provide the cuttings with bright, indirect light. As they grow, you can gradually acclimate them to more direct sunlight.
6. Pruning: Prune the cuttings regularly to encourage bushier growth. Pinch off the tips of the stems to promote branching.
7. Overwintering: If you live in a cold climate, you may need to overwinter your bay laurel cuttings indoors. Bring them inside before the first frost and provide them with adequate light and water.
Troubleshooting
Even with the best care, you may encounter some challenges when propagating bay laurel from cuttings. Here are some common problems and how to address them:
* Cuttings Not Rooting: This could be due to several factors, including poor cutting selection, lack of rooting hormone, or insufficient humidity. Make sure you’re using healthy, semi-hardwood cuttings, applying rooting hormone, and providing a humid environment.
* Cuttings Rotting: This is usually caused by overwatering or poor drainage. Make sure your potting mix is well-draining and avoid overwatering. Also, ensure good air circulation to prevent fungal growth.
* Leaves Turning Yellow: This could be a sign of overwatering, underwatering, or nutrient deficiency. Check the moisture level of the soil and adjust your watering accordingly. You may also need to fertilize the cuttings.
* Pests: Bay laurel can be susceptible to pests such as aphids and spider mites. Inspect your cuttings regularly and treat any infestations promptly with insecticidal soap or neem oil.
Patience is Key
Propagating bay laurel from cuttings takes time and patience. Don’t get discouraged if not all of your cuttings root. With the right care and attention, you’ll be rewarded with new bay laurel plants to enjoy for years to come. I’ve found that the satisfaction of growing new plants from cuttings is well worth the effort. Happy gardening!
Conclusion
So, there you have it! Propagating bay leaf from cuttings might seem a little daunting at first, but with a little patience and the right approach, you can successfully cultivate your own thriving bay leaf plant. This DIY trick isn’t just about saving money; it’s about connecting with nature, understanding the life cycle of plants, and enjoying the satisfaction of nurturing something from a simple cutting into a flourishing herb.
Why is this a must-try? Because fresh, homegrown bay leaves offer an unparalleled aromatic intensity that store-bought dried leaves simply can’t match. Imagine adding a sprig of your own freshly grown bay leaf to your soups, stews, and sauces, infusing them with a depth of flavor that will elevate your culinary creations. Beyond the flavor, you’ll have a constant supply of this versatile herb right at your fingertips.
Don’t be afraid to experiment! While we’ve outlined a specific method, there are variations you can explore. Some gardeners have success using different rooting hormones or varying the humidity levels. You could try using a propagation dome to maintain consistent moisture, or even experiment with different types of rooting mediums, such as perlite or vermiculite, in addition to the recommended potting mix. Another variation is to try taking cuttings at different times of the year. While late spring or early summer is generally recommended, some gardeners have had success with late summer cuttings as well. Just remember to keep detailed notes on your experiments so you can learn what works best for you and your local climate.
Consider the size of your cuttings too. While we recommended cuttings of a specific length, you might find that slightly shorter or longer cuttings work better for you. The key is to ensure that the cutting has several leaf nodes, as these are where the roots will emerge.
Ultimately, the best way to learn is by doing. So, gather your supplies, take a deep breath, and give this bay leaf propagation method a try. It’s a rewarding experience that will not only expand your gardening skills but also provide you with a continuous supply of fresh, flavorful bay leaves.
We’re confident that you’ll find success with this method. But more importantly, we want to hear about your experiences! Share your successes, your challenges, and any tips or tricks you discover along the way in the comments section below. Let’s build a community of bay leaf enthusiasts and learn from each other. Happy propagating!
Frequently Asked Questions (FAQ)
1. What is the best time of year to take bay leaf cuttings for propagation?
The ideal time to take bay leaf cuttings is typically in late spring or early summer. This is when the plant is actively growing, and the cuttings are more likely to root successfully. The new growth is tender and pliable, making it easier to work with and encouraging root development. Avoid taking cuttings during the dormant winter months, as the plant’s energy is focused on survival rather than growth.
2. What type of bay leaf plant is best for propagation?
The common bay laurel (Laurus nobilis) is the most widely cultivated and easily propagated variety. This is the type of bay leaf typically used in cooking. Ensure that the parent plant is healthy and free from any signs of disease or pests before taking cuttings. A vigorous, well-established plant will provide the best cuttings for propagation.
3. How long does it take for bay leaf cuttings to root?
Rooting time can vary depending on several factors, including the time of year, the health of the cutting, and the environmental conditions. Generally, it takes anywhere from 4 to 8 weeks for bay leaf cuttings to develop roots. Be patient and consistent with your care, and avoid disturbing the cuttings too frequently to check for root growth.
4. What are the signs that my bay leaf cutting has successfully rooted?
The first sign of successful rooting is often the appearance of new growth on the cutting. You may notice small leaves emerging from the nodes. Gently tug on the cutting; if it resists, it indicates that roots have formed and anchored the cutting in the soil. You can also carefully lift the cutting to observe the root system, but avoid disturbing the roots too much.
5. What type of rooting hormone should I use for bay leaf cuttings?
A rooting hormone containing indole-3-butyric acid (IBA) is generally recommended for bay leaf cuttings. This hormone helps to stimulate root development and increase the chances of successful propagation. Follow the instructions on the rooting hormone packaging carefully, and avoid using too much, as this can inhibit root growth.
6. What kind of potting mix is best for rooting bay leaf cuttings?
A well-draining potting mix is essential for rooting bay leaf cuttings. A mixture of peat moss, perlite, and vermiculite is often recommended. This combination provides good aeration and drainage, preventing the cuttings from becoming waterlogged and susceptible to rot. You can also use a commercial seed-starting mix.
7. How much light do bay leaf cuttings need during the rooting process?
Bay leaf cuttings need bright, indirect light during the rooting process. Avoid placing them in direct sunlight, as this can scorch the leaves and dry out the cuttings. A location near a window with filtered light is ideal. You can also use grow lights to provide consistent light exposure.
8. How often should I water bay leaf cuttings?
Keep the potting mix consistently moist, but not waterlogged. Water the cuttings when the top inch of soil feels dry to the touch. Avoid overwatering, as this can lead to root rot. Use a spray bottle to mist the cuttings regularly to maintain humidity.
9. What is the ideal humidity level for rooting bay leaf cuttings?
High humidity is beneficial for rooting bay leaf cuttings. You can increase humidity by placing a plastic bag or humidity dome over the cuttings. Make sure to vent the bag or dome regularly to prevent the buildup of excess moisture, which can lead to fungal growth.
10. Can I propagate bay leaf from seed?
While it is possible to propagate bay leaf from seed, it is a much slower and less reliable method than propagation from cuttings. Bay leaf seeds can be difficult to germinate, and the resulting plants may not be true to type. Propagation from cuttings is generally the preferred method for bay leaf.
11. What are some common problems encountered when propagating bay leaf cuttings?
Some common problems include root rot, fungal infections, and failure to root. Root rot is often caused by overwatering or poor drainage. Fungal infections can be prevented by ensuring good air circulation and avoiding excessive humidity. Failure to root can be due to a variety of factors, including poor cutting quality, improper rooting hormone application, or unfavorable environmental conditions.
12. How do I care for my newly rooted bay leaf plant?
Once your bay leaf cutting has developed a strong root system, you can transplant it into a larger pot filled with well-draining potting mix. Gradually acclimate the plant to outdoor conditions before planting it in the garden. Bay leaf plants prefer full sun to partial shade and well-drained soil. Water regularly, especially during dry periods, and fertilize occasionally with a balanced fertilizer.

Leave a Comment